(Week: 6) G: Milestone 2: Prototype & Architecture
Last revised date: 9/17/2026Overview
Build an accessible interactive prototype, document its architecture, and demo it live. Your goal is to be ready for implementation and accessibility auditing.
When you turn in this homework you will be assessed on these competencies: Accessible Implementation. Accessible Communication.
Assignment Details
- Before you start
- Build your prototype
- Document your prototype (system.html)
- Start on accessibility (vpat.html)
- Document your architecture (architecture.html)
- Contributions
- Demo Day (Week 6)
- Submitting for grading
Key: pink boxes happen in Canvas, blue boxes in your project repo, green boxes on your project’s public site, and the gray box happens in class.

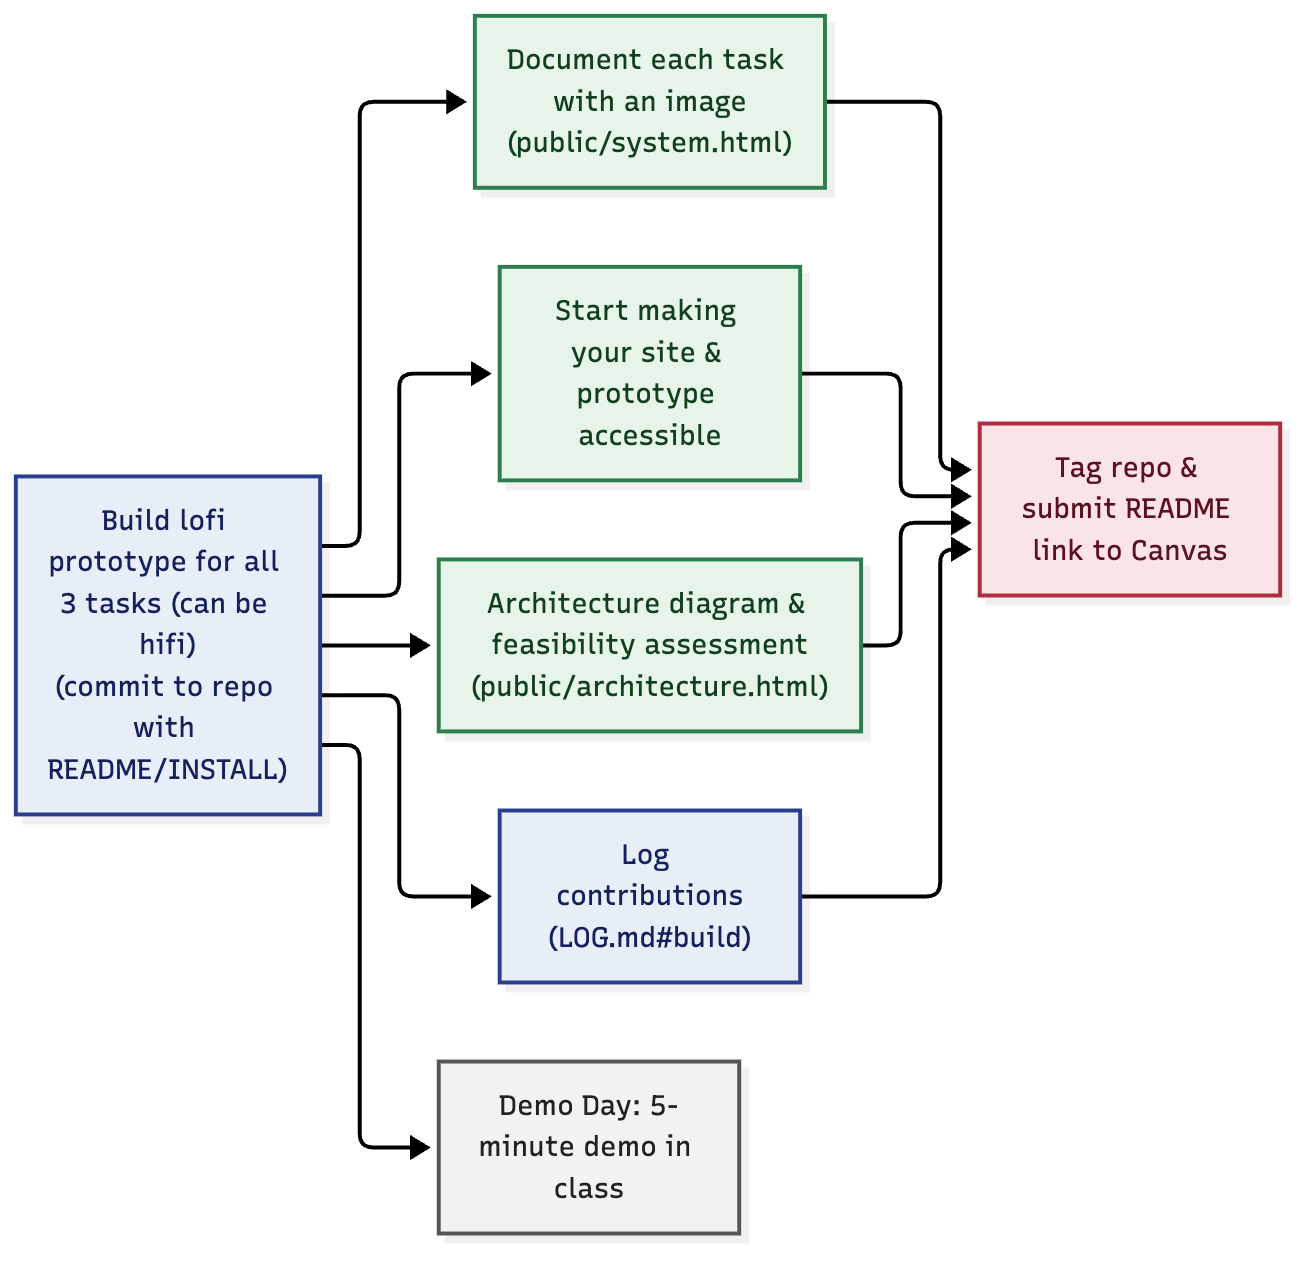
Text version of this diagram
- Build a lofi prototype for all 3 tasks (can be hifi). Commit with README/INSTALL note (repo).
- Document each task with an image in public/system.html (public site).
- Start making your site and prototype accessible.
- Add an architecture diagram and feasibility assessment (public site).
- Log your contributions in LOG.md#build (repo).
- Bring a 5-minute demo to Demo Day in class.
Before you start
Your project overview, first-person research paragraphs, design concept, interview notes and storyboard should already be on your project site from Milestone 0 and Milestone 1. As you receive feedback on these, or as your project evolves, you are welcome to update them. Likewise, if you received feedback on earlier milestones, you can address it now. We’ll review any changes and update any relevant competency grades when we review your Milestone 2 submission.
Milestone 2 requires you to edit the following:
- system.html
- vpat.html
- architecture.html
- Any prototype code, committed to your repo, or images of lofi mockups
LOG.md#buildwith your individual contributions
Build your prototype
Build a prototype that covers all 3 of your planned tasks (Your project may choose lofi or hifi based on what makes the most sense).
Commit the full prototype to GitLab with a brief README/INSTALL note on how to build and run it. Omit API keys if needed, but document what’s required to configure them. If your prototype is made of images of lofi mockups, commit those.
Document your prototype (system.html)
In the Overview of System section of the System page, document each task with an image of your prototype (a photo of a lofi mockup, a sketch, or a screenshot). Include alt text for each image.
Start on accessibility (vpat.html)
We’re going to focus only on things that will translate to your final product. To do so, you will start the VPAT table that you will complete over the next two milestones. Add rows to the table as needed for this (what is there are just examples). We will start with three things from the WCAG beginners’ guide. See Accessibility Tools for tools that may help you check these. You should check these on your public website as well as your prototype.
- Text contrast (1.4.3 Contrast (Minimum)). Any accessibility checker should flag issues for you. You can also check contrast with a contrast checker such as the WebAIM Contrast Checker.
- Non-text contrast (1.4.11). Basically the same as text contrast, but for borders around buttons, icons and so on.
- Alt text (1.1.1 Non-text Content). Alt text is much easier to write if you do it as you go. Everything you build that uses images should either mark them as decorative, or provide alt text. WAVE can check this on a public site.
Add this table to the VPAT page of your project site:
| Criteria | Severity | Conformance Level | Brief Explanation |
|---|---|---|---|
| 1.4.3 (Contrast (Minimum)) | |||
| 1.4.11 (Non-text Contrast) | |||
| 1.1.1 (Non-text Content) |
Fill in the Conformance Level (A, AA, AAA, or not conforming) and use the Brief Explanation to say what you checked, what you found (including the contrast ratios). You can skip severity, but we’ll provide feedback if you include it. If you don’t have time to fill in all of the alt text, or check all the contrast, that is OK – just state that it is non-conforming. The goal of a VPAT is to be accurate, not perfect.
Document your architecture (architecture.html)
On the Architecture / Implementation page include:
- Architecture diagram
- Feasibility assessment
Think of this as a planning exercise – it’s the architecture you plan to build, and your assessment of how feasible it is (addressing one or more of the items discussed in class)
Contributions
Log your individual contributions in LOG.md#build.
Demo Day (Week 6)
Bring a 5-minute demo of your prototype to class. Your mentor should attend.
Submitting for grading
At the deadline,
- tag your repo (
git tag milestone-2 && git push origin milestone-2) - submit the tagged link to your README in Canvas (e.g.
.../-/blob/milestone-2/README.md)
Completeness
Checklist (is your assignment complete)
- A lofi (or hifi) prototype for all 3 tasks is committed to your repo
- system.html has an image of each task, with alt text
- vpat.html has the VPAT table started (the three rows, with conformance level and explanation filled in)
- architecture.html has an architecture diagram and a feasibility assessment
- LOG.md#build has an entry from every team member