|
Project 4: Animator
Assigned: 11/17/2000
Help Session #2: Monday, 11/27, 3:30pm Project TA: Brad Weikel
|
- W2K Skeleton
- W2K Sample
- Help Session Document
- C2 interpolating curve notes (look at pages 13 and 14) by Bartels, Beatty, and Barsky
- Notes about the animator artifact
Project Objectives
This project is designed to introduce you to splines and how they are used for animation. There are two parts to this assignment. The first is to complete a keyframe animation system which is based on the project 2 modeler code. This system lets you assign a time-varying curve to the variables of your model that were controlled with sliders. The system currently only supports piecewise linear curves; your job is to extend it with several types of splines. Additionally, you should create a particle system to integrate with your animation.The second part, due shortly after the implementation is due, is to use your system to produce an animation based on the character you developed in project 2.
Using models with animator
The skeleton code contains all the files that are needed for you to get started, minus all the spline implementation. The sample solution has all the required curve types implemented (as well as a few more), so you can see how they behave. The help session document is hereA new user interface has been created to assist in positioning the camera. To use this, make sure that there are no calls to load a new matrix (i.e. glLoadIdentity, glLoadMatrix, etc) before your model is drawn. The camera positioning occurs before the model is drawn, so any of these operations will destroy that positioning.
To use viewpoint positioning, select the edit view button on the curve editor. Then drag the model around until you have positioned it as desired. Next, move the time slider (using shift - middle click) to the desired time, and click set viewpoint. This sets the camera position at the value of the slider to be what you see. To manipulate the model using the viewpoint editor:
-Left click and drag to rotate about the axisThere is a new control type called a curve control. This works just like the scale controls, but does not create sliders. Use this type if you want to animate a variable but don't want to clutter up the control panel with a slider for it. The arguments are the same as for scale, omitting the res argument.
-Middle click and drag to translate
-Right click and drag vertically to zoom
-Shift - left click to rotate only about the y axis
-Shift - middle click to rotate only about the x axis
-Shift - right click to rotate only about the z axis
Changes to Modeler Interface
If you have lots of controls cluttering your modeler, you can now split them into smaller groups under seperate tabs. There is a more detailed explanation here. These groupings will also be reflected in the curve editor as submenus which can be viewed and hidden collectively. Additionally, if you made changes to the modeller.dll--such as implementation of a new primitive--you will need to merge those changes into the new version.Animator interface
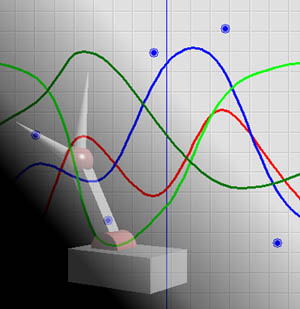
When you first load a model, animator will open up in curve editor mode. The x axis represents time; 20 seconds by default but this can be changed via the animation time parameter box below curve editor. Every slider or curve control now appears in the animation variables pop-up menu. You can display the pop-up menu by right-clicking the curve editor. You can turn the display of individual curves on and off using this menu. You can display as many curves as you want on the curve editor. To select a curve, you should click the curve with your middle mouse button. When a curve is selected, its control points are drawn with circles and can be edited. Create a new control point by clicking on the background with your left mouse button. Control points can be moved around by dragging them with the mouse. They also can be deleted by pressing the control key while left-clicking them.By default, a curve will always have two control points. This means when a curve is displayed for the first time, it will always be a piecewise-linear curve, regardless of what curve type is selected in Curve-type menu.
Holding the shift key down while dragging the mouse with the middle mouse button in the curve editor will drag the time line, a red vertical line, around. This can be used to see how your model behaves in a particular time period. In adddition, you can zoom in and out on your curve to get a finer curve. You can do this by pressing the shift key and selecting a region on which you want to zoom in. The Undo Zoom button is provided to undo the zoom. The curve settings menu changes how the control points are interpreted. Use this menu to change the type of spline used for a particular curve. The skeleton code has only the type linear; your job is to implement Bezier curves, B-splines, Catmull-Rom splines, and C2 interpolating curves. Other curve types may be added for extra credit.
Animations can be saved and reloaded. If you change the model, when you load an animation the system will match curves to saved values in the file based on the name of the control.
Adding curve types
For each curve type, you must write a new class derived from CurveEvaluator. Inside the class, you should implement evaluateCurve function. This function takes the following parameters: control_points--a collection of control points that you specify in the curve editor, evaluated_curve_points--a collection of evaluated curve points that you return from the function calculated using the curve type's formulas, animation_time (the maximum time that a curve is defined), and bezier_curve_points - a collection of bezier points that you return from the function. To add a new curve type, you add a line in the CurveEditor constructor in the same fashion as the addition of the curve evaluator already present (the piecewise linear curve evaluator).For Bezier curves (and the splines based on them), it is sufficient to sample the curve at fixed intervals of time. The adaptive de Casteljau subdivision algorithm presented in class may be implemented for an extra bell.
You do not have to sort the control points or the evaluated curve points. This has been done for you. Note, however, that for interpolating curves (Catmull-Rom and C2 interpolating curves), the fact that the control points are given to you sorted by x does not ensure that the curve itself will also monotonically increase in x. You should recognize and handle this case appropriately. One solution is to return only the evaluated points that are increasing monotonically in x.
Particle System Simulation
You should implement a particle system simulation within the animator. The initial location, velocity and force of the particles should depend on the certain geometric properties of the character (which, in turn, depend on the animation variable curves). For example, we can define the detailed animation of the character and then add an effect of sparks flying off the heal as the character's foot hits the ground. Similarly, as the train moves, the chimney could release particulate smoke. The location and the timing of the sparks depend on the position of the heel. We can calculate the position of the heel (or the top of a chimney) during the animation by multiplying the heel's local position in the object space by the matrix accumulated during the traversal of the model hierarchy. Each particle is specified by its mass, start and end time, position, velocity and the accumulated forces. The forces acting on the particle should include at least the initial creation force (acting on the particle at the start time) and gravity. You should not worry about providing the user interface for the particle system.
With the click of a button, the entire animation is simulated once, at which point the simulation is "baked" and can be played back in a regular fashion. In order to enable playback, you should record the trajectory of each particle during the simulation. You can subsequently change the motion curves of the character, and then re-simulate the particle system. Look at these SIGGRAPH course notes on particle systems for details.
Animation Artifact
You will eventually use the curve editor and the particle system simulator to produce an animated artifact for this project. Each group should turn in their own artifact. We may give extra credit to those that are exceptionally clever or aesthetically pleasing. Try to use the ideas discussed in the John Lasseter article that will be distributed in class. These include anticipation, follow-through, squash and stretch, and secondary motion.Requirements
Here is a summary of the requirements for this project:- Implement the following curve types:
- Bezier (splined together with C0 continuity)
- B-spline
- Catmull-Rom
- C2 interpolating
- For each curve type, given the control points, return evaluated curve points and bezier points.
- For interpolating (Catmull-Rom, C2 interpolating) curves, return evaluated points that correspond to a curve that is a monotonic function of x.
- Implement a particle system with an initial force and at least one additional force.
Bells and Whistles
![[whistle]](whistle.gif) Support a wrapping flag for each curve type, indicating
whether the curve should continuously wrap around from the end of the
animation back to the beginning. For wrapping around B�zier curve, please click here.
Each correctly wrapped curve type earns a whistle, except for C2 interpolating curves,
for which wrapping is worth one bell.
Support a wrapping flag for each curve type, indicating
whether the curve should continuously wrap around from the end of the
animation back to the beginning. For wrapping around B�zier curve, please click here.
Each correctly wrapped curve type earns a whistle, except for C2 interpolating curves,
for which wrapping is worth one bell.
Enhance the required spline options. Some of these will require
alterations to the user interface.
Some suggestions:
- Let the user control the tension of the Catmull-Rom spline
- Implement higher degree polynomial splines (ones that are C3 or C4 continuous)
- Implement one of the standard subdivision curves (e.g., Lane-Riesenfeld or Dyn-Levin-Gregory).
- Allow the user to specify the derivatives at the two endpoints of your C2 interpolating curves.
- Add options to the user interface to enforce C0 or C1 continuity between adjacent Bezier curve segments automatically. (It should also be possible to override this feature in cases where you don't want this type of continuity.)
- Add the ability to add a new control point to any curve type without changing the curve at all.
![[bell]](bell.gif) Implement adaptive
Bezier curve generation; i.e., use a recursive, divide-and-conquer, de Casteljau
algorithm to produce Bézier curves, rather than
just sampling them at some arbitrary interval. You must be able to toggle
this feature on and off as well as provide a control (e.g., a slider) for the flatness parameter. The number of points
generated for each curve is displayed at the bottom right, so you can
see how well your adaptive algorithm is working.
Implement adaptive
Bezier curve generation; i.e., use a recursive, divide-and-conquer, de Casteljau
algorithm to produce Bézier curves, rather than
just sampling them at some arbitrary interval. You must be able to toggle
this feature on and off as well as provide a control (e.g., a slider) for the flatness parameter. The number of points
generated for each curve is displayed at the bottom right, so you can
see how well your adaptive algorithm is working.
Extend the particle
system to handle springs. For example, a pony tail can be simulated with a
simple spring system where one spring endpoint is attached to the character's
head, while the others are floating in space. In the case of springs, the
force acting on the particle is calculated at every step, and it depends on the
distance between the two endpoints.
Allow for particles to
bounce off the ground floor surface by detecting collisions and computing the
collision response.
![]() Implement a "general" subdivision curve, so the user can specify an
arbitrary averaging mask You will receive still more credit if you can
generate, display, and apply the evaluation masks as well.
Implement a "general" subdivision curve, so the user can specify an
arbitrary averaging mask You will receive still more credit if you can
generate, display, and apply the evaluation masks as well.
![]() If you find something you don't like about the interface, or something
you think you could do better, change it! Any really good changes
will be incorporated into Animator 2.0. Credit varies with the quality of
the improvement.
If you find something you don't like about the interface, or something
you think you could do better, change it! Any really good changes
will be incorporated into Animator 2.0. Credit varies with the quality of
the improvement.
![]()
![]() Add the ability to
edit Catmull-Rom curves using the two "inner" Bezier control points as "handles" on the
interpolated "outer" Catmull-Rom control points. After the user tugs on handles,
the curve may no longer be Catmull-Rom. In other words, the user is really
drawing a C1 continuous curve that starts off with the Catmull-Rom choice for
the inner Bezier points, but can then be edited by selecting and editing the
handles. The user should be allowed to drag the interpolated point in a
manner that causes the inner Bezier points to be dragged along. See PowerPoint
and Illustrator pencil-drawn curves for an example.
Add the ability to
edit Catmull-Rom curves using the two "inner" Bezier control points as "handles" on the
interpolated "outer" Catmull-Rom control points. After the user tugs on handles,
the curve may no longer be Catmull-Rom. In other words, the user is really
drawing a C1 continuous curve that starts off with the Catmull-Rom choice for
the inner Bezier points, but can then be edited by selecting and editing the
handles. The user should be allowed to drag the interpolated point in a
manner that causes the inner Bezier points to be dragged along. See PowerPoint
and Illustrator pencil-drawn curves for an example.
![]()
![]()
![]()
![]() Implement direct manipulation of a part in the model hierarchy. In other
words, make it so that you can click on a part of your model and drag it
(rotate/translate/scale) to the position you want for the given moment in
time. This sophisticated feature requires a number of steps. To
recognize which body part you're picking, you need to first render all body
parts into a hidden buffer using only an emissive color that corresponds to an
object ID. After modifying the mousing UI to know about your new picking
mode, you'll figure out which body part the user has picked by reading out the
ID from your object ID buffer at the location where the mouse clicked.
Then, dragging the mouse must be made to correspond to modifying one of the body
part's sliders (e.g., rotation) in some intuitive way. When the mouse
clicks on a part, it would be nice to keep that part under the mouse so that you
can feel like you're dragging exactly that point (not required and doesn't make
sense for all transformations, but would be slick). To achieve this, you
can read out the z-coordinate from under the mouse, "unproject" it to
see what point in 3D space you have selected, and then control the
transformation so that the point stays under the mouse.
Implement direct manipulation of a part in the model hierarchy. In other
words, make it so that you can click on a part of your model and drag it
(rotate/translate/scale) to the position you want for the given moment in
time. This sophisticated feature requires a number of steps. To
recognize which body part you're picking, you need to first render all body
parts into a hidden buffer using only an emissive color that corresponds to an
object ID. After modifying the mousing UI to know about your new picking
mode, you'll figure out which body part the user has picked by reading out the
ID from your object ID buffer at the location where the mouse clicked.
Then, dragging the mouse must be made to correspond to modifying one of the body
part's sliders (e.g., rotation) in some intuitive way. When the mouse
clicks on a part, it would be nice to keep that part under the mouse so that you
can feel like you're dragging exactly that point (not required and doesn't make
sense for all transformations, but would be slick). To achieve this, you
can read out the z-coordinate from under the mouse, "unproject" it to
see what point in 3D space you have selected, and then control the
transformation so that the point stays under the mouse.