Git Basics
This guide covers the day-to-day git workflow you'll use in
CSE 333: keeping your local and GitLab repositories in sync,
recovering from common mistakes, and tagging commits for submission.
All commands below are run from your CSE Linux environment (attu or a CSE Linux VM). Your GitLab repository and your local copy do NOT sync automatically, so it's your responsibility to keep both up to date and avoid stale copies. The workflow here should suffice for CSE 333; for more depth, see the Git Community Book.
Updating Local and GitLab Repositories
Update Local from GitLab
Navigate to anywhere within your local repository and run:
$ git pull
Update GitLab from Local
.gitignore that omits object
files (.o) and editor backup files automatically; add more
entries there as desired.
Make sure you are in your local repository and that all changes are saved before running the following commands:
-
$ git pull # make sure your local copy is up to date with GitLab
-
$ git add <files> # stages files to commit to GitLab
- It is common to navigate to the top-level repository
directory and then use
.(period) as<files>, which stages all added/deleted/modified files in the local repo because.represents the current directory. - Omit any added/deleted/modified files from your
git addcommand that you don't want committed to the GitLab repository.
- It is common to navigate to the top-level repository
directory and then use
-
$ git commit -m "<message>" # add a descriptive message about your update
-
$ git push # push your changes to GitLab
Recovery Methods from Weird Git Situations
Keeping your workspace organized is crucial to a smooth, efficient workflow. Frequently updating your local and GitLab repositories reduces the chance of getting into weird situations. Nevertheless, it's common to end up in a "Git spaghetti ball" every so often, so here are some useful survival tips and commands.
Recovering from Local Messiness
The following git commands are ways to manage local changes
to your repository before pushing to GitLab:
- Reset your files to the
HEADof the branch if you don't want your changes anymore:$ git reset --hard HEAD
- Reset a single file instead of the entire branch:
$ git checkout HEAD -- <path to file>
- Revert changes that were already committed:
$ git reset --soft HEAD~1
- Stash/hide local changes and revert to a clean working directory:
$ git stash
- Revisit your stashed changes after you're done working on a fix:
$ git stash pop
- Discard the last stashed state:
$ git stash drop
- More info on
git stash.
- Revisit your stashed changes after you're done working on a fix:
Reverting to an Old Commit on GitLab
This is a way to remove a commit that you pushed to GitLab but no longer like. These instructions take inspiration from the GitLab documentation.
- Log in to the GitLab web interface and navigate to your repo for CSE 333. On the left menu, hover over "Repository" and then click on "Commits" to view your repo's commits in reverse chronological order.
- Go to the specific commit you want to revert
(i.e., the earliest commit you want to remove) by clicking
on its title:

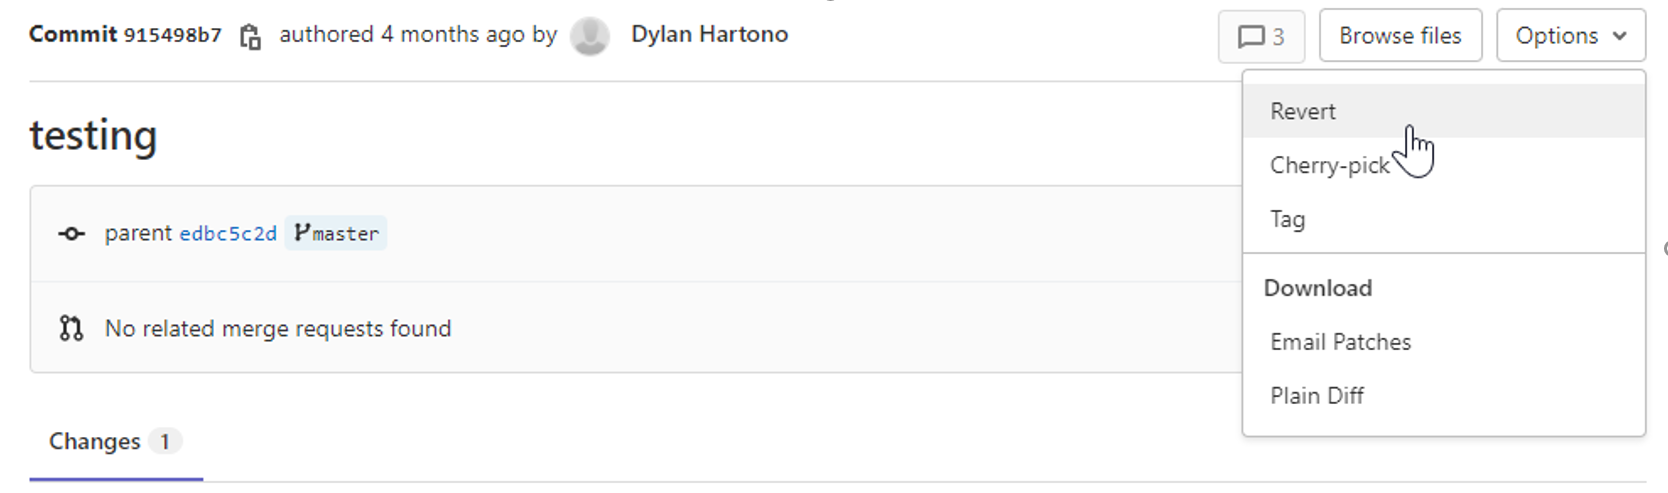
- Click on options on the top-right side of the
page and press revert:
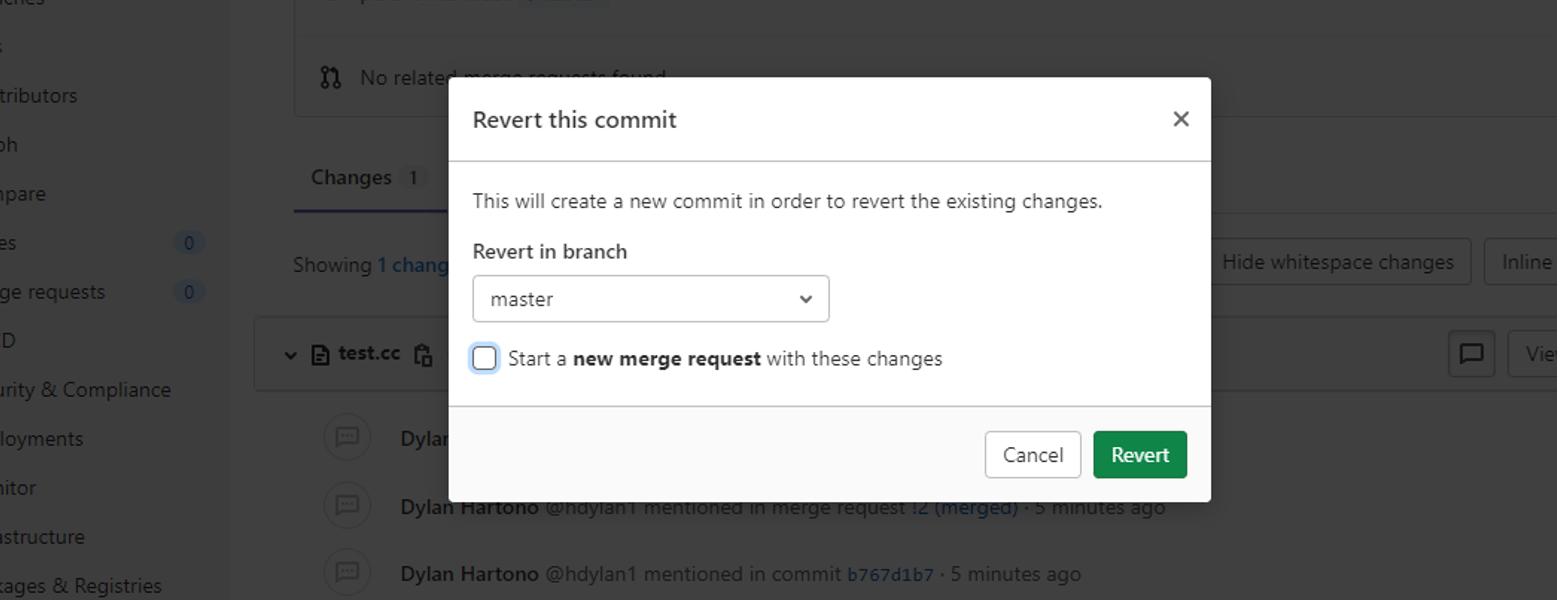
- You won't need a merge request for changing your
own work (unless you want to), so you can unselect the "Start a
new merge request with these changes" checkbox and click
Revert:
- Your repository has been updated!
Don't forget to update your local repository by running
git pull.
