Contents:
The purpose of this homework is to help you set up your development environment, get reacquainted with Java, and start getting familiar with tools you will use for the rest of the course. Although the homework description is long, we expect the step-by-step instructions will make doing the homework less overwhelming than reading it may be.
This homework links to (the middle of) some other handouts at many points. For convenience, here is the list of these handouts:
(It also links to various Java files and API documentation files that are not listed above.)
You are free to get help from anyone on any portion of this homework. That is, the standard collaboration policy does not apply to this homework. You will need to know this material for the remainder of the quarter, however, so make sure you understand thoroughly the tools and concepts in this homework.
We encourage you to finish this homework well before its due date. If you are having trouble with finishing on time, get in touch with the staff immediately so we can help you get back on track.
You first need to decide what computer(s) and development environment(s) you will use for the course, or at least for this homework. We strongly recommend using either the IntelliJ or Eclipse IDE in CSE331, but we will not check whether or not you do so. The staff may not be able to provide instructions and support for other IDEs. (We also provide instructions for working from the Linux command line.)
The Working At Home document lists all the options available for you. There are trade-offs among the choices that are also listed in the document. Please read the document as it includes instructions for each option. Once again, the IntelliJ and Eclipse IDEs are hightly recommended. (Note that even if you mostly do not use the department's machines, you should may still need to connect to attu to validate your assignment after you submit it, as described in Turning In Homework.)
Once you have chosen and prepared a development environment, you should set it up for CSE331 use. See the appropriate handout for detailed instructions on setting up how to set up your project and begin coding: we have instructions for IntelliJ, Eclipse, and the command-line. (If you switch development environments later in the quarter, revisit these instructions.)
Throughout the course, you will receive starter code and submit your assignments through CSE's GitLab server (git). git is a version control system that lets software engineers backup, manage, and collaborate on large software projects. GitLab is a CSE department server that provides git repositories for students in CSE331 and many other classes and projects (You will learn more about git in section.)
To learn more about version control and git in general, see this document.
The document for your chosen environment (IntelliJ, Eclipse, or command-line) will have detailed instructions on how to clone your CSE331 GitLab repository to a local machine and begin working with it. That document also contains instructions for pulling from, committing to, and tagging your repository. You should familiarize yourself with these commands as you will need to use them throughout this homework and the rest of the course.
For this problem, you will fix some buggy code we provide.
See the document for your environment to help learn how to perform the following basic tasks: adding new files to your directory structure, compiling Java code, and reading the Java compiler's output (which may indicate errors).
Try to compile the provided code in HolaWorld.java
using the build gradle task. Your environment specific handout should
have instructions on how to integrate gradle with your environment.
You should see compilation errors for this file. (And
possibly in src/test/java/hw3/RandomHelloTest.java too; if so,
ignore these for now since we will fix them in the next part.) In
particular, the lines:
System.out.println(world.);
and:
return SPANISH_GREE;
are problematic. If you are using IntelliJ or Eclipse, these errors will be marked in the IDE and HolaWorld.java, and HolaWorld.java themselves will show errors in the Package Explorer (or equivalent).
Fix these errors and run HolaWorld. Here you may
find it easier to compile and run either directly using your IDE
or using javac and java.
If you look at all the files in the package src/test/java/hw3/,
you will notice that their first line states package hw3.test;.
However, as you can notice in the file structure, these files are located in
the package hw3. You should update all these files to identity as
members of the hw3 package instead of the hw3.test package.
You will need to make this change for every java file in the
src/test/java/hw3 directory. In each one, replace the first line
package hw3.test;
package hw3;
After you've fixed the errors and run the code, it would be a good time to commit and push your changes to GitLab. It is usually a good idea to commit and push multiple times while working on a homework. That way, if you have a hardware failure with your local machine, you will not lose your work.
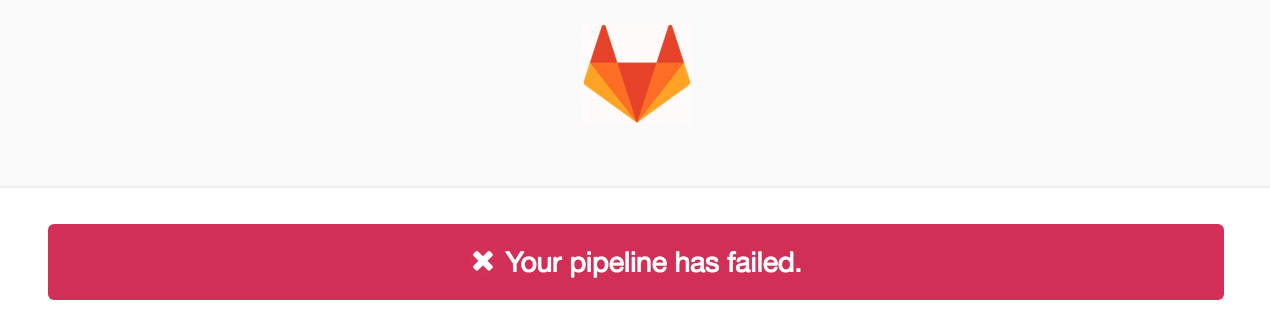
After you push these changes, however, you should receive an email from GitLab telling you that your code failed validation. It should include a message like this:
This is expected as we haven't finished the assignment yet and we still have tests that are failing. After you have completed all the parts of the assignment, your final commit should pass validation.
If you do not receive an email like this, then something is wrong. Look at these instructions for how to view the results on the GitLab web site. If you do not see your commit, then there is a problem pushing your changes to GitLab. If the commit is shown but you did not get an email, then there is a problem with GitLab's notifications (or your email!).
Create a Java class with a main method that will randomly choose, and then print to the console, one of five possible greetings that you define.
Create the file RandomHello.java, which will define a Java class RandomHello that will reside in the Java package hw3; that is, its file name is src/main/java/hw3/RandomHello.java.
Java requires every runnable class to contain a main method whose signature is public static void main(String[] args) (for example, the main methods in HelloWorld and in HolaWorld).
A code skeleton for the RandomHello class is shown below. IntelliJ and Eclipse will generate some of this skeleton for you when you create the new RandomHello class.
RandomHello.java:
package hw3;

/**
 * RandomHello selects a random greeting to display to the user.
 */
public class RandomHello {

    /**
     * Uses a RandomHello object to print
     * a random greeting to the console.
     */
    public static void main(String[] argv) {
        RandomHello randomHello = new RandomHello();
        System.out.println(randomHello.getGreeting());
    }

    /**
     * @return a random greeting from a list of five different greetings.
     */
    public String getGreeting() {
        // YOUR CODE GOES HERE
    }
}
This skeleton is meant only to serve as a starting point; you are free to organize it as you see fit.
Don't write your own random number generator to decide which greeting to select. Instead, take advantage of Java's Random class. (This is a good example of the adage "Know and Use the Libraries" as described in Chapter 7 of Joshua Bloch's Effective Java. Learning the libraries will take some time, but it's worth it!)
Type the following into the body of your getGreeting() method:
Random randomGenerator = new Random();
This line creates a random number generator (not a random number, which comes later, but a Java object that can generate random numbers). In Eclipse, your code may be marked as an error by a red underline. This is because the Random class is defined in a package that has not yet been imported (java.lang and hw3 are the only packages that are implicitly imported). Java libraries are organized as packages and you can only access Java classes in packages that are imported. To import java.util.Random, add the following line under the line package hw3; at the top of your file (after the package hw3; declaration):
import java.util.Random;
This will import the class Random into your file. Both IntelliJ and Eclipse have shortcuts to help you organize your imports. In Eclipse, CTRL-SHIFT-O will organize your imports. In IntelliJ, using ALT-ENTER will automatically import the required statement if your cursor is on the word "Random". Because there is only one class named Random, the IE will figure out that you mean to import java.util.Random and will add the above line of code automatically. (If the name of the class that needs to be imported is ambiguous — for example, there is a java.util.List as well as a java.awt.List — then your IDE will prompt you to choose the one to import.) In IntelliJ, CTRL-ALT-O will remove all unnecessary imports.
Read the documentation for Random's nextInt(int n) method by going to the Java API and selecting java.util from the list of packages and then Random from the list of classes. Many classes also let you pull up documentation directly in Eclipse. Just hover over the class or method name and press SHIFT+F2.
Use the nextInt(int n) method to choose your greeting. You don't have to understand all the details of its behavior specification, only that it returns a random number from 0 to n-1.
One way to choose a random greeting is using an array. This approach might look something like:
String[] greetings = new String[5];
greetings[0] = "Hello World";
greetings[1] = "Hola Mundo";
greetings[2] = "Bonjour Monde";
greetings[3] = "Hallo Welt";
greetings[4] = "Ciao Mondo";
The main method in the skeleton code above prints the value returned by getGreeting. So if you insert code in getGreeting to select a greeting randomly, when the class is run it will will print that greeting.
When you are finished writing your code and it compiles, run it several times to ensure that all five greetings can be displayed.
Again, now it would be a good idea to add your new class to version control, commit your code, and push your changes to GitLab.
Testing is essential for writing quality software, so it's important for testing to be a convenient part of software development. JUnit is a framework for creating unit tests in Java. A unit test is a test for checking that a given method in a class conforms to its specification for an input. This problem provides a quick overview and simple example of how JUnit works. (Unit testing will be more significant in later assignments.)
Open both src/main/java/hw3/Fibonacci.java
and src/test/java/hw3/FibonacciTest.java.
From the comments, you can see that
src/test/java/hw3/FibonacciTest is a test of the
Fibonacci class.
Now run the JUnit test hw3.FibonacciTest located
in src/test/java/hw3/FibonacciTest. See the document for your
environment—IntelliJ, Eclipse, or command-line—for detailed
instructions.
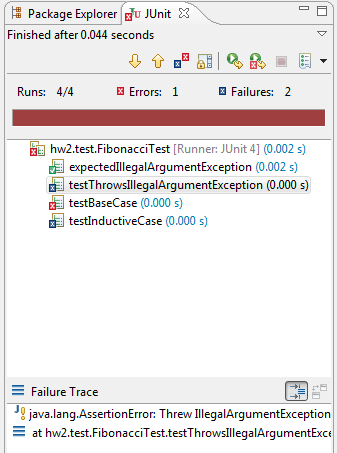
In Eclipse, for example, a window or panel with a menacing red bar will appear, indicating that some of the tests in FibonacciTest did not complete successfully (see screenshot at right). The top pane displays the list of tests that failed, while the bottom pane shows the Failure Trace for the highlighted test. The first line in the Failure Trace should display an error message that explains why the test failed. (The author of the test code creates this error message.)
If you click on the failure testThrowsIllegalArgumentException, the bottom pane in Eclipse will switch to the appropriate error message. In this example, the first line of the failure trace shows that Fibonacci.java improperly threw an IllegalArgumentException when tested with zero as its argument. (You may have to scroll to the right to see this.) If you double-click on the name of a test in the top pane, Eclipse will jump to the line where the failure occurred in the editor pane. Figure out the problem in Fibonacci.java, fix it, and rerun the JUnit test. Eclipse will automatically rebuild when you make changes, but if you are running JUnit from the command line, you must manually rebuild (compile) Fibonacci.java before you rerun JUnit. This can be done by rerunning the ant command (which also compiles the files) or by following the compiling instructions and then clicking the “Run” button.
The UI will be somewhat different in IntelliJ, but it will show you the same information.
Warning: If you have not yet made the changes described in Fixing the Test Files above, then you will see different errors here. (In Eclipse, you will see an X on the file FibonacciTest but no red bar and no tests run.) In this case, go back and complete the steps described there before continuing.
Use the information provided to help you continue debugging Fibonacci. Keep a record of what you did to debug Fibonacci as you will have to answer questions about your debugging experience in the next problem. After you have fixed all the problems in Fibonacci, you should see a bright green bar in Eclipse instead of a red one when you run FibonacciTest. IntelliJ will likewise tell you that the tests now pass.
Now look at the JUnit tests that we wrote for HolaWorld and RandomHello. They are called HolaWorldTest and RandomHelloTest, respectively. Ensure that your modified code passes these tests before you turn in your homework.
Find the file named hw3/answers.txt in your hw3 package. Open this file and add answers to the following questions under Problem 6:
Until now, we have only been introducing tools. This problem delves into a slightly more real programming exercise. Don't be discouraged if this part is more difficult. We're here to help, and we expect that time spent now will pay off significantly during the rest of the course.
As you work on this problem, record your answers to the various questions in the answers.txt that you first edited in the previous section of this assignment.
Look at src/main/java/hw3/Ball.java. This defines a
Ball class, a simple object that has a volume.
We have included a JUnit test in src/test/java/hw3/BallTest.java
to help you. Moreover, one of your IDE's warnings should help you find at
least one of the bugs without even referring to the JUnit results.
Next, complete the class BallContainer. As before, skeleton
code is provided (see src/main/java/hw3/BallContainer.java). A
BallContainer is a container for Balls.
BallContainer should support the following methods: your task is
to fill in the code to implement these methods correctly:
add(Ball)remove(Ball)getVolume()size()clear()contains(Ball)src/main/java/hw3/BallContainer.java.
In BallContainer, we use a
java.util.Set to keep track of
the balls. This is a great example of using a predefined Java data-structure to
save yourself significant work. Before implementing each method, read the
documentation for Set. Some of your methods will be as simple as
calling the appropriate predefined methods for Set.
To help you out, we have included a JUnit test in the file
src/test/java/hw3/BallContainerTest.java.
Before you start coding, please take time to think about the following question (which you need to answer in the text file):
There are two obvious approaches for implementing
getVolume():
- Every time getVolume() is called, go through all the Balls in the Set and add up the volumes. (Hint: one solution might use a for-each loop to extract Balls from the Set.)
- Keep track of the total volume of the Balls in BallContainer whenever Balls are added and removed. This eliminates the need to perform any computations when getVolume is called.
Which approach do you think is the better one? Why?
In this problem, you will do a little more designing and thinking and a
little less coding. You will implement the Box class. A
Box is also a container for Balls. The key difference between a
Box and a BallContainer is that a Box has only finite volume.
Once a box is full, we cannot put in more Balls.
The size (volume) of a Box is defined when the constructor is called:
public Box(double volume)
Since a Box is in many ways similar to a BallContainer, we internally keep track of many things in the Box with a BallContainer, allowing us to reuse code. Many of the methods in Box can simply “delegate” to the equivalent in BallContainer. For example, removing from a Box cannot cause it to exceed its volume limit. This design of having one class contain an object of another class and reusing many of the methods is called composition.
(Optional Note: You may wonder why we did not make Box extend BallContainer via inheritance. That is, why did we not make Box a subclass of BallContainer? We will discuss this much more deeply later in the course, but the key idea is that Box is not what we call a true subtype of BallContainer because it is in fact more limited than BallContainer: in particular, a Box can only hold a limited amount; hence, a user who uses a BallContainer in his code cannot simply substitute that BallContainer with a Box and assume the same behavior. Their code may cause the Box to fill up, in which case it will not behave in the manner they expected for a BallContainer. For this reason, it is unwise to make Box extend BallContainer.)
In addition to the constructor described above, you will need to implement the following new methods in Box:
add(Ball)getBallsFromSmallest()The specifications for these methods can be found in the javadoc comments of for src/main/java/hw3/Box.java.
A few things to consider before you start writing code:
src/test/java/hw3/BoxTest.java should help
you. However, we do not guarantee that the tests we provide will catch
all bugs.Also, answer the following questions in your answers.txt file:
There is no one correct answer. Our intent is to help you fight that urge to code up the first thing that comes to mind. Remember: More thinking, less coding.
Each homework will indicate exactly what to turn in a Section titled “What to Turn In”. This typically includes Java source files (that you change or create) and text files. See below for a list of the files that you should have created or changed for HW3.
In general, you will turn in your homeworks by
See the document on your chosen environment (IntelliJ, Eclipse, or command-line) for specific instructions how to perform those three steps. For those using IntelliJ or the command-line, be sure to include a message with your tag so that an annotated tag (rather than a lightweight tag) is created. Also be sure to select the option to push tags when pushing your changes to GitLab. If you do not follow those steps, your tag will not be pushed to GitLab, which means that we will not see it when grading.
Before you commit your final changes for HW3, we recommend that follow these instructions to set up email notifications of successful pipelines. By default, GitLab only emails you (or tries to email you) when validation fails. The instructions tell you how to change the settings so that GitLab will also email you to tell you that the validation step succeeded.
When you are done with HW3 and have set up notifications as described above, commit your changes, tag them as hw3-final, and push those changes to GitLab. If you have set up notifications of successful pipelines, you should receive an email indicating that the validation step succeeded. It will include a message like this:

If you have not set up notifications of successful pipelines, then follow the instructions to make sure that what you have submitted correctly validates on GitLab or attu. If your code does not validate, expect to receive very few points for the assignment.
Your TA should be able to find the following in the src directory of Gitlab:
Please include your first and last name in every text file you turn in (i.e., files ending with .txt). In particular, be sure to update answers.txt to include your name as well as the expected answers.
In this part, you will learn about Eclipse's built-in debugger. A debugger can help you debug your program by allowing you to "watch" your program as it executes, one line at a time, and inspect the state of variables along the way. Using a debugger can be much more powerful and convenient than littering your program with statements that print output.
One of the most useful features of a debugger is the ability to set breakpoints in your program. When you run your program through the debugger, it will pause when it reaches a line with a breakpoint. You can inspect the current state of variables, then continue running your program normally or step through one line at a time to watch the variables change.
return x - y; A blue circle should appear, indicating a
breakpoint. (Double-clicking again removes the breakpoint.)Run >> Debug, or
the green bug icon in the toolbar. As before, enter two ints (say, 3 and 4) in
the console when prompted. When your program hits the breakpoint, Eclipse asks
if you want to open the Debug perspective. Choose yes.What are all the names and values listed in the “Variables” panel? What does the “Debug” panel list as the current method and line number? (Write down the text that was highlighted when the Debug perspective first opened.)
return statement and
exit computeSum. Hit “Step Over” again to progress to the next
line.
What are all the names and values listed in the “Variables” panel after each of the two step overs?
Windows >> Open Perspective >> Other... and selecting
Java (default).