| Lab 6/7: Introduction to JavaScript |
Printing to the page
We will now "print" the ticket (on the page, that is not on paper), rather than just displaying the information in a pop-up box.
First we need to create a location for the ticket to appear. We'll use a table for that.
1. Create a table that consists of one cell (put this at the bottom of your <body> section, after the closing </form> tag):
<table>
<tr>
<td></td>
</tr>
</table>
Next we'll change it's appearance with CSS. We'll do something slightly differently than we've done before. Rather define the appearance for an HTML element, we'll create a "style" in the CSS file and then tell the table to use that style. Here's how:
2. Open your CSS file (tickets.css).
3. Our style will be called "ticket". To indicate that in CSS, type a period and then "ticket" like this:
.ticket
and then follow it with the usual curly brackets:
.ticket
{
}4. Choose a text color, a background color, and add some padding (padding is space between the edge of the table and the text), 20px (which stands for 20 pixels) is a reasonable amount of padding for this situation:
.ticket
{
color:#CCCCCC;
background-color:#0000CC;
padding:20px;
}Save your css file and go back to your html file.
5. To get the table cell to use this style, add it to the cell as a "class" attribute like this:
<td class="ticket">
We'll need to write a JavaScript instruction that says to put the ticket information into the cell. To refer to the cell, it needs a name (i.e. an 'id' value)
3. Give the cell an id value "result" (you can type it before or after the "class" attribute you typed in the previous step)
Now, we need to write some JavaScript that tells the browser to put the ticket information inside the cell.
4. To do that, type the following line at the end of your function, after the alert statement:
document.getElementById("result").innerHTML = "MAIN PERFORMER: " + chosenConcert + " ATTENDEE: " + nameEntered;
Lets break this down.
document.getElementById("result").innerHTML = "MAIN PERFORMER: " + chosenConcert + " ATTENDEE: " + nameEntered;
This first part says to find the element on the page that has an id of "result" - this is the table cell that we just labeled.
document.getElementById("result").innerHTML = "MAIN PERFORMERr: " + chosenConcert + " ATTENDEE: " + nameEntered;
"innerHTML" refers to the text that is inside the table cell (in other words, that text that is between <td> and </td>) which is where we want to put the ticket information
document.getElementById("result").innerHTML = "MAIN PERFORMER: " + chosenConcert + " ATTENDEE: " + nameEntered;
The equals sign says "make this equal to"
document.getElementById("result").innerHTML = "MAIN PERFORMER: " + chosenConcert + " ATTENDEE: " + nameEntered;
This is the phrase we created for the popup box earlier.
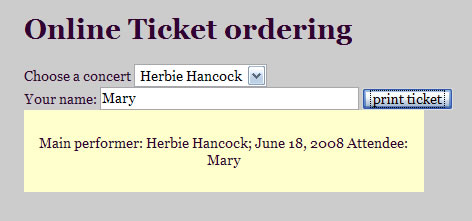
5. Save the file and open it with a browser. Choose a concert from the list, type in a name and hit the button. The "ticket" should be filled in and look something like this:
If it didn't work, check for:
- quotes around all of the text and HTML characters, but not the variable names
- a + sign between each quote and variable name
6. Go to the Catalyst quiz and answer question #9
Next, you'll start to modify the page so the user can print more than one ticket