In this lab you'll build an amplifier circuit for use as an Electrocardiograph.
Then you will interface it to the Teensy for use in next week's lab.
Do this work with your partner, but please build two circuits for testing and comparison purposes.
In this lab, you will learn about:
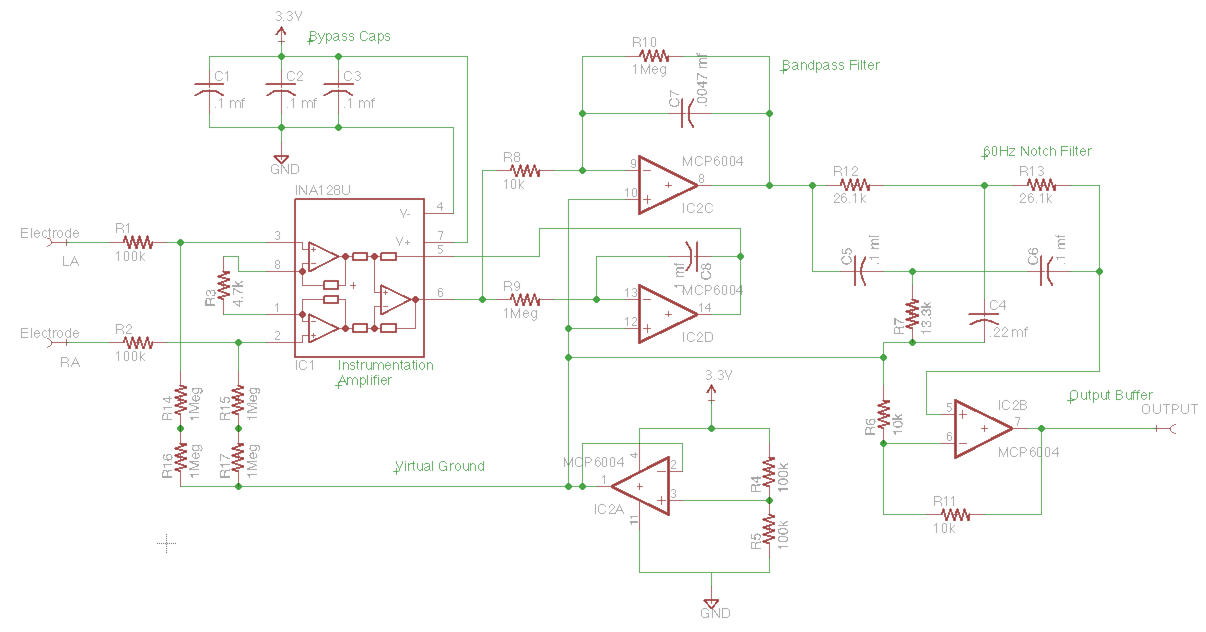
Here is the schematic of our AFE circuit:

Neatness counts! At least it helps in reliability.
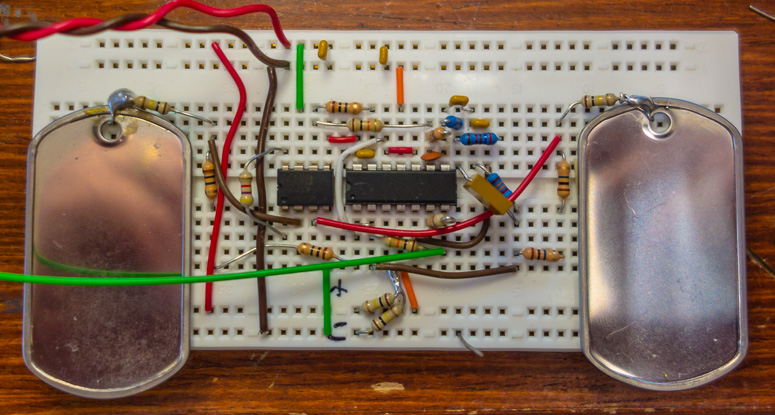
Cut leads short, but remember that leads should protrude into the perotoboard to the bottom, i.e. the protoboard's thickness. My biggest headache was IC2, which didn't want to make good contact in the protoboard.
Suggested wiring sequence:
place the two I.C.s, and wire power and ground.
wire the virtual ground IC2A and test using your voltmeter.
wire the input IC1and the reference IC2D and test. You should see some sort of signal on pin 6 of IC1 with your oscilloscope.
Construct the rest of the circuit, and follow the signal path through to the end.
Here is the way we wired it:

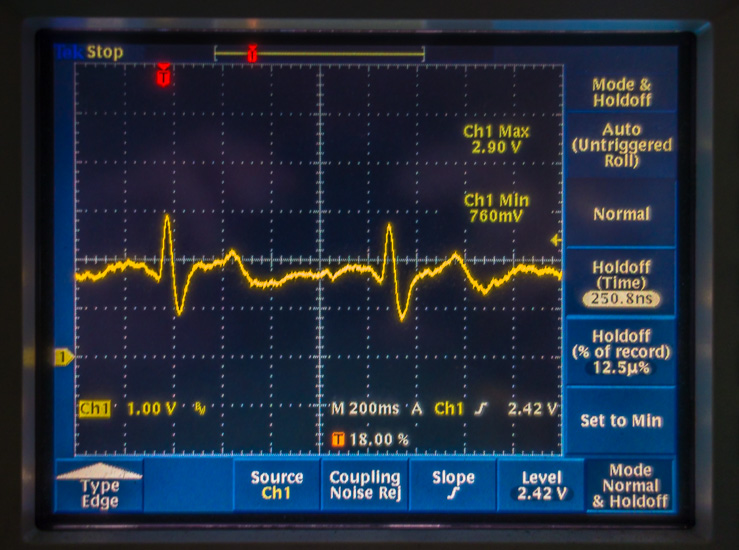
Place two fingers of each hand on the dogtags to measure the heart signal. And here is the output trace on the oscilloscope at pin 7 of IC2:

This is a Lead I trace, prior to signal processing. You should be able to identify the P wave, the QRS complex, and the T wave.
Next week we will read the signal with the Teensy and display it on the LCD. You may work ahead if you wish.