Skip to main content
Link
Menu
Expand
(external link)
Document
Search
Copy
Copied
# Fabrication and Accessibility Discuss how Fabrication and Accessibility relate cse443: Winter 2026; Jennifer Mankoff (Last Edited: 2026-02-23). <a href="/courses/cse443/26wi/slides/3dprinting.html">Live View: /slides/3dprinting.html</a> Important Reminder: check zoom & captioning <a href="/courses/cse443/26wi/slides/3dprinting.html"><img src="https://api.qrserver.com/v1/create-qr-code/?data=/slides/3dprinting.html&size=100x100" alt="QR for /courses/cse443/26wi/slides/3dprinting.html" title="" /></a> --- <div class="slide-outline" style="margin: 1em 0; padding: 1em; background: #f5f5f5; border-radius: 5px;"> <h2 style="margin-top: 0;"> Outline </h2> <ul style="list-style-type: none; padding-left: 0;"> <li><a href="#7">Accessibility and Fabrication</a> (Slide 7)</li> <li><a href="#25">Laser Cutting</a> (Slide 25)</li> <li><a href="#47">Other Thoughts (if time)</a> (Slide 47)</li> </ul> </div> --- class: center, middle, inverse # Announcements <p>Monday Announcements Week 8</p> --- ## Class location on Wednesday <p>We will meet in CSE I 022 You should have keycard access This is the “fabrication classroom” and hash 3D printers, a laser cutter, and other equipment in it.</p> --- ## On Thursday and Friday, we’ll have project meetings. <ul> <li>Details to be announced on Ed</li> <li><strong>Attendance is <em>required</em> for your group meeting</strong></li> <li>Goal will be to talk about your project and how your group is functioning <ul> <li>Describe your tasks and how you will validate them</li> <li>Show your storyboard (slides are a good way to do this!)</li> <li>Discuss your timeline</li> <li>Discuss your role reflections</li> </ul> </li> </ul> --- ## Project updates <ul> <li>Removed plain language overview from project.</li> </ul> --- class: center, middle, inverse # Accessibility and Fabrication --- ## Making in an accessibility course? Why? .column[ What is craft? ] .column[ - Fits real needs - Comfortable - Loving - .lowlight[Creative] - Practical - .lowlight[Healing] - .lowlight[Empowering] - .lowlight[Subversive] ] .column[  ] --- ## Making in an accessibility course? Why? .column[ What is craft? ] .column[ - Fits real needs - Comfortable - Loving - .lowlight[Creative] - Practical - **Healing** - **Empowering** - .lowlight[Subversive] ] .column[  ] --- ## Making in an accessibility course? Why? .column[ What is craft? [Vice Article](https://www.vice.com/en/article/8qwpzb/mark-my-words-the-subversive-history-of-women-using-thread-as-ink) ] .column[ - Fits real needs - Comfortable - Loving - **Creative** - Practical - Healing - Empowering - **Subversive** ] .column[  ] ??? dating back to the 1890s, it's the work of a German seamstress who had been consigned to an asylum. Although it's often falsely described as her straitjacket, it was actually cut and assembled from a hospital gown, tailored and then turned into an autobiography wrought on fabric. --- [Facebook Fashion Discrimination](https://www.nytimes.com/2021/02/11/style/disabled-fashion-facebook-discrimination.html)  --- ## What is craft? - 1000s of years old - Highly skilled - Only labeled “arts and crafts” after the industrial revolution - Often centered in women’s “busy” work - Sometimes entrepreneurial - Exceptional at addressing unique and individual needs ---  --- ## Modern crafting technology - New ways to ideate and create: Faster, easier, sometimes better - New ways to customize: Faster; Mass customization - New materials - New and/or more complicated shapes -- count: false .right-column50[ ![:youtube Video of child using a 3D printed hand, WoZ2BgPVtA0] ] --- <!-- ![:youtube Time lapse video liquid printing, l3TgmvV2ElQ?t=23] --> ![:youtube Time lapse video explaining 3D printing, m_QhY1aABsE] <!-- ![:youtube Time lapse video laser sintering, 9E5MfBAV_tA?t=53] --> <!-- ![:youtube Time lapse video of powder printing, kBHsfNDsbCs?t=7s] --> --- ## Fabrication technologies are not - ...the Star Trek replicator - ...as fast as the best manufacturing solutions for bulk manufacturing - ...as fast as your 2d printer - ...inexpensive - ...nice to touch (material range is limited) **But** they can do a lot of interesting things --- ## Additive Vs Subtractive - Additive printing puts down material, building up the object layer by layer - Some are done with extruded plastic or other material - Others are done with powders that are sealed together (powder printers) - Subtractive removes materials from around the object --- ## Example: CNC Spoon ![:youtube Video of a person using a CNC machine to make a spoon, caf5WDeBUaA] --- ## Creating Knitted Objects ![:youtube Video a knitting machine, t2Lpk4Jal6o] --- ## Additive or Subtractive?  <!-- --- --> <!-- # KnitScript: Striped Sheet --> <!-- ```python --> <!-- import cast_ons; --> <!-- width = 40; --> <!-- height = 12; --> <!-- def knit_colored_stripe(new_carrier):{ --> <!-- with Carrier as new_carrier:{ --> <!-- knit_stripe(); --> <!-- } --> <!-- } --> <!-- def knit_stripe():{ --> <!-- for r in range(0, height):{ --> <!-- in reverse direction:{ --> <!-- knit Loops; --> <!-- } --> <!-- } --> <!-- } --> <!-- with Carrier as c1:{ --> <!-- cast_ons.alt_tuck_cast_on(width); --> <!-- knit_stripe(); // uses c1 --> <!-- knit_colored_stripe(c2); // will use c2 --> <!-- knit_stripe(); // starts using c1 again --> <!-- } --> <!-- ``` --> <!-- --- --> <!-- # Knitting a stripe --> <!-- ![:youtube Video a knitting machine, jpDFHhmgsnk] --> --- ## DIY Accessibility Rapid iteration can help with accessible design .left-column40[   ] .right-column60[ ![:youtube Xbox adaptive controller intro, 9fcK19CAjWM] ] --- ## DIY Accessibility .right-column60[ [Interactiles: 3D Printed Tactile Interfaces to Enhance Mobile Touchscreen Accessibility](https://make4all.org/portfolio/interactiles/) (ASSETS 2018)  ] .left-column40[ Combination of materials - Silicon & sewn conductive thread (could use conductive powder instead) - Nuts and bolts ] --- # Pause and discuss Try to think of some everyday objects that could be made more accessible (customized through DIY making) Pair & share; Post on [Ed](https://edstem.org/us/courses/56844/discussion/5641954) --- class: center, middle, inverse # Laser Cutting This week, we will focus on a particular kind of fabrication: Laser Cutting --- exclude: true # Exclude after planning is done - Bring scissors - Have a demo of building something from flat to 3D ready to show (including the wood with the punched out pieces so they understand how to layout SVGs in Tinkercad) --- # Example: Bagholder .left-column[  ] .right-column[ [Instructables project](https://www.instructables.com/Making-a-laser-cut-bag-holder/) Examples In Tinkercad: [1](https://www.tinkercad.com/things/iR1ogjaD0a9) [2](https://www.tinkercad.com/things/lhLixGNHxFe-bag-holder) [3](https://www.tinkercad.com/things/8Cu8NS0Ws2n) [4](https://www.tinkercad.com/things/3gfeTggL15I) [5](https://www.tinkercad.com/things/h9xkhbg6dgE) [6](https://www.tinkercad.com/things/6OoyVYTHOU4) How could you modify this to make it more comfortable? ] --- # Example: Book Opener ([Etsy](https://www.etsy.com/listing/883330413/book-buddy-book-holder-wood-thumb-page)) .left-column50[] .right-column50[ Example In Tinkercad: [1](https://www.tinkercad.com/things/a5riyLRKUBU) ] --- exclude: true # Example: Cup Holder ([T:1863196](https://www.thingiverse.com/thing:1863196))  --- # Example: Key Guard ([T:1365497](https://www.thingiverse.com/thing:1365497))  --- # Example: Bottle Opener ([T:40131](https://www.thingiverse.com/thing:40131))  Example in Tinkercad: [1](https://www.tinkercad.com/things/9SmzdtgJ9Ou) [2](https://www.tinkercad.com/things/gt2P9U1njre) [3](https://www.tinkercad.com/things/kUCNz3pnKIG) [4](https://www.tinkercad.com/things/l7ol57fDvi3) [5](https://www.tinkercad.com/things/lbPdLUKzzoP) --- # Example: Key Handle ([T:2802082](https://www.thingiverse.com/thing:2802082)) .left-column50[  ] .right-column50[ How would you attach this securely? ] <!-- --- --> <!-- # Example: Cookbook Holder ([Home Depot](https://www.homedepot.com/p/Honey-Can-Do-Natural-Acacia-and-Steel-Tablet-or-Cookbook-Stand-KCH-08569/312111086)) --> <!--  --> --- # Example: Pillbox ([Etsy](https://www.etsy.com/listing/1321874671/laser-cut-3-or-4-mm-18-inch-svg-7-days?ga_order=most_relevant&ga_search_type=all&ga_view_type=gallery&ga_search_query=laser+cut+pill&ref=sr_gallery-1-6&organic_search_click=1)) .left-column50[ 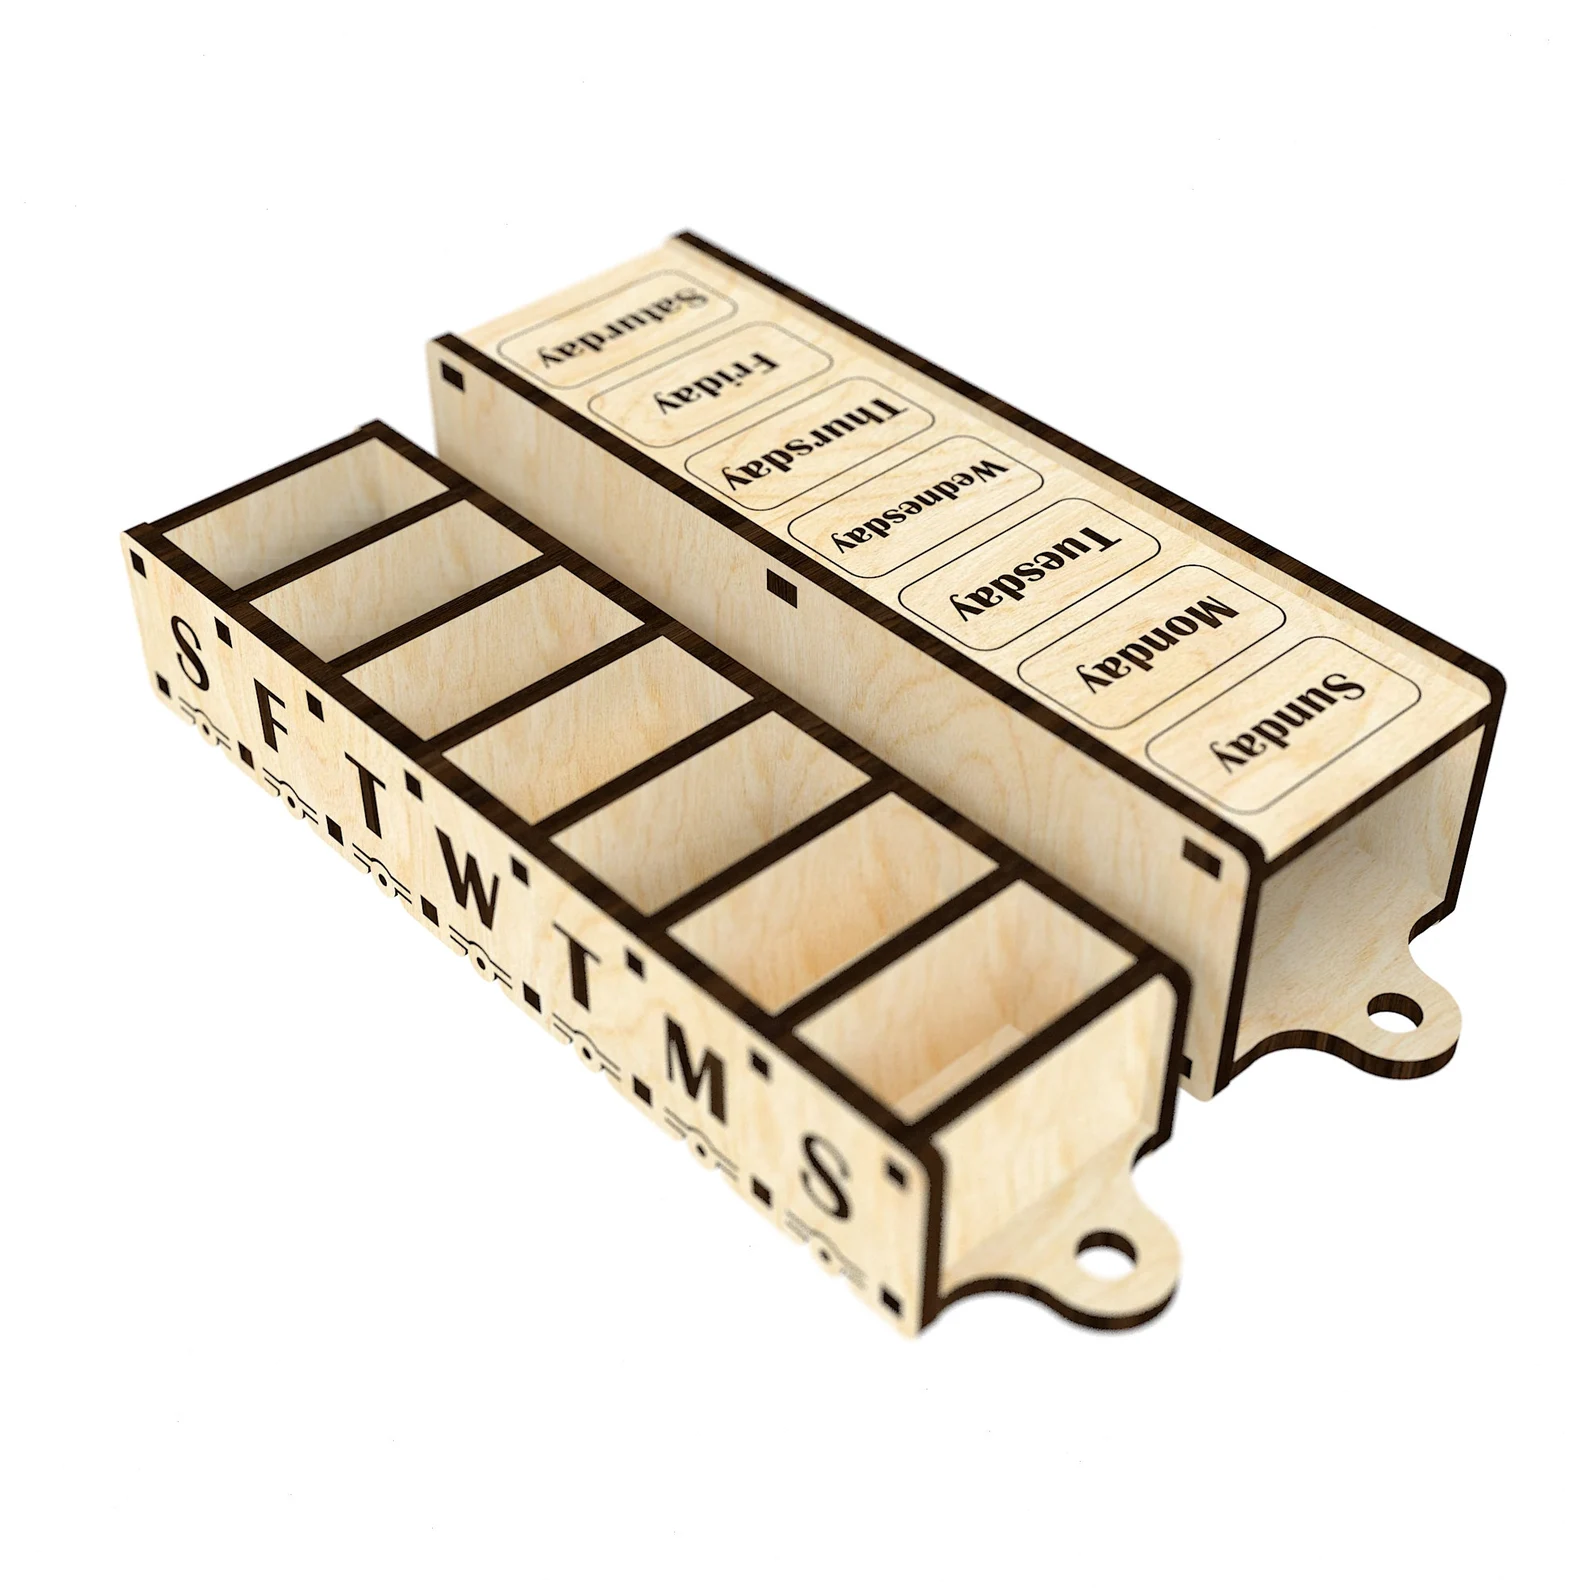 ] .right-column50[ Probably made with [boxes.py](https://www.instructables.com/Lasercut-Little-Wood-Boxes/) 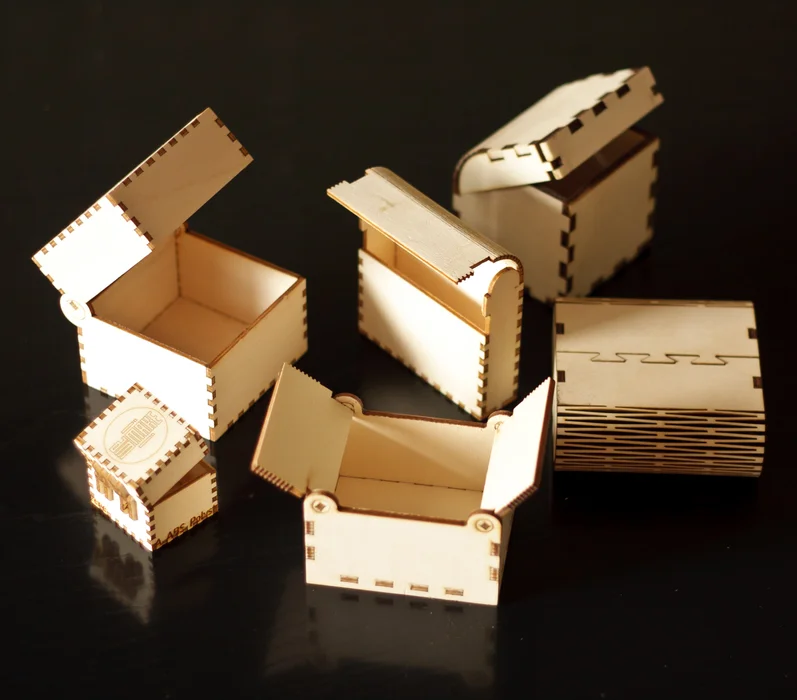 ] --- # Example: Cutting Board ([rehab-store.com](https://www.rehab-store.com/p-one-handed-deluxe-maple-cutting-board.html)) 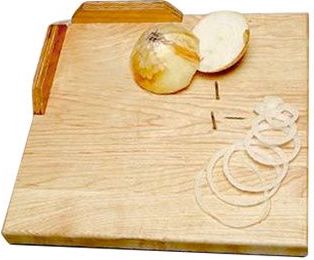 Examples in Tinkercad: [1](https://www.tinkercad.com/things/iWToRbHgluC) [2](https://www.tinkercad.com/things/eDCKLmKA0MA) --- # Example: Keyboard Risers ([Amazon](https://www.amazon.com/SUPBEE-Laptop-Computer-Keyboard-Pockets/dp/B0B21VHY57)) 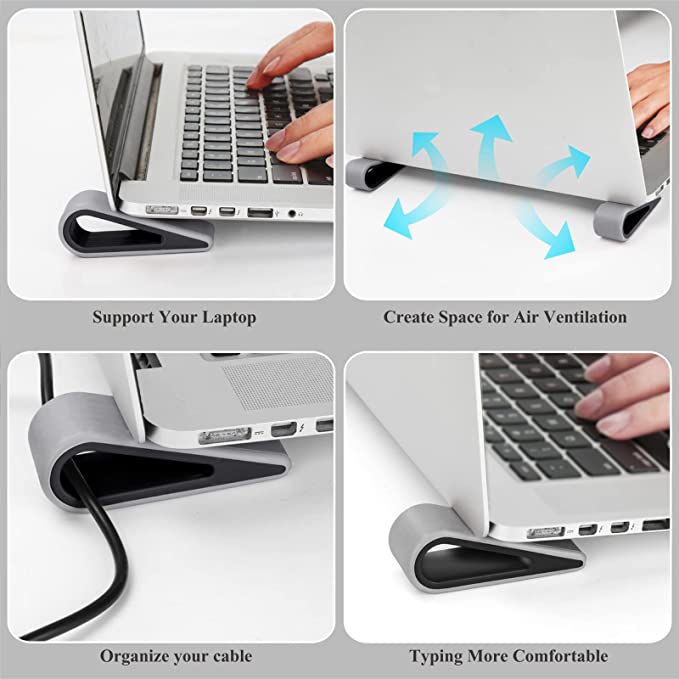 --- # Next steps - Now it's time to think about what you might want to make - Talk to your neighbor - Post on [Ed](https://edstem.org/us/courses/90089/discussion//4829755)! --- # How Laser Cutting works We're using a [Glowforge](https://glowforge.com/). - It takes SVGs as input - It can engrave, cut, etc - We're providing plywood, 3mm thick [double check with calipers] - We will not engrave during lab, it slows things down too much, but we may cut --- # What can you do? .left-column40[ 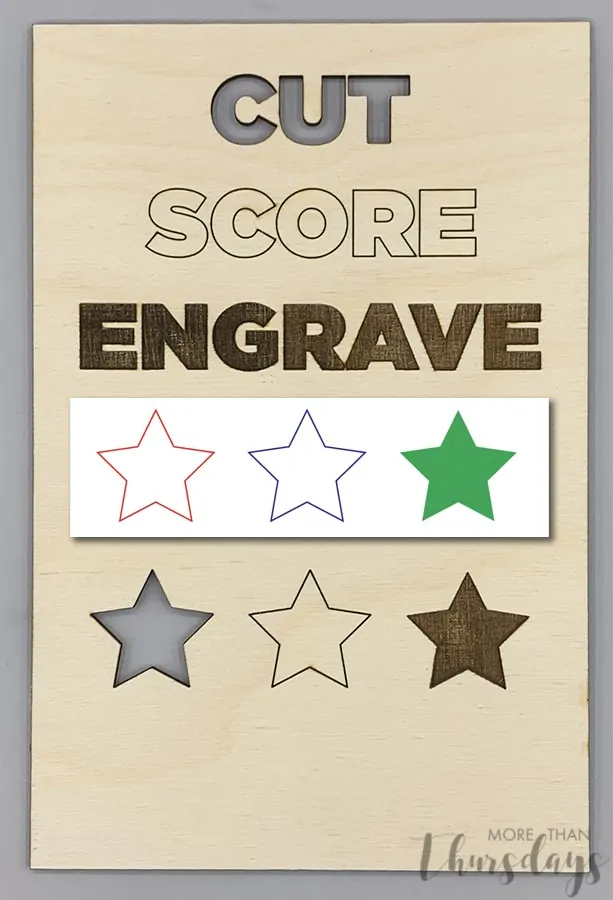 ] .right-column60[ Cutting: Makes a hole Scoring: Doesn't cut all the way through. Use a different color Engraving: Burns. Can do greyscale. - Images. Make sure they're not too dark. - Add in a drawing program after Tinkercad ] --- # How we will create SVGS First create a design in TinkerCAD (or other CAD software if you know it well) - You should group everything together that is touching - Place it carefully. The base plane will determine what is part of the final SVG - We will not engrave during lab, it slows things down too much, but we may cut - Export it as SVG (demo) - Include mm as units --- # Your process 1. Measure your object 2. Make an svg of your design 3. Print it on paper 4. Cut it out and check your measurements AGAIN 5. Iterate 6. Upload it to our drive 7. Sand, glue & paint (if you want) --- # Example: My bag holder .left-column50[ ] --- # First print: On Paper .left-column50[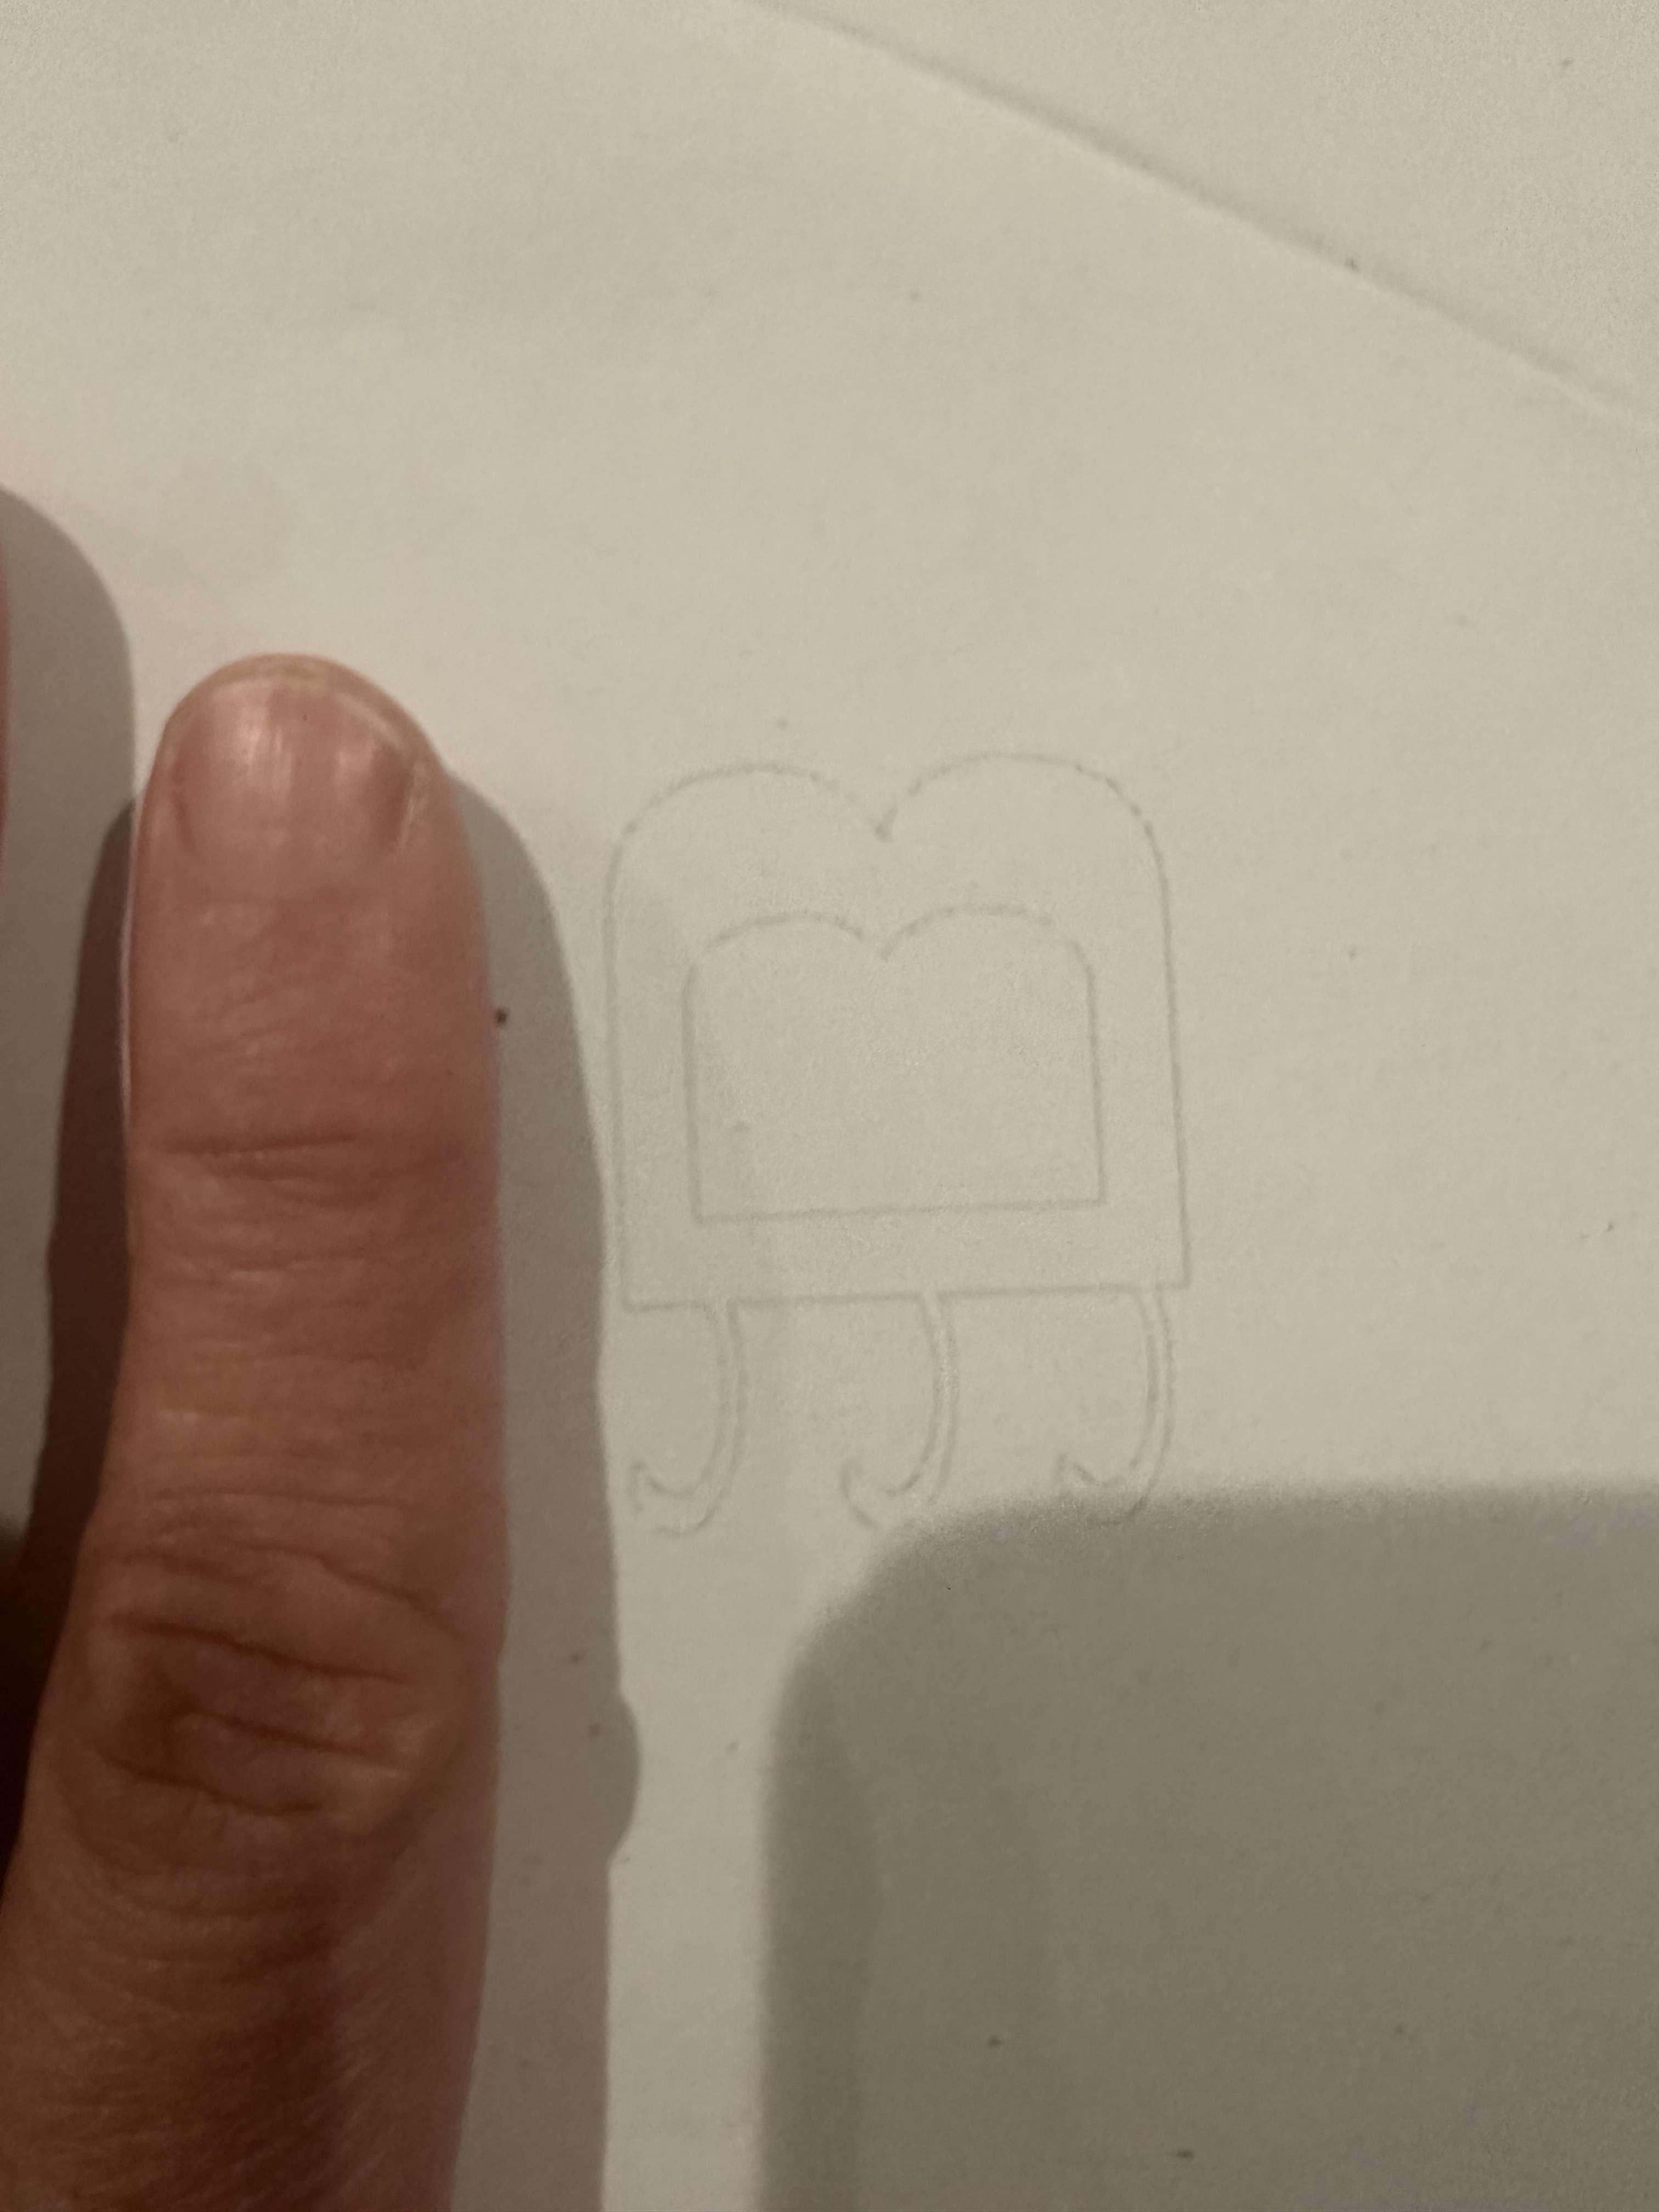] --- # Measuring .left-column50[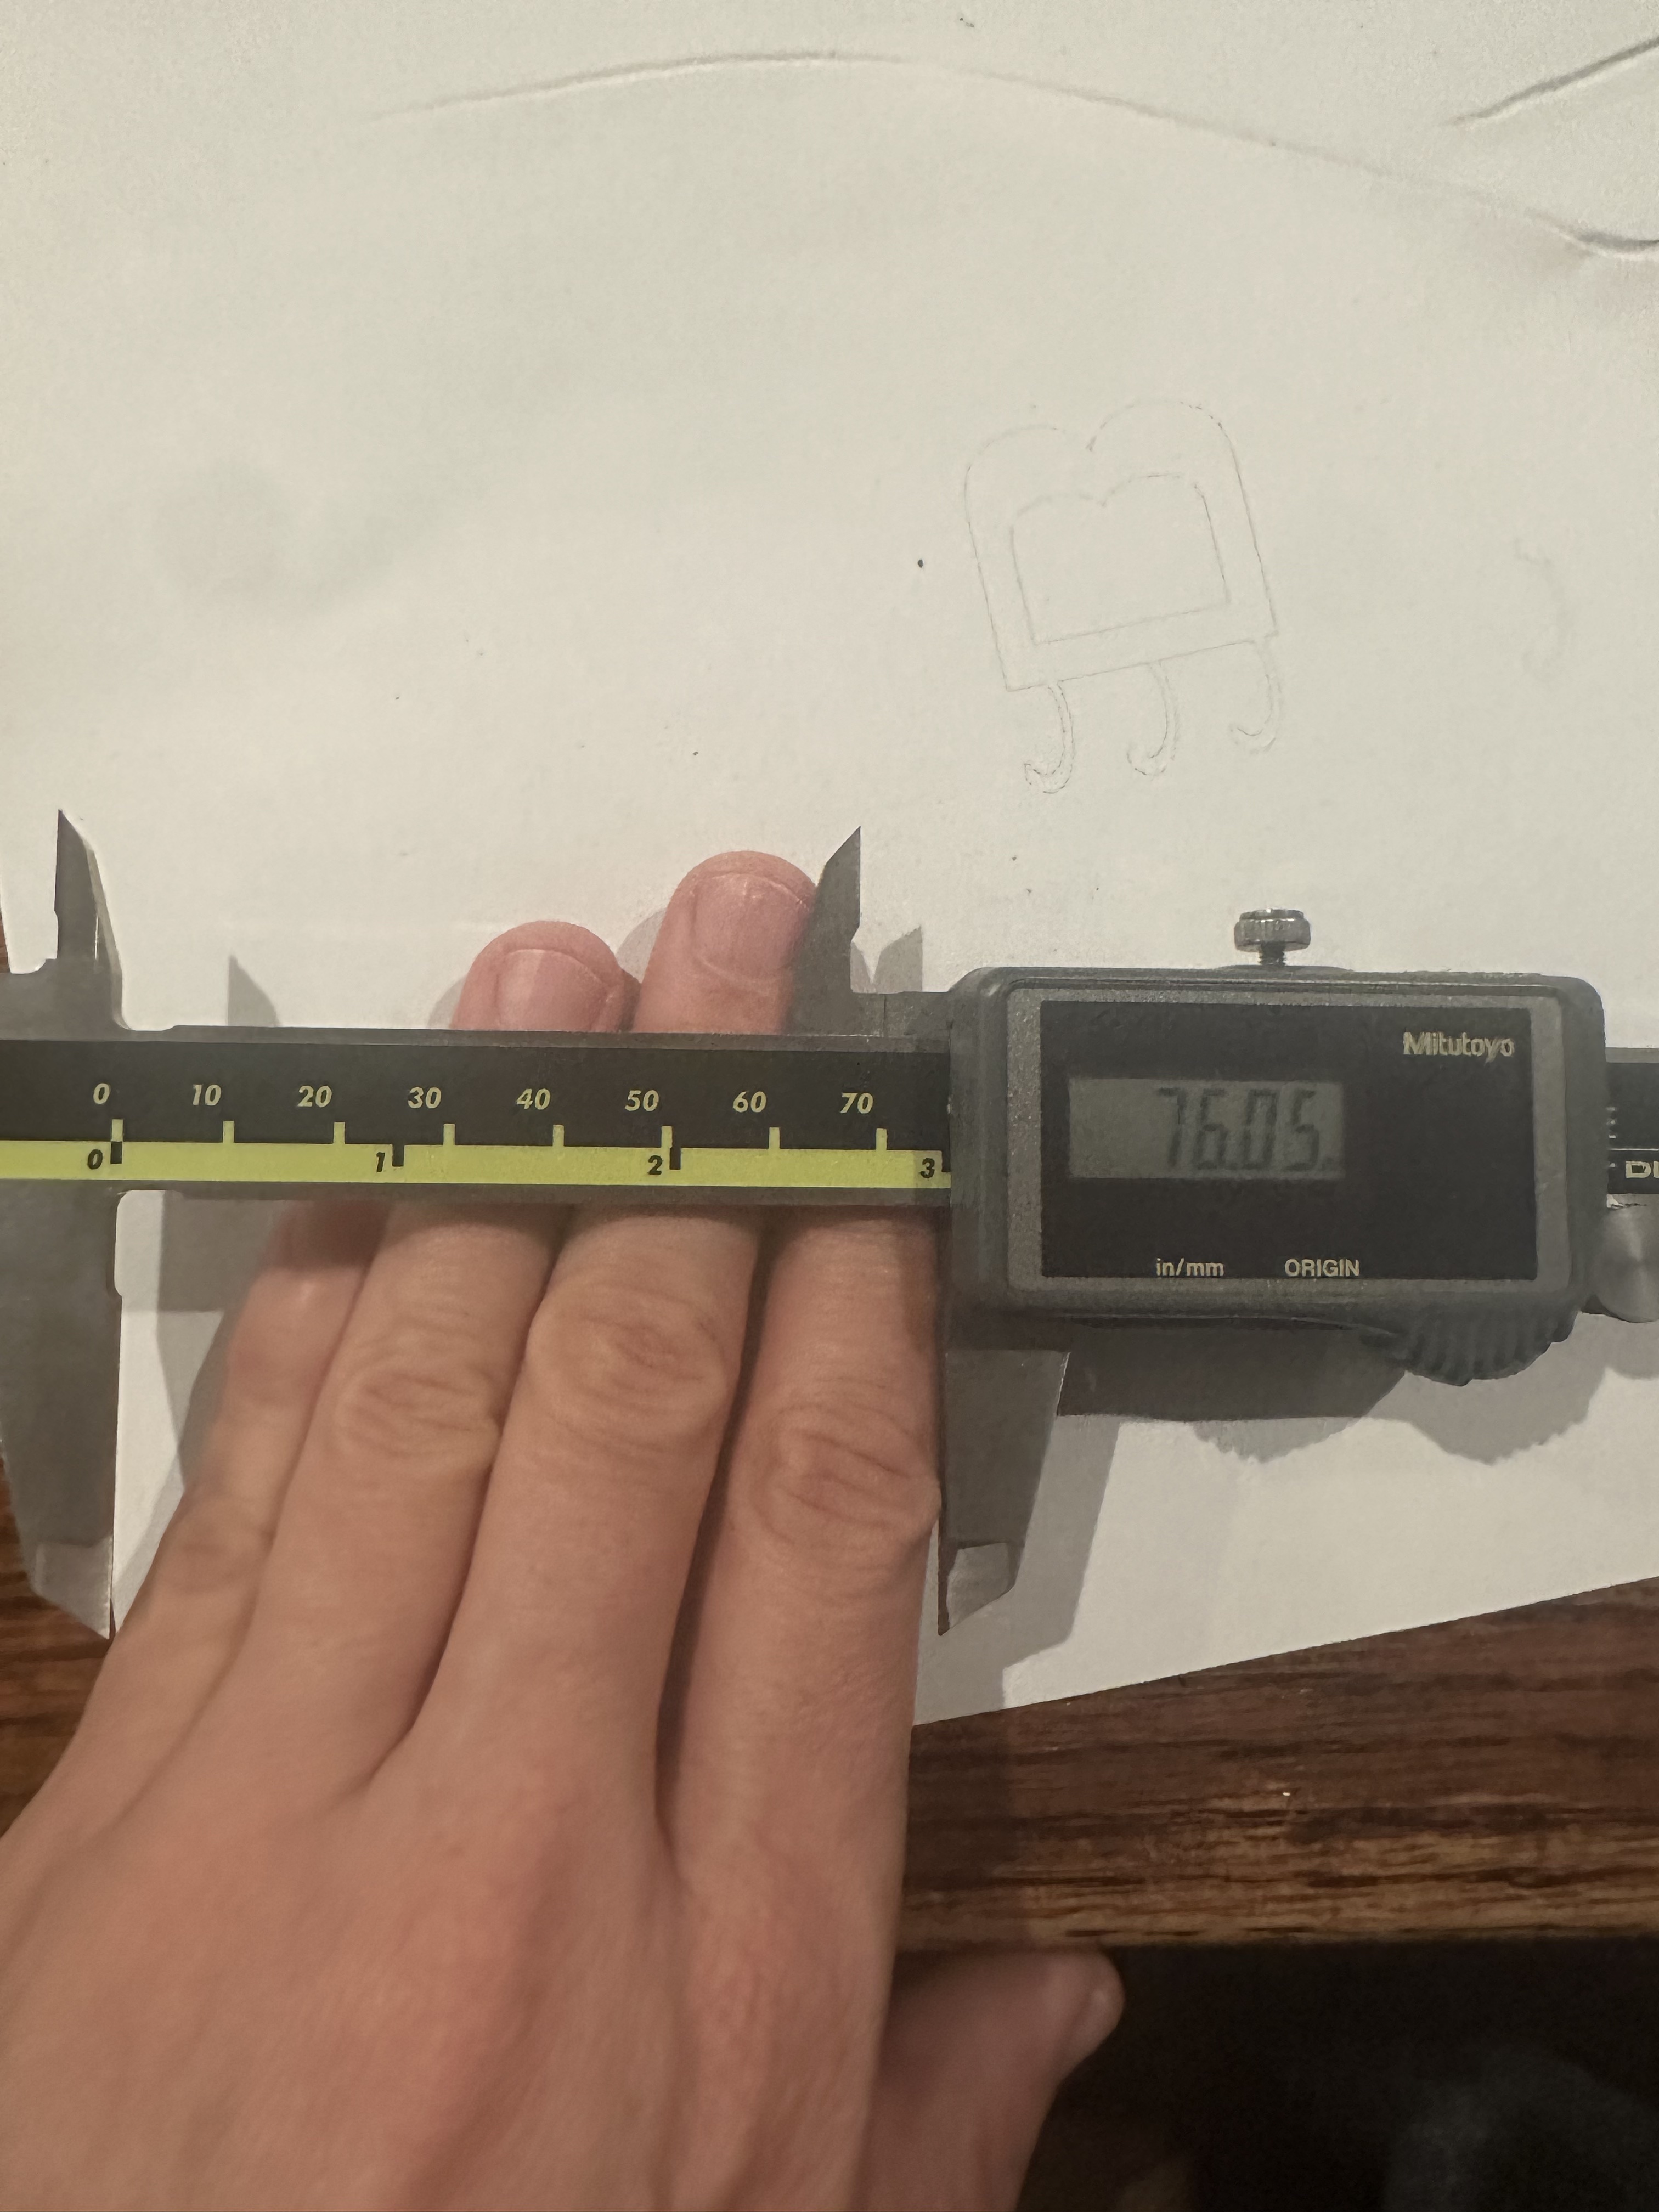 ] --- # Other Important Measurements The amount of wood removed by the laser cutter as it burns through the wood. Should always test for each new type of wood and wood thickness [Instructable](https://www.instructables.com/How-to-Adjust-for-Wood-Thickness-and-Kerf-on-a-Las/) on how to do this Only an issue if you're making a box or something else that has to assemble Use calipers to measure! --- # Reprinted on paper .right-column50[Reason? I used 76mm for the *outer* dimension instead of the *inner* one!] .left-column50[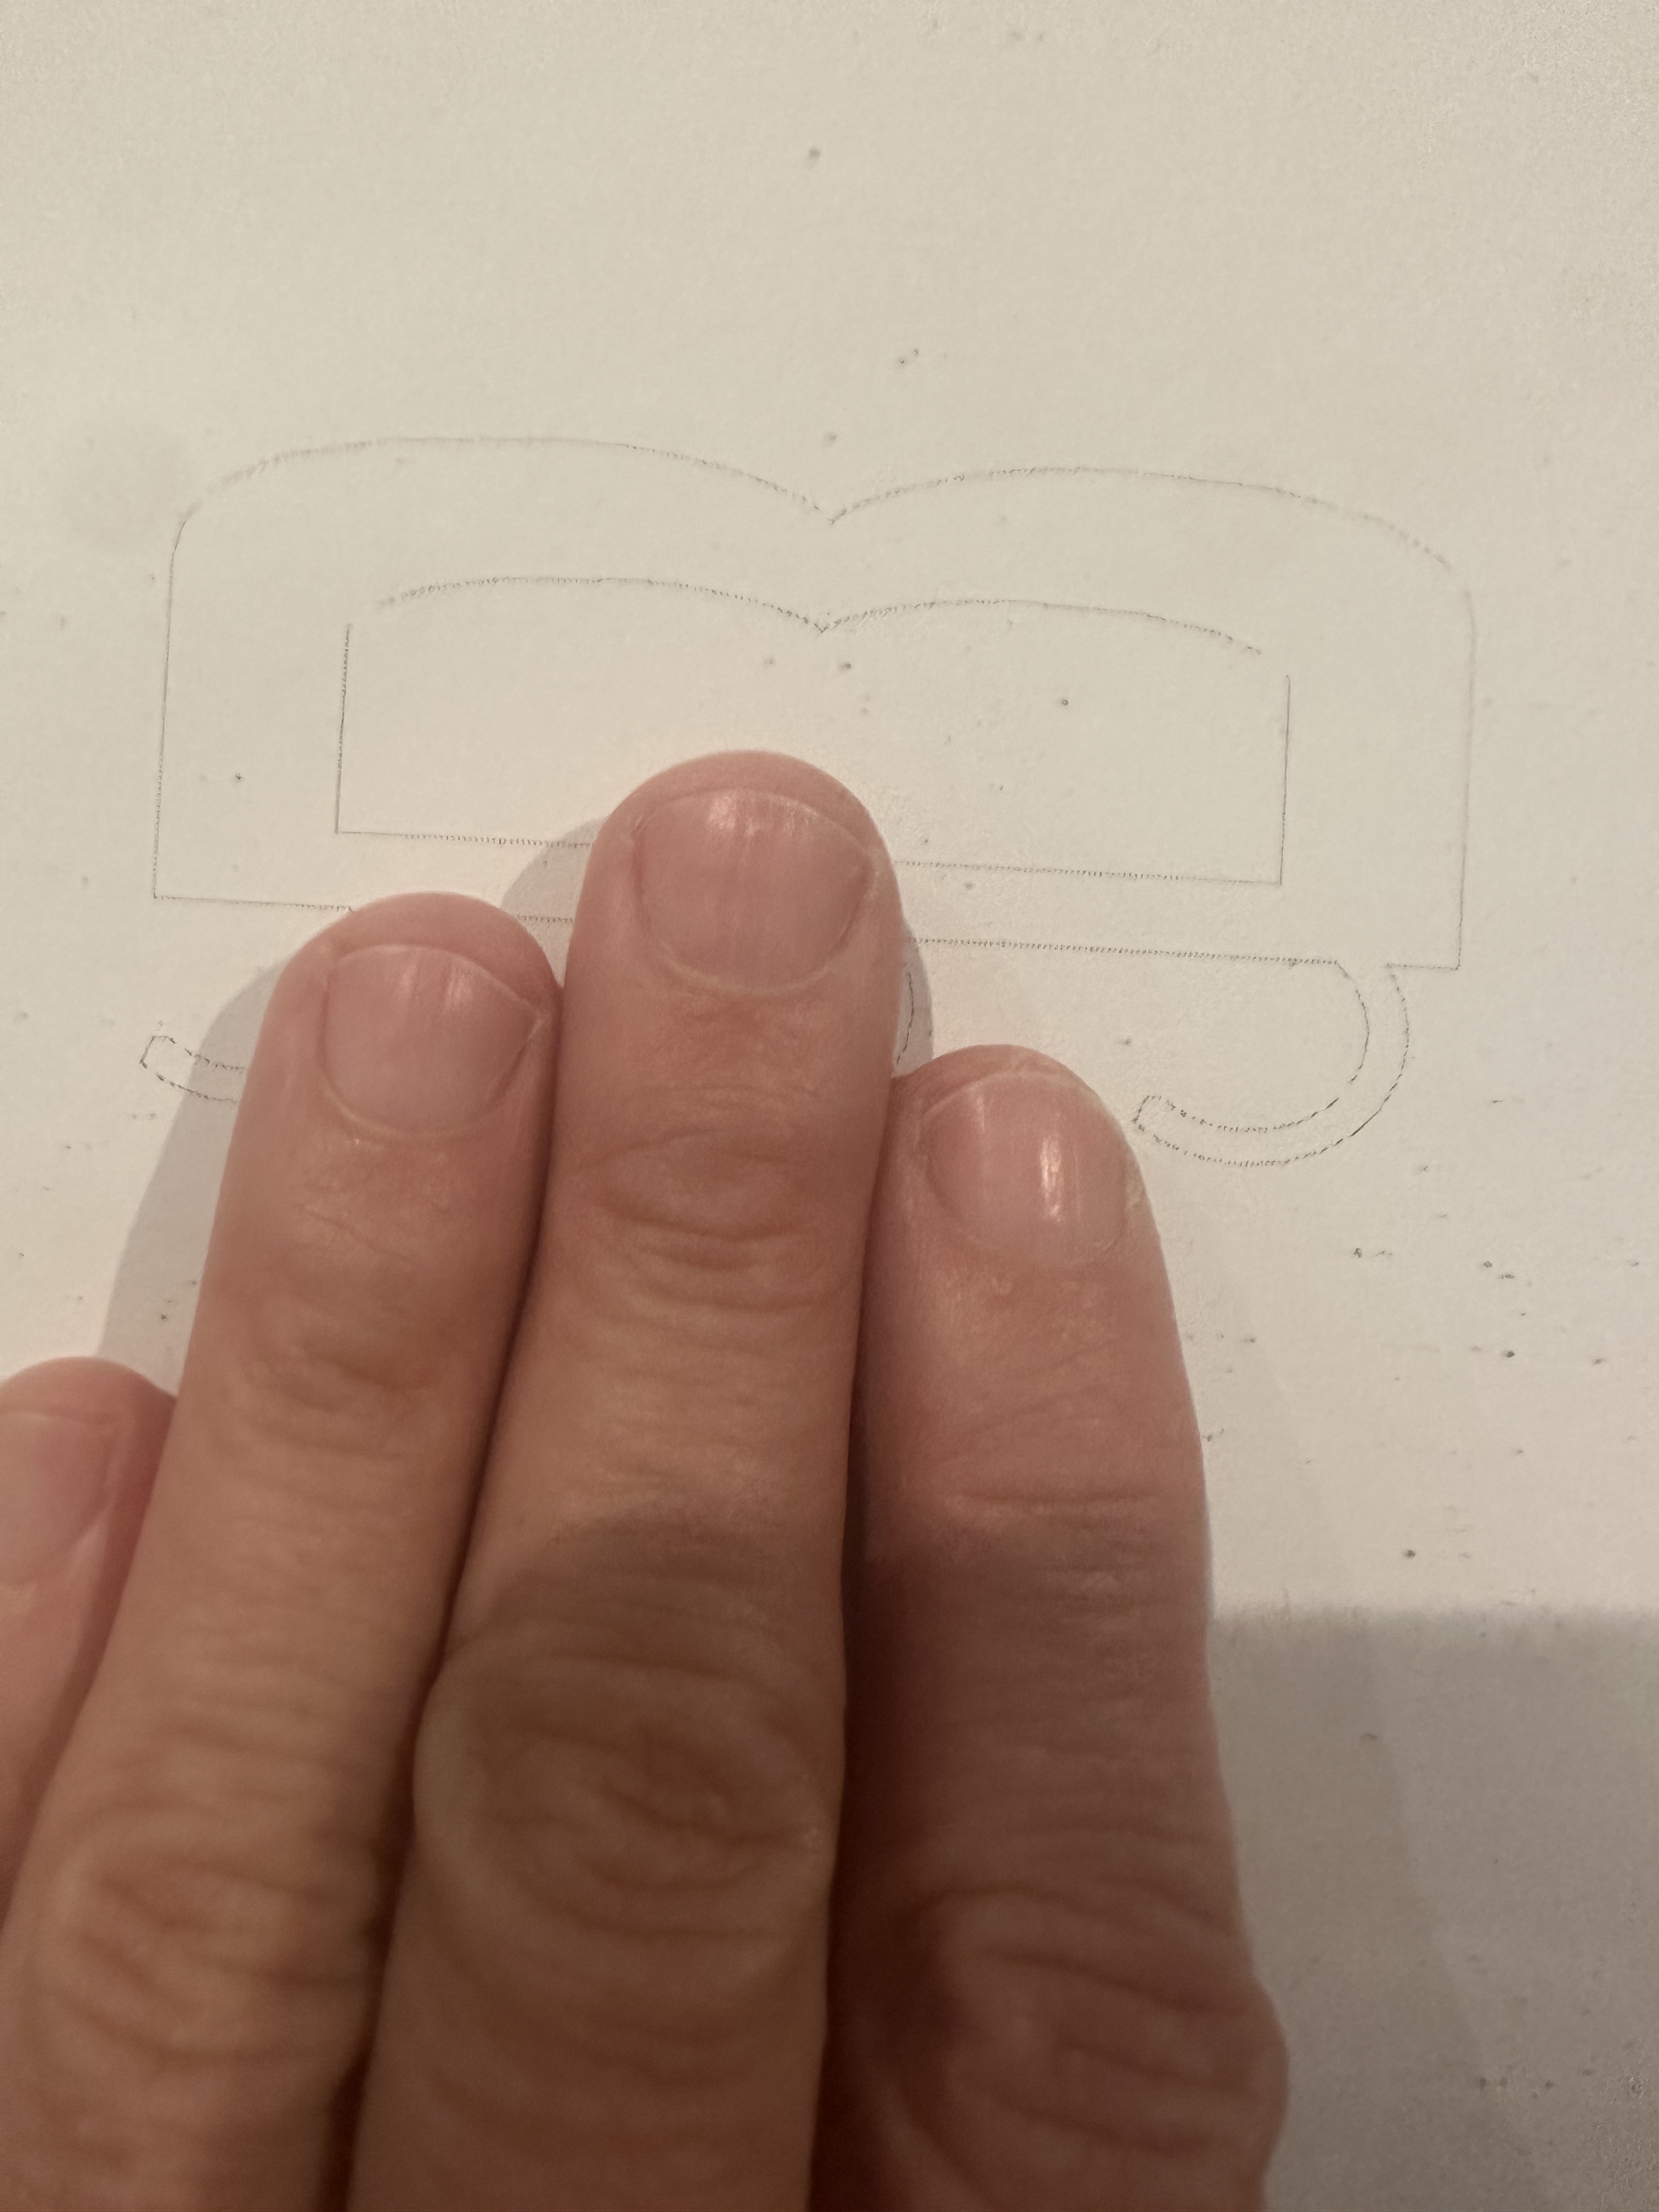] --- # Final print .right-column50[Do you see the problem with this design?] .left-column50[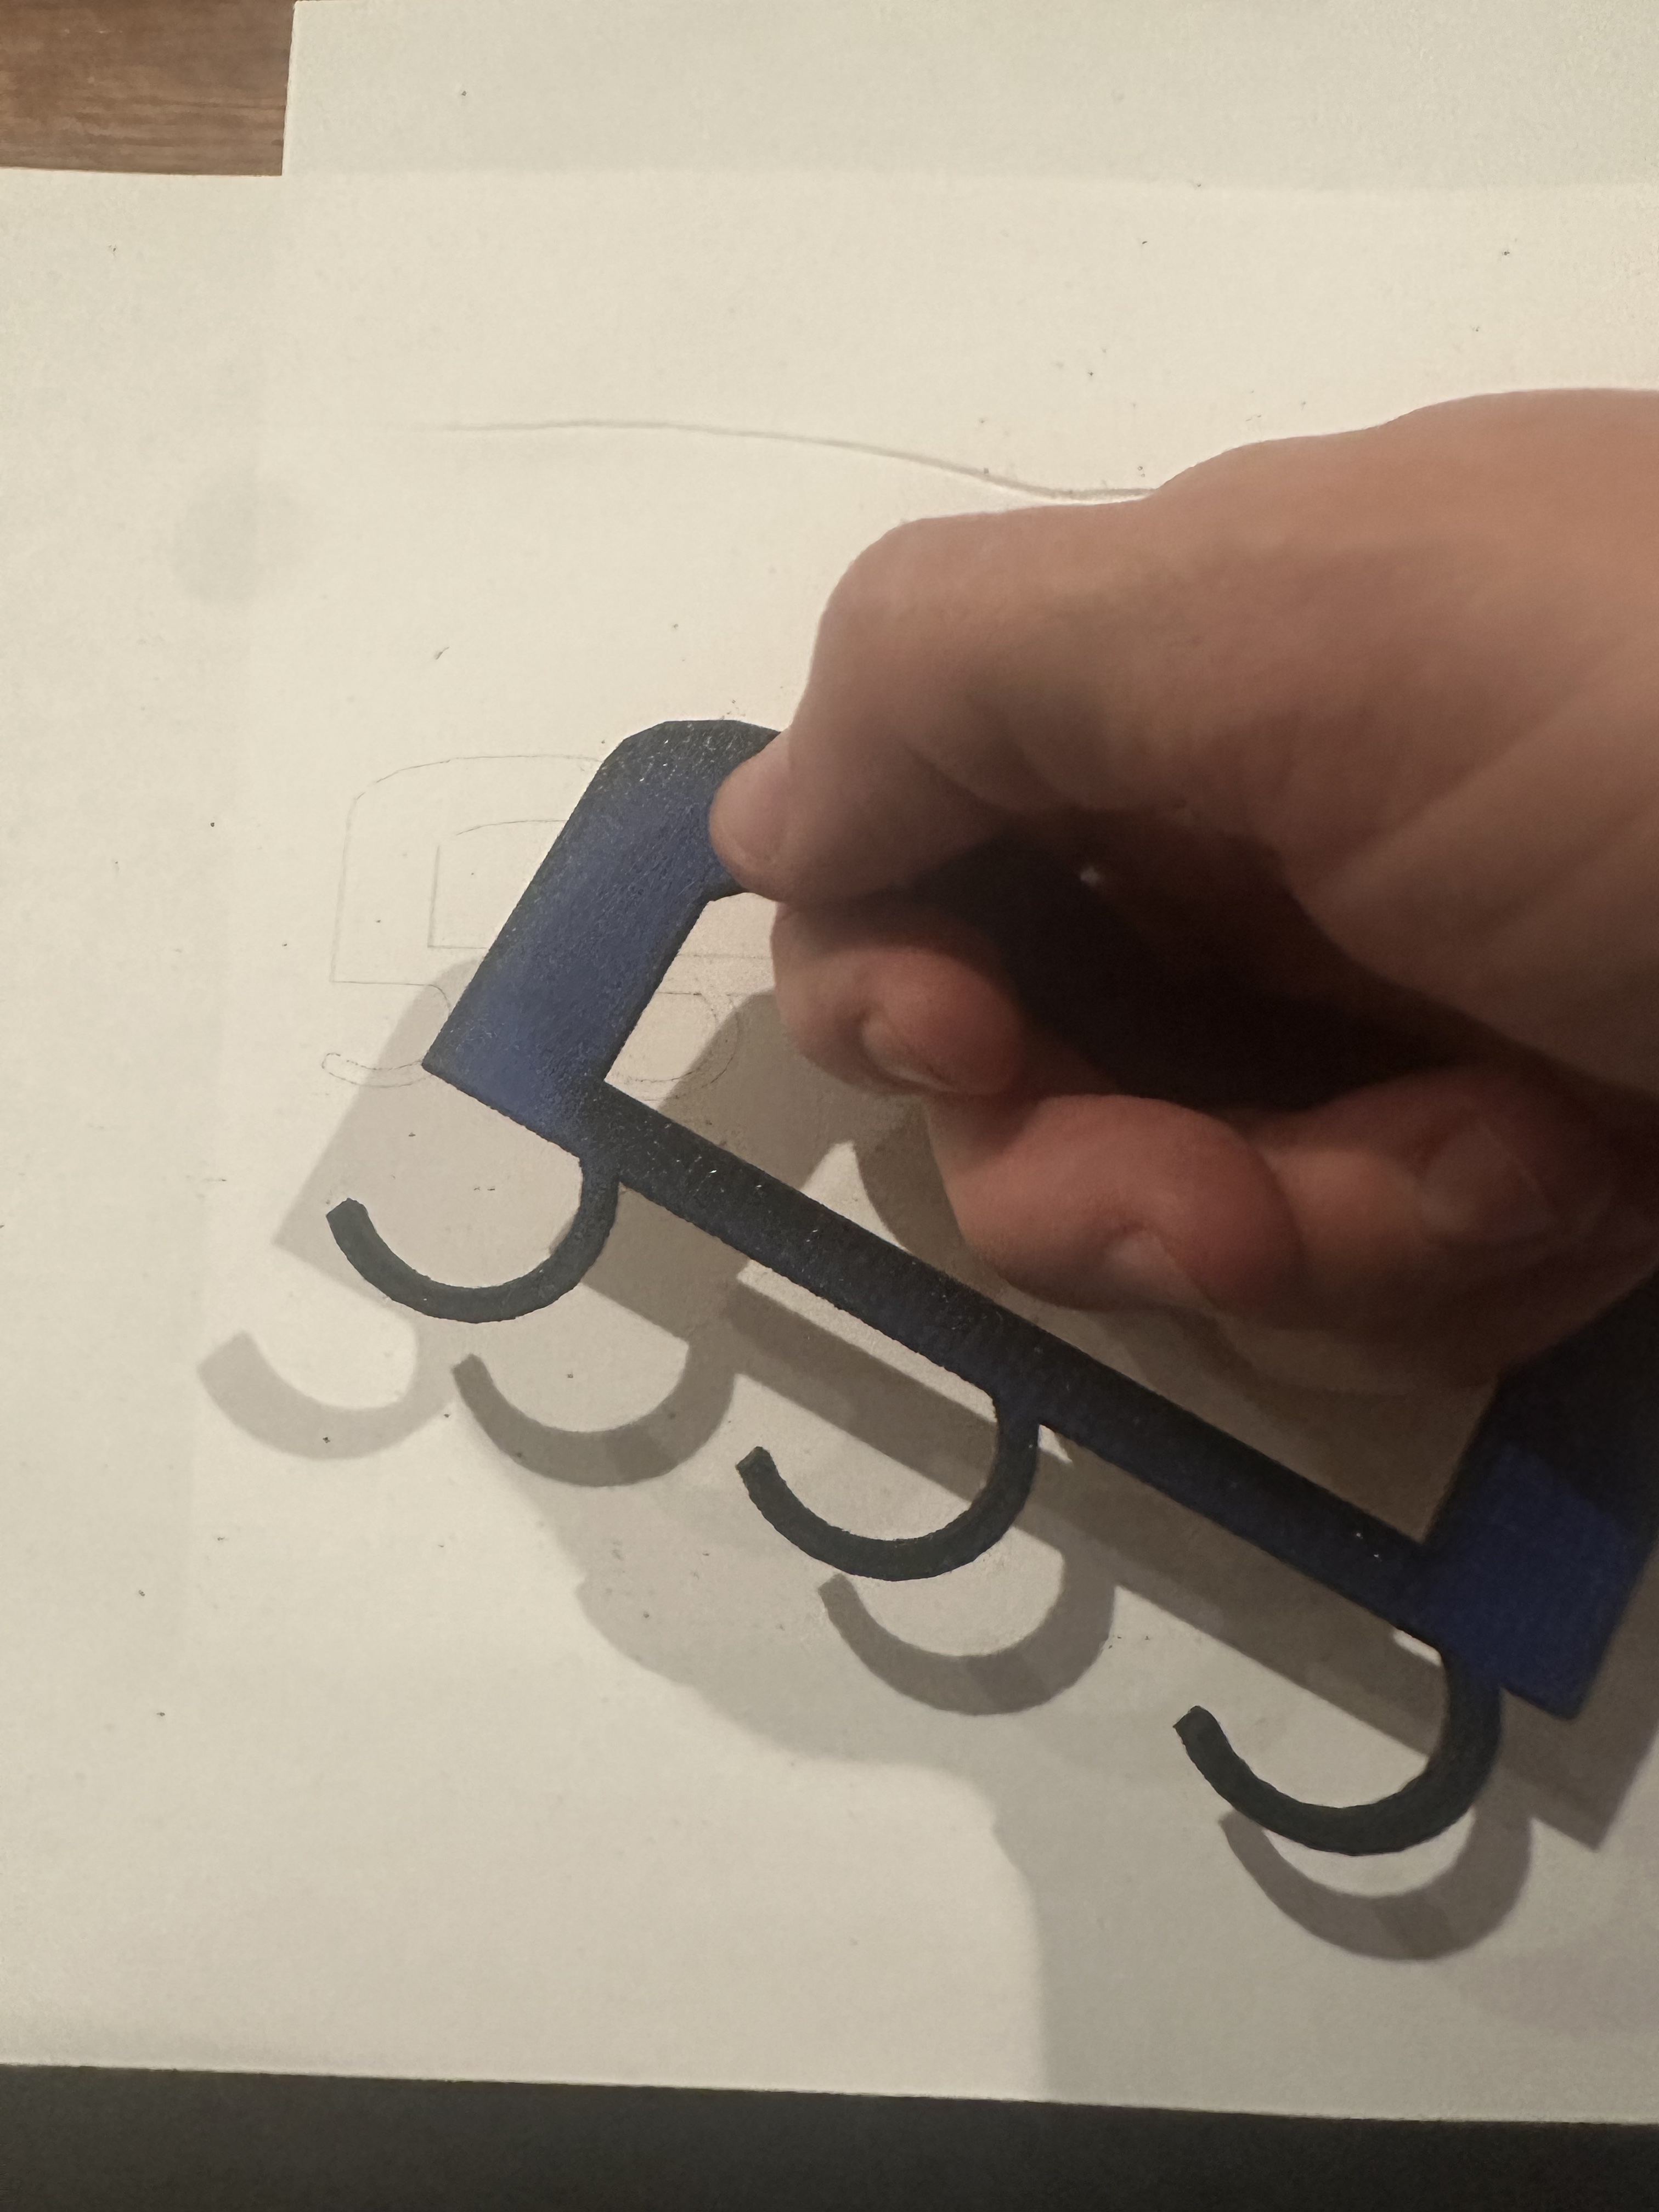] --- # Next class Come prepared to design: [TinkerCad](https://www.tinkercad.com/dashboard) [Adobe Illustrator](https://www.adobe.com/products/illustrator.html). Best for most tasks if you have it [AutoCAD](https://www.autodesk.com/products/autocad/overview?term=1-YEAR&tab=subscription) (free for students). Probably overkill [Inkscape](https://www.autodesk.com/products/autocad/overview?term=1-YEAR&tab=subscription) (free). Best free option Can even use powerpoint --- # Now: time to start your design (Pen and paper first) --- class: center, middle, inverse # Other Thoughts (if time) --- ## Pause and discuss Try to think of some everyday objects that could be made more accessible (customized through DIY making) (think pair share) --- [//]: # (Outline Slide) # Who makes accessibility happen? (1/2) Crafters with Disabilities --- ## Example: Knitters with disabilities We interviewed 16 disabled knitters about their motivations, process, needs, and experiences of bias - 11 Blind or Low-Vision - 7 Motor-impaired - 3 with Cognitive Impairment We collected data from six forums to extend our sample size and complement our interviews with more motor and cognition related data --- ## Making Patterns Accessible Pattern accessibility was a frequent problem for disabled knitters - Forum posters mentioned over 40 different pattern formatting guidelines to make patterns more accessible - Not just about nonvisual access For example P14-MC, who wrote out patterns in detail, said: .quote[...if it says you need to go and knit 16 rows, I’ll write out [all of them] and then I’ll mark them off as I go. (P14-MC)] .footnote[MC indicates motor and cognitive impairment] --- ## Making Craft Accessible Four participants (P1-MVC, P2-V, P5-M, P11-V) reported difficulty with small gauged looms Both circular knitting needle and loom knitters experienced difficulty executing a purl stitch .quote[...when I purl …[I] have to push my thumb down like that to get tension… And so there’s a lot more pinching for me… and that definitely causes discomfort the fastest. (P3-M)] --- ## Making Accessible Objects .left-column[ 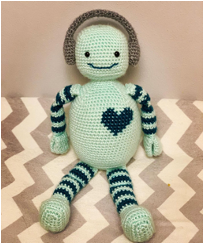 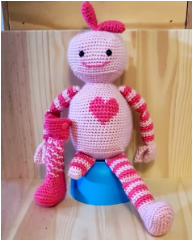 ] .right-column[ The results of knitting solved accessibility problems for some knitters - Patterns for toy robots with disabilities to increase the inclusion and representation of disability in the knitting community (P10-M) - Tops for wheelchair users with a shorter back and longer front .quote[if your sweater is too long in the back [and] goes underneath you, it's hard to transfer. (P14-M)] ] --- ## Community Ableism Participants primarily participated in communities of knitters to learn, as support networks, project collaborators, and to increase inclusion. Bias included assumptions about ability and even concerns about image, such as one forum poster experienced when a pattern designer *“didn’t like the idea of a wheelchair being in the shot.”* --- [//]: # (Outline Slide) # Who makes accessibility happen? (2/2) Crafters with Disabilities Domain Experts - Medical makers - People with disabilities - ... --- ## Domain Experts **A lot of research is needed here** - Full power of software engineering - Equivalent of end user programming - Production and personalization of interactive systems - Modularity - Requirements Specification - Hybrid Control over AI based systems (e.g. optimization) -- This is a focus of a lot of my group's work --- --- ## If you want more .left-column50[ [3D printing for health](http://make4all.org/portfolio/3d-printing-for-health/) [More materials](http://make4all.org/portfolio/3d-printing-in-a-range-of-materials/) [Metamaterials](http://make4all.org/portfolio/metamaterials/) [3D printing for education](http://make4all.org/portfolio/3d-printing-for-education/) ] .right-column50[ [Interactive objects](http://make4all.org/portfolio/3d-printing-of-interactive-objects/) [3D printing and sustainability](http://make4all.org/portfolio/3d-printing-and-sustainability/) [Options for rapid fabrication with 3D printing](http://make4all.org/portfolio/rapid-fabrication-prototyping/) ] --- ## Other Materials - [Lisa Harouni Talk](https://www.ted.com/talks/lisa_harouni_a_primer_on_3d_printing#t-120717) (@2:12) - [Powder printer](https://youtu.be/kBHsfNDsbCs?t=29s) - [Liquid Based additive printers](https://www.popsci.com/new-liquid-based-3d-printer-takes-minutes-not-hours/) (@1:07) - [Candy](https://www.youtube.com/watch?time_continue=5&v=rU6RAM0Wrck&feature=emb_logo), [Chocolate](http://youtu.be/BIFi8but3Vw) other [Confections](https://www.youtube.com/watch?v=U3TmrCzVZ6w) - [Pancake bot](https://www.youtube.com/watch?v=f3Q8nbtRNT0) - Cement for houses [old](https://www.youtube.com/watch?v=WzmCnzA7hnE), [new](https://www.youtube.com/watch?v=8zt_3Gs1ksg) - [MIT’s glass printer](https://gizmodo.com/watching-mits-glass-3d-printer-is-absolutely-mesmerizin-1725433454) - [Ceramics](https://www.youtube.com/watch?v=1JjaqKUUMMw) (with sound vibrations), [Sample art](https://www.foransuon.com/) --- ## Printing: Beyond plastic .left-column50[ 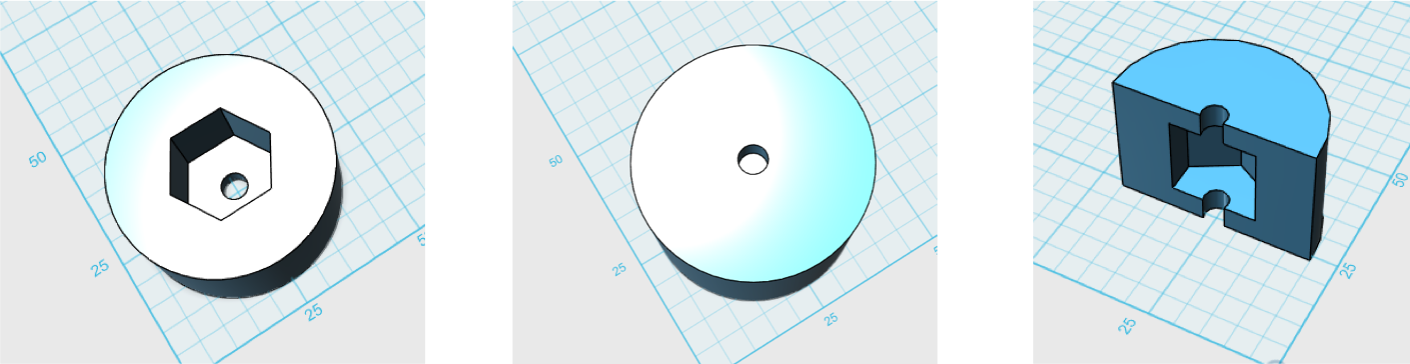   ] .right-column50[   [Shorey Designs](https://www.shoreydesigns.com/3d-printing-on-fabric) ] --- ## Printing with Kinetics .left-column-half[   ] .right-column-half[ ![:youtube Examples of embedded fabric, 9xqze9csLmY] ] ??? - String or wire (like a tendon) <!-- --- --> <!-- # Printing with Kinetics --> <!--  --> <!--  --> <!--  --> <!--  --> --- ## Printing new interactions <iframe title="vimeo-player" src="https://player.vimeo.com/video/551468278" width="640" height="360" frameborder="0" allowfullscreen></iframe> --- ## More examples! <br> - [3D Printed Medical Device Saves Baby's Life](https://www.youtube.com/watch?v=zr0HGCZSgE4) - [Prosthetic hand](http://youtu.be/CHPuMCshkLU?t=42s) (up to ~2:10) - [Prostheic 3D printed Eagle Beak](https://youtu.be/M1jxnogZgd4) - [3D printed car](https://www.youtube.com/watch?v=daioWlkH7ZI) - [Lots of examples quickly](https://www.youtube.com/watch?v=X5AZzOw7FwA) - [3D printers print ten houses in 24 hours](https://www.youtube.com/watch?v=SObzNdyRTBs) - [Printed body parts](http://youtu.be/jSjW-EgKOhk?t=1m8s) - [Printed organs](https://www.youtube.com/watch?v=4nqw1yjyKEs) - [3D printed pizza](http://youtu.be/dvjqmMfMU7w?t=15s) - [3D printed fashion](http://youtu.be/63Xozzh_uHM) - [3D Printing a Garden Sprinkler](https://www.youtube.com/watch?v=y9XRD3P2G-E)
