Setting Up a Project
NOTE: If you don't plan to use a workspace, skip to option II.
Once you've established your workspace, you'll want to create a project and begin writing code. In Eclipse, projects are the next-smallest functional unit after workspaces, but where you might have only one workspace, you will usually have several projects inside one workspace. For example, in my workspace I have a project setup for a web-app I worked on last quarter, a project for a GUI app I'm currently fiddling with, etc. You might want to have one project per assignment. There are many different ways to organize projects, but ultimately it comes down to what makes your environment most suitable to you.
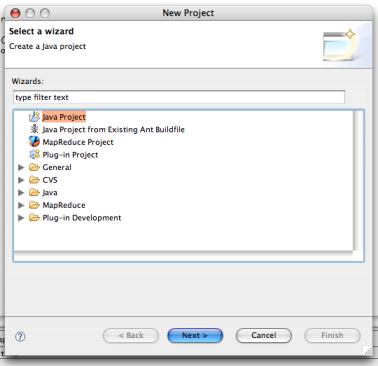
To create a new project, click on File > New > Project. In the window that pops up, choose Java Project and click Next.

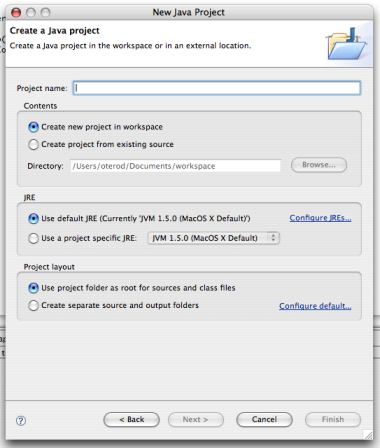
You are then given a chance to name your project. Names don't have to follow any conventions, so you can be as verbose as you need to be. Generally you will want to Create new project in workspace, unless you have a pre-prepared folder that you'd like to use (this can be useful for importing an entire project). You'll also want to ensure that you're using a JRE version 1.5 or later. You might as well be using 1.6 if you're on a Windows or Linux machine. At this point you can generally just click the Finish button, though you're welcome to explore the rest of the wizard.

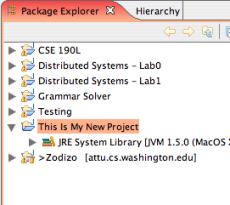
You now of a new project to work with. It should appear in your Package Explorer in the upper-left of your screen.

Option II - Organizing files yourself
If you want to set up each project on its own, independent of any workspace, you'll go about things slightly differently. Bring up the New Project dialogue in the same way: File > New > Project. This will bring up the new project wizard.

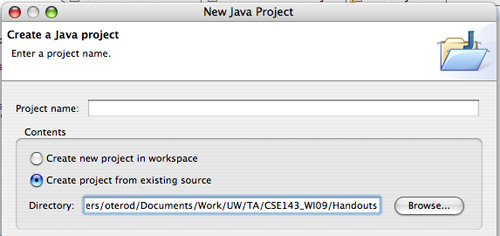
Choose Java Project, click Next, and you'll arrive at the New Java Project window. The difference is that you will want to choose Create project from existing source in the Contents section. At this point you will want to have created a folder on your hard drive for your new project, including all existing source files (for instance, files provided by the instructor). Click the Browse... button to choose that directory.

Once you've named your project and specified its location, you can just click the Finish button.