CSE 142, Autumn 2021: Assessment 8
Assessment 8: Critters
Initial submission due Wednesday, December 8, 11:59:59pm
Objectives
This assignment will assess your mastery of the following objectives:
- Write a class to define objects with specified behavior.
- Use fields to store state necessary for a class's operation.
- Practice good object-oriented design, including abstraction and encapsulation.
- Utilize inheritance and choose an appropriate base class for each new class.
- Follow prescribed conventions for spacing, indentation, naming, and comments.
Program Behavior
You are provided with several client program classes that implement a graphical simulation of a 2D world of animals and other creatures, called "critters". You will write classes that define the behavior of those critters. Critters move and behave in different ways. In this world, critters propagate their species by infecting other critters with their DNA, which transforms the other critter into the infecting critter's species. You will write classes to define the unique behaviors for each critter.
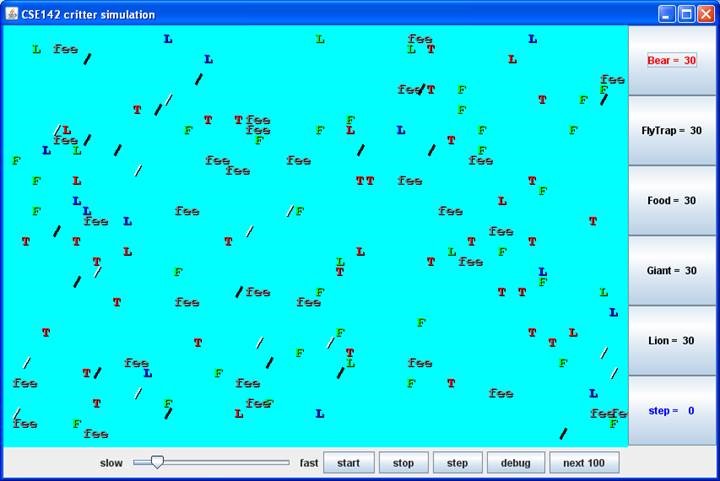
For this assignment you will be given a lot of supporting code that runs the simulation. You are only defining the individual critters that wander around this world trying to infect each other. While it is running, the simulation will look like the image below.
This assignment may be confusing at first, because you will not write the main method of the executed program; your code is
not in control of the overall execution. Instead, your objects are part of a larger system. You might want your critters make
several moves at once using a loop, but you can't. The only way a critter can move is to wait for the simulator to ask it for a
single move and return that move. This is typical of object-oriented programming, though it might be frustrating at first.
Running the Simulation
You will need to download support files in order to properly run the simulation. These files are available on the course website individually and in a zip file called critters.zip. All of these files will need to be in the same folder as your critter files. You should not modify any of the provided files, except as described below.
To run the simulation, compile and run CritterMain.java. Within that file, you will notice several lines of code of this form:
// frame.add(30, Lion.class);
You should uncomment the line of code for any critters you wish to include in the simulation and comment out all other lines.
For example, if you want to run with only bears, leave all lines except frame.add(30, Bear.class)
commented. If you want all types of critters included, uncomment all lines. You should not make any other modifications to
CritterMain.java or any of the other provided files.
Critter Implementation
Each of your critter classes should extend a base class called Critter. So, each of your critter classes
will start like this:
public class SomeCritter extends Critter
The "extends" clause in the header of this class establishes an inheritance relationship. This is discussed in Chapter 9 of the
textbook, although you don't need a deep understanding of the concept for this assignment. The main point to understand is
that the Critter class has several methods and constants defined for you. By extending this class, you
inherit these methods and constants. Inheritance makes it easier for our code to talk to your critter classes, and it helps us be
sure that all your critter classes will implement all the methods we need. You should then give new definitions to certain
methods to define the behavior of your critters.
There are three key methods in the Critter class that you will redefine (override) in your own classes. When you override
these methods, you must use exactly the same method header as what you see below. The three methods you may override
for each Critter class are:
public Action getMove(CritterInfo info)- Each round, the client calls this method on your critter to find out what action it should take on this turn.
(See below for more information on
CritterInfoandAction.) public Color getColor()- Each round, the client calls this method on your critter to find out what color it should appear.
public String toString()- Each round, the client calls this method on your critter to find out what text it should be displayed as.
By extending Critter as shown above, you receive a default version of these methods. The default
behavior is to always turn left (a move of Action.LEFT), to use the color black, and to display as a
"?". If you don't want these defaults, rewrite (override) the necessary methods in your class with your own behavior.
The getMove method will return one of the four Action constants described below.
The getColor method will return whatever color you want the simulator to use when drawing your critter. And
the toString method will return whatever text you want the simulator to use when displaying your critter
(usually but not always a single character).
Each class will also begin with an import declaration for the package java.awt.* to enable usage of the
Color class.
For example, below is a definition for a critter called Food. Food always
infects and displays itself as a green letter F:
import java.awt.*;

public class Food extends Critter {
    public Action getMove(CritterInfo info) {
        return Action.INFECT;
    }

    public Color getColor() {
        return Color.GREEN;
    }

    public String toString() {
        return "F";
    }
}
Critter Movement
On each round of the simulation, the simulator asks each critter object what action it wants to perform (by calling the
getMove method). Each round, a critter will take one of the following actions:
Action constant |
Description |
|---|---|
Action.HOP |
Move forward one square in the critter's current direction |
Action.LEFT |
Turn left (rotate 90 degrees counter-clockwise) |
Action.RIGHT |
Turn right (rotate 90 degrees clockwise) |
Action.INFECT |
Infect the critter in front of you |
The getMove method is passed an object of type CritterInfo. This is an
object that provides you information about the current status of the critter. It includes eight methods for asking about surrounding
neighbors, plus a method to find out the current direction the critter is facing. Below are the methods of the CritterInfo class. (You will not necessarily use all of these methods in your critters.)
CritterInfo method |
Description |
|---|---|
public Direction getDirection() |
returns the direction you are facing |
public Neighbor getFront() |
returns the neighbor in front of you |
public Neighbor getBack() |
returns the neighbor in back of you |
public Neighbor getLeft() |
returns the neighbor to your left |
public Neighbor getRight() |
returns the neighbor to your right |
public boolean frontThreat() |
returns whether or not there is an enemy facing you in front of you |
public boolean backThreat() |
returns whether or not there is an enemy facing you in back of you |
public boolean leftThreat() |
returns whether or not there is an enemy facing you to your left |
public boolean rightThreat() |
returns whether or not there is an enemy facing you to your right |
The getDirection method returns what direction you are facing as one of four Direction constants. The next group of
four CritterInfo methods (the "get" methods) return one of four Neighbor constants to represent the different kind of
neighbors you might encounter. Below are the values of these constants:
Direction constant |
Description |
|---|---|
Direction.NORTH |
Facing north (up) |
Direction.SOUTH |
Facing south (down) |
Direction.EAST |
Facing east (right) |
Direction.WEST |
Facing west (left) |
Neighbor constant |
Description |
|---|---|
Neighbor.WALL |
The neighbor in that direction is a wall (the edge of the world) |
Neighbor.EMPTY |
The neighbor in that direction an empty space |
Neighbor.SAME |
The neighbor in that direction is a critter of your species |
Neighbor.OTHER |
The neighbor in that direction is a critter of another species (an "enemy") |
Notice that you are only told whether critters are of your species or some other species; you cannot find out exactly what species they are. The final group of four methods (the "threat" methods) tell you whether there is an enemy in each direction that is facing you (which means they could potentially infect you). An enemy is a critter of a different species.
Required Critters
You will implement the following four critters for this assessment. Each critter will have one constructor,
which must accept exactly the parameters shown below. (Any changes to the constructor will cause the
client to not compile.) For any behavior described as random, all possibilities should be equally likely,
and random values should be generated using a Randomobject.
Bear
| constructor | public Bear(boolean polar) |
getColor |
Color.WHITE for a polar bear
(when polar is true),
Color.BLACK otherwise (when polar
is false) |
toString |
Alternate on each move between a forward slash ("/") and a backslash ("\") starting with a forward slash ("/") |
getMove |
Infect if an enemy is in front; otherwise hop if empty in front; otherwise turn left |
The Bear constructor accepts a parameter indicating whether or not the bear is a polar (white) bear. When the parameter is
true, the resulting bear will be white. When the parameter is false,
the resulting bear will be black. The simulator deals
with deciding whether each bear will be white or black; your class just needs to ensure that you create the right color bear
based on the parameter.
Lion
| constructor | public Lion() |
getColor |
Randomly pick one of Color.RED,
Color.GREEN, or Color.BLUE and use that color
for three moves, then randomly pick one of those colors again for the next three moves,
then randomly pick one of those colors for the next three moves, and so on |
toString |
"L" |
getMove |
Infect if an enemy is in front; otherwise if a wall is in front or to the right, turn left; otherwise if a fellow Lion is in front, turn right; otherwise hop |
Giant
| constructor | public Giant() |
getColor |
Color.GRAY |
toString |
"fee" for 6 moves, then "fie" for 6 moves,
then "foe" for 6 moves, then "fum" for 6 moves,
then repeat |
getMove |
Infect if an enemy is in front; otherwise hop if empty in front; otherwise turn right |
Husky
| constructor | public Husky() |
getColor |
your choice |
toString |
your choice |
getMove |
your choice |
Your Husky may have any behavior you like, as long as it does not exactly duplicate any example critter you have been shown in class (lecture, section, or lab) or any of the three required critters (Bear, Lion, Giant). In addition you may use advanced material if you choose, as long as it does not break or attempt to "hack" the simulation. Your Husky will only contribute to the Behavior dimension grade. It will not factor in to grading on the other dimensions.
Unlike on most assignments, your Husky can use advanced material you happen to know in Java (with some restrictions). If you wish to use particularly complex material in your Husky, contact your TA or instructor to make sure it will be compatible with our system.
On the last day of class, we will hold a competition pitting students' Husky critters against each other. More details about the tournament and how to participate will be released later. The tournament will be for fun, and participation will be entirely optional—your grade will not be affected by your participation or performance in the tournament.
Development Strategy and Hints
We recommend attempting the classes in the order they are presented above (Bear,
then Lion, then Giant).
Within each class, you can test each part of the behavior without having implemented
them all. (Any methods that are not implemented will use the default critter behavior.) You will likely
be able to debug your work more easily if you test each method individually.
Remember that you will not be able to control when or how often the methods of your class are called—
that is controlled by the simulator. You will need to ensure that your critters behave properly no matter
when, how often, or in what order the simulator class your methods. For example, you should not assume
that getColor() is always called before toString(),
or that those two methods will only be called once between calls to getMove().
You will also only be able to return one value each time the
method is called. You will need to use fields (see above) to keep track of each object's current state and
remember what your next choice should be.
Be sure that your code is tied to actual moves made by a critter (i.e., that changes to state occur in the
getMove() method). For example, the bear is supposed to be displayed alternately
as a slash or backslash. This should happen as the getMove() method is called.
The alternation should happen for each move, not for each call on toString().
Debugging Tips
The simulator provides great visual feedback about where critters are, so you can watch them move around the world. But it doesn't give very helpful feedback about what direction critters are facing. The simulator has a "debug" button that makes this easier to see. When you activate debug mode, your critters will be displayed as arrow characters that indicate the direction they are facing. The simulator also indicates the step number as the simulation proceeds (initially showing a 0).
The following descriptions and suggestions may help you test and debug your individual critters:
Bear
Try running the simulator with just 30 bears in the world. You should see about half white and about half black bears. Initially they should all be displayed as slash characters. When you click "step," they should all switch to backslash characters. When you click "step" again they should go back to slash characters. And so on. When you click "start," you should observe the bears heading towards walls and then hugging the walls in a counter-clockwise direction. They will sometimes bump into each other and go off in other directions, but their tendency should be to follow along the walls
Lion
Try running the simulator with just 30 lions in the world. You should see about one-third red, one-third green, and one-third blue lions. Use the "step" button to make sure that the colors change properly. The lions should keep their initial colors for three moves, while the simulator is indicating that it is step 0, step 1, and step 2. They should then switch colors when the simulator indicates step 3 and should stay with these new colors for steps 4 and 5. Then you should see a new color scheme for steps 6, 7, and 8. And so on. When you click "start," you should see the lions bouncing off of walls. When they bump into a wall, they should turn around and head back in the direction they came. They will sometimes bump into each other as well. They shouldn't end up clustering together anywhere.
Giant
Try running the simulator with just 30 giants in the world. They should all be displayed as "fee." This should be true for steps 0, 1, 2, 3, 4, and 5. When you get to step 6, they should all switch to displaying "fie" and should stay that way for steps 6, 7, 8, 9, 10, and 11. Then they should be "foe" for steps 12, 13, 14, 15, 16, and 17. And they should be "fum" for steps 18, 19, 20, 21, 22, and 23. Then they should go back to "fee" for 6 more steps, and so on. When you click "start," you should observe the same kind of wall-hugging behavior that bears have, but this time in a clockwise direction.
Code Quality Guidelines
In addition to producing the desired behavior, your code should be well-written and meet all expectations described in the grading guidelines and the Code Quality Guide. For this assessment, pay particular attention to the following elements:
Object-oriented Design
Your code must follow good object-oriented design principles as described and demonstrated in class, the textbook, and the Code Quality Guide. In particular, you should encapsulate the data inside your objects, and you should not declare unnecessary data fields to store information that isn't vital to the state of the object. You should also not create any unnecessary objects. When possible, create an object once and use it as a field or parameter rather than repeatedly recreating the object.
Code Aesthetics
Your code should be properly indented, make good use of blank lines and other whitespace, and include
no lines longer than 100 characters. Your class, methods, variables, parameters and constants should all have
meaningful and descriptive names and follow the standard Java naming conventions. (e.g.
ClassName, methodOrVariableName,
CONSTANT_NAME) See the Code Quality Guide for more information.
Commenting
Your code should include a header comment on each class, following the same format described in previous assessments. Your code should also include a comment at the beginning of each method that describes that method's behavior. Method comments should also explicitly name and describe all parameters to that method and describe the method's return value (if it has one). Comments should be written in your own words (i.e. not copied and pasted from this spec) and should not include implementation details (such as describing loops or expressions included in the code). See the Code Quality Guide for examples and more information.
Since you are not writing a program, your comments will be slightly different than on previous assessments, but should follow the same guidelines. Your class comments will describe the general behavior of a type of object rather than the function of a specific program. Your method comments should describe the behavior of the method in the context of the larger class. The commenting section of the Code Quality Guide has some examples specific to object-oriented programming.
Getting Help
If you find you are struggling with this assessment, make use of all the course resources that are available to you, such as:
- Reviewing relevant examples from lessons, section, and lab
- Reading the textbook
- Visiting support hours
- Posting a question on the message board
Collaboration Policy
Remember that, while you are encouraged to use all resources at your disposal, including your classmates, all work you submit must be your own. In particular, you should NEVER look at a solution to this assessment from another source (a classmate, a former student, an online repository, etc.). Please review the full policy in the syllabus for more details and ask the course staff if you are unclear on whether or not a resource is OK to use.
Reflection
In addition to your code, you must submit answers to short reflection questions. These questions will help you think about what you learned, what you struggled with, and how you can improve next time. The questions are given in the "Reflection" slide in the Ed assessment.
Running and Submitting
You can run your program by clicking the "Run" button in Ed. This will compile and execute your code and show you any errors, or the output of your program if it runs correctly. If you believe your behavior is correct, you can submit your work by clicking the "Mark" button in the Ed lesson. You will see the results of some automated tests along with tentative grades. This grade is not final until you have received feedback from your TA.
You may submit your work as often as you like until the deadline; we will always grade your most recent submission. Note the due date and time carefully—work submitted after the due time will not be accepted.