Jumping Monster
Due: Must be submitted on Canvas by the end of January 31.Goals
- Practice using if-statements.
- Learn how separate parts of a program can perform different operations without interference by using if-statements in several forms.
Getting Set Up
You will be asked to design your own monster for this assignment. However, to make more effective use of your lab time, you may start early on the rest of the lab by using this default monster. However, your assignment submission MUST be with your custom monster!
Jumping Monster
Step 1: Create Your Monster
Start this assignment with a drawing canvas of width 500 pixels and center your monster in the middle (around an x-position of 250 pixels).
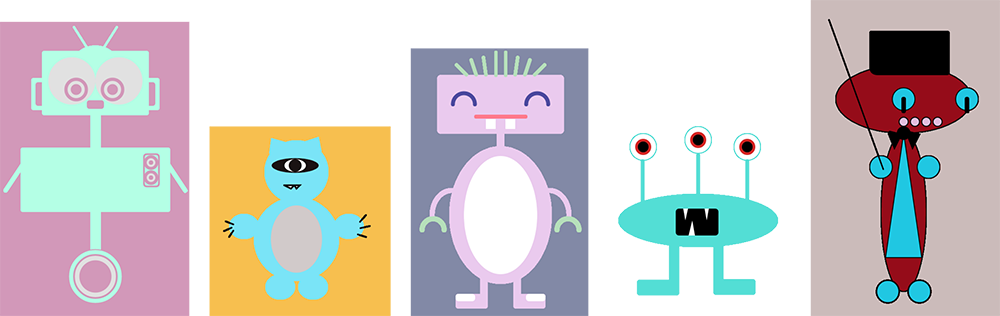
Create your own customized monster — it should have its own function with parameters to control its position. It should have at least 1 leg and at least 1 eye, but everything else is up to you.
Some inspiration is shown below, but remember this monster should be your very own and not a copy of someone else's. As usual, please sketch your ideas on paper before you start to code, and, if it helps, label some points.
Step 2: Set Up the Pages
If you haven't already set up your window and background color, make sure to clear your background
in draw().
Create an int variable at the top of your code[?] named page and initialize
it to 0.
Add the code below into your draw() function, replacing the comments about your monster
function with actual calls to your monster function:
noStroke();         // remove shape outlines
fill(0);            // black for indicator shapes

if (page == 0) {    // display page 0
   // if-statement(s) for moving the eye

   rect(5, 5, 50, 50);       // page 0 indicator
}

if (page == 1) {    // display page 1
   // if-statement(s) for jumping

   ellipse(30, 30, 50, 50);  // page 1 indicator
}

// call your monster function
Make a call to your monster function underneath the comment asking you to do so.
Note that this gets called on both page 0 and page 1 as it is outside of the if-statements.
Also note that the noStroke() and fill() commands will apply to both the
rect() and ellipse().
Step 3: Changing Pages
Now add the code below to the bottom of your program:
void keyPressed() {
   page = 1 - page;
}
Now when any key on the keyboard is pressed, the value of the page variable toggles
between 0 and 1.
Try it out – you should see it flipping between a square and a circle.
If it works properly, these shapes in the upper-left of your drawing canvas can be used to let you know which page your program is currently displaying!
Step 4: Moving the Eye(s) (Page 0)
We will move the eye(s) left or right based on where the mouse is.
-
Begin by declaring a new
floatvariable, calledeyeAdjust[?].eyeAdjustshould be declared at the top of your code (i.e., not inside of a function) alongsidepage. When we change theeyeAdjustvalue in the code, we will change it by 0.5, which is why it must be afloatinstead of anint. -
In your monster function, add
eyeAdjustto the eye's x-position. (Before proceeding, try initializingeyeAdjustto 10 and to -10, and notice that the eye is looking right or left! SeteyeAdjustback to 0 afterwards.)
Moving the eye requires if-statements in the page 0 code block (if (page == 0), right under the comment about moving
the eye).
We'll write two if-statements that move the eye(s) left or right, but not so far as to have them leave the head, which
is why we will use min() and max():
- Write an if-statement that tests if
mouseX[?] is greater than, say, 300. If it is greater, seteyeAdjust = min(eyeAdjust + 0.5, 10);. If not, do nothing.
Test this out by running the code. Start with your mouse in the middle of the drawing canvas and then slowly move it to the right. When does the eye start and stop moving? Make sure you understand how the line of code above accomplishes this.
- Write a second if-statement immediately after the first that does an equivalent, but opposite test (i.e. it should handle the eye moving to the left).
Test it out! The eye should move towards the mouse when the mouse is on each side, but it won't move if the mouse is in the "middle range." If it's working in both directions, then you can customize the eye movement speed, range, and detection range:
- 0.5/-0.5 adjusts the speed at which the eye(s) move,
- 10/10 adjusts how far the eye(s) will move before stopping,
- 300/200 adjusts how far to the left or right you need to move the mouse before the eye(s) begin to follow it.
Step 5: Smarter Eye Movements (Page 0)
Your monster's eye will always start looking left because the cursor begins at (0,0) by default. So let's have the user's mouse click determine whether the eye should move or not.
To do this, we begin by declaring a boolean variable called look, again at the top of your code.[?]
This variable can only have the value true (allow eye movements) or false
(disable eye movements).
Which do we want to initialize look with?
Similar to keyPressed(), create a mousePressed() function at the bottom of
your code.
This function will automatically execute each time the user clicks the mouse.
Write the function so that on each mouse click, it changes the value of look
(i.e. switch from false to true or vice-versa – more
if-statements!).
Finally, go back and update your if-statements in your page 0 code to only update the
eyeAdjust when look is true.
We accomplish this using the AND operator (&&).
Make sure that eyeAdjust is only changed when both look is
true AND your mouse is in particular ranges.
Step 6: Jumping (Page 1)
These modifications to the program are for page 1.
The plan is to make your monster jump.
To start, define two integer variables at the top of your code: jumpHeight[?], which should be initialized to 0,
and jumpSpeed[?], which should be initialized to 7.
To make the monster move, change the function for your monster to add jumpHeight to the
y-position for all of the shapes that make up the monster.
At the end of the monster code for page 1 (if (page == 1), right under the comment about jumping), add two if-statements similar to the ones from page 0:
- Test to see if
jumpHeightis greater than 100. If it is greater, setjumpSpeedto -7[?]. - Immediately following that if-statement, add an if-statement that tests if
jumpHeightis less than -50. If it is less than, setjumpSpeedto 7[?]. - Finally, after these two if-statements, update
jumpHeightby addingjumpSpeedto it.
Run your program and make sure that the page 1 monster is jumping around. If it is working, then feel free to adjust these numbers (the 7/-7 and 100/-50) to customize the jumping speed and height of your monster.
Now add to your code so that the jumping on page 1 can be started and stopped by clicking the
mouse, similar to the eye movements on page 0.
You should use a different variable than look to accomplish this so that jumping and
eye movements are independent of each other.
Step 7: Bending the Knees
Jumping monsters look cooler when they bend their knees while jumping.
It's a fact.
Currently, your monster's legs move down as much as the rest of the body.
But if they instead stopped moving at some point while going down, it would look like the knees were
bending!
This is another application for min().
If we replaced the y-position of the legs with something similar to
min(270+jumpHeight, 330), then they would stop at 330; again you will have to adjust
the numbers for your own monster.
Example Solution
 A working solution is shown on the right.
This solution uses the default monster code.
A working solution is shown on the right.
This solution uses the default monster code.
In order to better visualize what's going on, extra code was included to display a mouse symbol in the lower-left corner of the image every time the mouse was clicked. Key presses cause the black shape in the upper-left corner of the image to switch between a square and a circle.
The gif can be a little confusing to interpret because it plays in a loop:
- The monster starts immobile with eye in center on page 0 (square showing).
- The mouse is clicked and then mouse movements cause the eye to first look left and then look right.
- While the eye is still active, a key is pressed to flip over to page 1 (circle showing). The monster is not jumping when we switch.
- The mouse is clicked and the monster starts jumping, including "bending" its knees.
- A key is pressed to flip back to page 0, where the eye is still active.
- The mouse is clicked to disable eye movements just before the gif repeats.
Submission
- Read through the rubric carefully on the Assignment Page so you know what we will be checking for.
- Submit your sketches from Step 1 (
.jpg,.png, or.pdf) along with your finished.pdefile from Step 7. - When you get a chance, you should add this program to your portfolio.