This page documents some of our development tools and conventions. It aims to be thorough as possible while remaining generic. Individual projects then document their own installation and configuration details.
We provide detailed instructions for Windows and Mac OSX. If you’re on another operating system (e.g. Unix), you probably don’t need help setting this up. Take a look at the OSX instructions for some basic ideas.
Once you’re set up, we provide additional instructions for forking the repository, branching behavior, and submitting a pull request.
Windows Setup Instructions
Git and GitHub
We use Git and GitHub.
First, download git for Windows.
Consider downloading GitHub for Windows, which provides a graphical interface for interacting with git and GitHub.
By convention, GitHub for Windows defines the upstream remote:
git remote add upstream <GitHub HTTPS clone URL>
For example, for cse440-au14 we define upstream as:
git remote add upstream https://github.com/uwcse440/web-cse440-au14.git
This ends up being a very useful convention, regardless of whether you’re on Windows, Mac, Linux, or something we’ve never heard of.
Jekyll
We use Jekyll to build our websites. It requires Python 2.7 and Ruby.
First, install Python 2.7.
Second, install Ruby.
Now we can install Jekyll:
gem install jekyll
By convention, we use Fabric to ease deployment. It should be installed as part of requirements2.txt.
The build task will compile the site to _site.
fab build
The serve task will continuously compile and serve the website on localhost:4000.
fab serve
The deploy task will deploy the site to its production location.
fab deploy
Microsoft Visual Studio
Many Node.js and Python modules require a C compiler for included native code.
We currently use the freely available Microsoft Visual Studio C++ 2012 for Windows Desktop:
http://go.microsoft.com/?linkid=9816758
Versions
Node.js and Python each expect particular versions of Microsoft Visual Studio. Currently, that expectation is:
- Node.js: Microsoft Visual Studio C++ 2012
- Python 3.4: Microsoft Visual Studio C++ 2010
- Python 2.7: Microsoft Visual Studio C++ 2008
Each version defines environment variables that say where to find the build tools:
VS110COMNTOOLSis defined by Microsoft Visual Studio C++ 2012VS100COMNTOOLSis defined by Microsoft Visual Studio C++ 2010VS90COMNTOOLSis defined by Microsoft Visual Studio C++ 2008
Instead of installing all of these versions, we manipulate the environment variables to alias the old versions to the newer version. This is not necessarily 100% robust, but has not been problematic.
This can be done locally within a session:
set VS90COMNTOOLS="%VS110COMNTOOLS%"
set VS100COMNTOOLS="%VS110COMNTOOLS%"
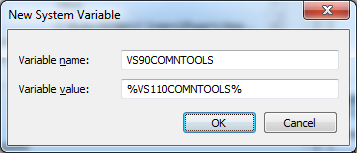
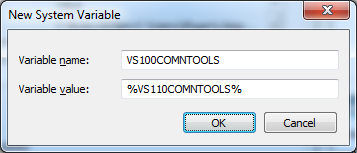
Alternatively, we can define the system environment variable:
 Control Panel
 System and Security
 System
 Advanced system settings
 Environment Variables...
 System variables
 New...
Node.js
When I first tried to install Node.js, a tree fell on my house. Seriously. So first check you are not under any trees.
First, install Microsoft Visual Studio.
You then need Node.js:
Unfortunately, the current installers seem to require a reboot for path settings to take effect.
You should then be sure to understand the difference between global and local modules:
http://blog.nodejs.org/2011/03/23/npm-1-0-global-vs-local-installation/
Following the advice “install it in both places”, we install several modules globally. These each have commands that it is convenient to be able to easily execute.
Cordova/PhoneGap enables mobile applications based on HTML, CSS, and Javascript:
npm -g install cordova
npm -g install phonegap
Ionic works with Cordova/PhoneGap and Angular to target mobile apps:
npm -g install ionic
And you should install a project’s local dependencies:
npm install
Python 2.7
We use Python 2.7 as little as possible, but there are still libraries that require it.
First, install Microsoft Visual Studio. Be sure to note the need to configure environment variables to point Python 2.7 at the install.
You then need Python:
https://www.python.org/ftp/python/2.7.6/python-2.7.6.msi
Python 2.7 does not come with a built-in package manager, so we need to install it. Download these two files:
https://bitbucket.org/pypa/setuptools/raw/bootstrap/ez_setup.py
https://raw.github.com/pypa/pip/master/contrib/get-pip.py
Then you can install pip:
c:\Python27\python ez_setup.py
c:\Python27\python get-pip.py
Now you need virtualenv:
c:\Python27\Scripts\pip install virtualenv
Finally you can create a Python environment for your project. By convention, we call our environment env27:
c:\Python27\Scripts\virtualenv.exe env27
Now you can install your project requirements. By convention, we put these in requirements2.txt:
env27\Scripts\activate.bat
pip install -r requirements2.txt
If a module fails with an error Unable to find vcvarsall.bat, it is because Microsoft Visual Studio is not set up correctly.
Python 3.4
We should use Python 3 whenever possible. Currently that means Python 3.4.
First, install Microsoft Visual Studio. Be sure to note the need to configure environment variables to point Python 3.4 at the install.
You then need Python:
https://www.python.org/ftp/python/3.4.1/python-3.4.1.msi
Python 3.4 includes pip and pyvenv, so we just get started. By convention, we call our environment env34:
c:\Python34\python.exe -m venv env34
Now you can install your project requirements. By convention, we put these in requirements3.txt:
env34\Scripts\activate.bat
pip install -r requirements3.txt
If a module fails with an error Unable to find vcvarsall.bat, it is because Microsoft Visual Studio is not set up correctly.
Ruby
To install Ruby, you need Ruby and an associated DevKit. You can get them here:
http://rubyinstaller.org/downloads/
Per the recommendations of the Ruby folks, I am using the 1.93 versions. First install Ruby:
http://dl.bintray.com/oneclick/rubyinstaller/rubyinstaller-1.9.3-p545.exe?direct
During the install:
- I use the install path
c:\Ruby193 - Ensure Checked “Add Ruby executables to your PATH”
Then install the Ruby DevKit:
https://github.com/downloads/oneclick/rubyinstaller/DevKit-tdm-32-4.5.2-20111229-1559-sfx.exe
Unzip it to a permanent directory. I use c:\RubyDevKit. Then install the DevKit:
cd c:\RubyDevKit
ruby dk.rb init
ruby dk.rb install
Mac OSX Setup Instructions
Git and GitHub
We use Git and GitHub.
First, download git for Mac.
Consider downloading GitHub for Mac, which provides a graphical interface for interacting with git and GitHub.
By convention, GitHub for Windows defines the upstream remote:
git remote add upstream <GitHub HTTPS clone URL>
For example, for cse440-au14 we define upstream as:
git remote add upstream https://github.com/uwcse440/web-cse440-au14.git
This ends up being a very useful convention, regardless of whether you’re on Windows, Mac, Linux, or something we’ve never heard of.
Jekyll
We use Jekyll to build our websites. It requires Python 2.7 and Ruby.
The easiest way to install Jekyll on Mac is to first install RubyGems. Once you do this, setting up Jekyll becomes simple.
gem install jekyll
If you run into problems with this, you might need to install OSX Command Line Tools. Directions for doing so are available here.
It’s that easy (note how much shorter the directions are than the Windows ones!). By default, the above command will install all other dependencies.
By convention, we use Fabric to ease deployment. It should be installed as part of requirements2.txt.
The build task will compile the site to _site.
fab build
The serve task will continuously compile and serve the website on localhost:4000.
fab serve
The deploy task will deploy the site to its production location.
fab deploy
Forking the Repository
The easiest way to fork a repository is to visit the repository on GitHub and press the fork button. So for our course repository, visit here.

And then you have a local version!

You can then clone it on your desktop and start editing.
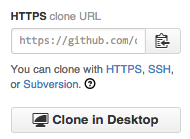
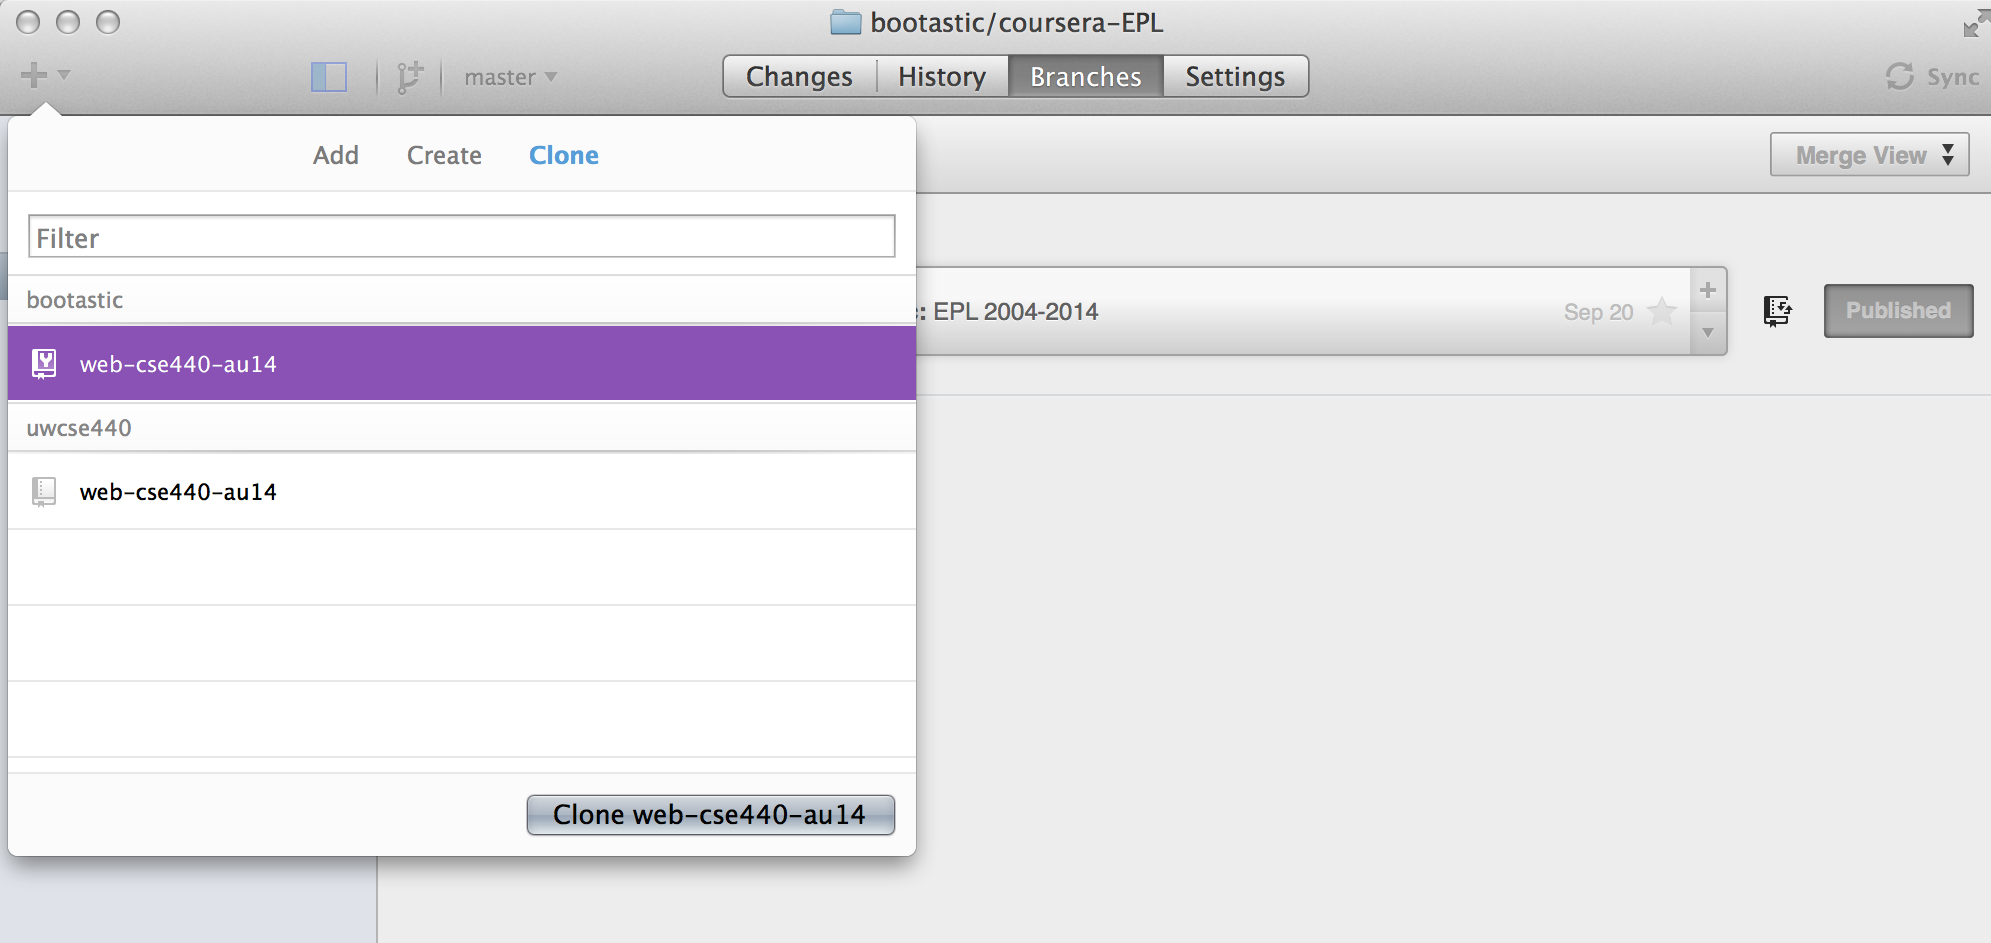
You can also clone it via the desktop application. For example, on Mac:
Branching Behavior
All of the directions in this section assume that you’re using a command line. If you decided to use Git for Windows or Git for Mac, you’ll need to navigate the user interface to do the same activities, but it should be fairly straightforward.
Git operates with an idea called branches. These are incredibly useful for keeping your code separate whenever possible. When you’re working, create a separate branch for your code. For example, if I were making a branch to edit assignment 3, I might do the following:
git checkout -b assignment3
Which checks out a new branch named assignment3. If you ever want to switch branches, you can check out a new branch. Such as: git checkout master.
You might also be able to achieve this via the desktop application. For example, on Mac:

Congrats! You now have your branch. You can now make whatever changes you need to within that directory.
To commit code, you first need to add your files with git add. For example, if I edited the index.html file, I would type:
git add index.html
I can then git commit my work and add a message. However, this only commits the files locally; meaning they will only appear on my computer, but not to the rest of the internet! To resolve this, we push our code after committing:
git push
This is usually pretty apparent via the desktop applications. Files usually are automatically checked to be added by default in the desktop applications.
Submitting a Pull Request
After pushing a set of changes, a pull request appears in the parent repository (the course website repository in our case). It’ll look something like the following:
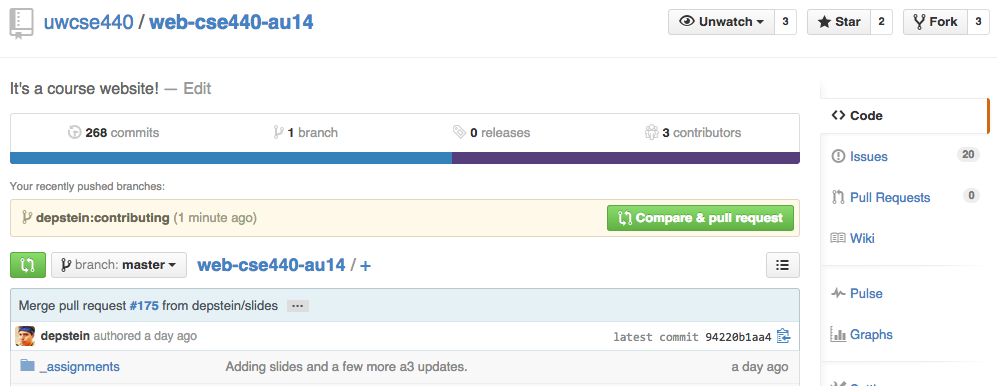
Push the pull request button and send one off to us! We’ll take a look, and accept your changes if they don’t crash the website.