Sony DXC 9000 Documentation
Features
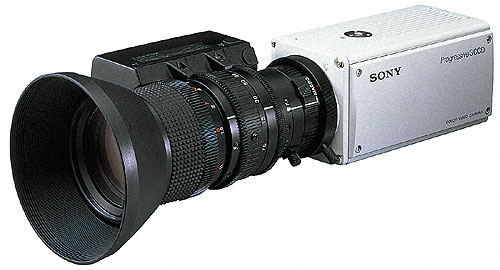
The DXC 9000 is a color video camera with an 1/2-inch, three-chip
Progressive Scan CCD. The CCD uses an "all pixels read-out" method, which enables the CCD to
output all pixel signals in 1/60 sec. This allows the unit to capture
blur-free, clear images of fast-moving objects without a mechanical
shutter.
Square Pixels
The unit uses pixels which have the same pitch horinzontally and
vertically, namely 9.9um, to make a sqaure pixel.
VGA compatible
The unit supports VGA(640*480) displays used by computers. An output
of 60 frames of non-interlaced signals per seconds allows you to connect
the unit to a monitor or a projector.
Capturing Video Sequence
Location
The camera is in the black room in the GRAIL. It is not locked and
should
be located easily. Please do NOT to take it out. We have two
DXC9000 actually. One ( with lens ) is borrowed from CSE dept and the
other ( body only ) is ordered by Steve Seitz. The lens for the second
one is on the way. All the related cable are currently in the box
labeled as "SONY DXC 9000".
Mounting the Lens
The lens should be mounted all the time. In case the lens is not
mounted, please follow the following steps:
Turn the mount lever counterclockwise as far as it goes.(If the
lens mount cap is in place, remove it.)
Align the positioning pin on the lens with the matching hole in
the lens mount and attach the lens.
Turn the mount lever clockwise as far as it goes to lock the lens in
the lens mount.
Mounting on a Tripod
To mount the camera on a tripod, use screw hole in the bottom of camera
body.
Basic System Connection
You first locate two connectors, "DC IN/VBS" and "RGB/SYNC", at the rear
of DXC9000 camera. You need two cables to do the following connnection:
DC IN/VBS <==== Power supply on the wall
RGB/SYNC ====> Matrox Frame Grabber in PC
Currently, we have two Matrox Cards installed in the Win2K box
"button". You can see them in the second and the sixth slot
(from top to bottom> at the back of "button". The top one is
"Device 0". The
bottom one is "Device 1". Choose either one you want.
You should find four and ONLY four cables in the box labled "SONY
DXC 9000" on the floor, two for each " Power ====> Camera ====> Matrox
Card " connection. Please put the cables in the box they belong to,
because we have so many cables there!
Testing
Login "button", run "Programs=>Matrox Imaging
Products=>Intellicam=>Intellicam".
Choose "Options=>System Selection" menu, Allocate and Make Active
either "Meteor_II Device 0" or "Meteor_II Device 1", depending on which
card you connect to the camera. Remember, we have two cards installed on
"button".
Choose "File=>Open" menu, open the Digitizer Config File
"C:\DXC9000\dcf\cdxc900c.dcf" and you
will see a dialog box.
Choose the "Digitizer=>Single Grab" menu, you will grab a still
image; Choose the "Digitizer=>Continuous Grab" menu, you will grab a
continuous sequence; Choose the "Digitizer=>Halt Grab" menu, you will stop
grabbing. If you can do these operations, you are in good shape!
You can save the currently grabbed frame by choosing "File=>Save
As". Make sure the Image window, instead of Digitizer Config Dialog Box,
is in focus before you save the grabbed
frame. Otherwise, you will overwrite the .dcf file, which is a bad
idea. You may not be able to run the digitizer correctly later on
if you accidentally changed the .dcf file and saved it. If that happens,
don't panic. I have a backup
version at "C:\LiZHANG\dcf\cdxc900c.dcf".
The IntelliCam program only grabs the image/sequence to RAM and can
NOT save the grabbed frames to hard disk automatically. I have codes to do
this right now and I will make it easy to use very soon and share
with you if you like.
More Reference
SONY 3CCD Color Video Camera - DXC9000 Operating Instructions, in box
labeled "SONY DXC9000"
"Programs=>Matrox Imaging Products=>", online documentation
installed in "button"