|
|

|

|
|
|
|
|
Project 3: Animator
Assigned: Friday, 11 Febrary, 2000
Due: Friday, 25 Febrary, 2000 (appointed demo time)
Artifacts Due: Monday, 28 Febrary, 2000 (by 5:00PM)
Project Description
This project consists of three parts: (1) use a simple OpenGL modeling tool to create and animate the hierarchical models of your own design (2) compose them into a scene and implement a keyframe animation system and (3) implement a particle system and integrate it with the animation system.
Building Hierarchical Model
A hierarchical model is a way of grouping together shapes and attributes to form a complex object. Parts of the object are defined in relationship to each other as opposed to their position in some absolute coordinate system. Think of each object as a tree, with nodes decreasing in complexity as you move from root to leaf. Each node can be treated as a single object, so that when you modify a node you end up modifying all its children together. Hierarchical modeling is a very common way to structure 3D scenes and objects, and is found in many other contexts. We provide a simple framework such that you can experiment your hierarchical model.Here is a how-to on building and using the modeling tool that you should definitely go through before jumping into this project!
Animator
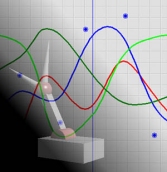
In the second part of this assignment, you will build a keyframe animator. In a keyframe animator, users specify the parameters, eg. the pose of the object, at some discrete times. The system will employ some spline function to interpolate these discrete samples into a smooth continuous curve. Therefore, we can generate a smooth animation. The provided skeleton code will only implement piecewise linear curves. You will extend it with several types of splines: B-Spline, Bezier, and Ctamull-Rom.For each curve type, you must write a new class, which is derived from CurveEvaluator. Inside the class, you should implement evaluateCurve function. This function takes the following parameters: control_points--a collection of control points that you specify in the curve editor, evaluated_curve_points--a collection of points that you output from the function after being calculated using curve's formulas, animation_time --the maximum time that a curve has, and wrap_control_points--for wrapping the curve. To add the new curve type that you just create into the Curve Type, you should see the code in CurveEditor.
For Bezier curves (and the splines based on them), it is sufficient to sample the curve at fixed intervals of time. The recursive subdivision algorithm presented in class may be implemented for an extra bell.
C2-interpolating splines have an extra two degrees of freedom that are unspecified by the control points. You should implement what will be referred to in class as "natural" C2-interpolating splines, that is, let the derivatives at the two endpoints be equal to zero. There are other valid ways to handle this, see the bells and whistles section.
You do not have to sort the points that you get from using the curves' formulas. The code has done this for you. Note that for interpolating curves (Catmull-Rom or C2-Interpolating splines), the fact that the control points are given to you sorted by x does not ensure that the curve itself will also monotonically increase in x. You should recognize and handle this case appropriately.
Particle System
You should implement a particle system simulation within the animator. The initial location, velocity and force of the particles should depend on the certain geometric properties of the character (which, in turn, depend on the animation variable curves). For example, we can define the detailed animation of the character and then add an effect of sparks flying off the heal as the character's foot hits the ground. The location and the timing of the sparks depend on the position of the heel. Similarly, as the train moves, the chimney could release particulate smoke --- the initial velocity of the smoke particles should depend on the movement of the train. We can calculate the position of the heel (or the top of a chimney) during the animation by multiplying the heel's local position in the object space by the matrix accumulated during the traversal of the model hierarchy. Each particle is specified by its mass, start and end time, position, velocity and the accumulated forces. The forces acting on the particle should include at least the initial creation force (acting on the particle at the start time) or the initial velocity and the global gravity force. You should not worry about providing the user interface for the particle system, but you are certainly encouraged to expose as many of the internal simulation parameters through the user interface. Since the simulations need to be computed before they can be played back the simulation aspects of the animation are handled slightly differently from the rest of the keyframed animation. With the click of a "Simulate" button, the entire animation is simulated once, at which point the simulation is "baked" and can be played back in a regular fashion. In order to enable playback, you should record the trajectory of each particle during the simulation. You can subsequently change the motion curves of the character, and then re-simulate the particle system. Additional details about the partcile system can be found at the SIGGRAPH course notes.Animation Artifact
You will eventually use the curve editor and the particle system simulator to produce an animated artifact for this project. Each person must turn in their own artifact. We may give extra credit to those that are exceptionally clever or aesthetically pleasing.
Bells and Whistles
One bell is worth two whistles.
Add camera control such that you can rotate pan and zoom in/out the camera. Use quarternion Arcball for camera rotation.
Use a texture map on all or part of your character. (This requires altering the implementation of the primitives shapes to include texture coordinates.)
- Implement C2-interpolating splines allowing the user to specify the derivatives at the two endpoints
- Implement higher degree polynomial splines (ones that are C3 or C4 continuous)
- Implement other types of subdivision curve.
- Let the user control the tension of the Catmull-Rom spline
- Add the ability to display cubic Bezier curves so that the two "inner" control points appear as "handles" on the interpolated "outer" points. (This would appear more intuitive to the user). See PowerPoint curves for an example.
- Add options to the user interface to enforce C0 or C1 coninuity between adjacent Bezier curve segments automatically. (It should also be possible to override this feature in cases where you don't want this type of continuity.)
- Add the ability to add a new control point to any curve type without changing the curve at all.