Assignment #2, part 1.1: fingers
Note: This section
is optional and students may choose to skip these steps for building the finger skeleton with no deduction from the assignment grades. The main assignment page has instructions for how to import a pre-made hand and attach it to the character skeleton.
Part 1.1, Adding fingers to the skeleton
Start with the skeleton created in the last assignment. Start by saving it as a new filename, "assignment_2.ma"
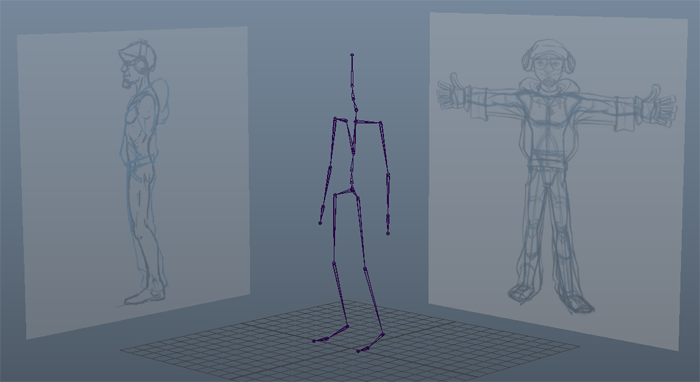
Use the following hand sketches for reference when building your hand skeleton. Download the images from the links below to the folder where you are saving your assignment.
(You are welcome to draw your own hand images, but that is not required. It will be easy to modify the shape of the hand skeleton once it has been built so that it fits your character's proportions.)
1.1 Map the hand images to polygon planes
(Start by hiding the character skeleton. Select the root joint and press ctrl-h to hide it.)
- Create a polygon plane
- Create →Polygon Primitives → Plane
- Name the plane "hand_top_plane"
- Scale the plane up to 20
- In the Channel Box, type "20" in Scale X, Y and Z
- Add a new material to the plane
- Right-click the plane and select Assign New Material
- Choose Lambert from the new material window
- In the Attribute Editor, name the new material "hand_top_material"
- Assign the hand image to the material
- In the Attribute Editor for the hand_top_material, in the Color field, click the checkerboard button
- Choose File from the create render node window
- In the Image Name field, click the folder button to browse for hand_top.jpg
- Press 6 in the viewport to switch to texture view
- Move and rotate the plane so that it faces forward along the Z axis with the wrist at 0,0,0.
- Repeat these steps for the hand side image
- Align the planes to the top and side cameras, and move them a few units away from the origin
- Assign the planes to the reference display layer
- Select hand_top_plane and hand_side_plane
- Right-click "reference_lyr" and choose Add Selected Objects
Your scene should now look like this:
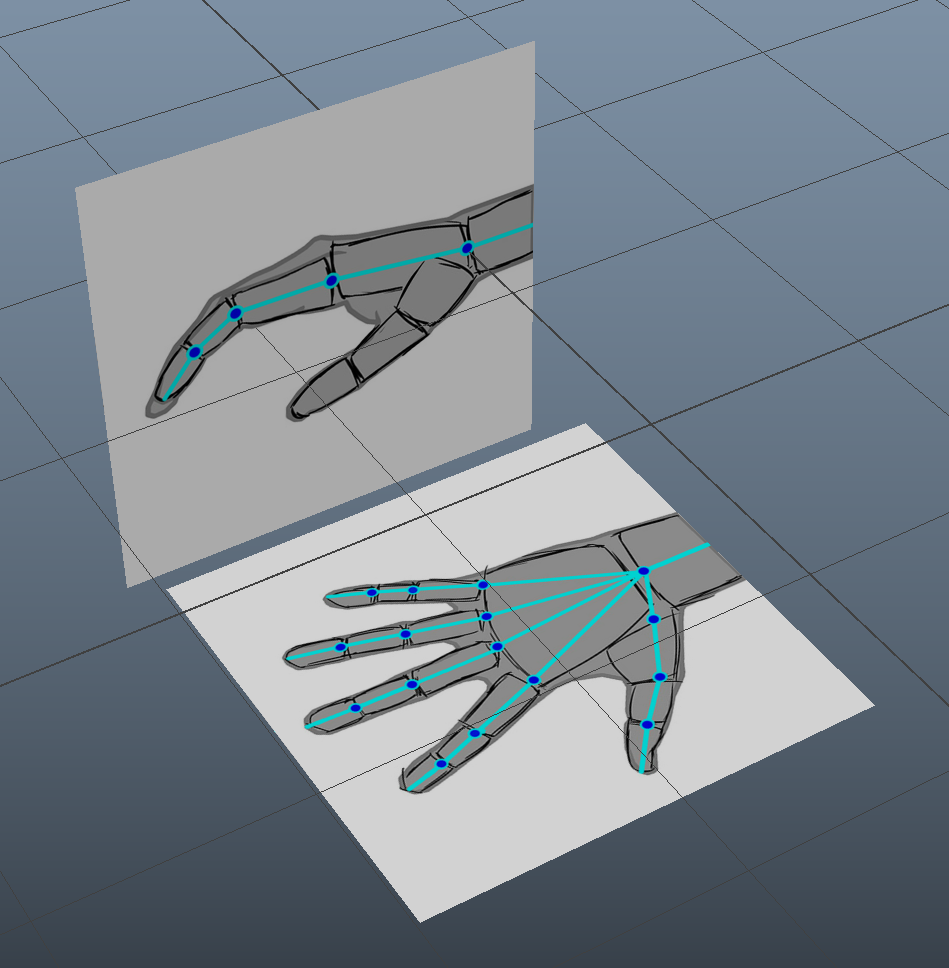
(Note: if one side of your plane is showing up black you can fix that in the pannel/Lighting menu, turn on Two Sided Lighting)
1.2 Create the index finger joint chain
- Switch to the side camera view - Panels -> Orthographic -> Side
- Activate the Create Joints tool
- Switch to the Rigging menu set
- Click Skeleton -> Create Joints
- Click and draw joints for the hand, kunckels and end joint
- Name the joints as follows
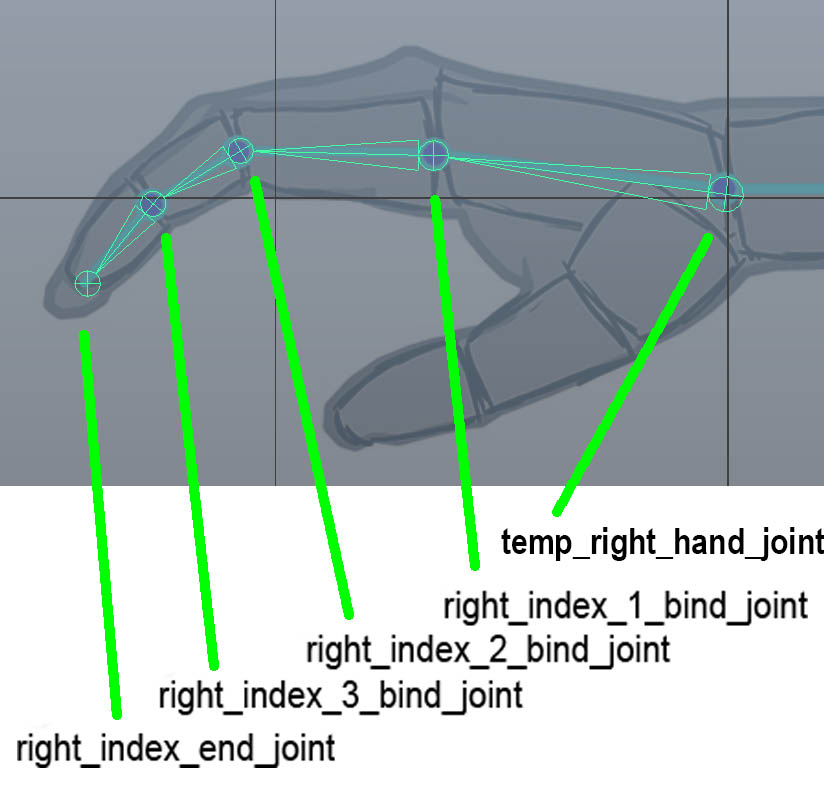
- Move and rotate the right_index_1_bind_joint to align with the top view
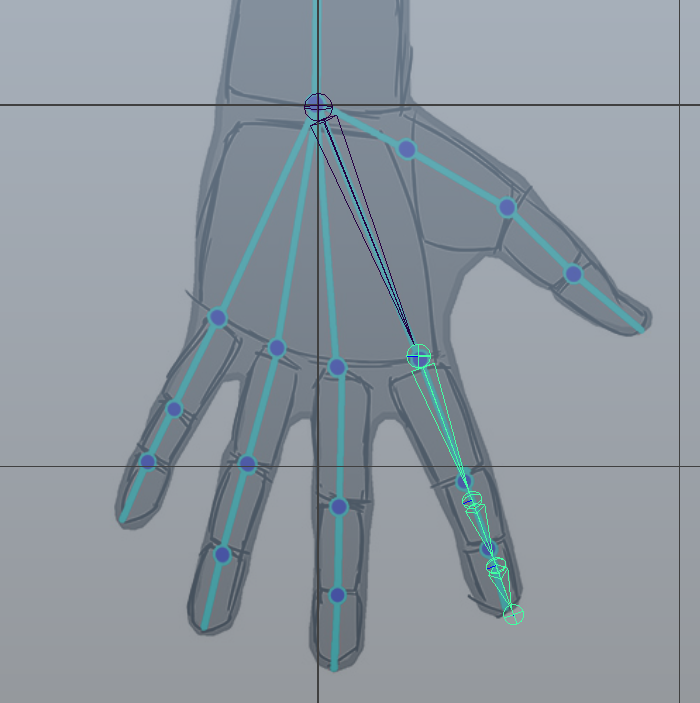
- Duplicate the index finger joint chain to create middle finger chain
- With right_index_1_bind_joint selected, press ctrl-d to duplicate
- Move and rotate the new joint chain to align with the middle finger. (Don't change the length yet)
- Rename the joint chain using Modify -> Search and Replace Names and use these settings
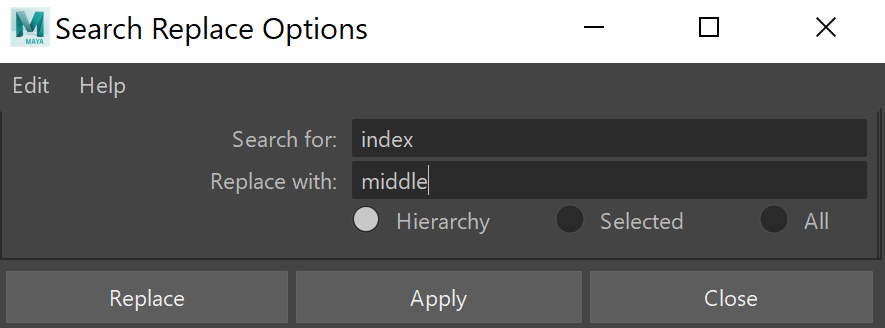
(Repeat these steps for ring and pinky fingers)
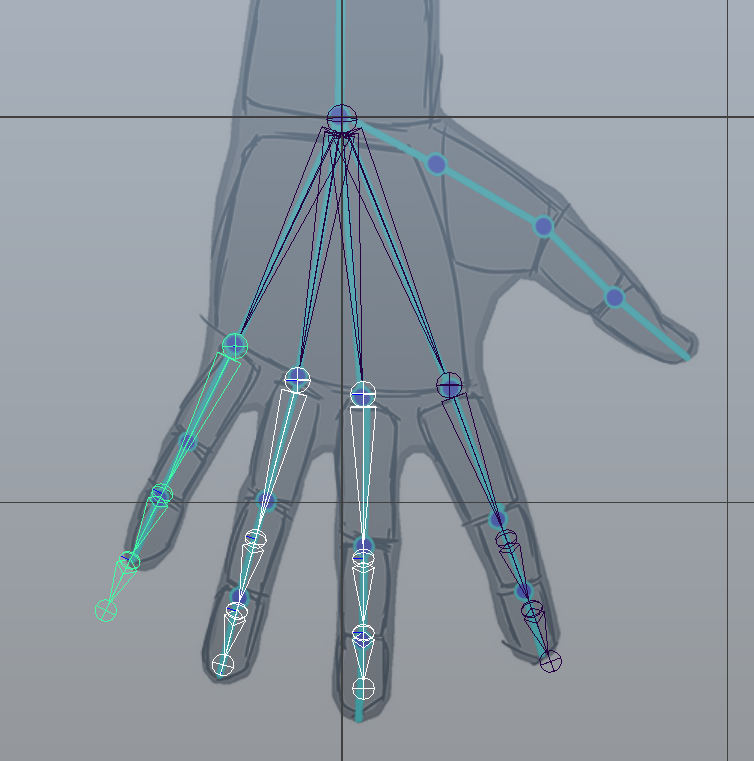
- Adjust the length of the finger joints
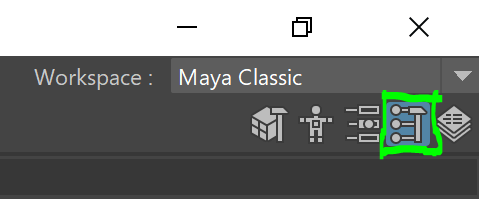
- With the Move Tool activated, open the Tool Settings located at the upper right corner of Maya
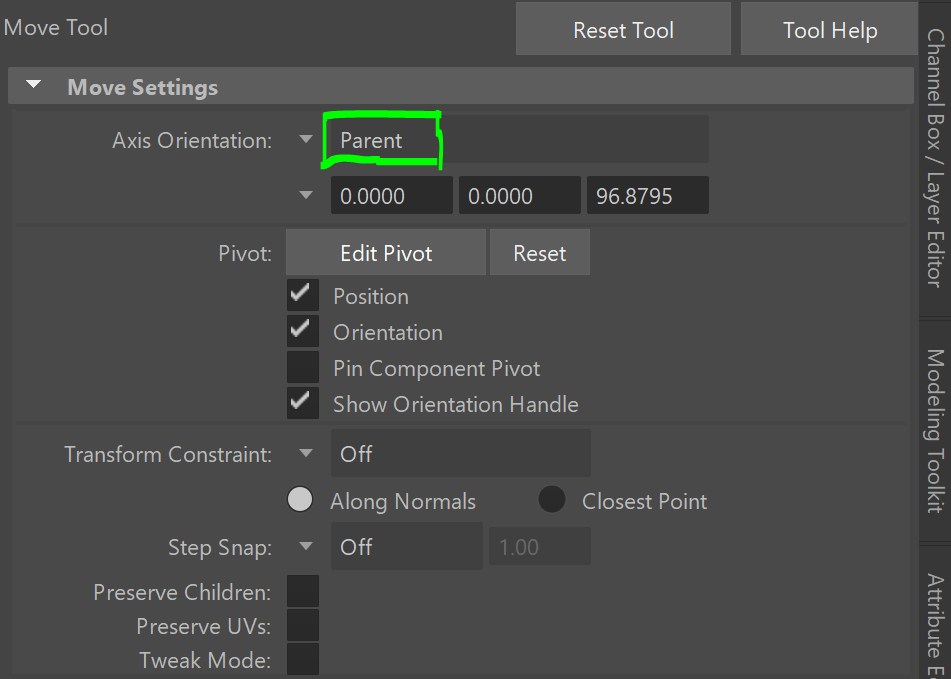
- Set Axis Orientation to Parent
- Move joints along the X axis only. This will keep the joints aligned co-planar.
- Duplicate the index finger again to make the thumb
- With right_index_1_bind_joint selected, press ctrl-d to duplicate
- Move and rotate the new joint chain to align with the thumb in both top and side views
- Rename the joint chain using Modify -> Search and Replace Names
- Test the rotations of the fingers and hands
- Shift-select all of the finger joints together and rotate them inward. They should touch when rotated all the way inward similar to how a real hand works.
- Shift-select all of the thumb joints and rotate them inward. The tip of the thumb should touch the pinky first joint.
- Make the necessary adjustments to the joint rotations and bone lengths so that the fingers fold inward naturally
- Finalize the hand skeleton
- Freeze transformations on the right_temp_hand_joint - Modify → Freeze Transformations Options
- Parent the temp hand joint to the actual hand joint
- If necessary, first unhide the character skeleton. Select center_root_bind_joint in the outliner and set visibility to 1.
- Select temp_right_hand_joint, and then shift-select right_hand_bind_joint
- Press "p" to parent it
- Zero out translations and rotations on the temp hand joint
- In the Channel Box with temp_right_hand_joint selected, set Translate to 0,0,0
- In the Attribute Editor (ctrl-a) with temp_right_hand_joint selected, set Joint Orient to 0,0,0
- Rotate the temp hand joint to align with the arm.
- Thumb should be pointing forward if the elbow is pointing backward
- (this example is set to Rotate X 90)
- Scale the hand to the desired size
- Select temp_right_hand_joint and press ctrl-g to group it
- With the group selected, press "r" for scale and set the desired size
- Freeze transformations on the group Modify → Freeze Transformations Options
- Ungroup - Edit -> Ungroup
- Parent all fingers and thumb joint chains to right_hand_bind_joint and delete temp_right_hand_joint
Be sure to save your scene!
(return to Assignment 2)
|


