Assignment #6
For this assignment, we will continue to work on cardinal expressions, specifically sadness. You will pose the face in an open mouth crying pose, closed mouth crying, a very sad pose and a little sad pose. You will be using the Valencia rig for this assignment. Keep in mind that even the slightest details can change how the face is read, so make sure the movements you make show the correct expression you want it to be read as. Use the mirrors in the lab and yourself as reference.
First make a new folder in your student folder and label it “assignment_6”
You can get the maya file for the assignment 6 template on the course website.
Once you’ve opened the assignment in Maya, you’ll notice that a neutral expression has been keyed and labeled for all the poses.
000 Open Mouth Crying
040 Closed Mouth Crying
080 Very Sad
100 Very Sad - Side View
120 A Little Sad
140 A Little Sad - Side View
Make sure as you go through the assignment that you are keying your poses every time you change something and to save often!
Use the front_face_cam to see in the view in which you’ll be turning your assignment in. It is highly recommended that you also use perspective and side view as you work on this assignment.
On some of these poses, you might want to turn on the secondary anims.
There’s nothing new to learn for these set of expressions.
For very sad and a little sad you will be doing both a pout and a frown.
Remember, for the pout use a combination of both the curl and push attributes on the 3 anims of the BOTTOM lip.
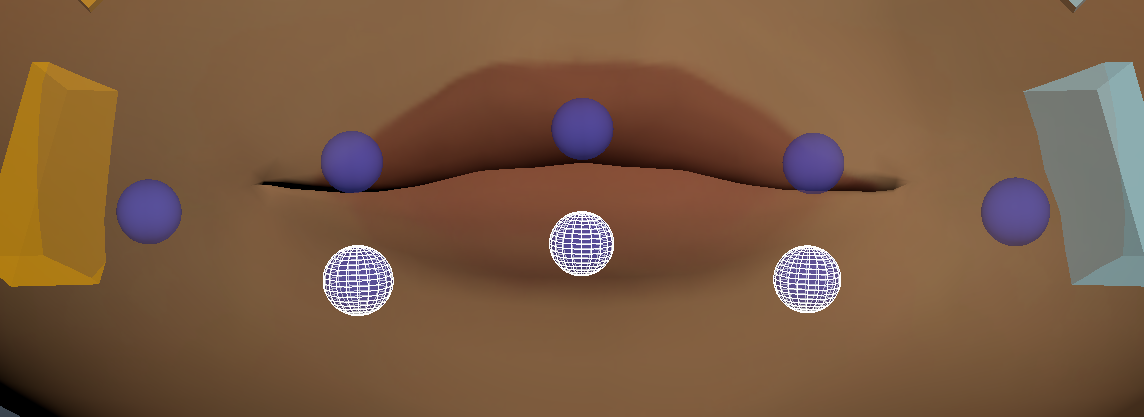
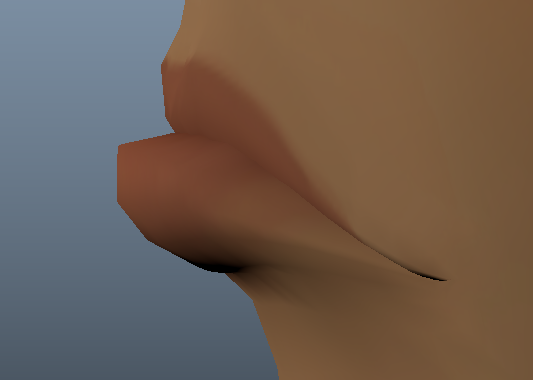
PLEASE USE RIGHT/LEFT CAMERA VIEWS. You will need to look at her profile to get the pout right.
The curl attribute will get you to achieve the pushed in dent of the chin and the push attribute will achieve the lip jutting outwards.
Although not mandatory, you may want to use slightly different values for the bottom center lip anim for better results. In general, I suggest using values between 20 to 50 for the curl attribute. For the push attribute use values between 3 to 5.
For a little sad pose, you’ll want to tone down the pout a little bit, so make sure to test out different values for the curl and push attributes.
Before you start screenshotting, make sure to click 7 so that the correct lighting is on.
MAKE SURE YOUR ANIMS AREN’T VISIBLE!
AND MAKE SURE YOU'RE IN FRONT_FACE_CAM VIEW!
For Very Sad and A Little Sad, you will be screenshotting in both the front face cam view and the side view cam.
To get to the side view cam, right click the camera button and choose side_view_cam.
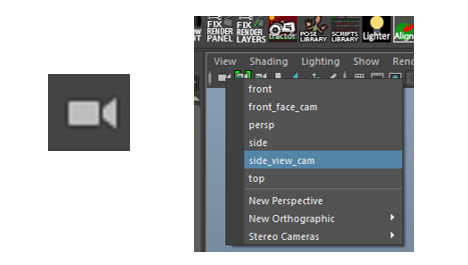
Please go to key 100 on the timeline for “very sad” and go to key 140 on the timeline for a little sad to screenshot those poses with the correct label.
Screenshot each pose. Name your screenshots:
open_mouth_crying.png
closed_mouth_crying.png
very_sad.png
very_sad_side_view
a_little_sad.png
a_little_sad_side_view.png