Assignment #7
For this assignment, we will continue to work on cardinal expressions, specifically anger. You will pose the face in an open mouth anger pose, clenched teeth, a closed mouth pose and an irritated pose. You will be using the Valencia rig for this assignment. Keep in mind that even the slightest details can change how the face is read, so make sure the movements you make show the correct expression you want it to be read as. Use the mirrors in the lab and yourself as reference.
First make a new folder in your student folder and label it assignment_7
You can get the maya file for the assignment 7 template on the course website.
Once you have opened the assignment in Maya, you’ll notice that a neutral expression has been keyed and labeled for all the poses.
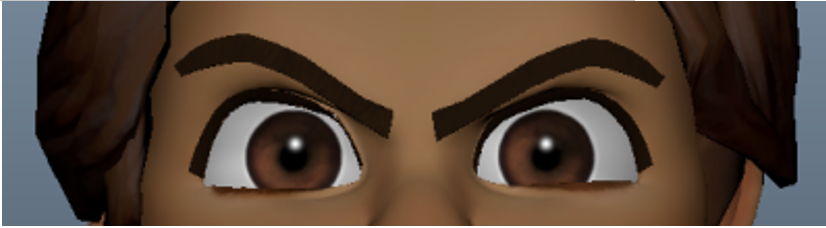
000 Open Mouth Anger
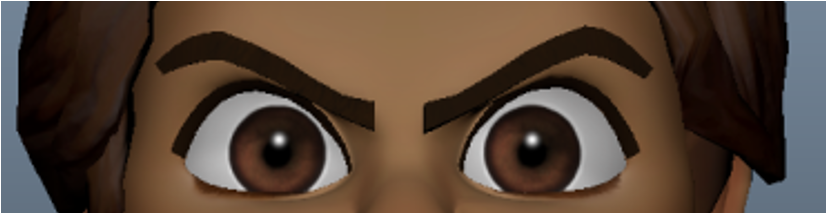
040 Clenched Teeth
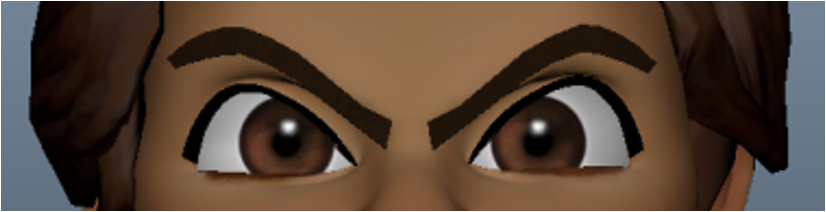
080 Closed Mouth Anger
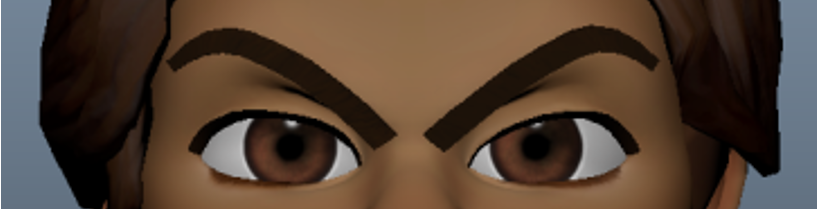
100 Irritated
Make sure as you go through the assignment that you are keying your poses every time you change something and to save often!
Use the front_face_cam to see in the view in which you will be turning your assignment in. It is highly recommended that you also use perspective and side view as you work on this assignment.
On some of these poses, you might want to turn on the secondary anims.
There is nothing new to learn for these set of expressions.
For these poses we will be revisiting the glare and the frown/scowl of the eyes and the eyebrows.
Here are some examples of the variations of the glare and the frown/scowl:
Glare #1 (open mouth anger): The eyebrows go down at an angle and are pulled closer together, passing the top of the eyeball area. The eyes have white above the iris on the outside of the eye, but has less on the inside of the eye. Flatten the inner part of the upper lid a little bit to give the illusion of that bit of horizontal skin that is stretched over that part of the eye in the glare.
Glare #2 (clenched teeth): The eyebrows go down at an angle and are pulled closer together, passing the top of the eyeball area. The eyes have white above the iris on the outside of the eye and less white showing on the inside of the eye.
Glare #3 (closed mouth anger): The eyebrows are pulled down at an angle and are pulled closer together. The eyes have white above the iris on the outside of the eye, but is clipped on the inside of the eye.
Scowl/Frown (irritated): The eyebrows and pulled down lower and are pulled closer together, having the outer edges of the eyebrow pulled higher up to look longer. The upper lid clips the iris.
These poses can be applied to any of the mouth shapes, but you should make sure that the "irritated" expression is the least intense.
Before you start screenshotting, make sure to click 7 so that the correct lighting is on.
MAKE SURE YOUR ANIMS AREN’T VISIBLE!
AND MAKE SURE YOU'RE IN FRONT_FACE_CAM VIEW!
Screenshot each pose. Name your screenshots:
open_mouth_anger.png
clenched_teeth.png
closed_mouth_anger.png
irritated.png