Assignment #7: Basic Rigging
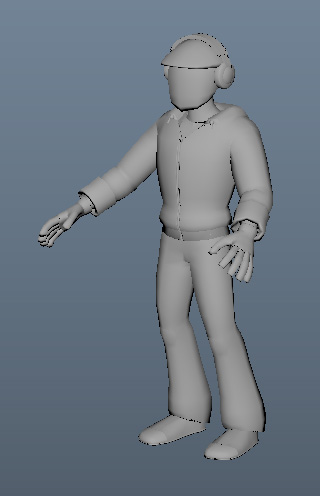
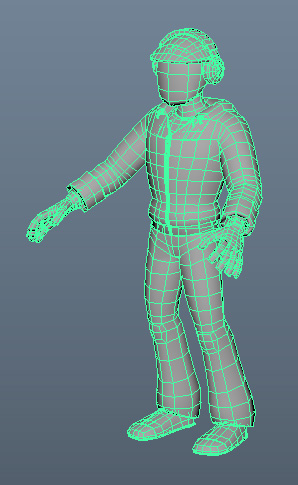
Start from the finished gray model scene from the last assignment.
 - - 
Save your file as "assignment7_control_rig" file type .ma
- Add IK to the right leg
- Activate the IK Handle tool
- (Rigging Submenu) Skeleton → Create IK Handle [options]
- In the option window for the IK Handle tool, set Current Solver to "ikRPsolver"
- Click on right_upperleg_bind_joint
- Then, click on right_foot_bind_joint
- Notice that the IK handle is now created
- Name the IK handle "right_foot_ik"
- You can select and translate the IK handle to test it out (be sure to undo and get it back to the original position)
- Create the right knee pole vector control
- Create a locator, Create → Locator
- Name the locator "right_knee_pv_ctrl"
- In the Channel Box, set Local Scale X, ,Y and Z to 10
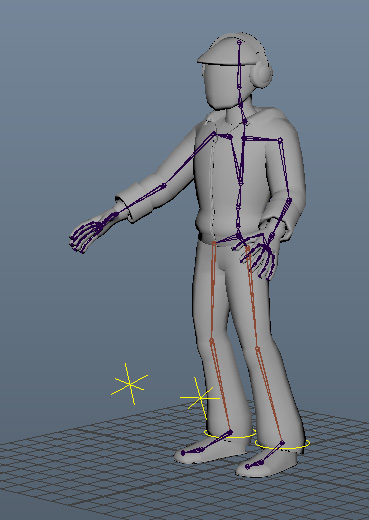
- Position the locator in front of the right knee
- Parent the locator to the knee
- Select right_knee_pv_ctrl, shift-select right_lowerleg_bind_joint, press "p"
- Set translate and rotate on the locator to zero in the Channel Box
- Move the locator forward in parent space
- Double-click the Move Tool button in the toolbox to bring up the Move Tool options
- Set Axis Orientation to "Parent"
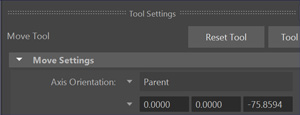 - Move the locator out to match the position in the screenshot
- Unparent the knee pole vector control. Select right_knee_pv_ctrl, press "shift-p"
- Create the pole vector constraint
- Select right_knee_pv_ctrl
- Shift-select the right_foot_ik
- (Rigging submenu) Constrain → Pole Vector
- Create the right foot control
- Create a NURBS circle, Create → NURBS Primitives → Circle
- Name it "right_foot_ctrl"
- Align it to the foot joint
- Parent it to the foot joint: select right_foot_ctrl, shift-select right_foot_bind_joint, press "p"
- Zero out translate and rotate in the Channel Box
- Unparent the foot control: select right_foot_ctrl, press "shift-p"
- Scale the foot control up so it can be easily selected
- Freeze Transformations on the foot control
- Select right_foot_ctrl
- Modify → Freeze Transformations
- Add a point constraint from the foot control to the IK handle
- Select right_foot_ctrl
- Shift-select right_foot_ik
- Constrain → Point Constraint
- Add an orient constraint from the foot control to the foot joint
- Select right_foot_ctrl
- Shift-select right_foot_bind_joint
- Constrain → Orient Constraint (Options)
- In the Orient Constraint options box make sure "Maintain offset" is checked, then hit apply.
- Lock rotate channels on the right foot joint
- Select right_foot_bind_joint
- In the Channel Box, highlight the names of the attributes, Rotate X, Y, and Z
- Right-click the highlighted attribute names
- Click "Lock Selected"
- Repeat steps 1-3 for the left leg
- Add the rig controls to a layer
- Select right and left foot and knee controls
- In the Layer Editor, go to Layers → Create Layer from Selected
- Double-click the new layer to open the Layer Editor window
- Name the layer "rig_ctrls_lyr"
- Choose yellow for the layer color
 - -
- Group the rig controls in the Outliner
- Create the top level rig group
- With nothing selected, press “Ctrl-g” to create an empty group null node
- Name the empty group “<character_name>_all” (for example, “sly_all”)
- Create the rig controls group
- Select right and left foot and knee controls and the skeleton root joint
- Press "Ctrl-g"
- Name the group "ctrls_grp"
- Parent ctrls_grp to the all group
- Select ctrls_grp
- Shift-select the all group
- Press “p”
- Create the “do not touch” group
- Select right_foot_ik
- Shift-select left_leg_ik
- Press “Ctrl-g”
- Name the group “do_not_touch”
- Parent do_not_touch to the all group
- Select do_not_touch
- Shift-select the all group
- Press “p”
- Create the skins group
- Select the gray model mesh (make sure the mesh has a name like “gray_model”)
- Press “Ctrl-g”
- Name the group “skins_grp”
- Parent skins_grp to the all group
- Select skins_grp
- Shift-select the all group
- Press “p”
- Create a Quick Select Set for your rig controls
- Select center_root_bind_joint
- Select Hierarchy, Select → Hierarchy
- Shift-select the foot and knee controls (Note: If you're doing this through the Outliner, Ctrl-select instead. Shift-select will just select all of the garbage inbetween.)
- Create a Quick Select Set, Create → Sets → Quick Select Set
- In the pop-up dialog box, enter the name <character_name>_rig_controls. (for example, “sam_rig_controls”)
- Tip: You can click "Add To Shelf" to create a button on the shelf to select everything in the quick select set.
- Clean up the control rig scene
- Delete any unused nodes from the scene hierarchy in the Outliner.
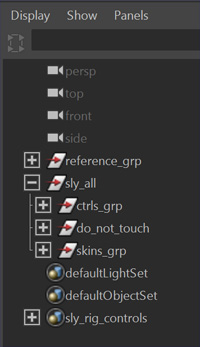
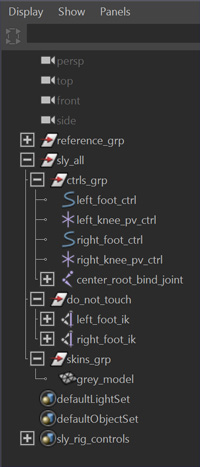
- At this point, your Outliner should look similar to this.
- Note, DAG sibling order is not important. This is the order in which nodes appear relative to their parent. As long as the parent is correct, that’s all we care about.
|
|
|
Collapsed Outliner |
Expanded Outliner |
- Save your file
- assignment7_control_rig.ma
Turning in your files
Like last time you will be turning your files into Collect-It on catalyst. For this assignment, turn in the following:
- assignment7_control_rig.ma (Part 2)
- screenshot of your control rig from a 3/4 perspective view.
Your assignment is due Thursday 8/11 at 5:00 PM.
|