Assignment #2b: Creating the Skeleton for the Hand
You will be creating the skeleton for the hands of your character. Start from the same Maya file you used in assignment 2, but save it as a new file named assignment2b.ma (so you will be turning in two files: assignment2.ma as a checkpoint from the end of the first part and assignment2b.ma from the end of this second part.)
1. Preparation
To create the skeleton for the fingers we will continue from the right_hand_null_joint.
- First, you may need to reposition the right_hand_null_joint
- Unparent the joint
- Move it so that it sits in the center of the palm
- Reparent it to right_hand_bind_joint
2. Create Finger Joint Chain
- Switch to the top view
- Continuing from the right_hand_null_joint, create a four joint chain roughly where the knuckles are for the index finger.
- Name them right_index_1_bind_joint, right_index_2_bind_joint, right_index_3_bind_joint, right_index_end_joint
- Unparent right_index_1_bind_joint
- Switch to perspective view
- Rotate and position it to where the index finger would start
- By only rotating in Z, rotate the child joints to put the finger in a relaxed pose
- Open the tool settings located at the upper right of Maya

- For Move Axis, change to Local
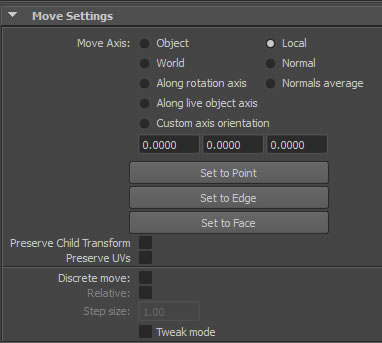
- Change bone lengths by only moving the X-axis (red arrow manipulator)
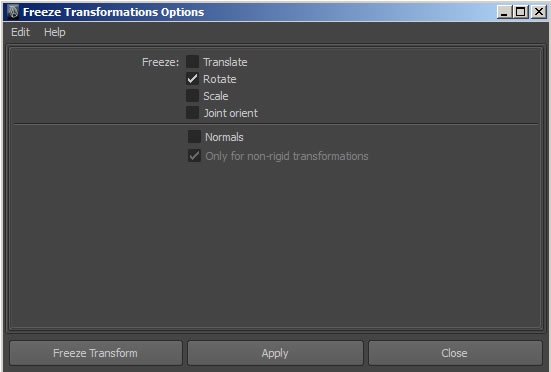
- Select right_index_1_bind_joint
- Go to Modify → Freeze Transformations Options
- Click Freeze Transform. This will make all rotations down the chain 0.
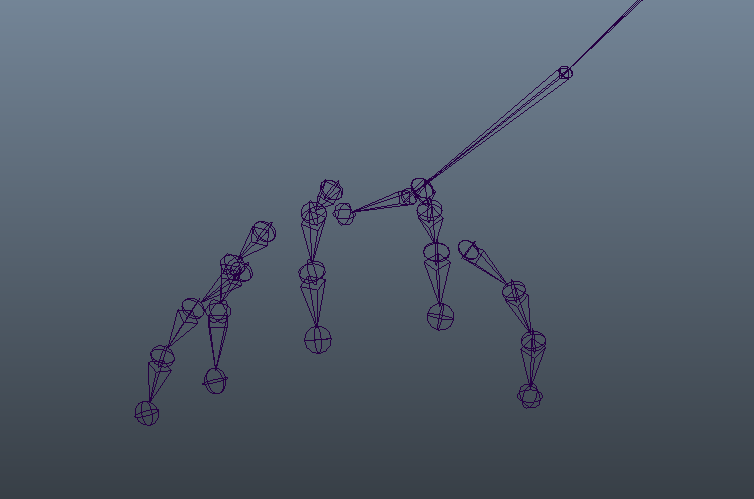
Here is a side view of the finger in relation to the arm:

3. Creating the Remaining Fingers
- Select right_index_1_bind_joint and duplicate it four times (ctrl+d)
- Move and rotate them so that you form the rest of the fingers
- Use the same technique as above to lengthen or shorten bones
- Rename the fingers so that index is replaced with thumb, middle, ring, and pinky for each duplicate
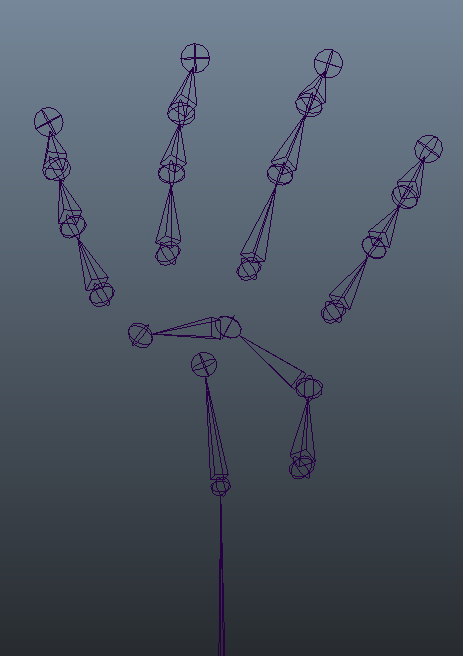
4. Orienting the Fingers
- To make sure everything is oriented and positioned properly, select all the finger joint chains and their children.
- Rotate about the Z-axis and the fingers should form a fist
- Undo the rotation and make any changes to the position or rotation of the fingers so that it will clamp into a fist when you rotate about Z
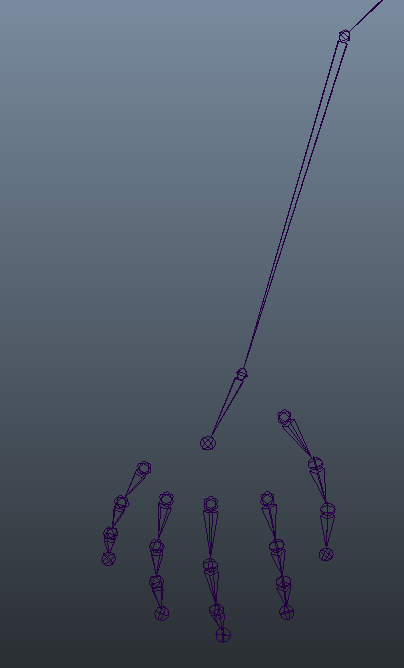
- Keep repeating these steps until you get the desired fist shape when you rotate about Z. The fingers should start coming together when you rotate them. It should look as follows when looking at the fist head on:
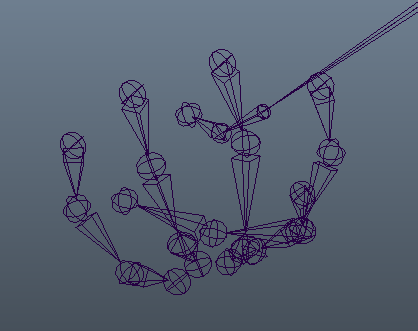
- The the thumb should be oriented so that when you rotate about Z, it will reach just below the start of the pinky joint chain. Below is what it looks like from underneath the hand:
5. Completing the Hand
- Select the top most parent of all the finger joint chains
- Freeze transformations, again making sure you are only freezing rotation
- Parent each finger to the right_hand_null_joint
- Delete left_clavicle_bind_joint
- Select the right_clavicle_bind_joint
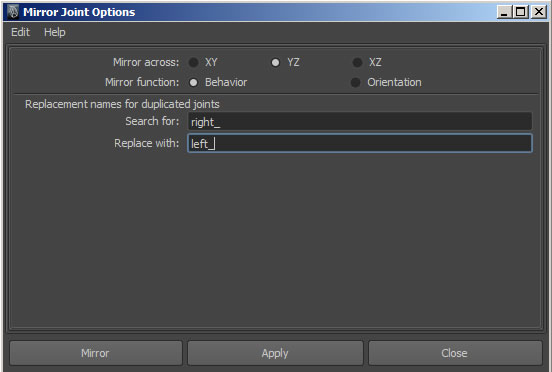
- Go to Skeleton → Mirror Joint Options
- Make sure the settings match the screenshot below:
End of Assignment 2b.
Turning in your files
Turn in as a part of Assignment 2. Your Collect-It turn in on catalyst should have the following files in total:
- front_view.png
- side_view.png
- assignment2.ma
- assignment2b.ma
Your assignment is due Thursday 8/8 at 5:00 PM.
|