Assignment #2: Forward Jump Part 1
Assigned: Thursday, Jan 12th, 2012
Due: Thursday, Jan 19th at 4:30 PM
Resources:
Part 1: Forward Jump
For this part of the assignment you will be creating a planning sheet for a forward jump using the specified key poses. The character will start in a neutral standing position, jump with forward momentum, then land and settle into a neutral standing position. The feet must also take-off from and land on the ground at the same time (also known as a symmetrical jump). Planning sheets make the entire animation process faster and easier;
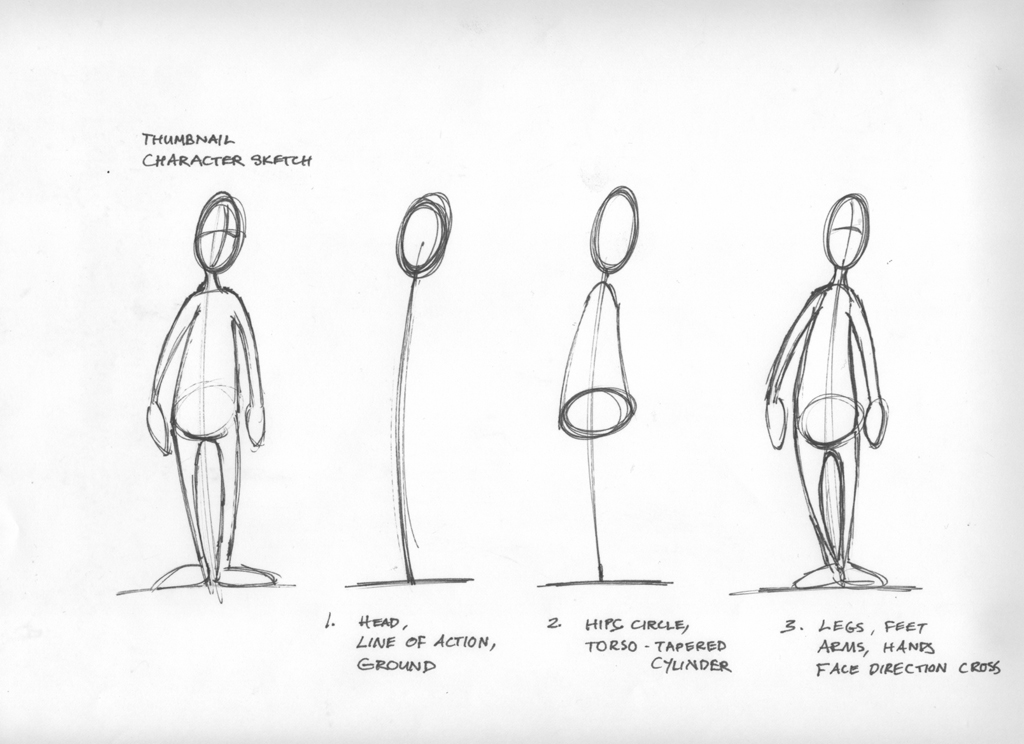
they are invaluable tools for visualizing and planning your motion even before you get into Maya. When drawing your planning sheets, you will want to try to make
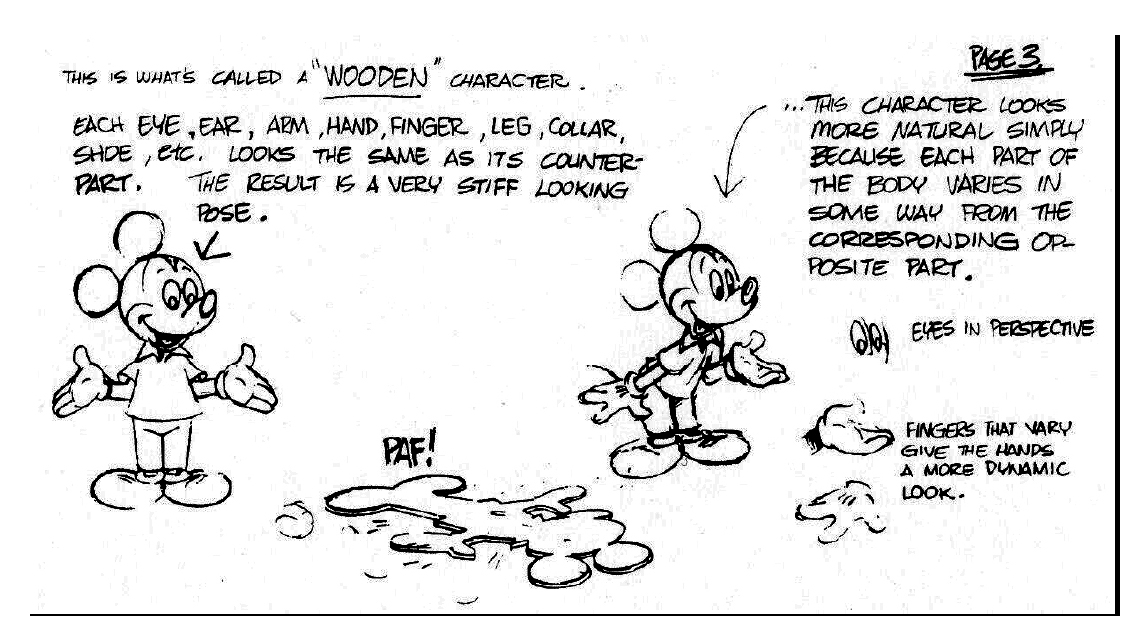
your poses as interesting as possible and avoid twinning. You can find an example of the poses we want you to draw
from The Animator's Survival Kit here.
What to do:
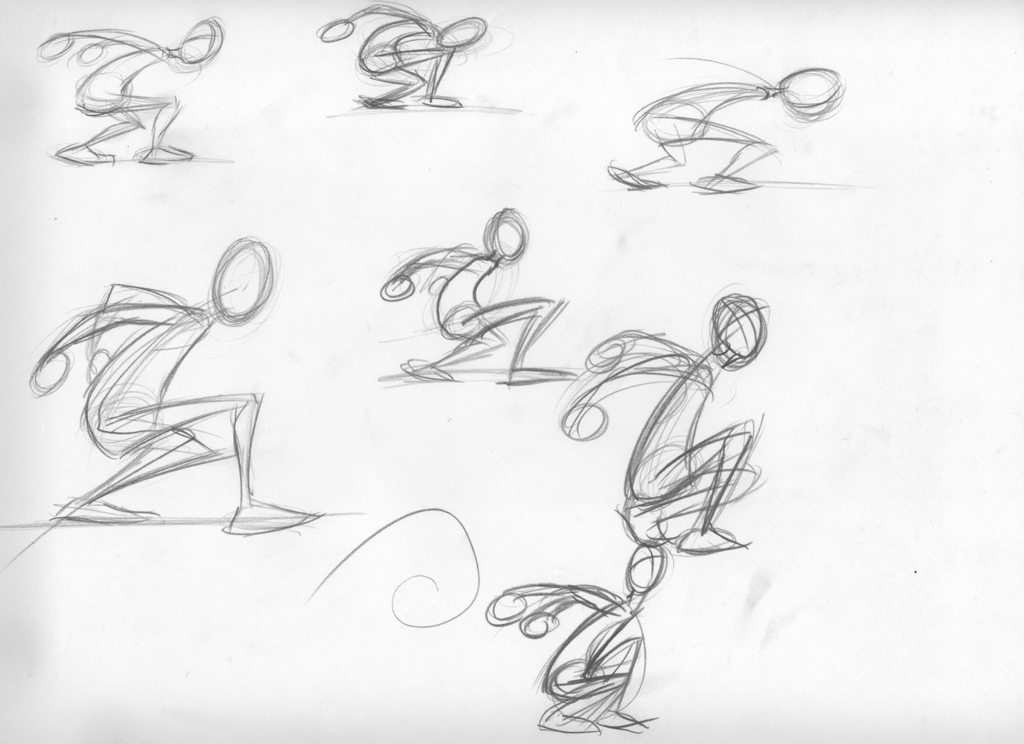
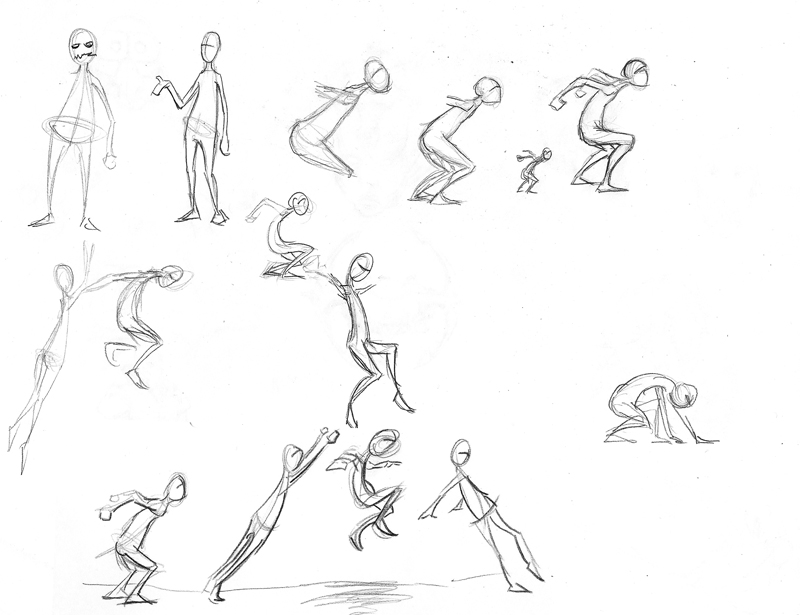
- On one or more sheets of paper sketch out several "research" poses. Try drawing different variations of each jump pose to see what works and what doesn't. Don't worry about perfection. These sketches can be rough as you are only experimenting at this stage. You are only required to turn in one sheet of research, though it is encouraged you do more.
Here is an example of pose research.
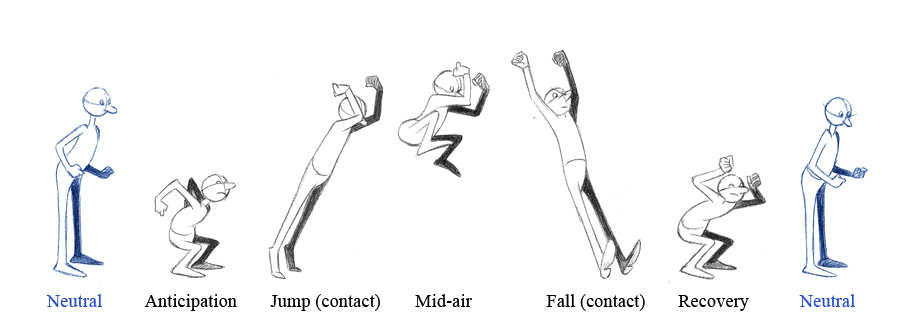
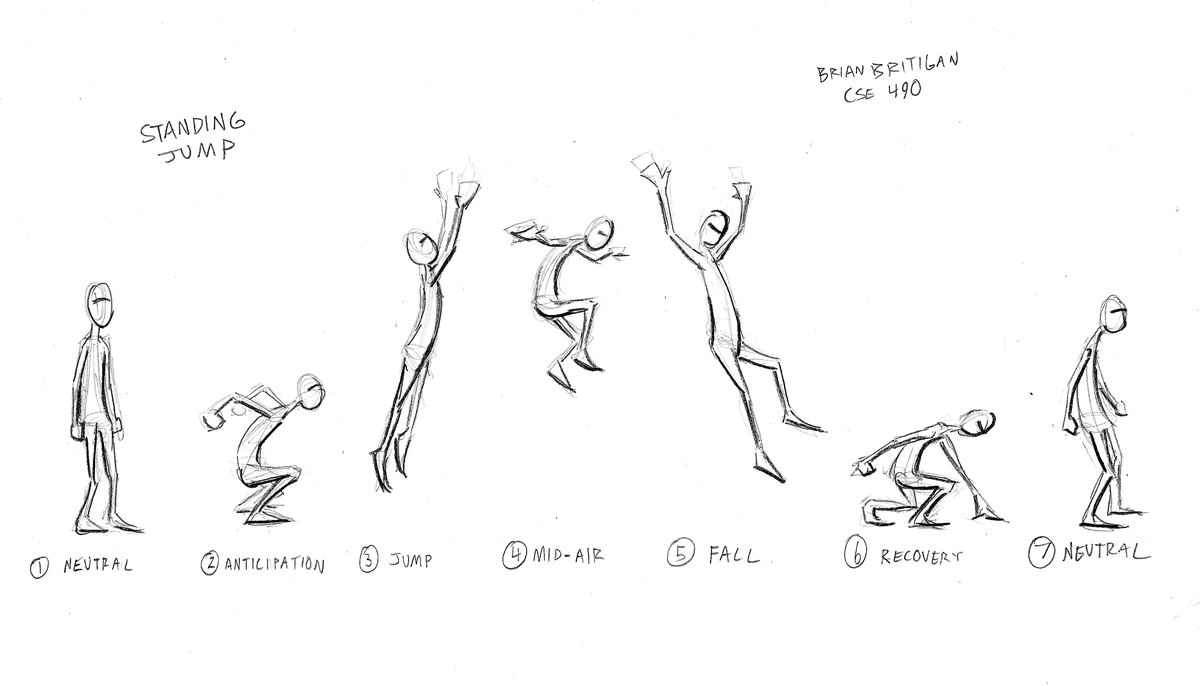
- Draw out a planning sheet for the standing jump, using only the following poses:
- Start and end with a neutral pose
- Anticipation (squash)
- Jump (stretch), contact with the ground
- Mid-air (squash)
- Fall (stretch), contract with the ground
- Recovery (squash)
Check out this example of a jump planning sheet from a previous year.
Note that though this is the optimal level of detail, your planning sheet at the minimum just needs to be enough to convey poses and lines of action.
Part 2: Forward Jump Posing
Now that you have a planning sheet it's time to start posing. You will be using your choice of the Melvin or Annie rig.
You can find the rigs in the production/rigs folder.
What to do:
- Reference either the Melvin or Annie rig into an empty scene from here:
- \\cseexec\cs\unix\projects\instr\capstone3\cse464_wi12_turn_in\464_rigs
- Pose the Melvin/Annie rig directly from your planning sheet in an orthographic side view. There should only be the seven poses specified above (two of which
are neutral). Set Maya to stepped mode. The poses should be in order with about 10 frames between each pose. We are not worrying about timing. Also don't do any inbetween/break-down poses.
Make these seven, particularly the inner five, as perfect as you can!
- Draw CV curves over each of the poses indicating motion arcs (not line of action). Just use the Create CV Curve Tool in the orthographic view you are posing from.
- Give us two playblasts, with and without the motion arc curves visible, so we can review the poses.
Part 3: Production Shot Assignments
For this part of the assignment you will create comprehensive planning sheet(s) for your shot assignments.
Planning sheets should include good form, strong lines of action, motion arcs, shot/motion notes, and numbering/labelling of poses.
Take reference as needed. Your planning sheet should be understandable by everyone in case someone else were to take on the shot.
Remember, planning is a crucial part of animation that saves animators a significant amount of time and helps produce strong motion.
Turn-in Checklist:
- MOTION CHECK-IN:
- Planning sheet and research sheet
- At least two or more poses in Maya
- Use .ma and not .mb
- Please name your files lastname_firstname_assignmentnumber_partnumber_filename.*
(example: doe_john_a1_p2_character_ball.ma)
- Part 1: One or more "research" sheets and one planning sheet with only the seven specified poses (neutral, anticipation, jump, mid-air, fall, recovery, and neutral).
- Part 2: Two playblasts from an orthographic side view in Maya. One with and one without the motion arcs visible. Don't worry about the jump's timing, but give each pose enough time
for us to get a good look at them.
- Part 2: One Maya file of your standing jump.
- Part 3: Planning Sheet(s) for shot assignments.