Assignment #1: Bouncing Ball
Assigned: Thursday, Jan 6th, 2011
Due: Thursday, Jan 13th @ 3:00 PM
Resources:
Part 1: Forward Bounce Revisited
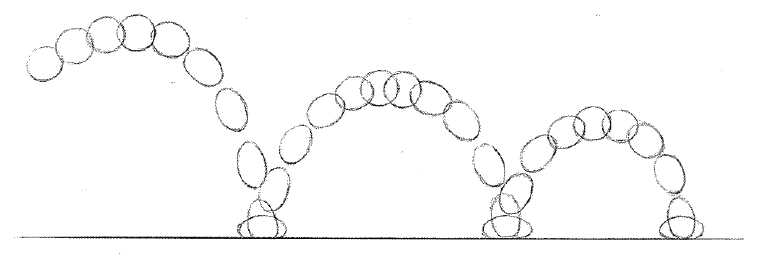
You will be animating a single bouncing ball with forward momentum from an orthographic side view using the provided ball rig.
Unlike the introductory animation assignment in 458, which looked at how different balls (light and heavy) would bounce comparatively, the idea here is to focus on producing a single, polished bouncing ball animation using your knowledge thus far. You may look at video reference or draw sketches if it helps, but you are not required to do so. These are topics we will cover in greater detail as the quarter progresses. Just experiment and get the motion to look good to the best of your ability.
As opposed to last quarter, the ball rig should ease up the workflow a bit. There are two controls on the rig: the "ball_anim" is for both movement and rotation, while the "squash_anim" allows you to modify the direction and magnitude of the squash and stretch independent of the ball's position and rotation. This means that it is much easier to add/adjust squash and stretch without negatively impacting other portions of your animation. Note that it is recommended you always key both controls on a given frame, and not just one without the other.
Always be thinking about the animation principles, particularly squash and stretch, ease-in ease-out, timing, and
arcs. Also keep in mind that you are animating a "normal" bouncing ball that doesn't have a mind of its own. So, for example, you generally shouldn't see squash and stretch when playing at full speed,
but you should be able to feel it. Squash and stretch that is too extreme and that spans too many frames will make it look like the ball is willing itself to jump, and that's not what we want to see for this part of the assignment (just keep it to one frame, with a maximum of two frames for earlier bounces).
Part 2: Bouncing Ball with Character
In contrast to Part 1, where you showed how a standard ball might bounce, in Part 2 you will show how one or more "living" ball characters might move/act to express specific emotional states. Here's what we are looking for:
-
Animate at least one ball as if it were a living character. Here's an example showing how "living" balls with personalities might move.
- Tell a short story such that your character expresses one or more clearly identifiable emotions. It could be as simple as "This character is happy, and then something happens, so now this character is sad." You may use additional ball characters or add simple props to your story if it helps convey emotion. However, remember that these emotions need to read primarily through movement (don't use elaborate prop and set design as a crutch). Think of this in terms of your room assignment for 459. Here you are still expressing a specific mood, but in this case you are using animation to do so rather than shading and lighting. If you are having trouble coming up with a story, it is perfectly fine to use the mood and story from the room project as direct inspiration.
- The ball character needs to bounce, it can't just emote on the ground. The manner in which it bounces, what it does in between each bounce, and what it does in the air will help it convey emotion. This rule applies to each character used.
- DO NOT go overboard on extra elements such as shading, lighting, and rendering. The point of this assignment is to express mood through animation. Make sure that your character's emotions read and that your animation is polished, as that is what we are looking for. This is a case in which a simple playblast is preferred to a fully rendered, multi-shot sequence.
- Your animation should be a minium of 10 seconds long and a maximum of 30 seconds long.
General Animation and Maya Tips
- Start with your "extreme" poses first! Get those right, then add breakdowns (poses further defining the motion between your extremes) as you need them.
- When defining poses for your ball you will want to key both controls on the same frame. If you stagger their keys
(meaning, for example, that the ball_anim's keys don't line up with the squash_anim's keys), figuring out which key goes to which pose will
become frustrating later and slow down the workflow. Keying all controls on the same frame is an important habit to start now, as the number of controls per rig will only increase from here.
- Make sure keys don't land on partial frames (for example, frame 3.14). If this happens it is usually the result of key scaling. To fix partial framed keys, select
all of the problem keys in the timeline, right-click hold on the selection, and choose "Snap".
- Try not to spend too much time in the Graph Editor. Focus on what your animation looks like, not what the curves look like. Don't be afraid to add more keys or breakdowns.
- Save iterations! You especially want to save an iteration when all of your key poses are set, before moving on to clean up the graph editor and adding in-betweens (basically another word for breakdowns).
PLAYBLASTING NOTES: The point of playblasts are to get a good preview of your animation. This means that you should hide everything that clutters the screen, and set the camera up to get a good view of your motion (you don't want the camera so far away that your bouncing ball it just a dot!)
You will want to hide the heads up display information by going to Display → Heads Up Display and unchecking everything in the list. You will also want to hide all of the animation controls. Since these controls are usually NURBs curves, go to the panel menu and uncheck Show → NURBS Curves.
Turn-in Checklist
- MOTION CHECK-IN:
- First iteration of the revisited forward bouncing ball (already playblasted!)
- Proposal of an idea or a partially complete bouncing ball with character.
- Use .ma and not .mb
- Please name your files lastname_firstname_assignmentnumber_partnumber_filename.* (example: doe_john_a1_p2_character_ball.ma)
- Turn your files into production1/cse464_wi11_turn-in/assignment1
- Part 1: One playblast of the orthographic side view you animated the ball from.
- Part 1: One Maya file for your bouncing ball.
- Part 2: One playblast that can be either an orthographic side view or perspective, just give us the best view. (No moving camera!)
- Part 2: One Maya file.