Ball Animation Tutorial
Key Terms:
Rig: “A digital puppet”. A rig is a poseable skeleton that is tied to the deformation of a mesh. In other words, a rig is what we call a model and its associated set of controls. For us, this is just like using a digital puppet.
Anims or Controls: Anims or Controls are the shapes around our model that we position to pose our rig. These are what you manipulate and key, instead of the model itself!
Keyframe: A keyframe is the saved location of an object at a specific frame. You set a keyframe by selecting an object and pressing “s”.
Frames: There are 24 of these every second of animation.
Viewport: This is the area where you will be animating, the big window in the center of Maya
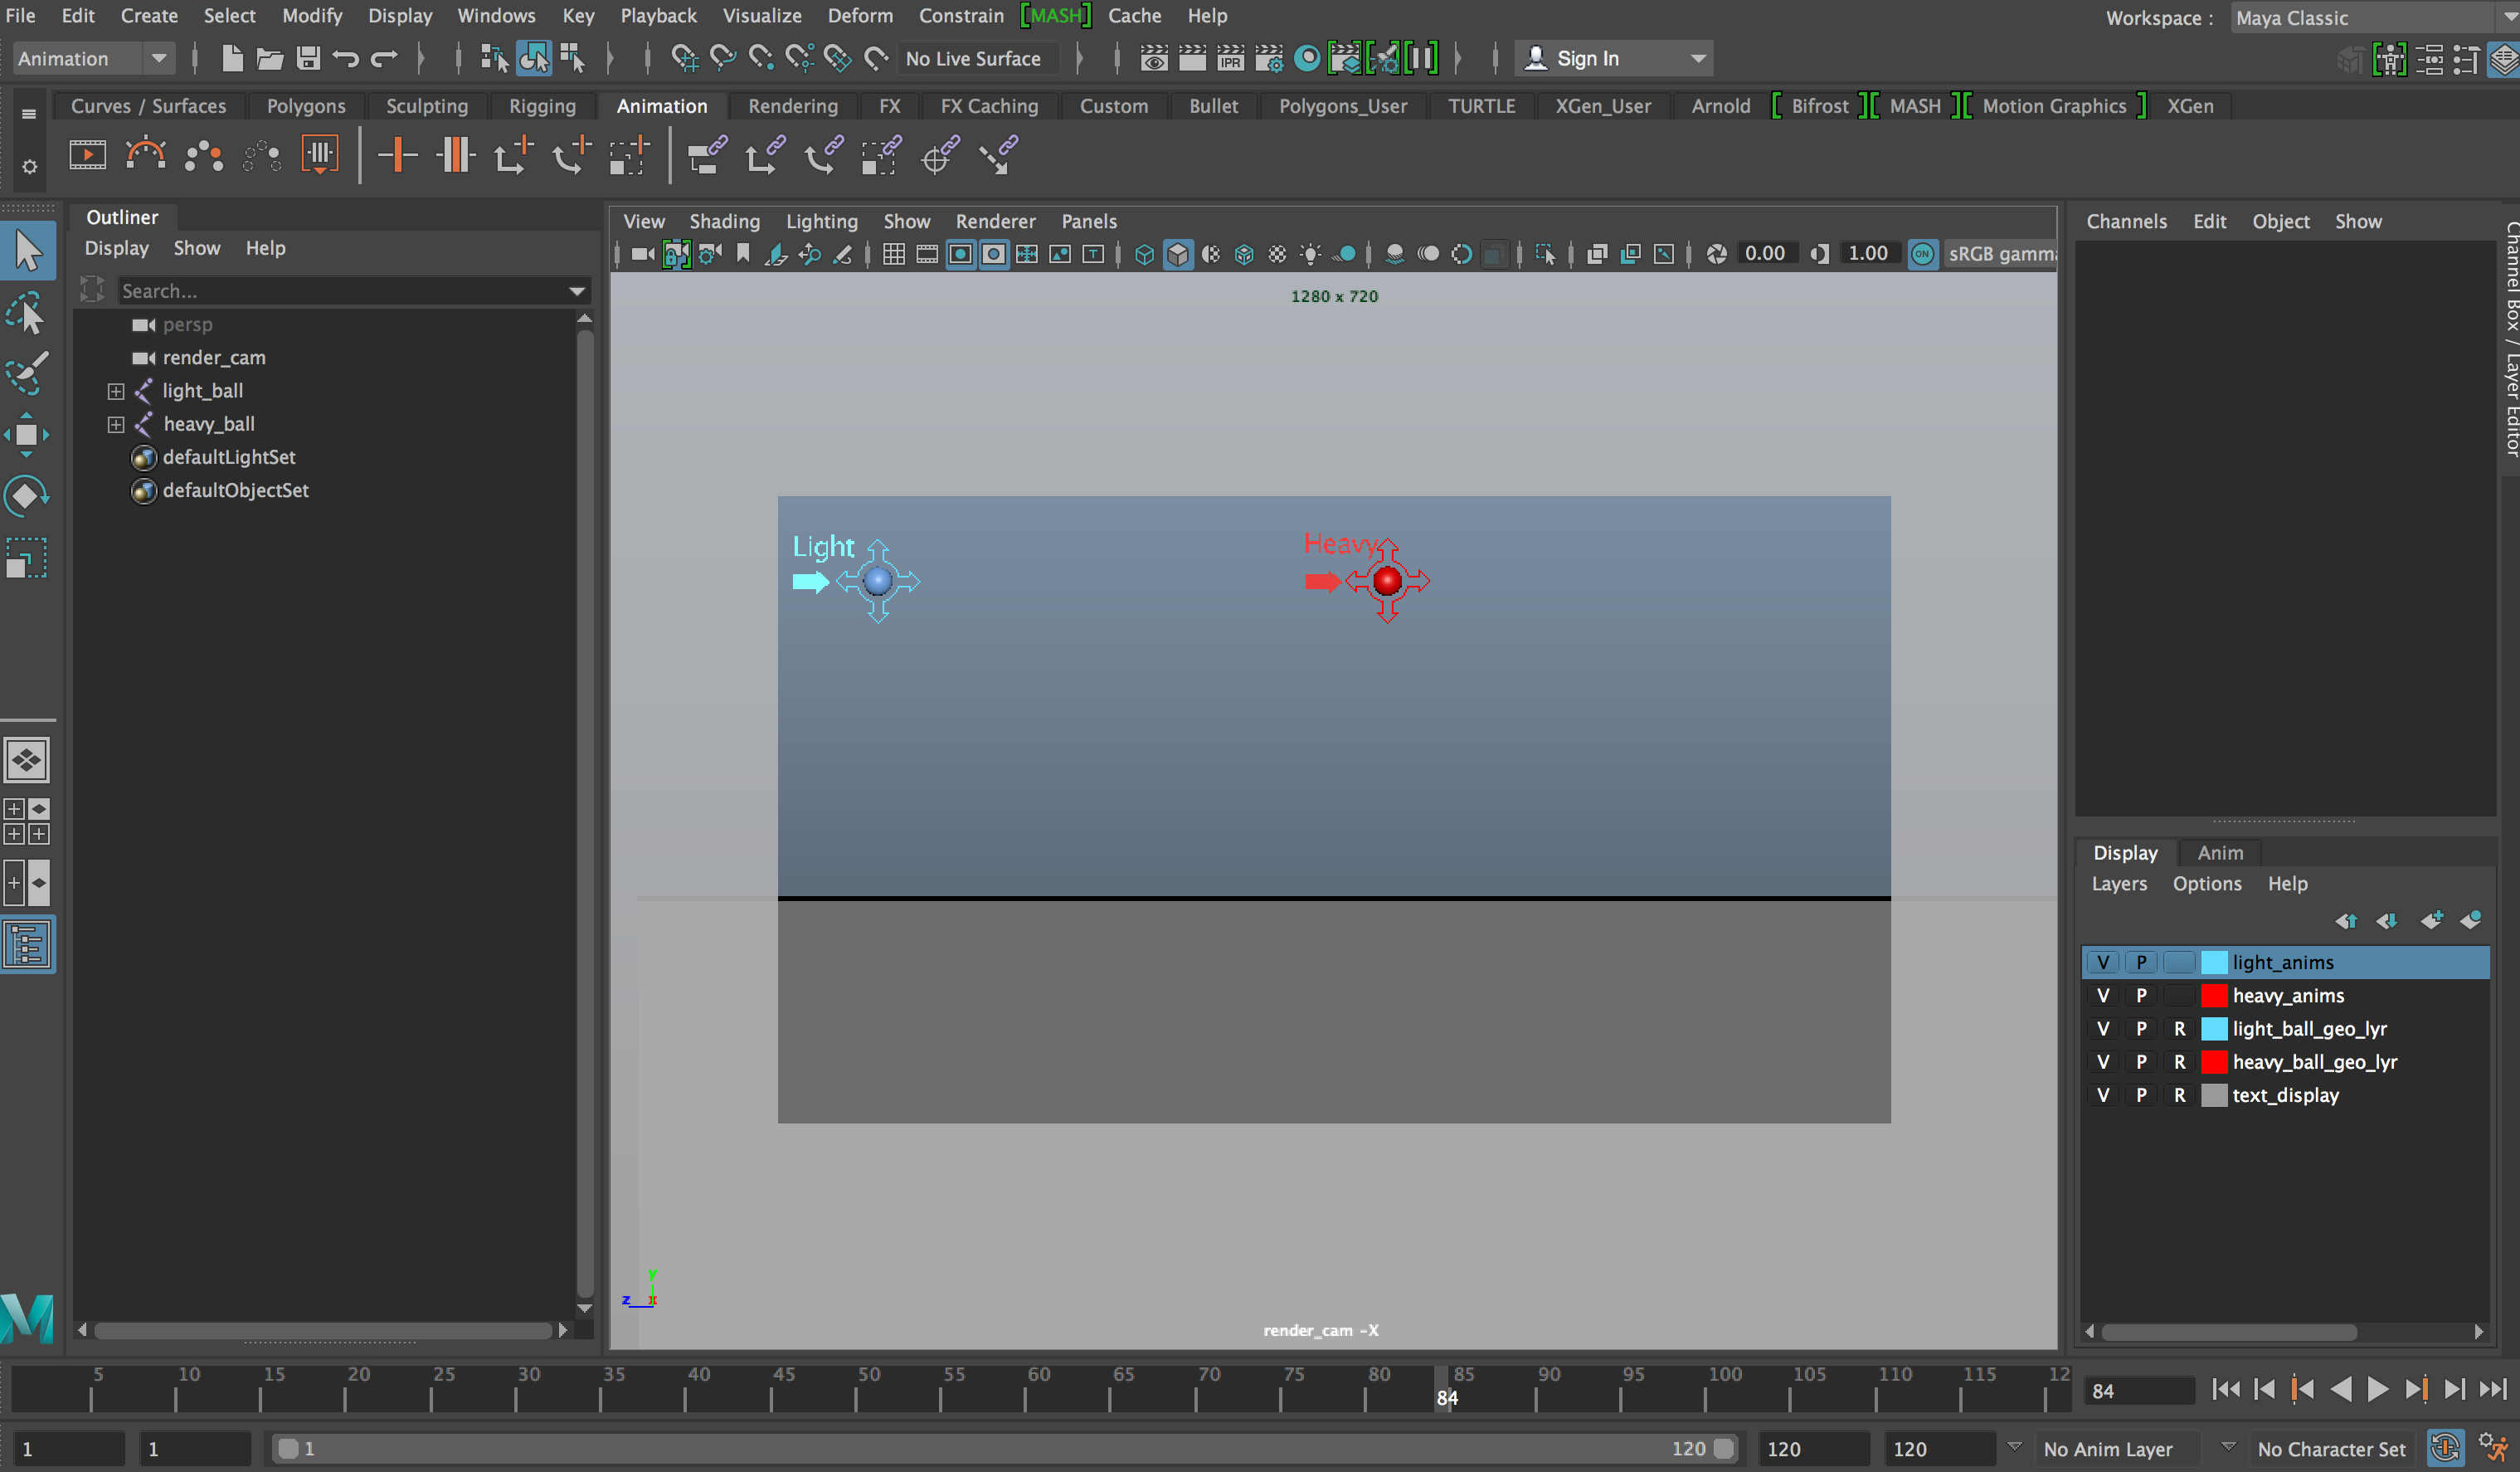
Channel Box: The Channel Box
appears to the right of the viewport. The button to bring it up is found on the
upper righthand side of Maya’s interface, and looks like this: ![]()
Orthographic View: An orthographic view in Maya is a way to look at a 3D object from a 2D view. This allows us to view our animation in 2D.
Render_cam: We create this camera to playblast from.
Playblast: The exported video of your animation.
Planning Sheet: A piece of paper you use to draw out poses so you know what they should look on the computer before you start setting keyframes.
Saving: Something you should do often! Press ctrl+s to save.
Questions: Something you should ask often! We’re here to help! Find a TA in your lab space (Sieg 329) or a Staff member in Sieg 332 if you get stuck.
TUTORIAL
The bouncing ball carries with it many of the principles necessary to master in order to become a successful animator. Timing, Spacing, Arcs, Ease in and Out, settling, and Squash/stretch. Everything in life moves in ways that we can observe that exhibit similar properties to how a bouncing ball moves. If you pay attention, you’ll see – and by that observation, you will learn what you need to in order to succeed.
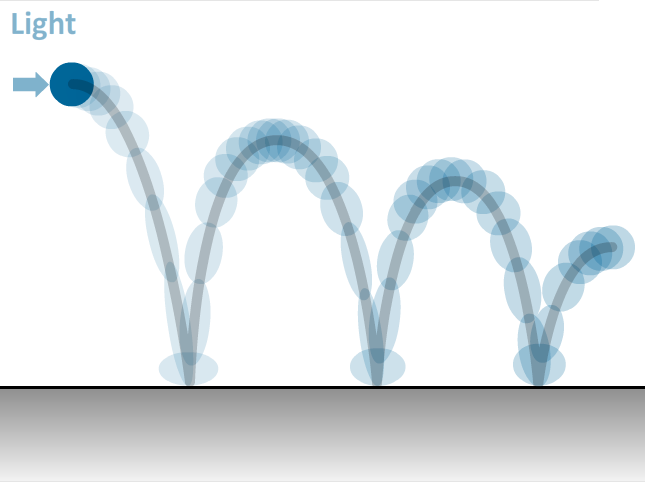
This tutorial will go over how to animate a bouncing ball in a 2D orthographic view using Maya Autodesk 2017.
It will use the bouncing
ball template pictured below as a starting point. Throughout this
assignment, you will start by creating a path of motion for reference, setting
a series of keyframes on both the light and heavy ball to define their motion,
and finally, creating and exporting the animation from Maya.
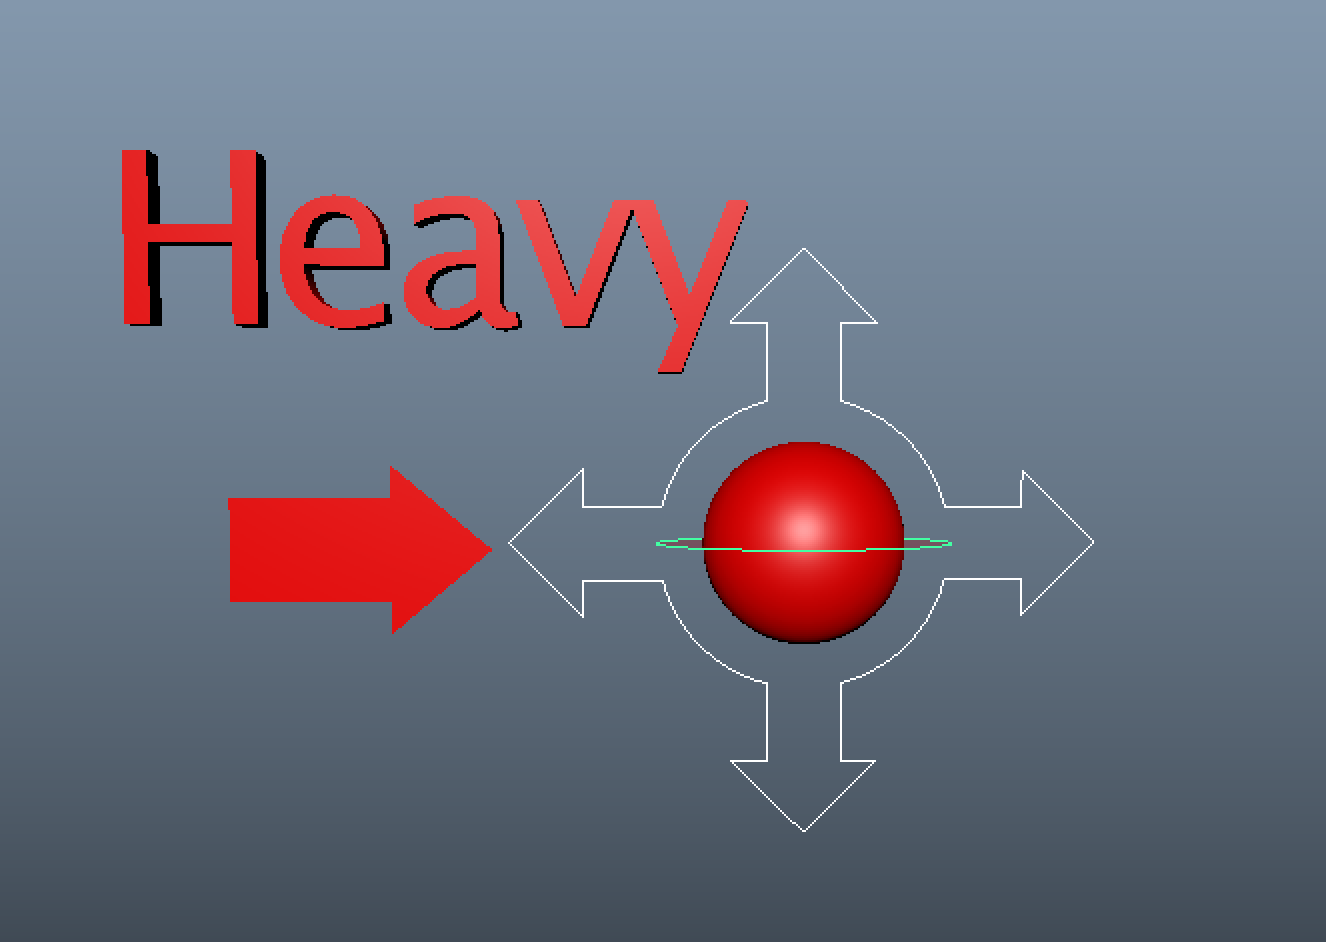
THE BALL RIG
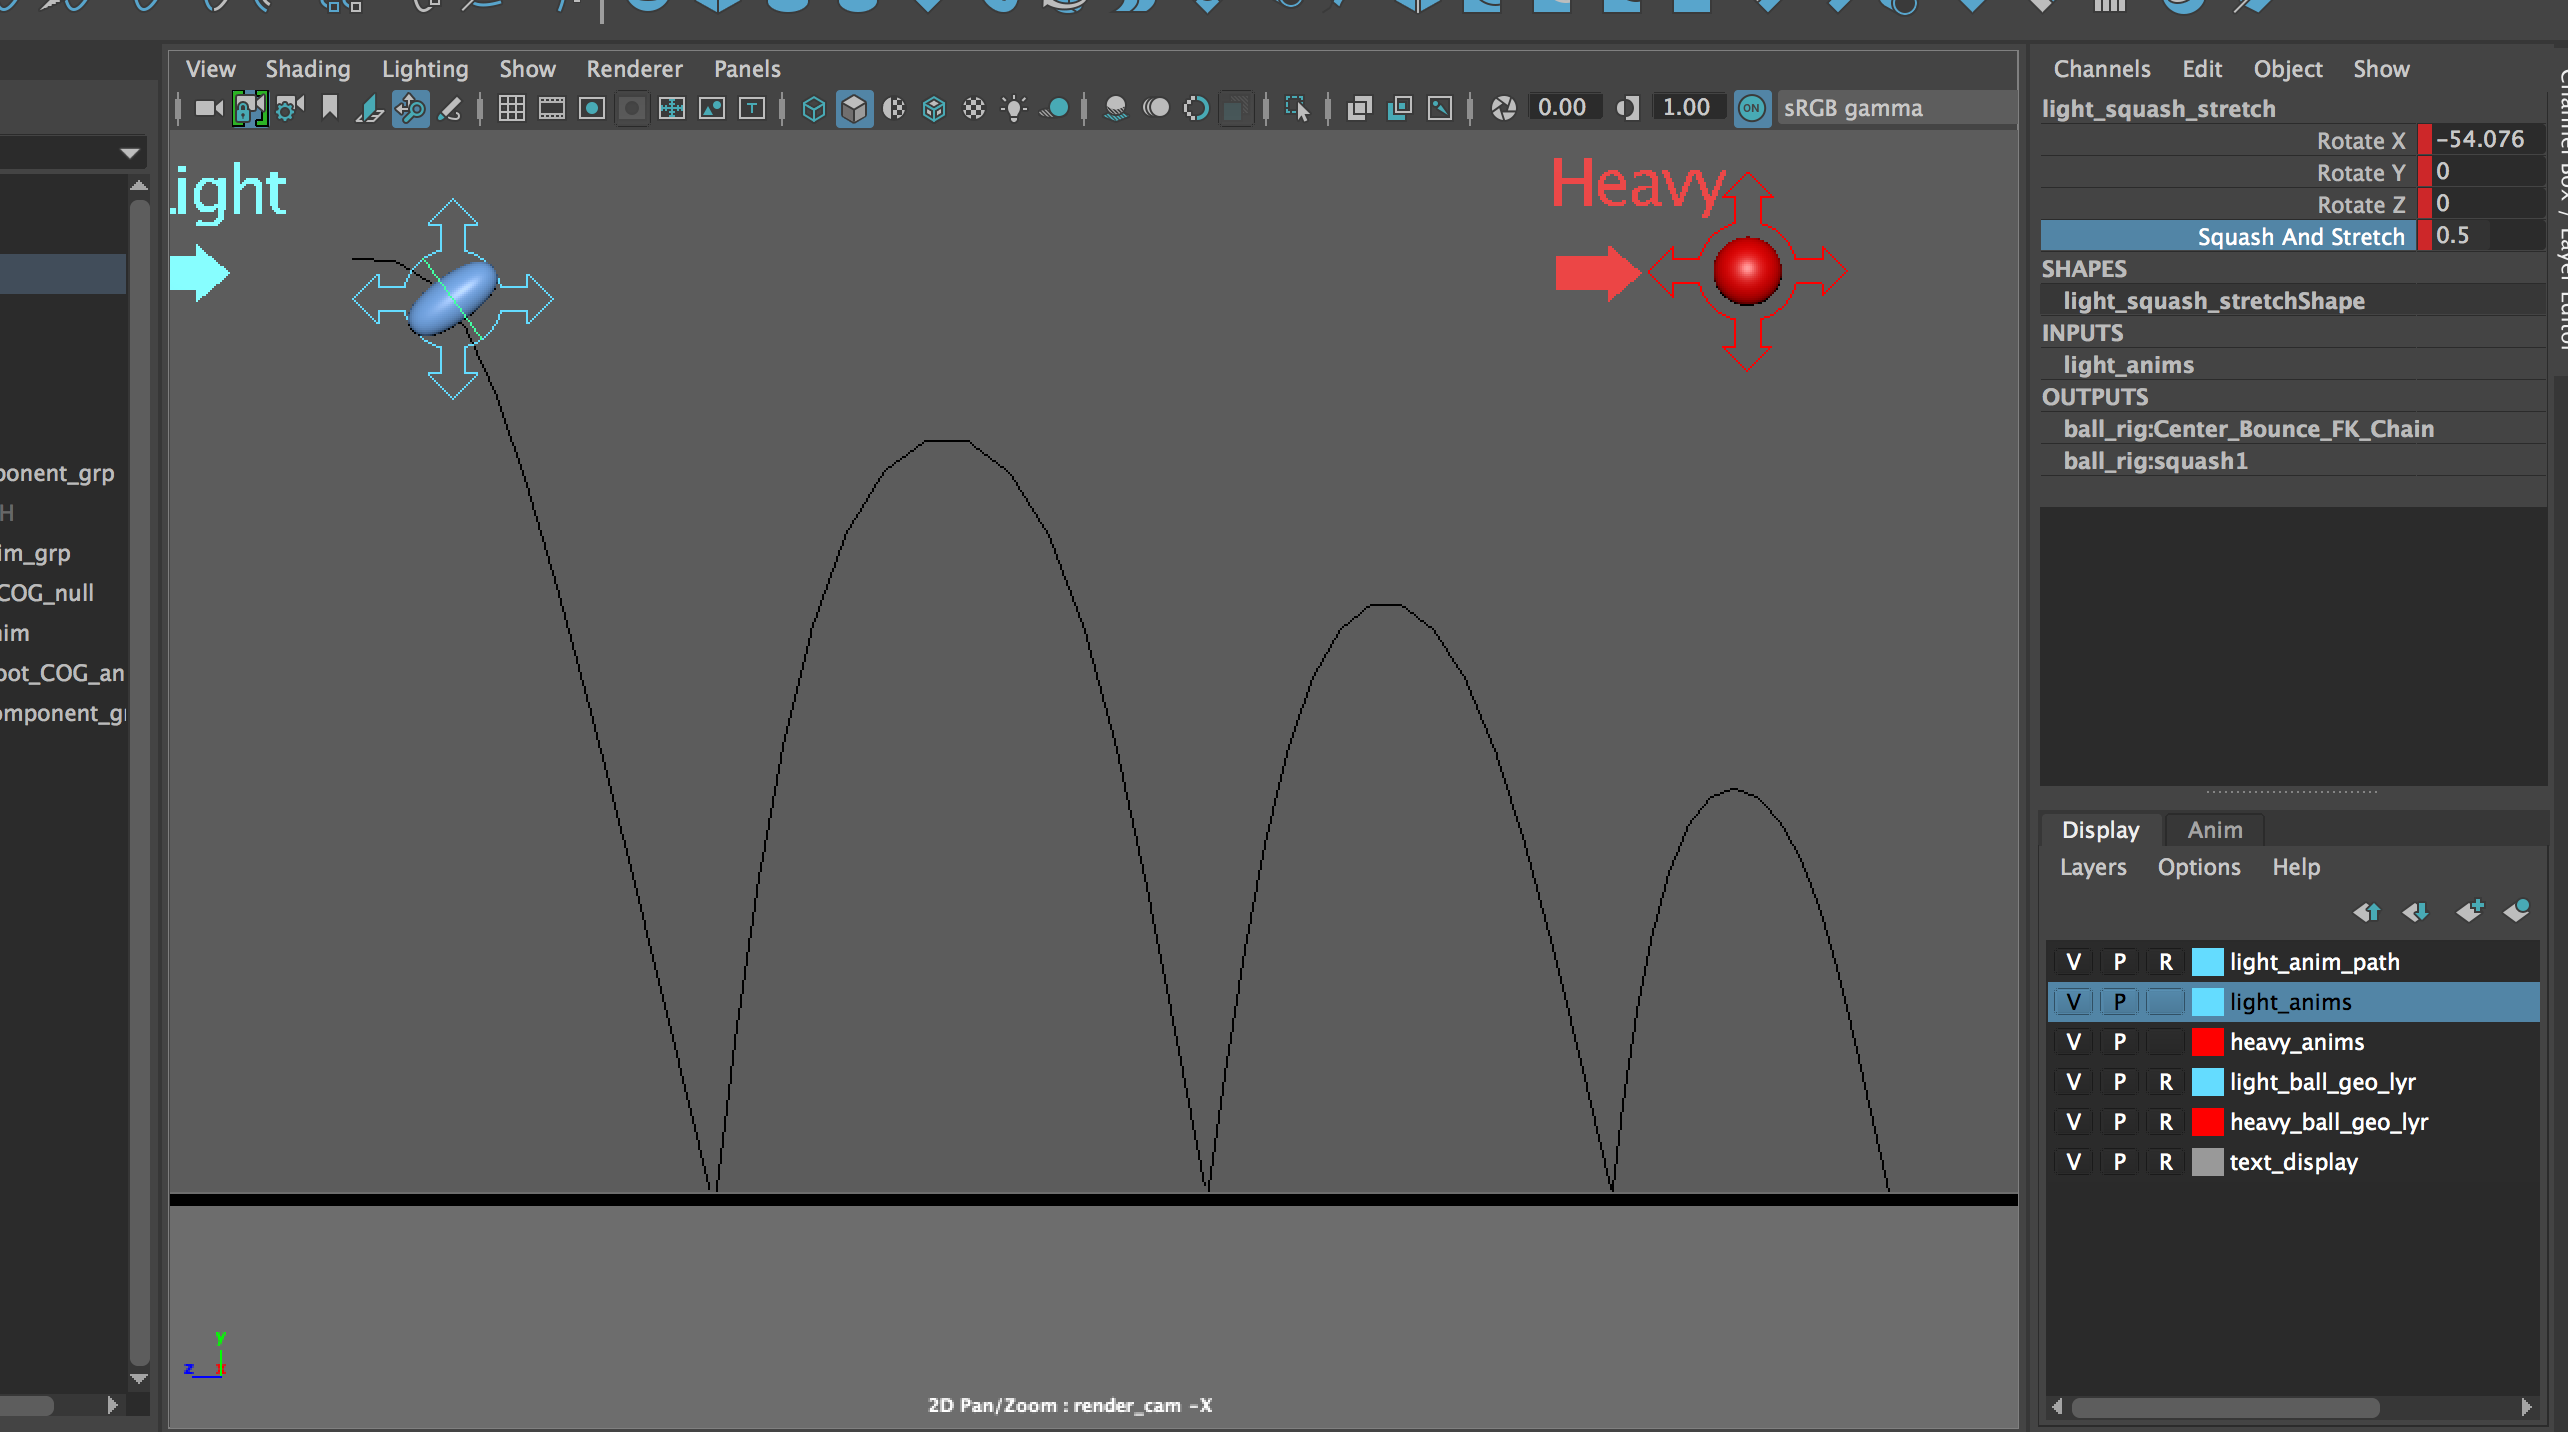
There are two controls on the provided rig: the "ball_anim" is for both movement and rotation, while the "squash_anim" allows you to modify the direction and magnitude of the squash and stretch independent of the ball's position and rotation. This means that it is much easier to add/adjust squash and stretch without negatively affecting other portions of your animation. IMPORTANT - You should always key both controls on a given frame, and not one without the other.
Planning Sheet and Reference Video
Use your reference video as a way to
help make a planning sheet that you can use as reference for a first pass of
poses. You will be submitting both with
your assignment.
As you work in Maya and playback
your animation, you will find that adjustments will need to be made.
Ultimately, you are not required to follow the exact path and timing of the
planning sheet. If you find that deviating will result in a better animation,
by all means do so!! Animation isn’t the exact replication of what we see in
real life, but the expression of it.
Always have timing, spacing and arcs in the back of your
mind as you set the poses.
Workspace Setup and Navigation
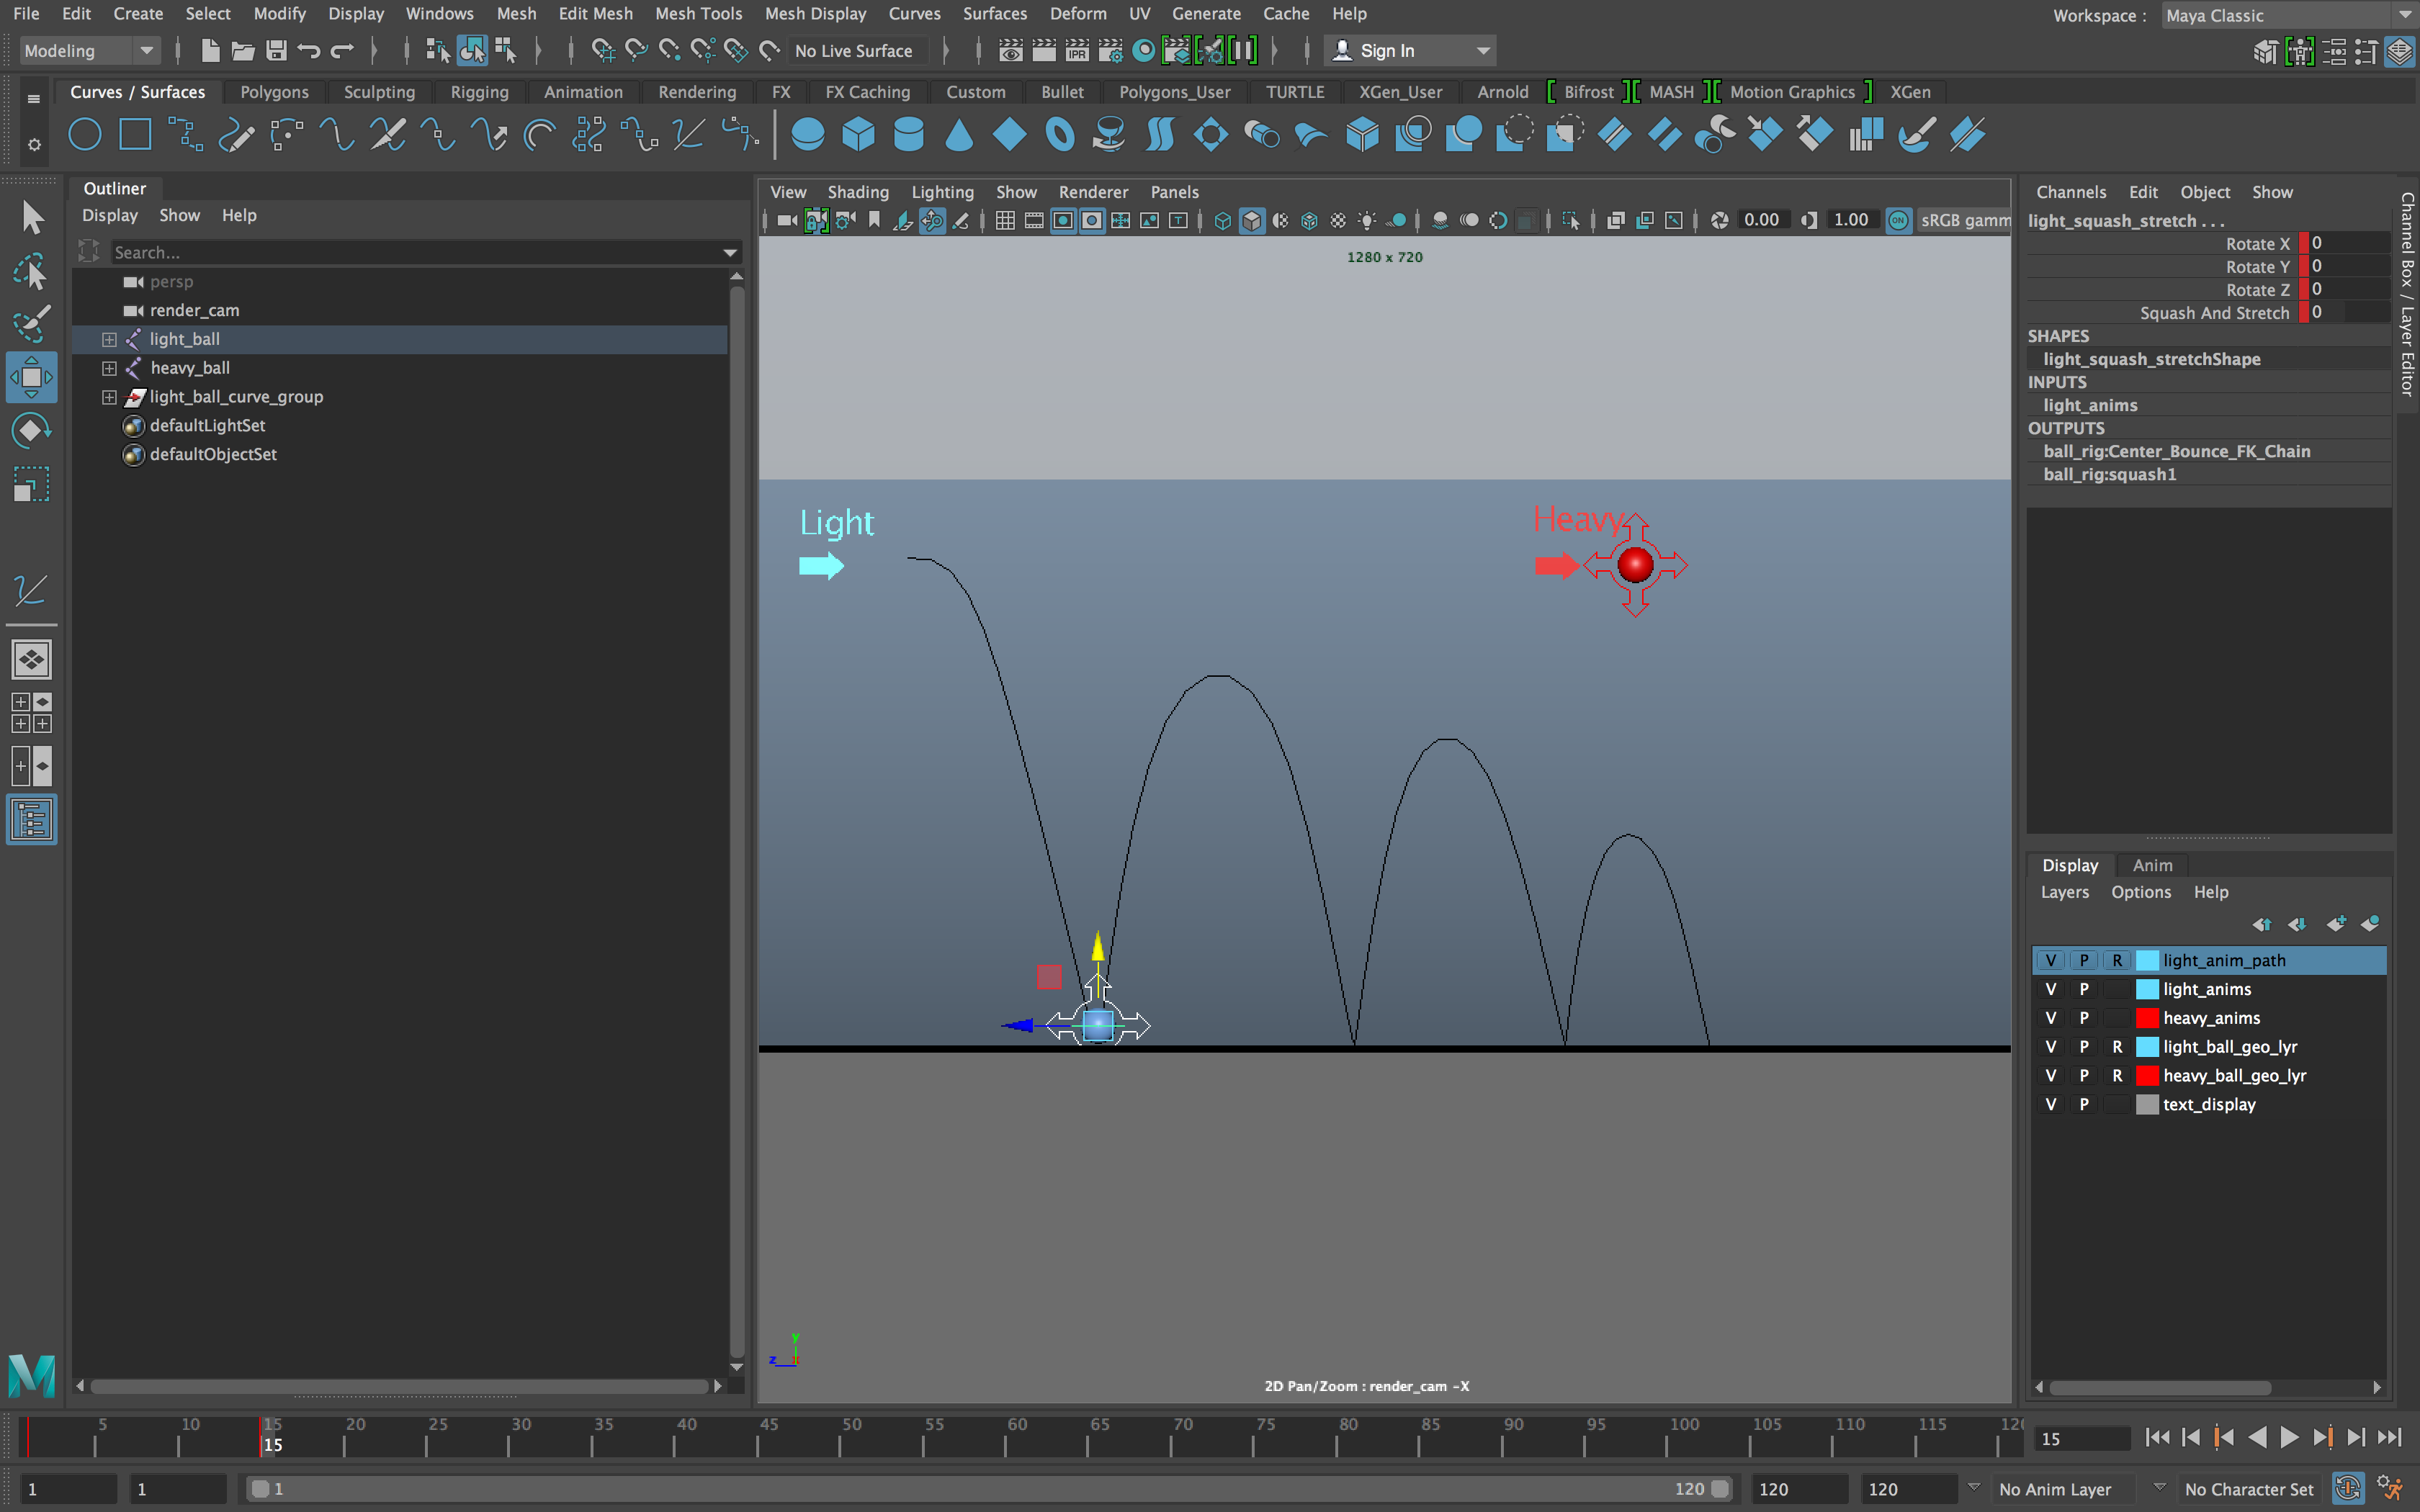
You will do the bulk of your work in the "Viewport", where the light and heavy balls are animated.
We will go over the various tools used for animation as the tutorial progresses, but here is a summary of everything covered for reference:
TOOLS + HOT KEYS
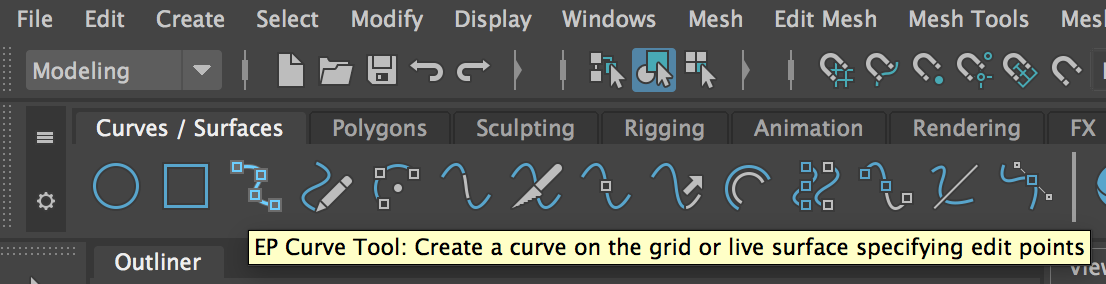
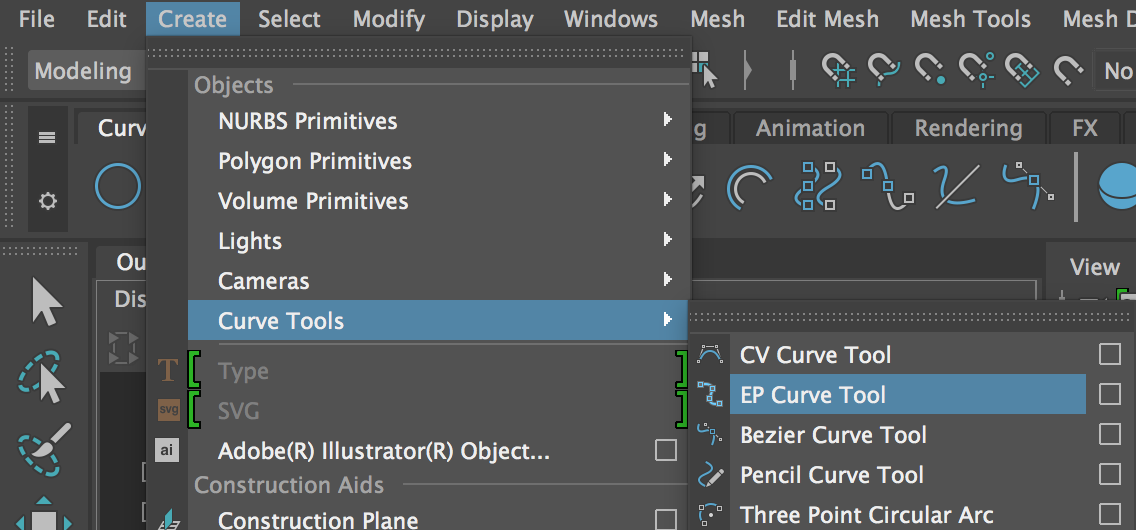
Curves
- EP Curve Tool - Lets
you draw a NURBS curve by placing edit points.
- Found in the “Curves/Surfaces” tab
- or Create > Curves > EP Curve Tool
- r – scale tool
- ctrl +
d – duplicate selected object.
Don’t do this when you’ve selected a rig!
Animation
- s -
Insert a new keyframe at the current time.
- w – Move tool.
Used for moving the ball.
- e- Rotate
tool. Used for rotating the ball.
- Alt+v - Play the animation.
- Alt + <
or > - Step back or forward a frame.
- <
and > - skip between set keyframes on selected object
Channel Box
- The channel box is to
the right of the viewport
Animation
- s -
Insert a new keyframe at the current time.
- w – Move tool.
Used for moving the ball.
- e- Rotate
tool. Used for rotating the ball.
- Alt+v - Play the animation.
- Alt + <
or > - Step back or forward a frame.
- <
and > - skip between set keyframes on selected object
2D Navigation
- 2D Pan/Zoom Mode can be found at the top of the
viewport at View > Camera Tools > 2D Pan/Zoom
- The square options button will let you choose
between zoom and pan modes.
- Zoom mode allows you to zoom by dragging the
middle mouse button in the viewport. You can hold shift and click to
pan.
- Pan mode allows you to pan by dragging the middle
mouse button in the viewport. You can marquee select while holding CTRL
to zoom in or out of the selection.
- Middle mouse button - Hold and click to move or zoom around the viewport
when in 2D Pan/Zoom Mode.
- \ - Enter and exit into 2D Pan/Zoom view
General
- Z or ctrl+z - Undo
- Ctrl+y - Redo
- Alt+B Change the color of the background.
- G – Activate last tool used
Part 2a – Animating a Bouncing Ball without
Squash and Stretch
Path of Motion Reference
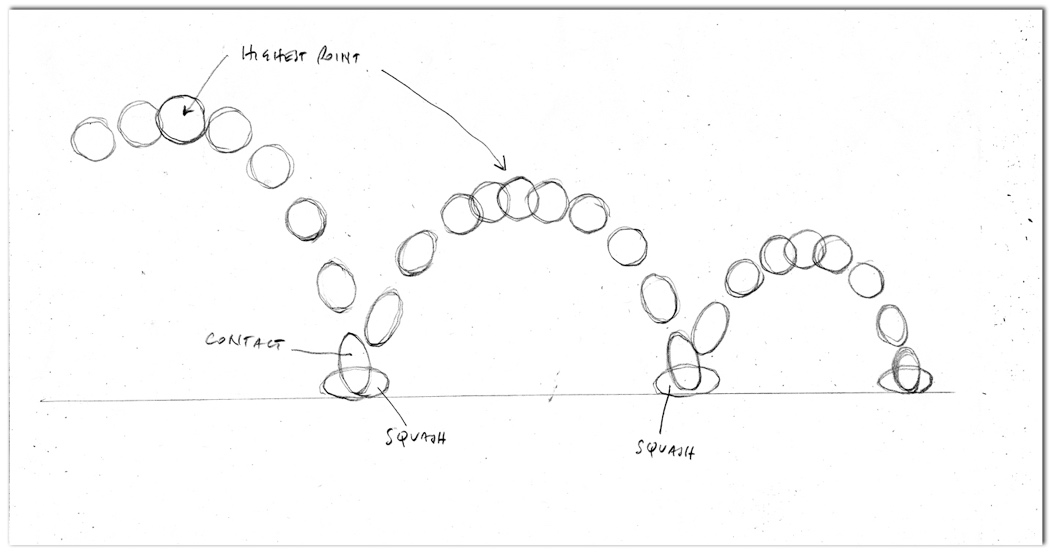
The first step is to plan your movement.
In the case of the bouncing ball, you will be drawing several arcs that represent how it moves through the air.
You will be drawing curves using the EP Curve Tool! Go to the Curves/Surfaces Tab and press the EP Curve button, or Create > Curves > EP Curve Tool.
You will only need to get the first two curves done correctly, the first fall and the first bounce. As you may have observed when you were creating your planning sheet, a bouncing ball loses a consistent percentage of its momentum with every bounce. Each bounce before it is going to be in a similar arc, because no other forces are acting upon the ball other than the initial momentum and direction, gravity, and the floor. So, after we create our first bounce arc – we are going to copy it and scale it down to create the other arcs.
With the EP Curve Tool ready you can click around the screen to create a path. You may want to test this out a couple of times to get a feel for how it works. Repeatedly undo back using Ctrl+z to remove a path you aren’t happy with, or you can delete it from the outliner.
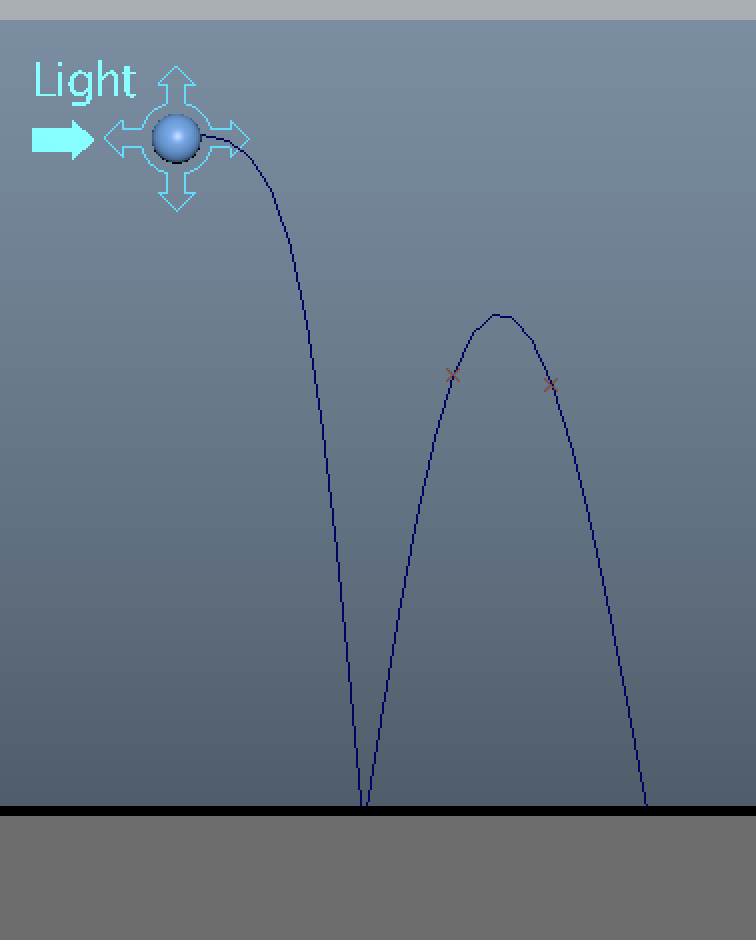
Once you've gotten the hang of the EP Curve Tool, it's time to start drawing the path of motion for the ball. Left click at the starting position of the ball, then click further down where the path would be to guide where the line will start to curve. With your third click, click the ground where the ball should make contact with the ground. If you hold down your mouse button after making the third When you’re happy with your work, press enter.
If you want to edit your curve, use the edit curve tool. You can find this on the top in the dropdown Curve Menu or in the Curves tool bar. To edit your curve, press the spot on the curve you want to edit, then you can change the positioning and the length of the tangent to change the curve how you would like.
For the next arc, repeat the process from above. It’s recommended that you click once where it should bounce, once around 3/4s up the arc, and then the same to places on the other side. You should end up creating a nice parabolic shape.
When you’ve completed the arc between the first and second bounce, press enter to save it.
Next, you’ll want to duplicate the full bounce arc. Press Ctrl+D when the curve is selected to duplicate it. Then press s to activate the scale tool, and reposition it with the Move tool (m) so the next bounce starts when the last ends.
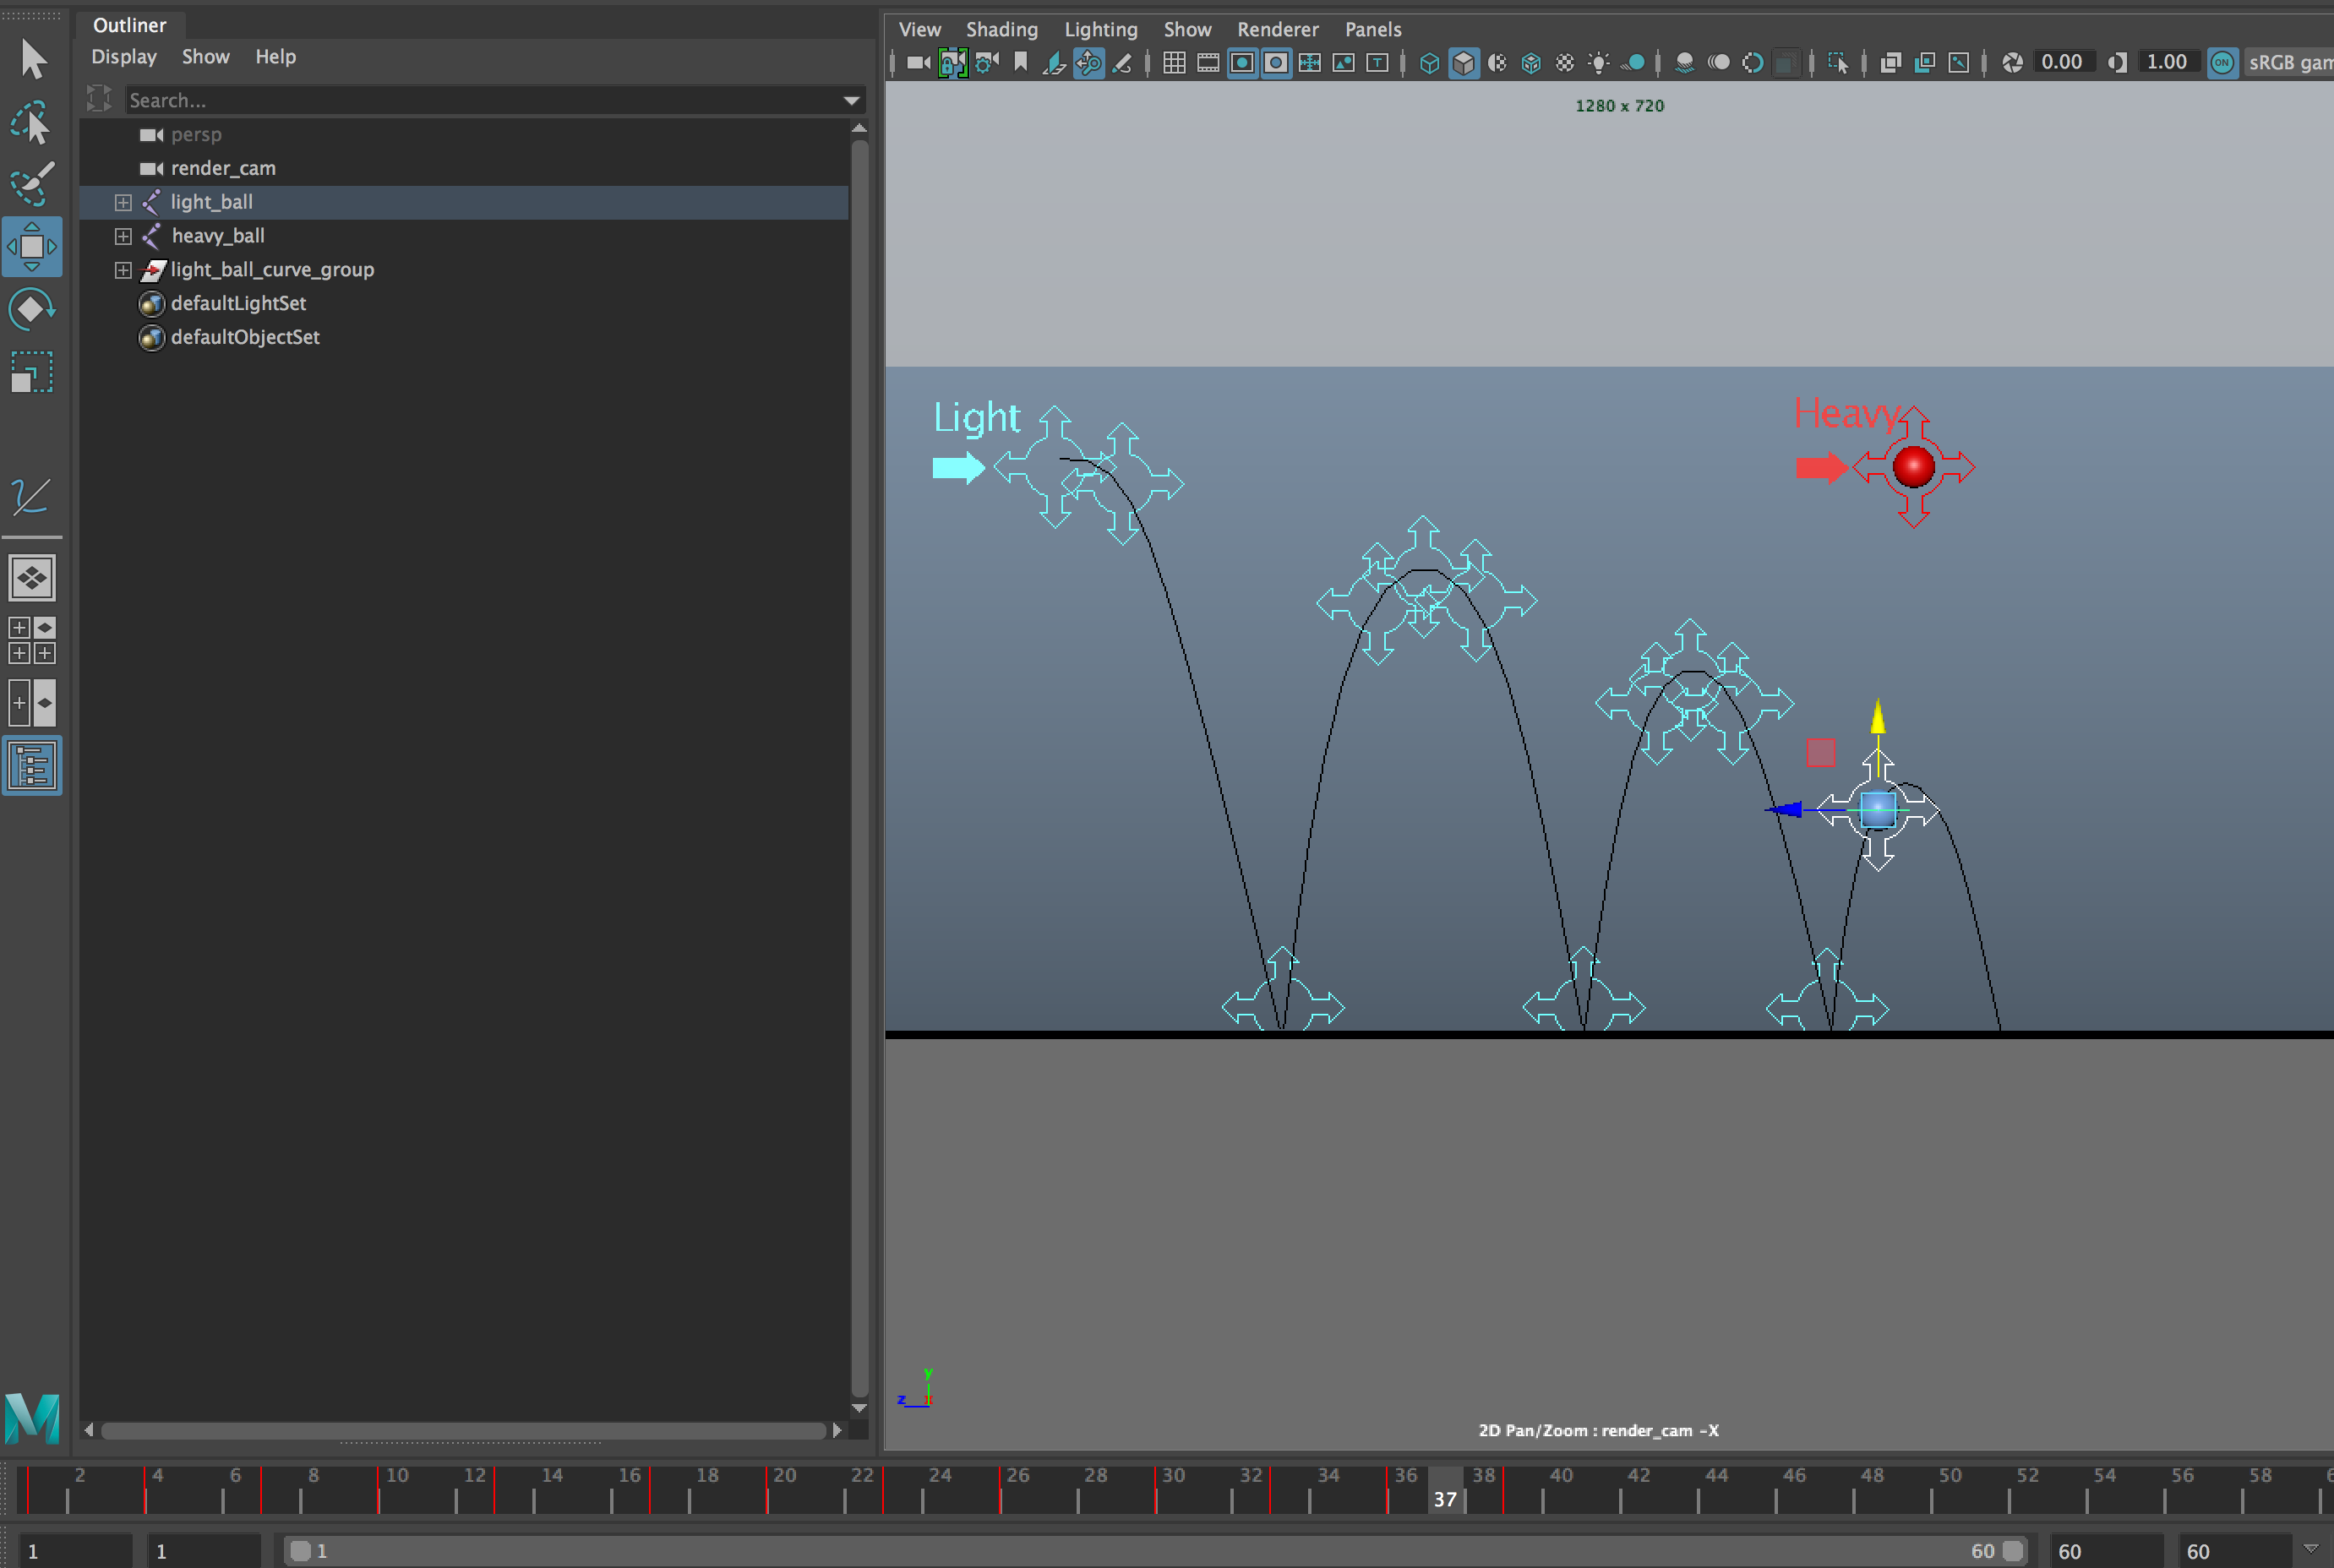
Repeat this until you have 4 or so bounces for the Light Ball. As a general rule, we want to keep our outliner clean. So we’ll be making a group of all of our curves. Select all of your curves for the light ball, then group them by pressing ctrl+g. Rename the group “light_ball_curve_group”.
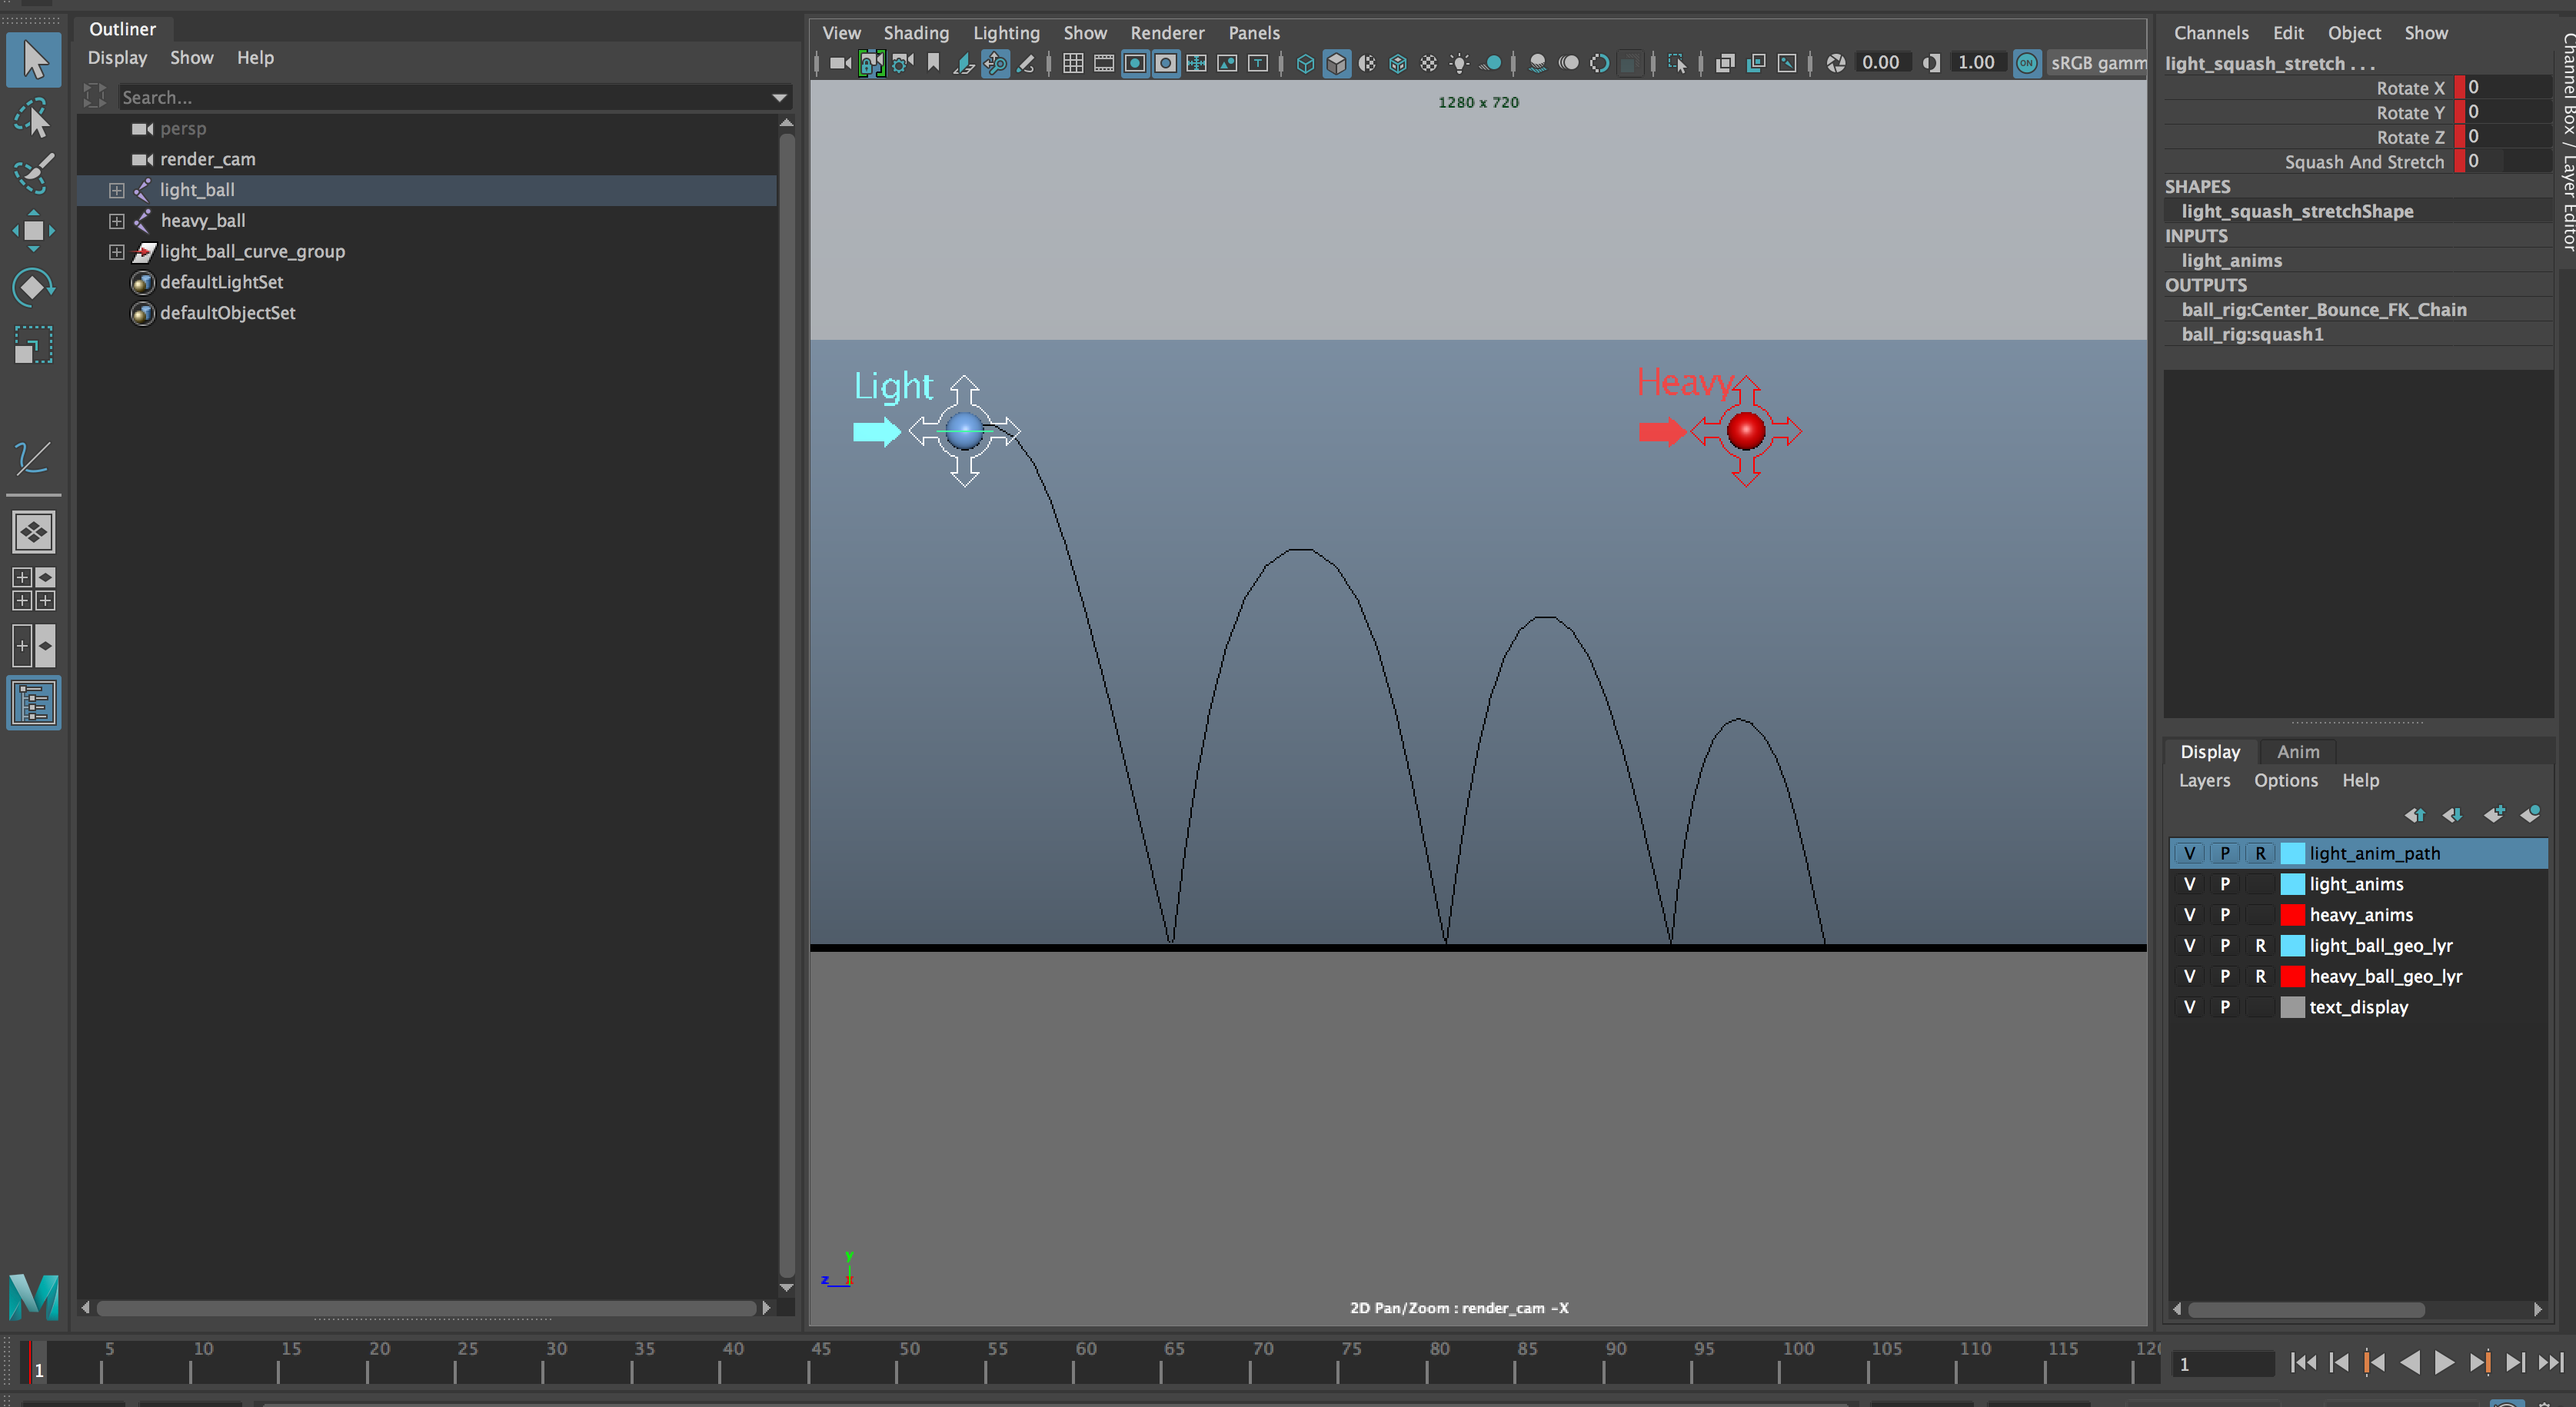
Then, repeat the steps above to create the same curves for your heavy ball.
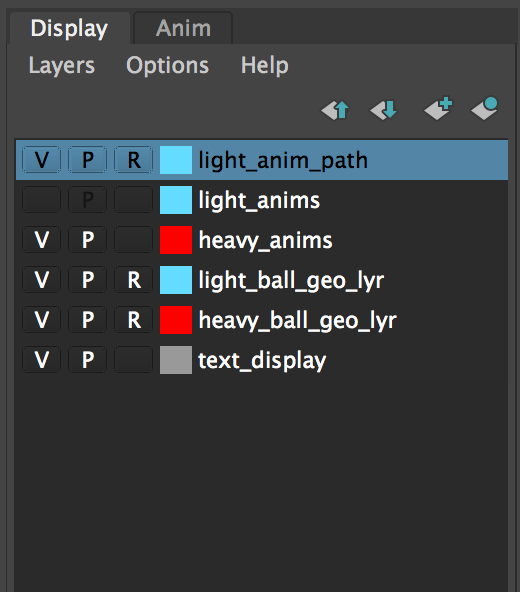
To avoid selecting the path later on, we’re going to put it on a reference layer. Select all of the curves for one ball, then click the “create a new display layer and add all objects” button in the display layer window. Name it “light_curve_layer”. When naming anything in Maya we want to make sure everything has a different name, and a specific name so we know what we’re looking at it. This will speed up your animation workflow greatly.

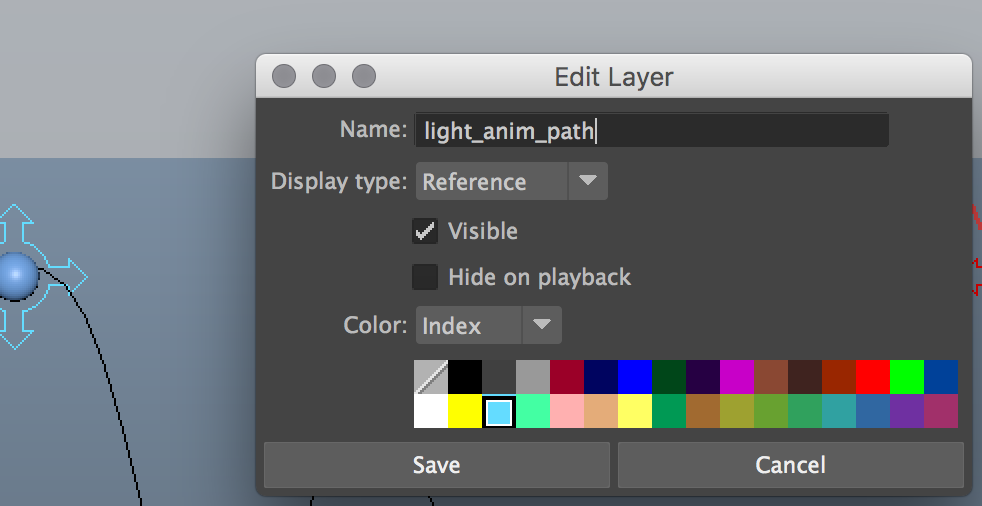
Be sure to create an additional reference layer for the heavy ball. If you’d like to color the display, you can click the box right next to the display layer name. A menu will pop-up, just select the color you’d like. This helps to make display layers differentiate from each other at a glance.
Posing – Pose to Pose Animation
Now that you have set up the reference path, it is time to define a series of keyframes on each ball layer.
A keyframe is a "pose"
defined at a particular point in time. Your animation will just be a series of
these.
It will be best to animate one ball at a time. Let us start with the light ball.
BEFORE YOU BEGIN ANIMATING
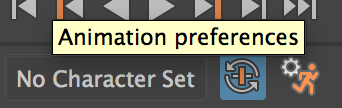
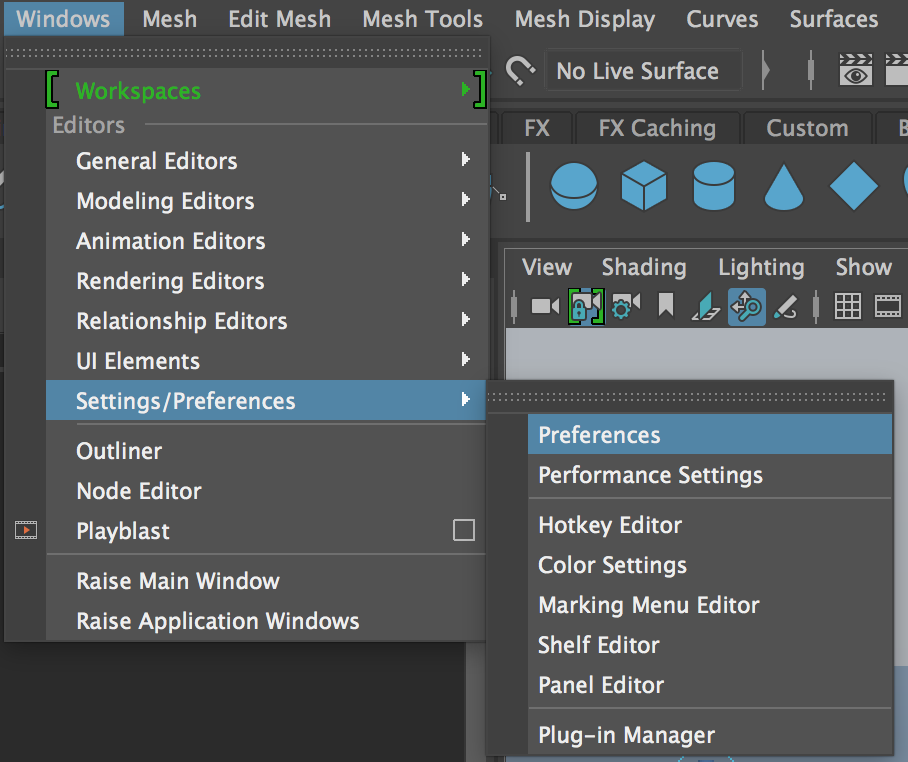
Go to
Animation Settings. You can open this by clicking the “running person” button in
the bottom right hand corner of the screen. You can also access it by going to
windows – settings – Preferences, then clicking on the Animation tab.
In “Tangents”
it says Default In Tangent: Auto and Default Out
Tangent: Auto. You want it to read Default In Tangent:
“Clamped” and Out: “Stepped”.
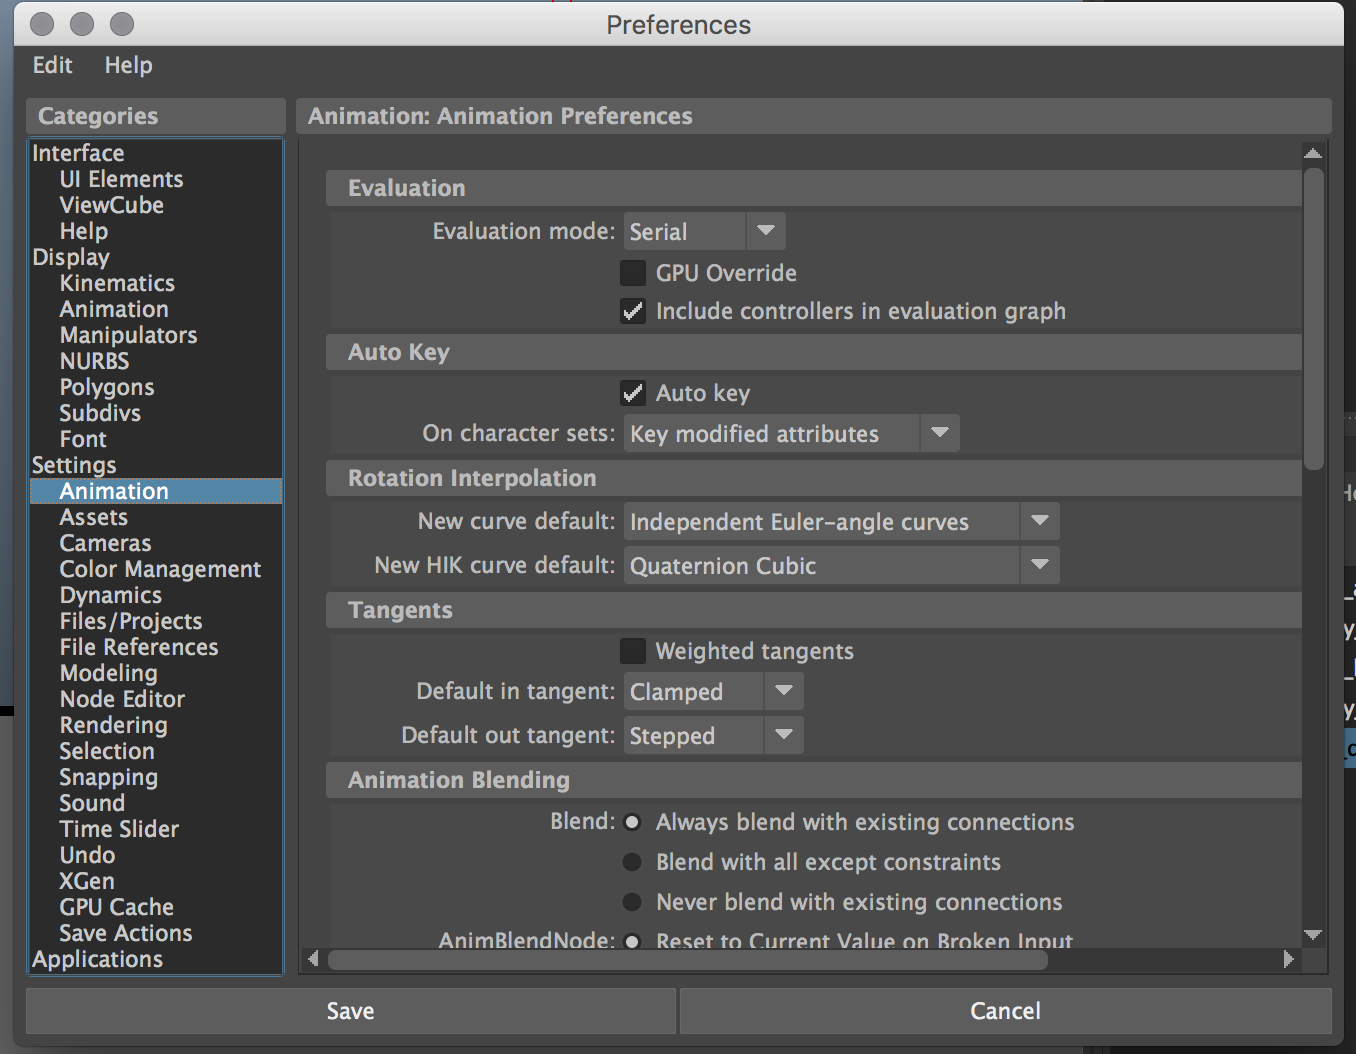
When you
animate in Maya, Maya will interpolate between keyframes for you. On “Auto” or “Spline”,
it will interpolate on a splined tangent, which makes it difficult to judge
timing and poses – especially when we are animating pose to pose, like in this
assignment.
Later we
will learn how to add the interpolation back into our motion.
Next, you’ll
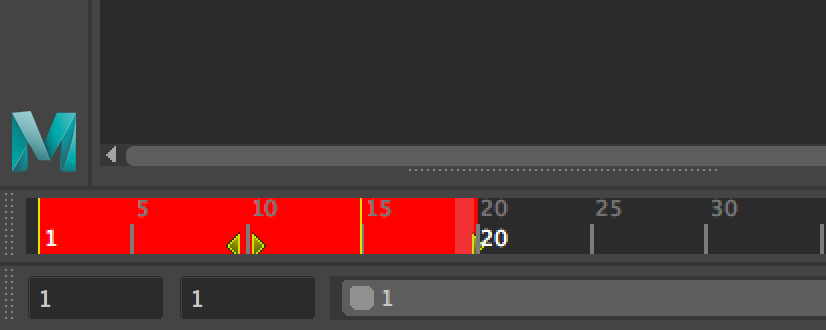
want to right click your timeline, go to Playback Speed, then select Real Time.
This makes sure it will preview in Maya in the appropriate 24 frames per
second.
Some General Animation and Maya Tips
When posing your ball, key both controls on the same frame.
If you stagger their keys (meaning,
for example, that the ball_anim's keys don't line up
with the squash_anim's keys), figuring out which key
goes to which pose will become frustrating later and slow down your workflow.
Keying all controls on the same frame is an important habit
to start now, as the number of controls per rig will only increase from here.
Keys should never land on partial
frames (for example, frame 3.14). To fix partial framed keys, highlight all of
the problem keys in the timeline, right-click on the selection, and choose
"Snap".
· Save iterations! You should save an iteration when all of
your key poses are set.
- The Editable Motion Trail is useful for reference.
Select the main ball anim then in the Animation
menu set, go to Visualize → Create Editable Motion Trail. Remember
to delete it when you're finished!
- The default playblast
resolution is 1280x720, but for making quick playblasts
just to look at your work, it may be faster to lower the resolution to
640x360. The easiest way to do this is to keep the Scale at
"0.50" in the Playblast Settings. Just
be sure to change it back to the original resolution before turn-in.
Let’s get to work!
You will need to start by setting your first keyframe. Marquee select both
the ball’s main anim and squash and stretch anim, then press “s” to set a keyframe. You’ll see all the
values in the channel box turn red – this means that you have keyed the anim! If you forget
to press s when posing the ball, your key will not be saved.
Let's start by defining the extreme poses for the ball: High, low, high, low, etc. We’ll make sure the first key is on frame one. The ball is already where we want it to start!
WHAT IS AN EXTREME!?
An extreme is the furthest a pose travels or stretches. In the case of the bouncing ball, this is all the highs and the lows. When animating Pose to Pose, we want to start with our key or story poses, then extreme poses, followed by breakdowns. For now, we want to get our extremes in, since they are the same as our key poses in this case.
Now, click on frame 15 in the timeline while both anims for the light ball are selected. To create a new keyframe here press 's'. Notice that a red line appears on the timeline indicating that this is a new keyframe.
Next, with the move tool selected by hitting w, left click and drag the ball with its main move anim so it is touching the ground along the path, then press “s” to save the pose. Don’t forget to key both anims!
Proceed to do this for each additional high and low position. The animation will play at 24 frames per second, so keep this in mind as you insert your keyframes. NEVER worry about getting the timing perfect on the first pass, right now you just want to get the frames in there. The same philosophy will carry on for character animation.
You can hit Alt+B to preview your animation. You can also hit the “play” button to the right of your timeline. Focus on the timing of the 'boinks', the point at which the ball hits the ground. Does it feel right for a ping pong ball? Before moving on you will want to adjust the timing so that it works.
Multiple frames can be selected by holding shift and left-click dragging on the timeline. You can then move the selected frame[s] by dragging them by left click and dragging the small yellow arrows that appear in the middle of the highlighted area. The first thing you will probably want to do is shift all the frames to the left, since frame 15 might be too late of a landing point.
You can also copy and paste your selected keyframe by middle clicking it, and dragging it to frame you want it at, then pressing ‘s’.
Your poses should all look something like what is pictured below. Note that all the poses are shown at once. This is via "onion skinning", which is an essential animation tool that allows you to see past and future frames as you work.
How do we do this?
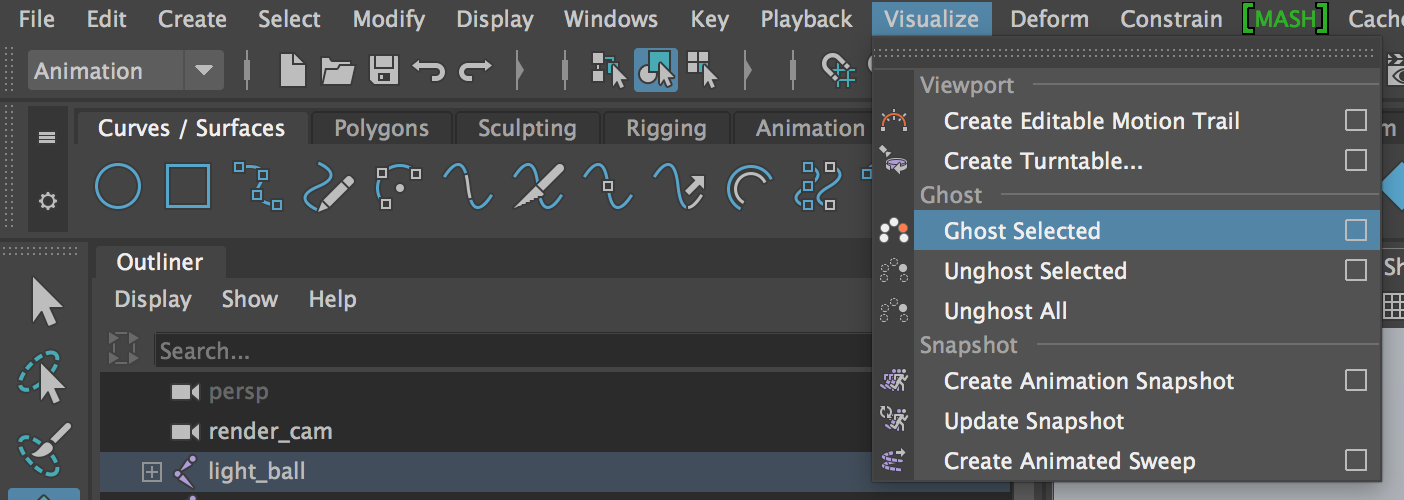
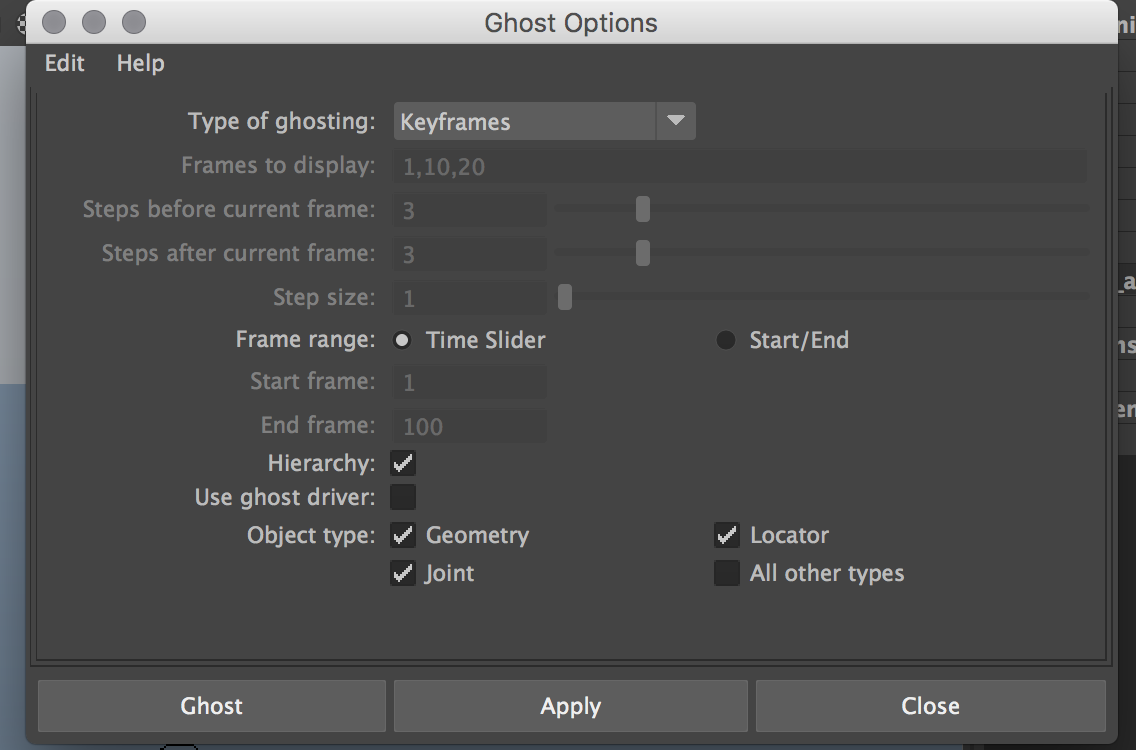
Selecting your anim, while in the Animation workspace, go to Visualize > Ghost Selected > Options and make sure that Type of Ghosting is set to “Keyframes” and then click “Ghost”. You’ll see all the positions of the keyed anim. To make it go away, go to Visualize > Unghost all.
We will revisit this more later.
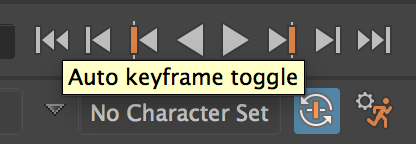
SIDE NOTE: AUTO KEY VERSUS MANUAL KEY
By now you must have noticed that keying every time you move an anim can be laborious. Also, if you create a new pose and
forget to make a keyframe, and move away in the
timeline – you lose all your work!
Maya has a solution. In the bottom right hand corner, next to the running
man, is the auto-key toggle tool. If you press it, every time you change the
spacing of a keyed object, a key will automatically be made.
The drawback of this solution is that it is easy to make accidental
keyframes.
Feel free to try using Auto-Key and keying Manually. Some animators find
they work faster one way or another. Pick whatever works best for you!
Posing: Breakdowns
Now that the extreme poses are defined, it is time to start shaping out the ball's path of motion. Before going into full blown straight-ahead animation (which is just doing a pose, advancing to the next frame, doing the next pose, and so on) you will first want to define some breakdowns. In this case, they will be keyframes centered timewise between the ball's extreme high and low poses.
Why is it important to define breakdowns? If we don’t, our animation won’t be fluid, won’t contain arcs, and won’t be defined. Breakdowns are incredibly important!
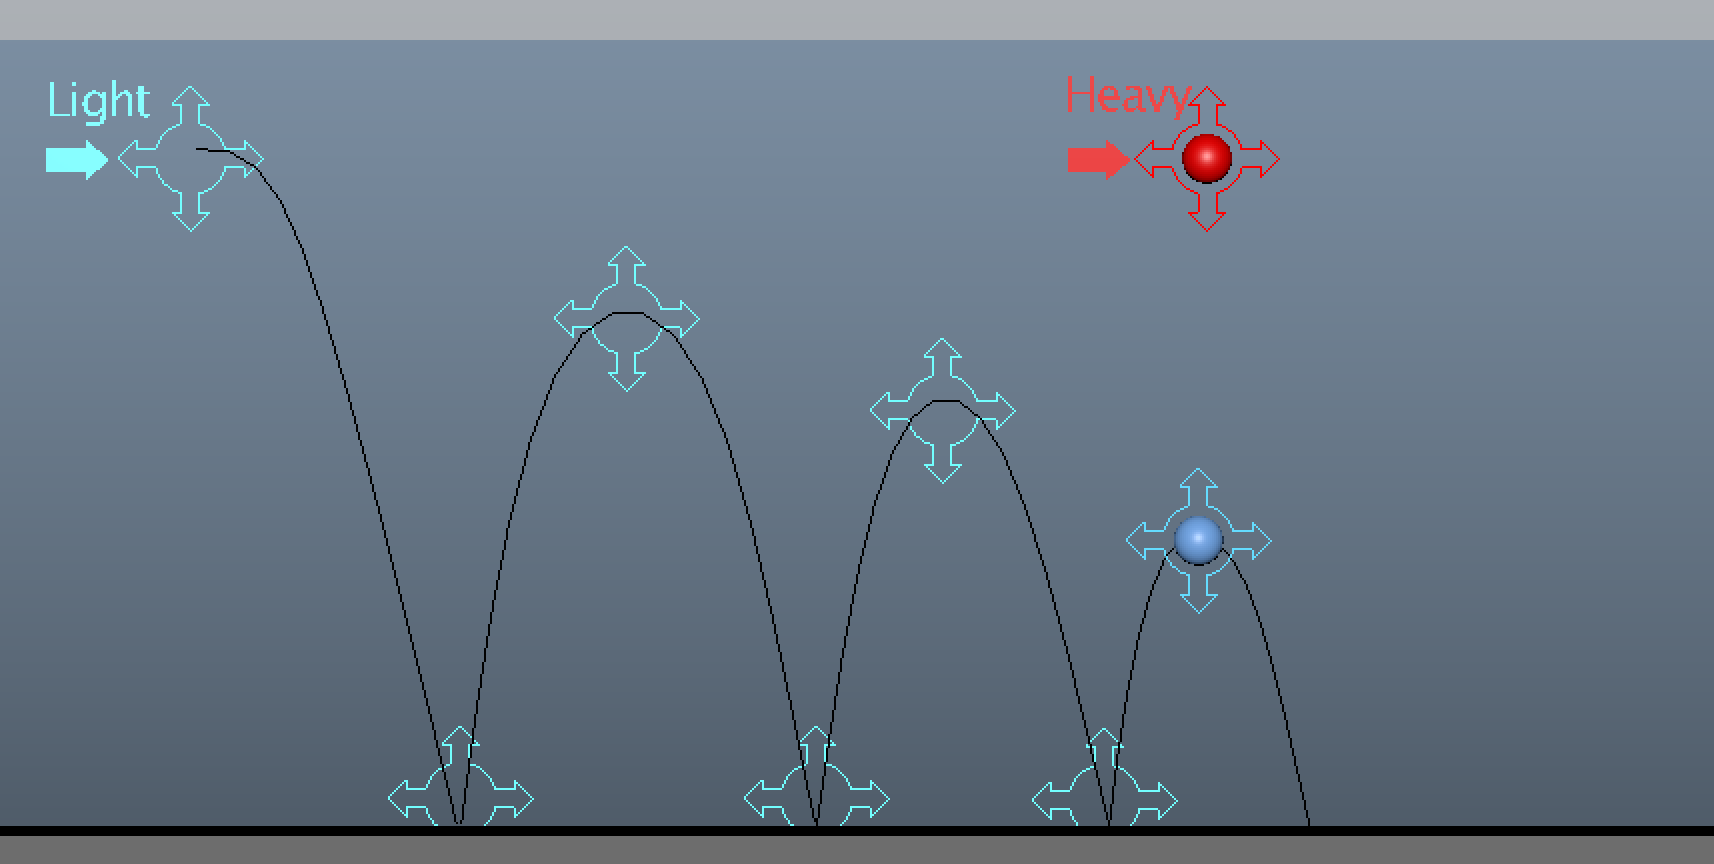
For each of these breakdowns, consider where the ball would be at that point in the animation. Spacing plays a critical role here. As the ball descends it will linger in the air longer before gravity takes full effect and it picks up speed. As the ball ascends from a bounce the opposite is true. Its momentum will carry it most of the way up before gravity begins to slow it down.
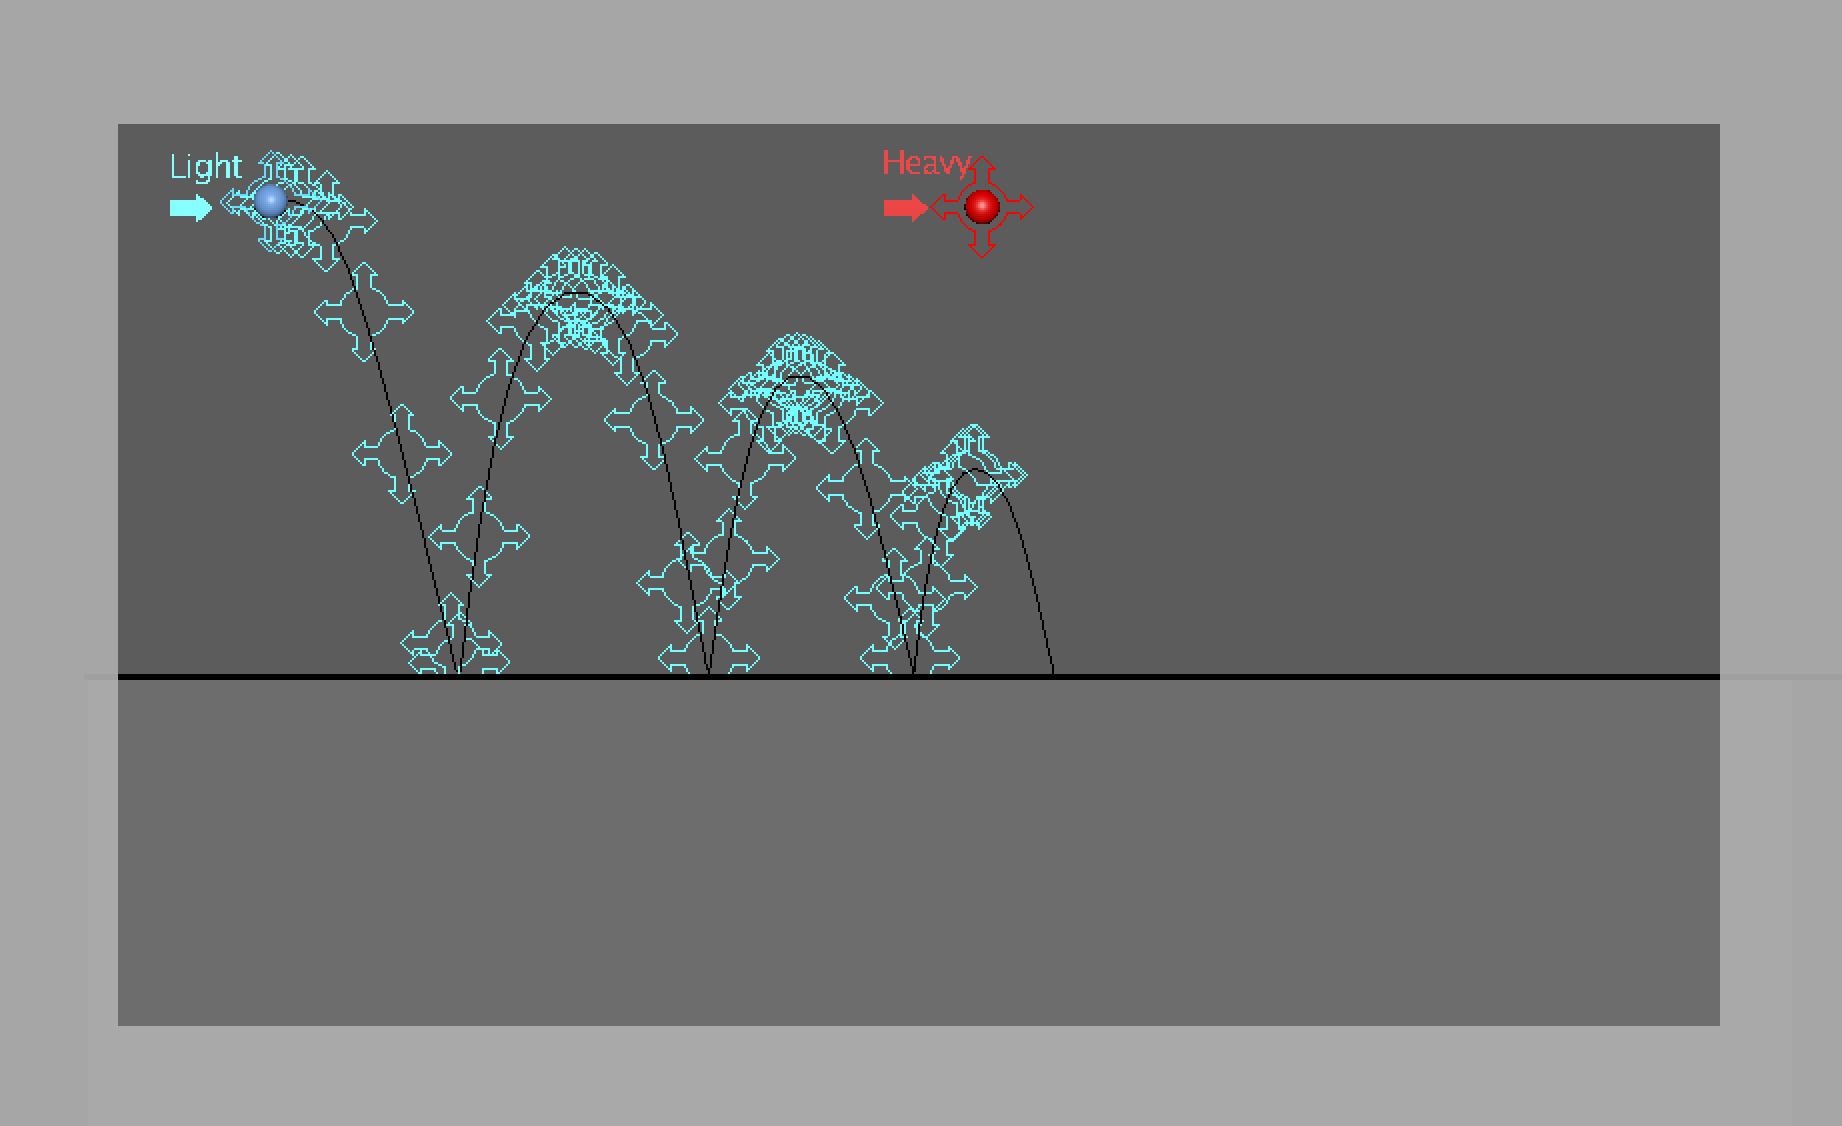
Check out the image below to see this in effect. Similar to when you finished your first set of poses, you should spend some timing playing back your animation and adjusting the timing before moving on.
While previewing your animation, you can click the “V” for Visibility on the “light_anims” display layer
Straight-ahead Animation
The next step is to fill in the rest of the frames doing some frame by frame straight-ahead animation. You will be doing this in segments, filling in each space between the ball's extreme and breakdown poses. Begin with the first two segments up until the ball hits the ground. Click on frame 2, move the ball along its path of motion, then press s. Click on frame 3, move the ball, then press s, and so on.
This is called animating on ‘ones’. This is because we are choosing the pose for each individual frame. For all further assignments, we will not be animating on ones, but will be animating on 2s, 3s, and 4s, with Maya creating all the in-betweens we need with interpolation. But until we reach that point, we will be learning what happens between the frames by defining them.
If you do want to judge your timing however, you can select all of your anims – double click the timeline so it highlights all of our frames, and take a look at Maya’s interpolation by right clicking the timeline and choosing “tangents – Auto”. We get a look to see what Maya thinks the animation should look like. This can be helpful in deciding where to place your breakdowns, but Maya will always choose the easiest path – not the most accurate! When you’re done, remember to select all anims, then double click the timeline, right click and choose “tangents – stepped”
Consider how much the ball should move from frame to frame. The same concept of spacing you used when establishing breakdowns still applies. It's just on a smaller scale. Once you have the first couple of segments complete play back your animation to make sure it looks right. Modify poses as needed, even if you need to tweak your initial extremes and breakdowns (just make sure not to change those too much).
This is where ghosting will come in handy. It will give you a more complete view of your motion and allow you to tweak your keyframes with visible context. Follow the instructions below to enable it.
Now finish the rest of the segments. Once done, it should like something like below, with most of the frames clumped at the top of its arcs and more space between the ball as it gets closer to the ground.
Notice how the ball eases in and eases out of the arc. This is the animation principle of “ease in, ease out” or “slow in, slow out”. All objects, limbs, and things in motion exhibit this property. The bouncing ball is the purest example.
IMPORTANT TIP:
ROLLING or FLIPPING. Flipping (also known as Rolling) is a technique a 2D animator would use flip between drawings by interweaving their fingers between each drawing and flipping them sequentially like they were a flipbook. We do this with our carrot keys “< and >”, and “Alt +< and Alt + >”. We roll between poses to see how each pose relates to the next, to imagine them in motion, and it is a quick way to judge how well the poses flow and follow the arc of motion.
Get into the habit of rolling through frames and you’ll be a pro in no time.
HEAVY BALL
Now repeat this animation process on the heavy ball. Though it will bounce
differently, the same principles of timing and spacing will apply. And
be sure to let the heavy ball roll naturally to a stop. Most objects
need to settle to a stop when they are stopping after being in motion – this
tool will help you add a lot of realism and believability to your animation. Don’t forget it, for this assignment
and all future animation!!
Remember….LOOK
AT YOUR REFERENCES
Export Part A Movie
You are not completely finished yet, but this is a good place for a check-point. Save your Maya project file as bb_animation.ma. You will be turning this Maya file and the following video into Canvas.
Remember, you are submitting TWO Maya
files and TWO videos! One with Squash and Stretch, and one without!
PLAYBLAST
Next, you will need to export a
movie, or “playblast” for review. This playblasting tutorial will run through how
to do this. Save the movie file as bb_animation.avi.
Before doing so you'll need to make sure the reference paths don't show up in the video. Click the box with the V for Visibility next to the curve layers and the reference paths will disappear. You can do the same with light_anims and heavy_anims. Alternatively, you can hide all NURBS CURVES in the scene, as is shown in the playblasting tutorial.
Before moving onto Part 2b, you will
want to be working in a different file. Save a copy of your Maya project file
as bb_animation_with_ss.ma.
Part 2b – Animating a Bouncing Ball with Squash and Stretch
Squash and Stretch
Now that we have a separate file
saved out, it’s time to add the squash and stretch!
For this assignment you shouldn't
see squash and stretch on the ball when playing at full speed, but you should
be still be able to feel it. Squash
and stretch that spans too many frames will make the ball look like it is
willing itself to jump - or just sticking to the ground. In general, use one or
two frames of squash preceded by one frame of stretch contacting the ground.
You've practiced arcs, timing, and spacing, but now it's time to do another pass on your motion to add a bit of squash and stretch. This will act both like a motion blur, thus reducing any sort of strobing effect, but ultimately it will give your animation more life and make it more interesting to watch. If you add too much stretch however, your ball will begin to look more like a cartoon. This is a stylistic choice that can serve an animator well, but for this assignment we don’t want to exaggerate it too much. Feel free to try exaggerating the squash and stretch though, as long as you submit a version that is more like your reference.
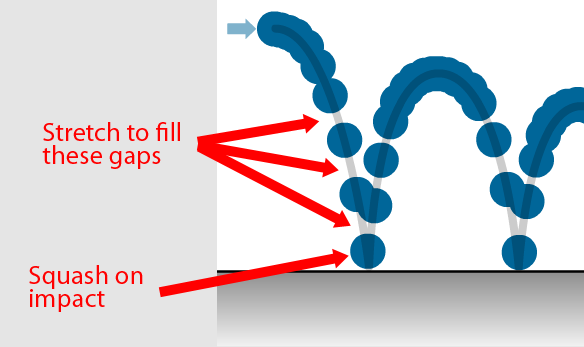
A good rule of thumb to follow here is that stretch can happen any time there is a significant gap between the ball between frames. You will most likely not have much of this in the heavy ball beyond the initial fall, but there will definitely need to be some in the light ball. Squash should happen any time there is any sudden stop in force, such as when the ball impacts the ground.
Another way to think of it – the faster an object is traveling, the more stretch that should happen. We know that the object is traveling quickly because there is more spacing.
Some 2D examples are provided to help explain this idea:
Go to the frame right before the first gap happens. You will be starting the stretch here, though on this particular frame it will only be a tiny bit. For this we will be using Maya’s virtual slider, which is activated by selecting a channel box value, then middle clicking in the viewport, then dragging left and right.
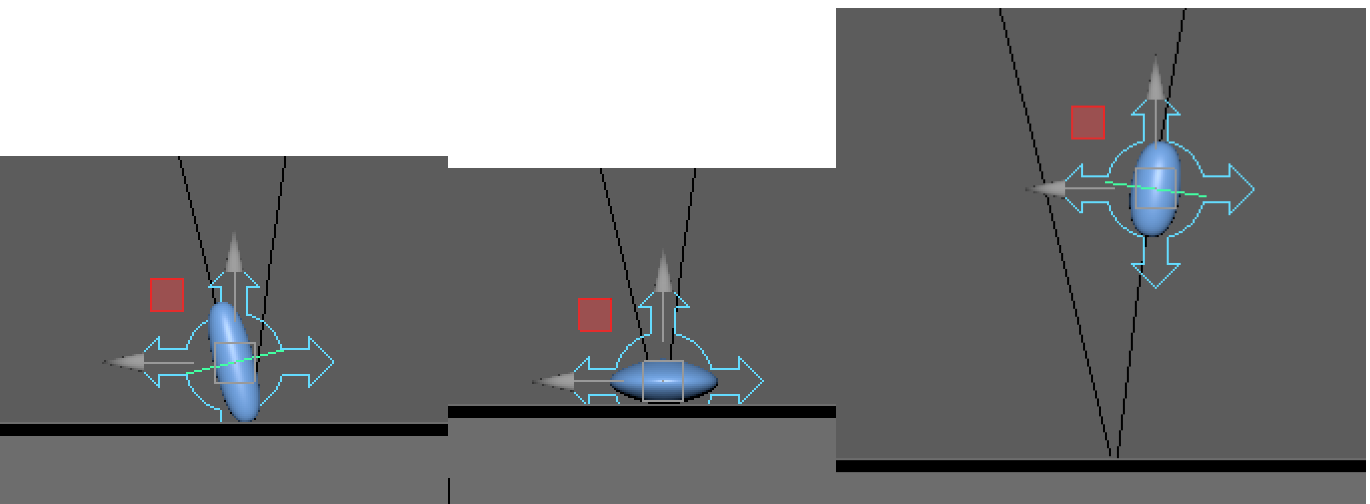
You’ll start by clicking the middle of the ball. This will select the “Squash and stretch” anim. You’ll notice that the squash and stretch anim also has rotation on it, if you look at the values to the right of the screen in the Channel Box.
Activate the virtual slider by clicking the “Squash and Stretch” value in the channel box, middle clicking in the viewport, and moving the slider back and forth. You will see the ball squash and stretch. Wow!
Next press e to activate the rotate tool, then rotate the ball so the stretch is facing in the correct direction.
A quick tip: You want the values for the stretch to be moving in a consistent direction. Start small, like with a value of .1, then build up to a bigger value right before it hits the ground, like .7.
Any time squash and stretch is utilized the volume of the object must be maintained or else the resulting motion will look too squishy and like the object is growing or shrinking in size. Luckily our rig allows us to do this with no issue. We do want to make sure that values don’t oscilate (we don’t want to go from a stretch of .5 to .4 then back to .5. We want our values to change consistently).
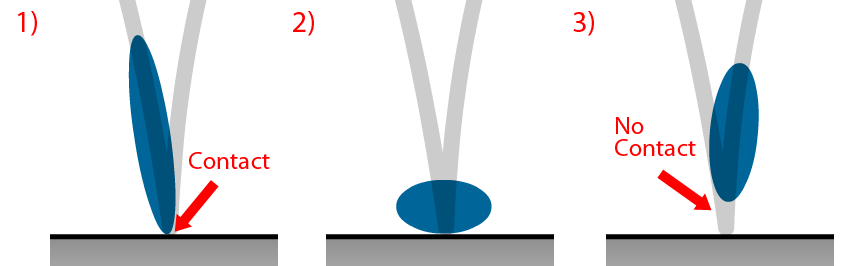
Proceed to stretch out the rest of the poses. When you get to the frame right before the ball hits, make sure the stretched ball is contacting the ground. This will emphasize the contrast between when the ball is stretched and when it is squashed, thus giving the impact more force.
When leaving the ground, the ball should not be contacting the
ground, otherwise the ball looks like it sticks to the ground. Remember, 1 frame can make all the
difference in the success of the illusion!
In this 2D example below, the squash and stretch are fairly exaggerated. Yours does not necessarily have to be this way; experiment with what looks best. Too much exaggeration will look too cartoony, which we don’t want for this assignment. Try to get the right feeling when watching it.
Here’s an example of a completed bouncing ball with squash and stretch
You will want to playblast your file to make sure everything feels right. Sometimes Maya will slow down the scene, so for this reason we playblast often to review our work.
Export Part B Movie
Make sure to save bb_animation_with_ss.ma.
As done previously, hide your reference paths and anims, then playblast your animation as a Windows AVI and name the file bb_animation_with_ss.avi, then upload both it and the .ma file to Canvas.