Production Rig Basics
Most large production houses and game development studios have their own rigging setup. The animation capstone is no different in this regard. This tutorial is to orient you with the style of rig used by the animation capstone for bipedal characters. Luckily, rigs across the industry share a lot of common features, so once you've familiarized yourself with one rig it will be relatively easy to pick up another.
Be sure to install this year's production workspace to utilize some of the rig's features.
The COG
The first control you should familiarize yourself with is the COG. Despite the control's resemblance to a cog, it's actually an acronym for center of gravity. When posing a character you usually want to start out with the more broad strokes then work your way out to the details, posing the main body then working out to the fingertips/toes. That is why this is one of the first controls you should manipulate. Its translation and rotation will give a rough estimate of where the character's weight is, roughly positioning the character's entire upper body versus the lower body.

The Arms and Hands
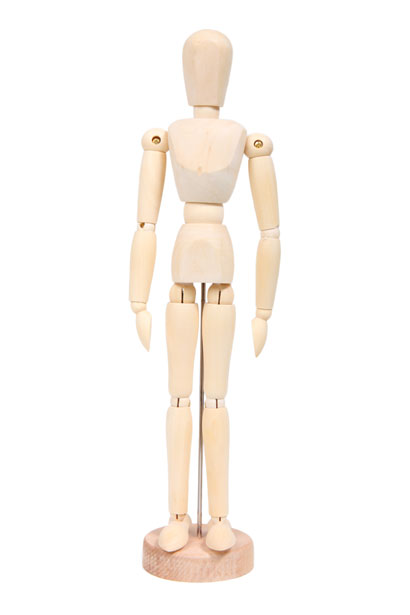
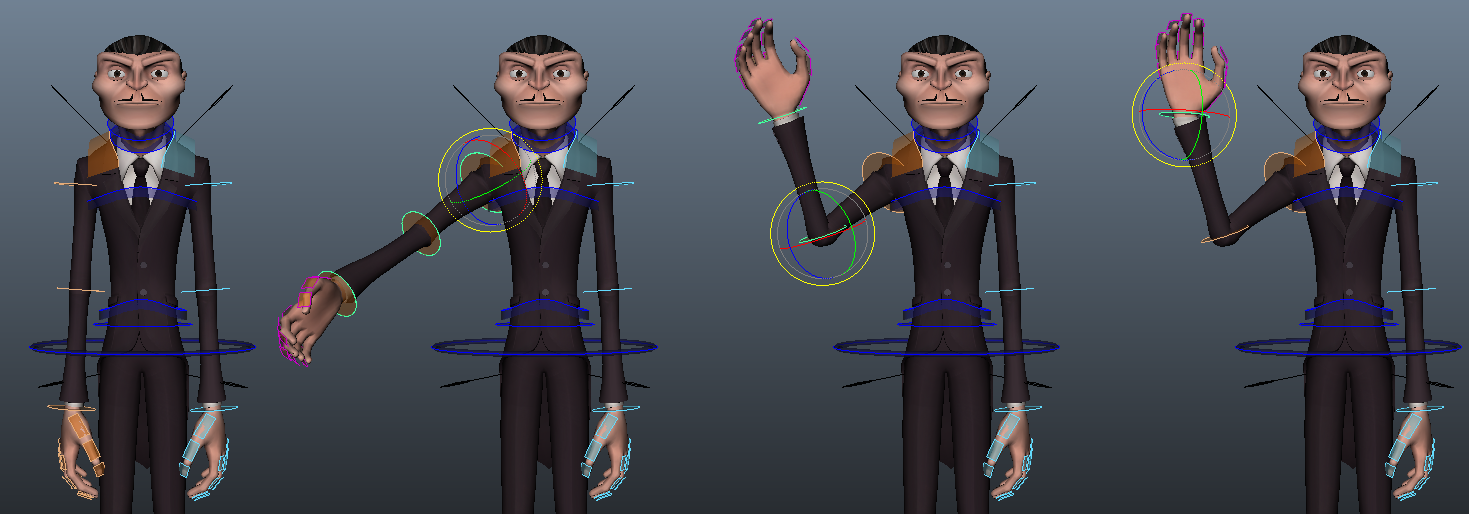
The arms use a basic style of control called FK, which stands for forward kinematics. With this style of control, you start from the base of the control chain and work your way up, rotating each segment forward until the desired pose is reached. Posing in FK is much like posing the limbs on one of those short wooden mannequins.
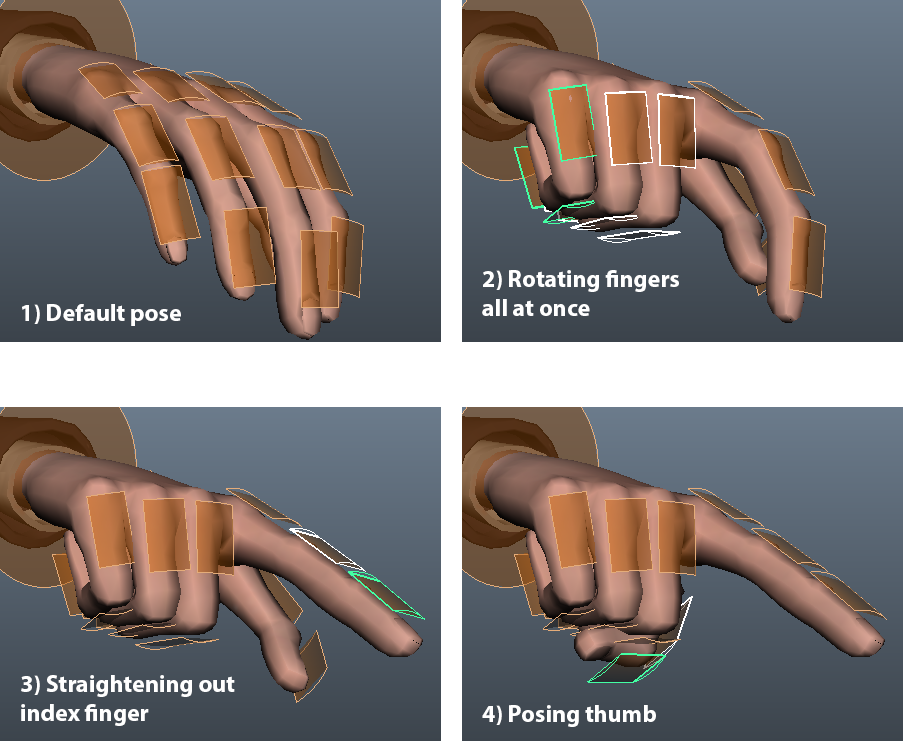
Like the arm, each finger is made up of an FK chain. Since this totals 15 controls it would be quite tedious to pose each finger segment individually for every hand pose. One trick to avoid this tedium is to select a series of finger controls all at once and rotate them.
It won't get you 100% to your target pose, but it will give you a fairly reasonable starting point.
The Legs and Feet
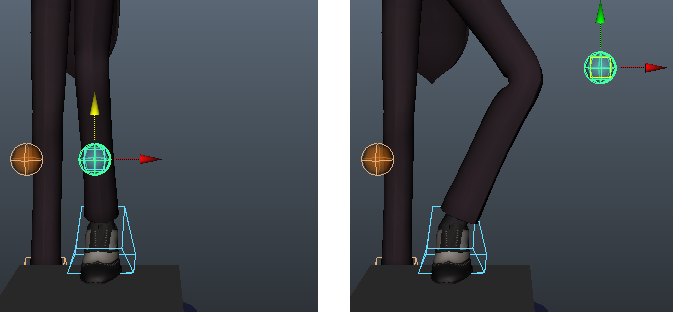
The legs use a control system called IK, short for inverse kinematics. IK is sometimes referred as a "goal based" control system. You position the end of the control chain, in this case a foot, and Maya will figure out how to rotate everything leading up to it. It is the polar opposite of FK, where you instead pose starting from the base of the chain.
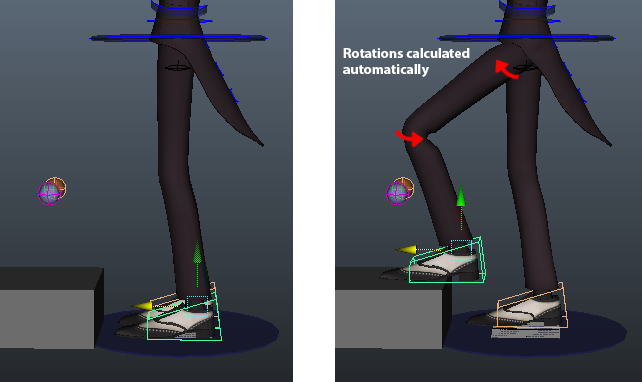
Maya still needs some guidance on how to rotate these joints, though. For this reason there is one additional control on each leg that aims the knee.
So far controls have just been handles you grab in the scene then move or rotate. Some of these controls have more advanced attributes, however. When you select the foot and open the Channel Box you should see a list of these extra attributes.
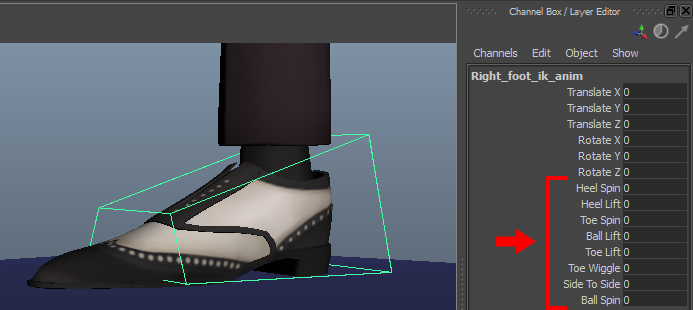
As fun as it is to type in numbers, the easiest way to modify these attributes is to use the "virtual slider" to interactively change the values. Click the name of an attribute to select it. Then in the viewport hold down the Middle Mouse Button and drag back and forth. If you hold down Ctrl before doing so you will get finer control.
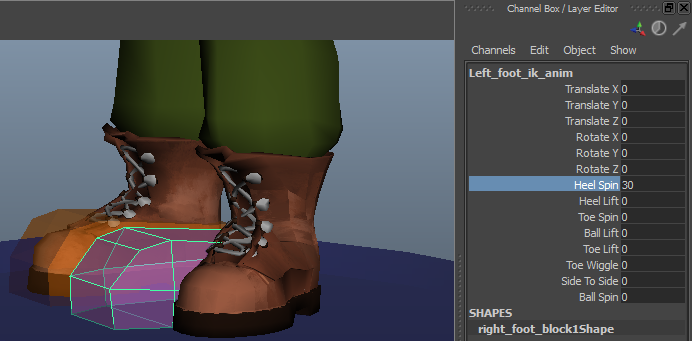
Here is a demonstration of what some of the foot attributes do:
-
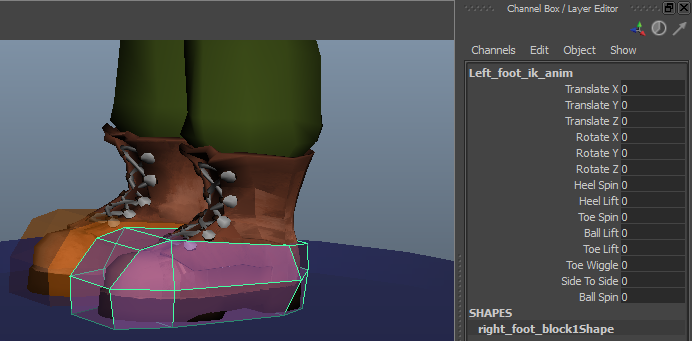
Default pose
-
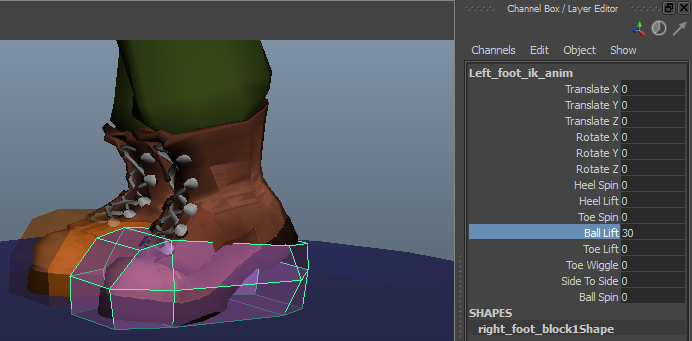
Ball Lift - Lifts the heel while the toe stays on the ground.
-
Heel Spin - Pivots the heel relative to the direction of the foot control.
-
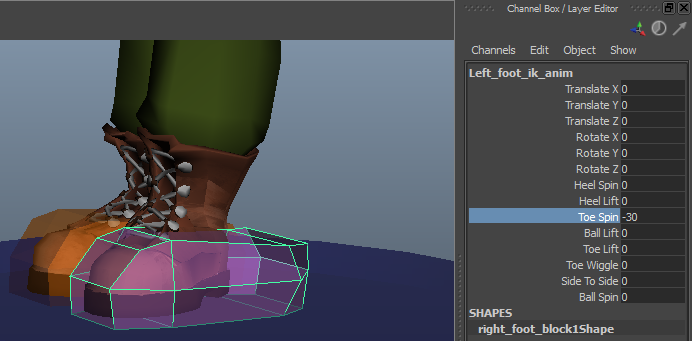
Toe Spin - Pivots the toe.
-
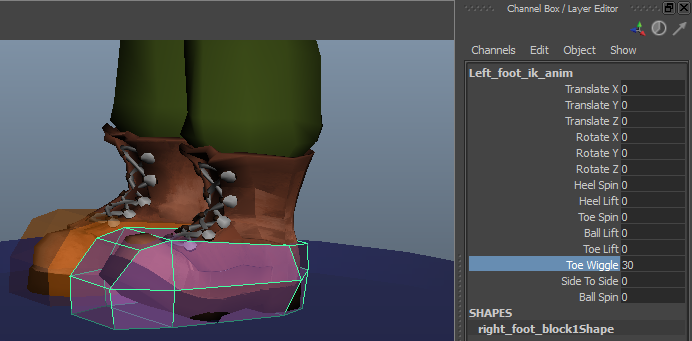
Toe Wiggle - Wiggles the toe. In the FK leg there is a control to handle this.
FK/IK Switching
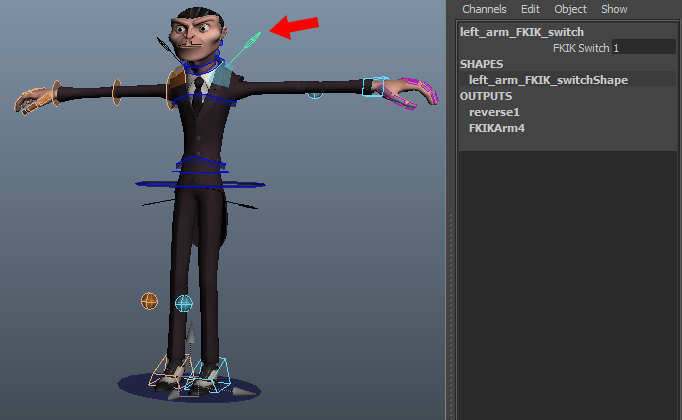
Though the production rig comes defaulted to FK arms and IK legs you can switch between the two based on the needs of your animation. Each limb comes with a switch control that has a single attribute which toggles the control chain between FK and IK.
Note that each each FK chain and IK chain is treated as its own independent rig. For example, if you pose the left arm in FK and then switch it to IK it will have a different pose, most likely the default pose.
This brings us to the concept of "FK/IK matching". If you want to switch from FK to IK (and vice-versa) and match the pose to the previous control scheme you need to either 1) Manually re-pose the limb to what it was or 2) Have some system automatically do it for you. Luckily, such a system exists within the production workspace!
Select any control from the limb you want to switch then hold down Ctrl+Shift+a and Left Click to bring up the rig's marking menu. Then go to Switch → Align Switch to toggle between FK/IK have have Maya do the matching for you!
The Spine
The spine has a slightly different flavor of FK called RFK, or "reverse forward kinematics". Rather than having a series of FK controls to pose the curve of the spine there are only two: one at the top of the spine and one at the bottom. Rotating one of these controls guides the curve of the spine in a certain direction. Note that both controls work independently of each other.
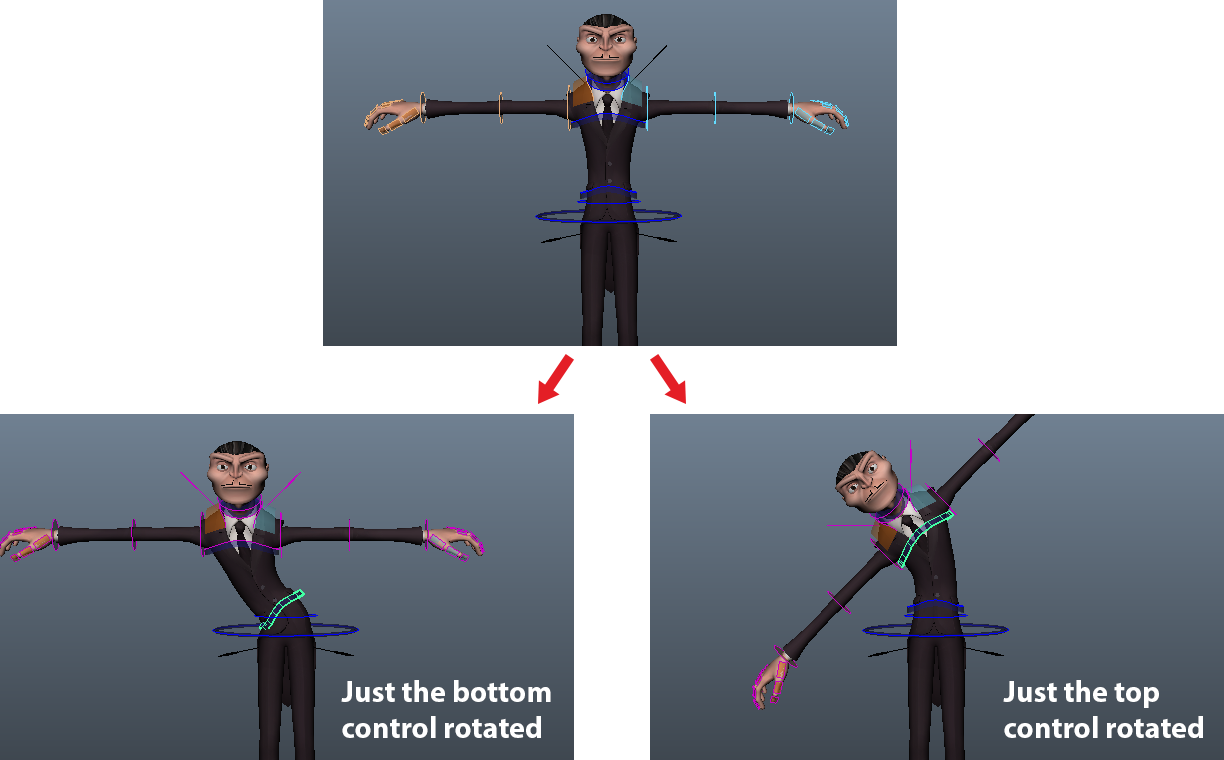
To aim the whole upper body in one direction without changing the curve you just need to rotate both controls at the same time.

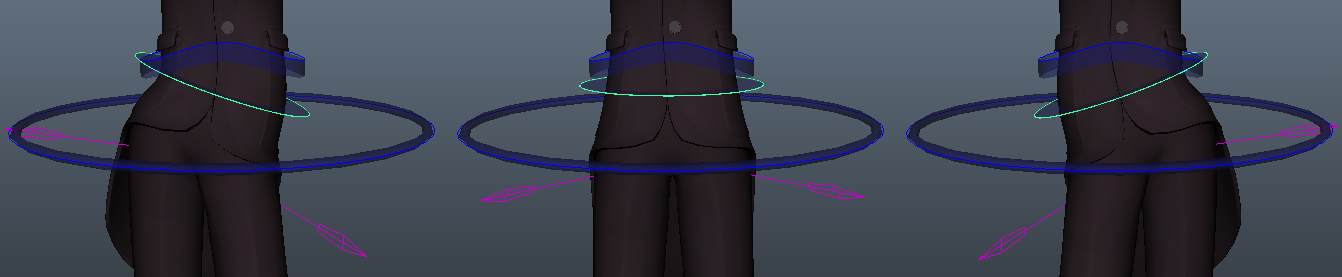
Right below the spine is the pelvis control. It works independently of the RFK system and allows you to easily shift the hips around.
Marking Menu
In addition to FK/IK switching, the character rig marking menu mentioned earlier provides a couple of other features which will be useful for animating. To access this marking menu you always select at least one control on the character then hold Ctrl+Shift+a and Left Click.
The features you will probably use the most are Select All Anims and Key All Anims.
Select All Anims will select all of the rig's keyable controls. (Note that rig controls in the animation capstone's system are always referred to as "anims".) This is a more reliable way of making sure you select everything, as just marquee selecting anims will sometimes miss certain controls.
Key All Anims will set a keyframe on every anim. It is the equivalent of selecting all of the controls and hitting 's' to set a keyframe. You will want to do this whenever you create a new pose for your character.
Finally, navigating to Default Pose → Character will reset your character to the default T-Pose.