2D Ball Animation Tutorial
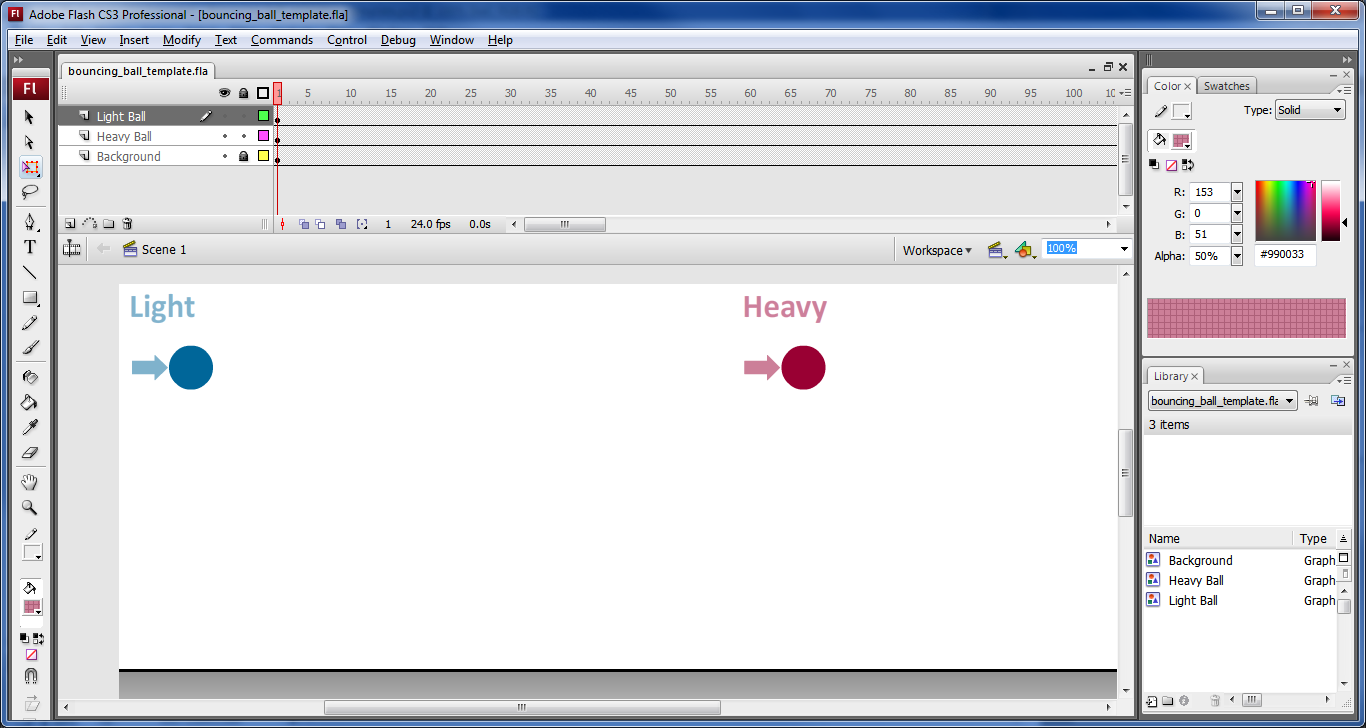
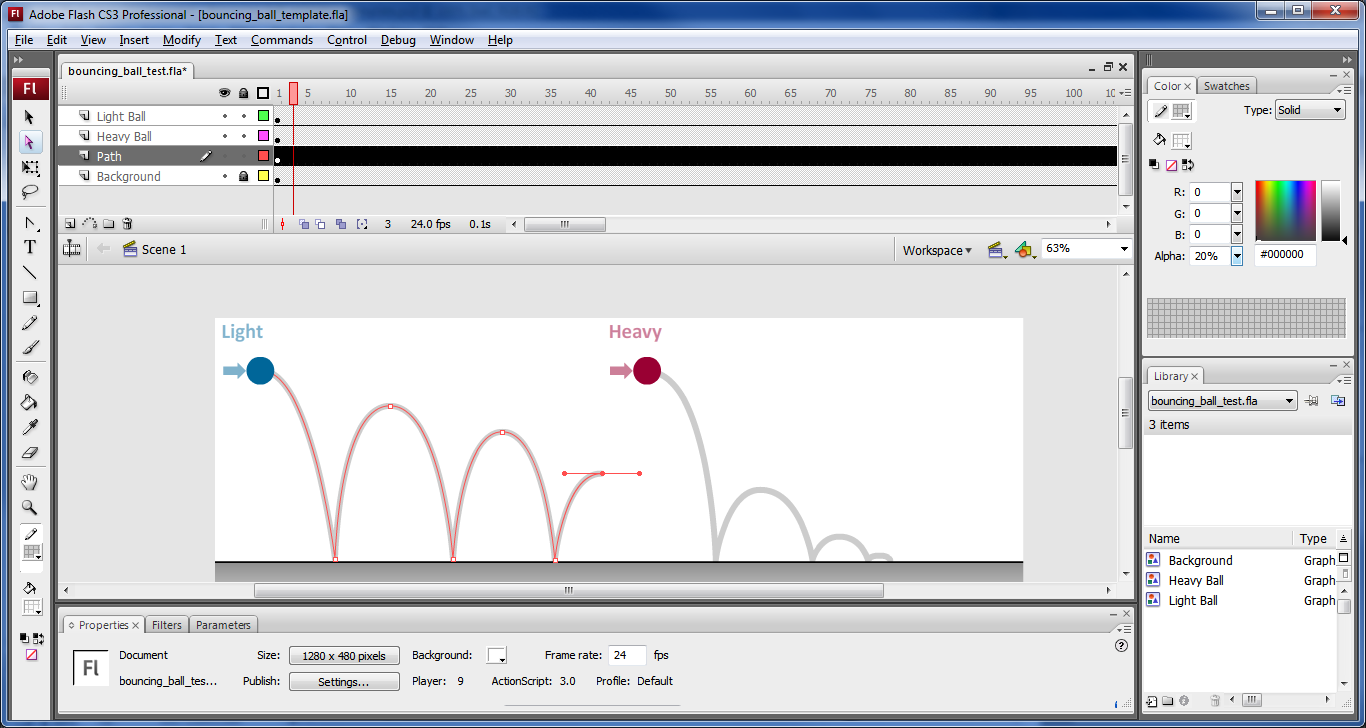
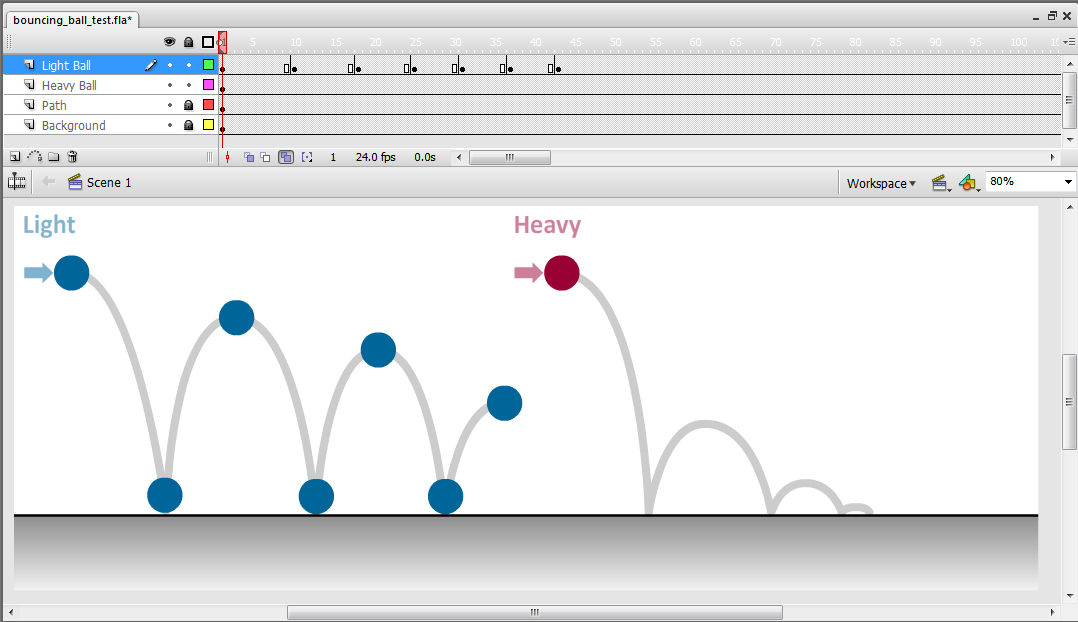
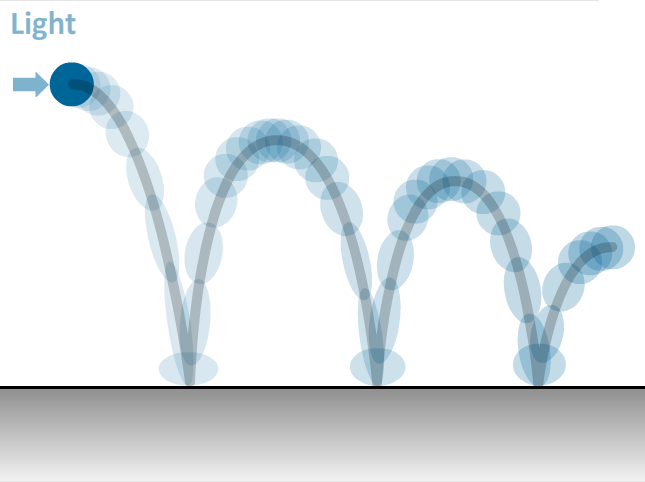
This tutorial will go over how to animate a bouncing ball in 2D using Adobe Flash CS3. It will use the bouncing ball template pictured below as a starting point. The overall process will involve making a path of motion for reference, setting a series of keyframes on both the light and heavy ball to define their motion, to finally creating and exporting the animation from Photoshop.
Part 2a
Path of Motion Reference
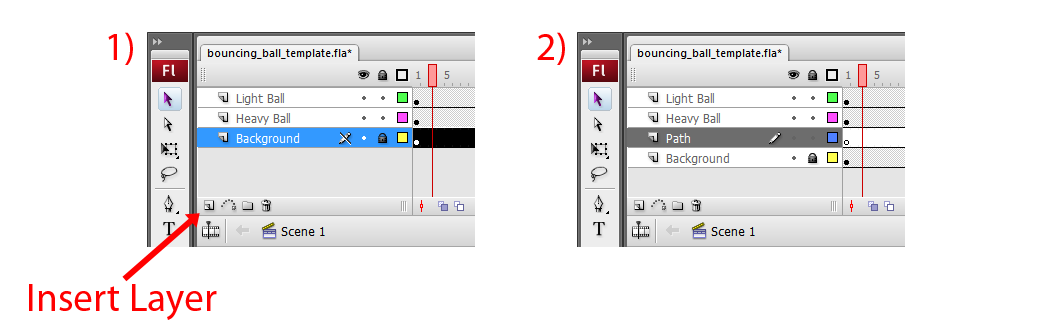
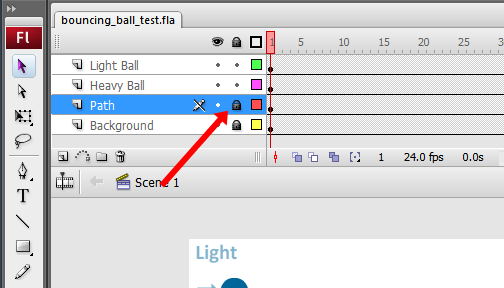
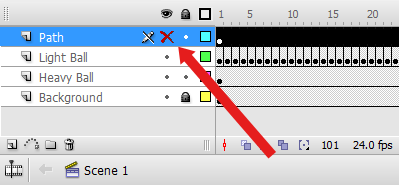
The first step is to plan your movement. In the case of the bouncing ball it's a bunch of arcs representing how it moves through the air. Select the Background layer and click the button indicated below to insert a new layer above it.
Next double click the new layer and rename it to "Path".
With the Path layer active, you can draw your path of motion using the Pen Tool.
Hit the 'p' key to activate the Pen Tool. Before using the tool you will need to set up the its line attributes. In the box on the bottom left of the screen set the paint attributes to the following values.
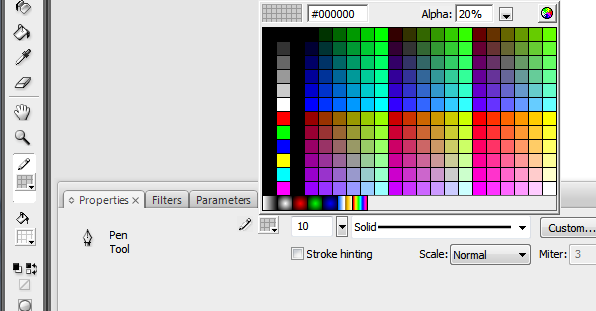
- Color to black (Hex value #000000)
- Alpha to 20%
- Line Type to Solid
- Line Width to 10
With the Pen Tool ready you can click around the screen to create a path. To make a smooth curve, left-click hold and drag each time you create a new path node. This will cause handles to appear that control the direction of the path. You may want to test this out a couple of times to get a feel for how it works. Repeatedly undo back using Ctrl+z to before you created the test paths.
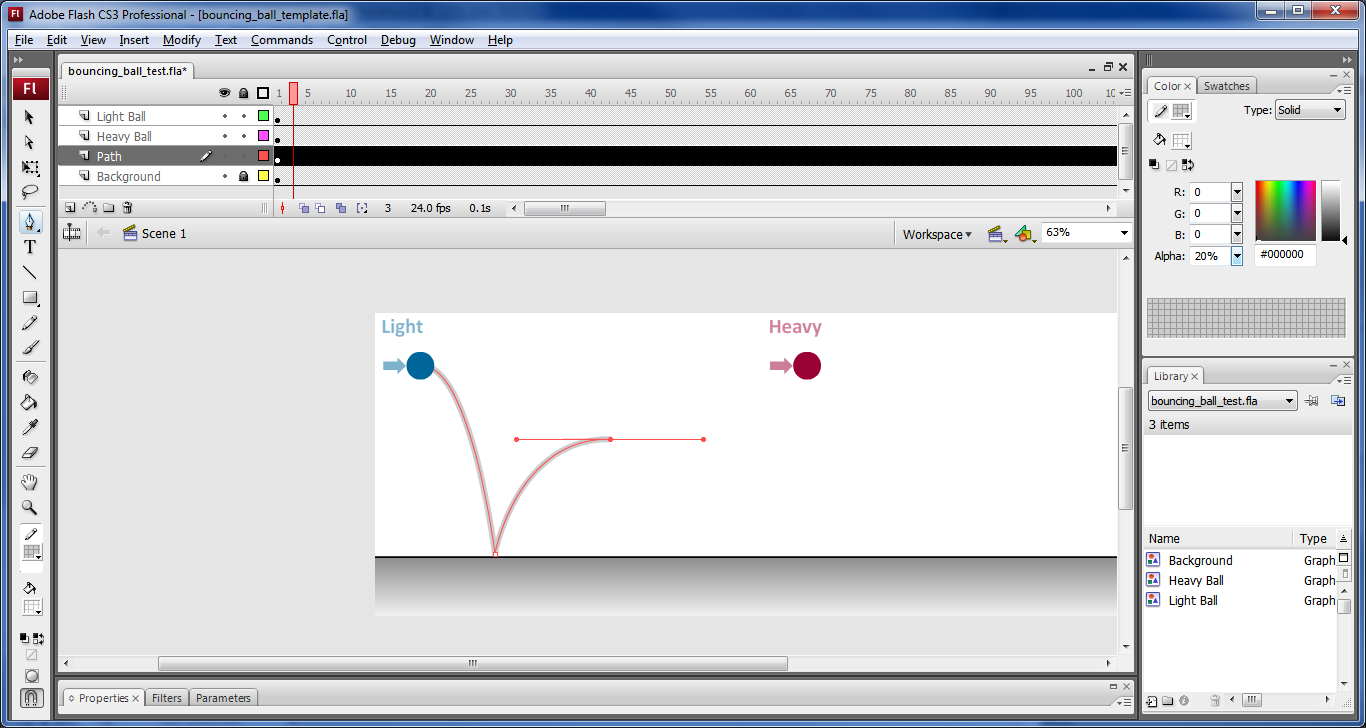
Once you've gotten the hang of the pen tool, it's time to start drawing the path of motion for the ball. Left-click hold at the starting position of the ball, hold shift after moving the mouse, then move the mouse and extend the handles out horizontally. The next node touching the ground is just a single left click. By not adding handles to the second node, the curve will end at the ground with a sharp point. For the next node, repeat the process of left-click holding, holding shift, and extending the handles horizontally. Alternate between these steps until you have a suitable path.
You can edit the nodes using the Subselection Tool. Hit the 'a' key to activate it. This will allow you to select and move individual nodes along the path as well as their handles.
To finalize your reference path, click the dot in the second column to the right of the layer name to lock the layer. This is so you won't accidentally modify it when setting keyframes on the balls.
Posing: Extremes
Now that you have set up the reference path it is time to define a series of keyframes on each ball layer. A keyframe is basically a "pose" defined at a particular point in time. Your animation will just be a series of these. It will be best to fully animate one ball at a time. Let's start with the light ball.
By default there is already one keyframe on each layer. The black dot on the timeline represents a keyframe, and the bar extending out from it is how long it is held for. You will be defining new keyframes within the extended bar.
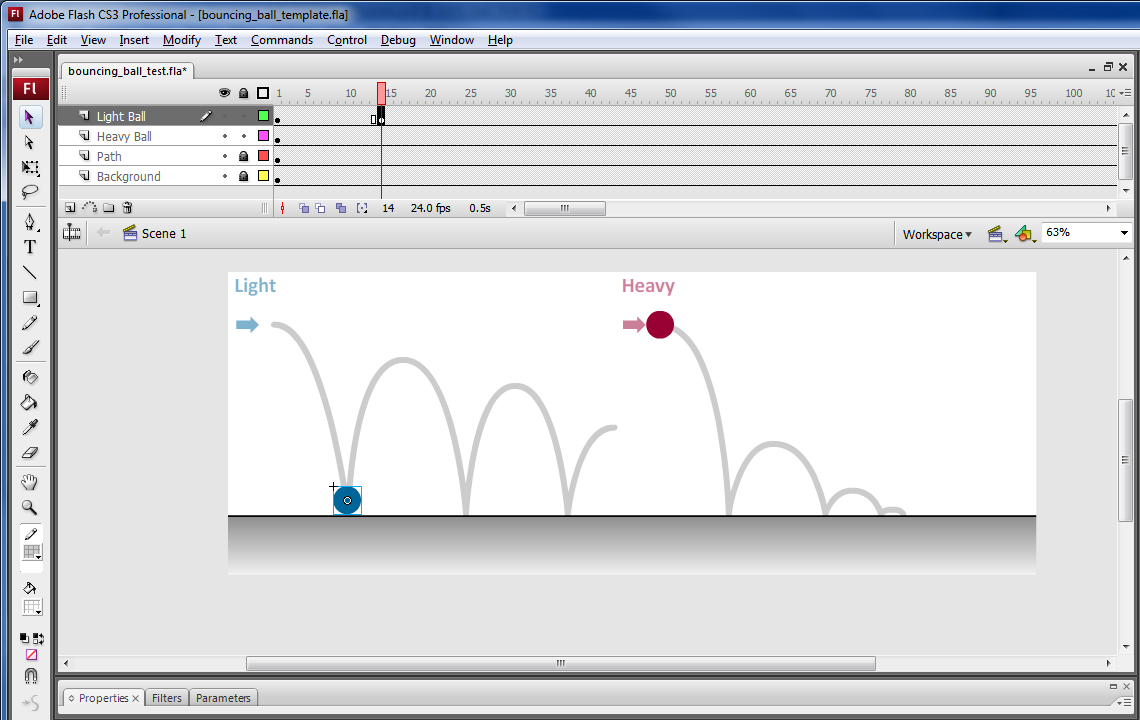
Let's start by defining the extreme poses for the ball: High, low, high, low, etc. Click on frame 15 in the Light Ball layer's timeline. To create a new keyframe here press 'F6'. Notice that a black dot appears on the timeline indicating that this is a new keyframe.
Next, left click and drag the ball so that it is touching the ground along the path.
Proceed to do this for each additional high and low position. The animation will play at 24 frames per second, so keep this in mind as you insert your keyframes. Don't worry about getting the timing perfect on the first pass, right now you just want to get the frames in there.
You can hit enter to preview your animation. Focus on the timing of the 'boinks', the point at which the ball hits the ground. Does it feel right for a ping pong ball? Before moving on you will want to adjust the timing so that it works.
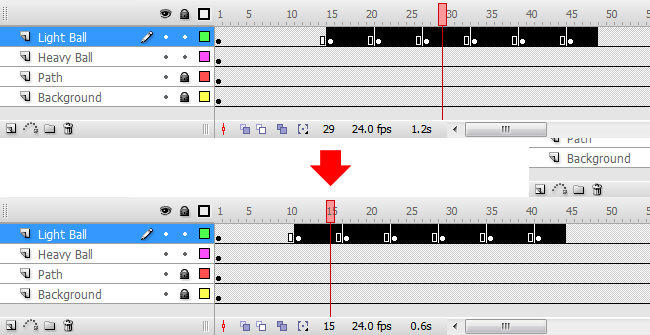
Multiple frames can be selected by left-click dragging on the timeline. You can then move the selected frame[s] by dragging them. Note that you will want to start your selections with a keyframe at the front, because if you do not moving a section of frames will cause Flash to automatically create a keyframe there (most likely at a place where you don't want it). The first thing you will probably want to do is shift all the frames to the left, since frame 15 might be too late of a landing point.
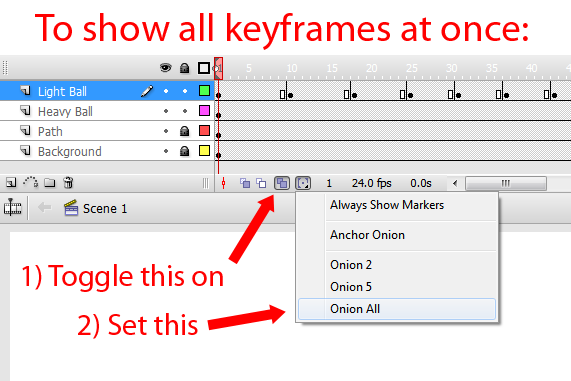
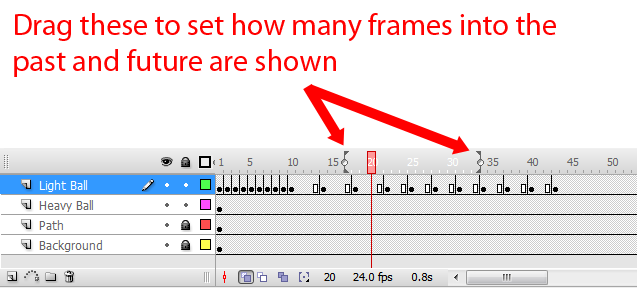
Your poses should all look something like what is pictured below. Note that all the poses are shown at once. This is via "onion skinning", which is an essential 2D animation tool that allows you to see past and future frames as you work. We will revisit this later.
Posing: Breakdowns
Now that the extreme poses are defined, it is time to start shaping out the ball's path of motion. Before going into full blown straight-ahead animation (which is just doing a pose, advancing to the next frame, doing the next pose, and so on) you will first want to define some breakdowns. In this case, they will be keyframes centered timewise between the ball's extreme high and low poses.
For each of these breakdowns, consider where the ball would be at that point in the animation. Spacing plays a critical role here. As the ball descends it will linger in the air longer before gravity takes full effect and it picks up speed. As the ball ascends from a bounce the opposite is true. Its momentum will carry it most of the way up before gravity begins to slow it down.
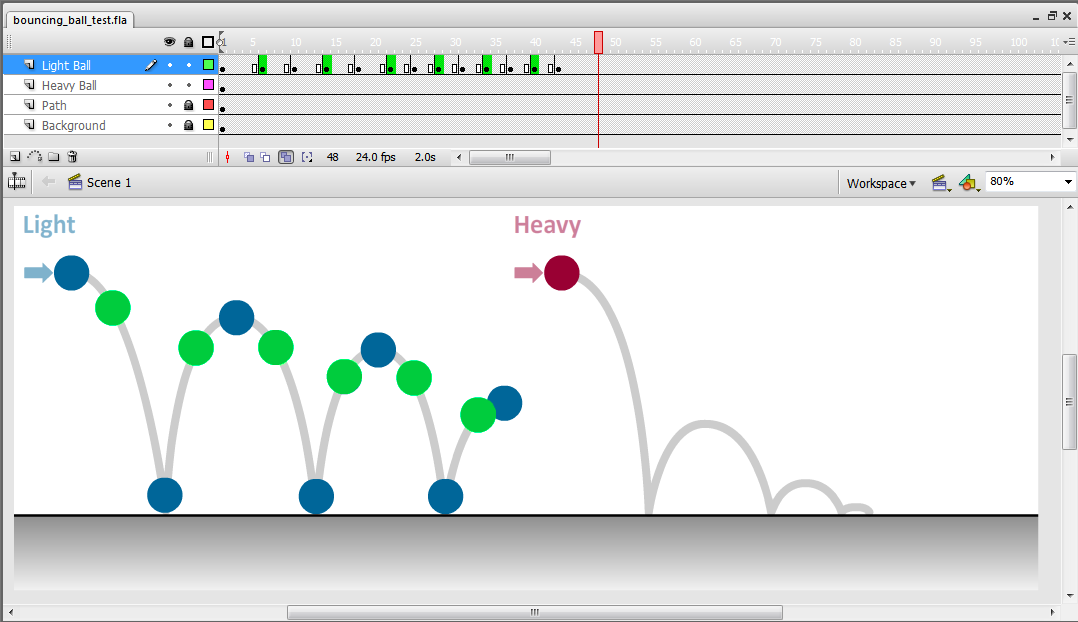
Check out the image below to see this in effect. The breakdowns are highlighted green. Similar to when you finished your first set of poses, you should spend some timing playing back your animation and adjusting the timing before moving on.
Straight-ahead Animation
The next step is to fill in the rest of the frames doing some frame by frame straight-ahead animation. You will be doing this in segments, filling in each space between the ball's extreme and breakdown poses. Begin with the first two segments up until the ball hits the ground. Click on frame 2, press 'F6', then move the ball along its path of motion. Click on frame 3, press 'F6', move the ball, and so on.
Here are some tips that should ease the process:
- You can also press the '<' and '>' keys to step backwards and forwards between frames. So hitting '>' then 'F6' might be a slightly less tedious way of setting a keyframe. You can also just select a span of frames and set them all as keyframes at once; however, be warned that they will all carry the same initial pose.
- Automatic snapping can be useful sometimes, but it can cause the ball to stick to other parts of the scene when you don't want it to. Go to View → Snapping to toggle on and off the various snapping options.
- If you want the ball to be in a very specific location it may be easier to select it and use the arrows on the keyboard for smaller, incremental movements.
- The reference path may be more helpful above the ball. Go ahead and drag the Path layer above the Light Ball layer. Now you can use the center pivot of the point as a point of reference for how to center the ball along the path.
Consider how much the ball should move from frame to frame. The same concept of spacing you used when establishing breakdowns still applies. It's just on a smaller scale. Once you have the first couple of segments complete play back your animation to make sure it looks right. Modify poses as needed, even if you need to tweak your initial extremes and breakdowns (just make sure not to change those too much).
This is where onion skinning will come in handy. It will give you a more complete view of your motion and allow you to tweak your keyframes with visible context. Follow the instructions below to enable it.
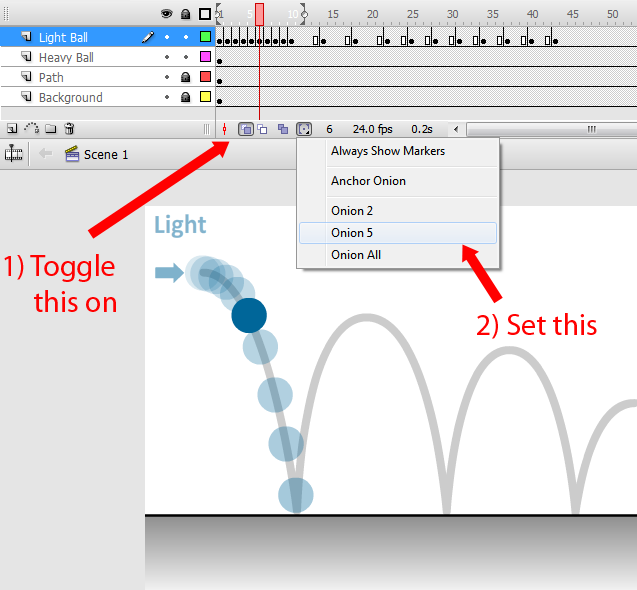
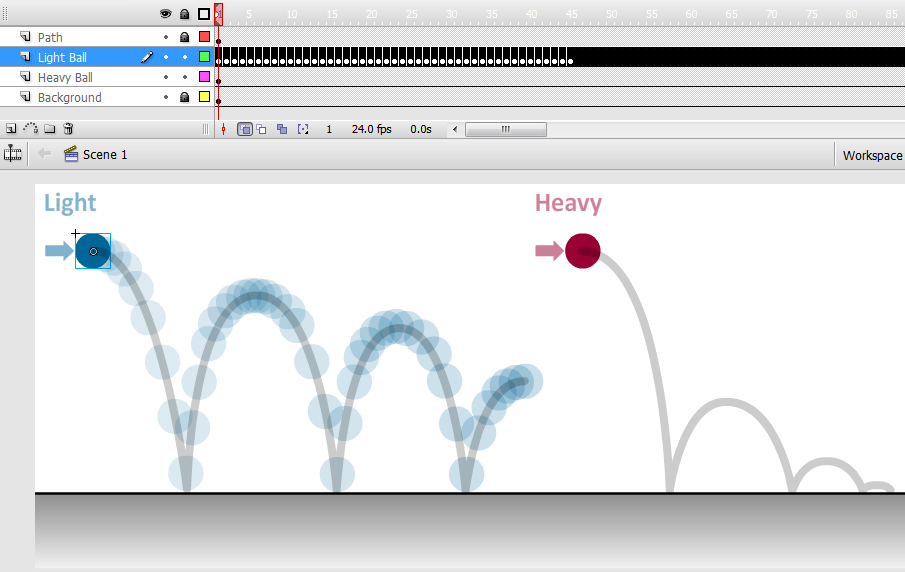
Now finish the rest of the segments. Once done, it should like something like below, with most of the frames clumped at the top of its arcs and more space between the ball as it gets closer to the ground.
Now repeat this animation process on the heavy ball. Though it will bounce differently, the same principles of timing and spacing will apply. And be sure to let the heavy ball roll naturally to a stop. It shouldn't just immediately lose all momentum.
Export Part A Movie
You are not completely finished yet, but this is a good place for a check-point. Save your Flash project file as bb_animation.fla. You will be turning this and the following video into Catalyst.
Next, export your animation. Before doing so you'll need to hide the reference paths. Click next to the Path layer to toggle off its visibility.
Now simply go to File → Export → Export Movie... Just use the default settings, but make sure Save As File Type is set to "QuickTime". Name your movie file bb_animation.mov.
Before moving on, save your file again as bb_animation_with_ss.fla.
Part 2b
Squash and Stretch
You've got down arcs, timing, and spacing, but now it's time to do another pass on your motion to add a bit of squash and stretch. This will not only act like motion blur, thus reducing any sort of strobing effect, but it will ultimately give your animation more life and make it more interesting to watch.
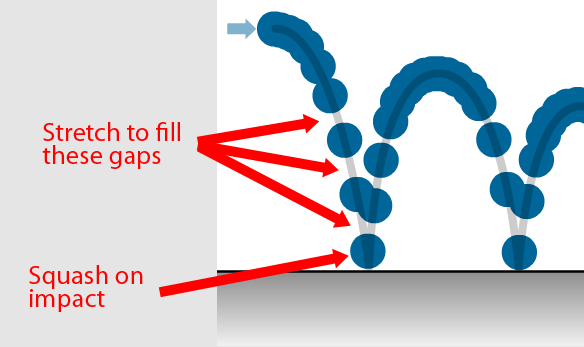
A good rule of thumb to follow here is that stretch should happen any time there is a significant gap between the ball between frames. You will most likely not have much of this in the heavy ball beyond the initial fall, but there will definitely need to be some in the light ball. Squash should happen any time there is any sudden stop in force, such as when the ball impacts the ground.
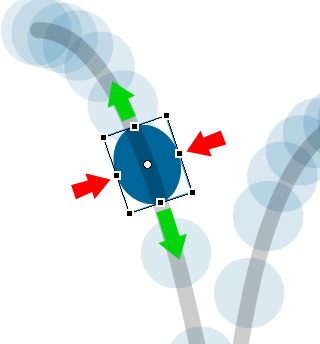
Go to the frame right before the first gap happens. You will be starting the stretch here, though on this particular frame it will only be a little bit. Select the ball shape and hit 'q'. This will bring up a transformation control that allows you to both rotate and scale the ball. Rotate the ball to face down the path of motion, then scale it appropriately to stretch it out along the same path. If you are unhappy with the result, the transformation can be reset by selecting the shape and hitting the key combination Ctrl+Shift+z.
Any time squash and stretch is utilized the volume of the object must be maintained or else the resulting motion will look too squishy and like the object is growing or shrinking in size. This means that when stretching the ball should squish in and when squashing it should squish outwards.
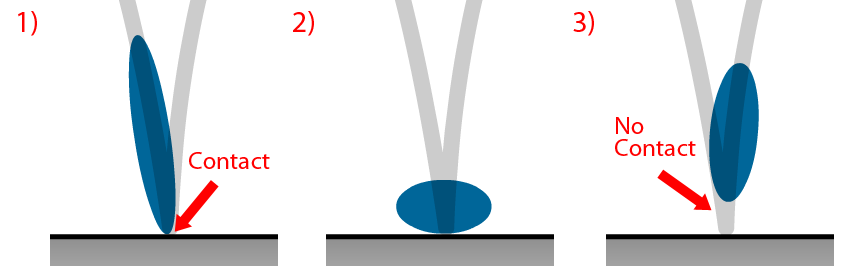
Proceed to stretch out the rest of the poses. When you get to the frame right before the ball hits, make sure the stretched ball is contacting the ground. (Also feel free to duplicate the ball's ground pose and use that as a starting point for the stretched contact pose.) This will emphasize the contrast between when the ball is stretched and when it is squashed, thus giving the impact more force. Conversely, when leaving the ground, the general convention is that the ball should not be contacting the ground.
When rotating the stretched pose near the ground, you may want to drag the pivot to the point of contact to make the ball easier to aim. It's the white dot that's at the center of the ball by default. Note that the pivot will only change for that keyframe.
In the completed example below you may notice that the squash and stretch is fairly exaggerated. Yours does not necessarily have to be this way; experiment with what looks best.
Export Part B Movie
Make sure to save bb_animation_with_ss.fla.
As done previously, hide your reference paths then export your animation as a QuickTime movie and name the file bb_animation_with_ss.mov, then upload both it and the .fla file to Catalyst.
Back to Assignment 1