Project 3a: Shading
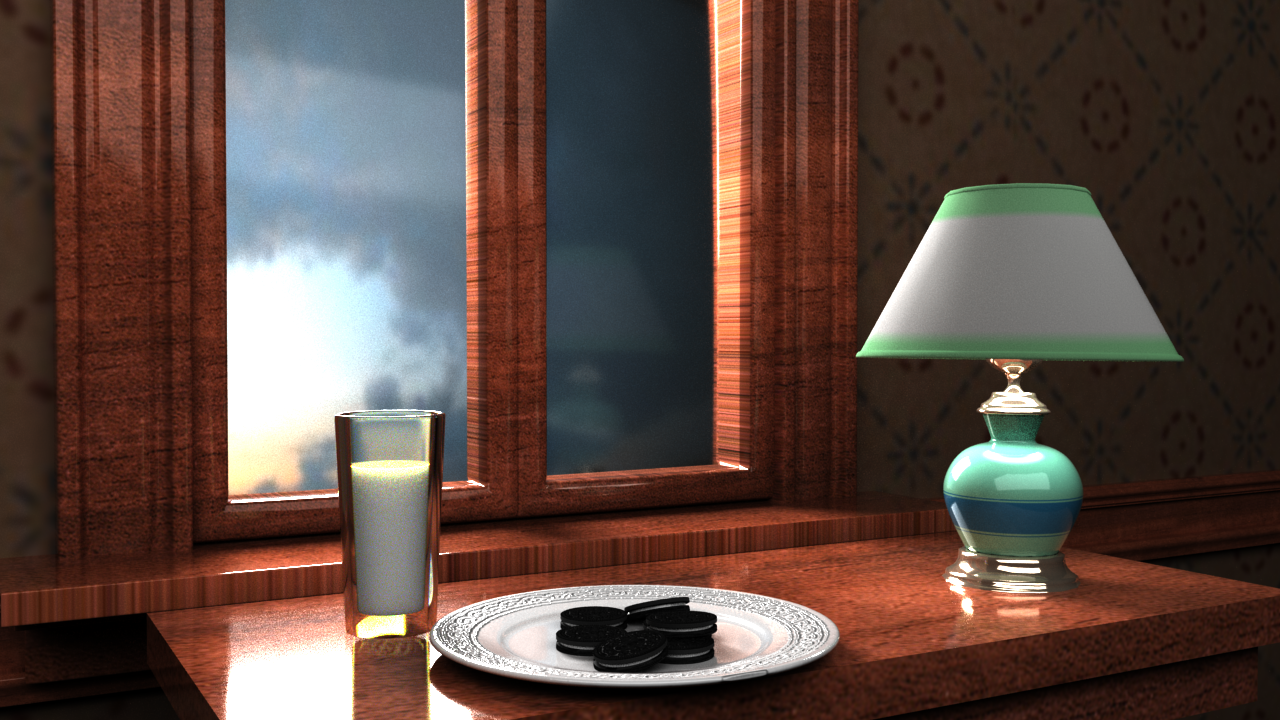
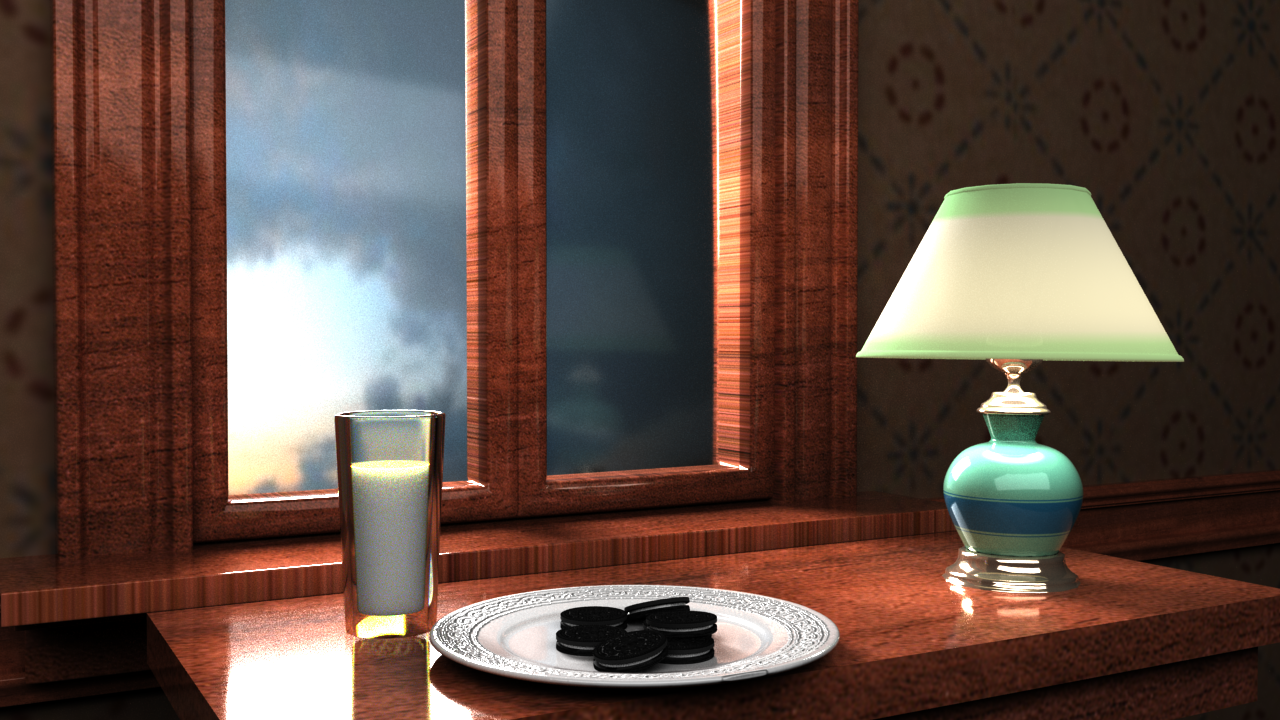
Shading is the process of defining the color, texture, shininess, and various other attributes of an object's surface. This project will an exploration of Maya's shading capabilities. The render node system is fairly simple, it is just a matter of combining different aspects of it to create a good result. We will provide a general direction to start in, but you will be expected to fill in the details. We will be using the Room file as well as these images for this assignment.
When adjusting material attributes, you'll have to render out a single frame to see your updates. First, you'll need to look through the render camera. You can get to it by right clicking the video camera at the top of the viewport and selecting render_cam.
![]()
Next, you'll click the render current frame button, located above the production shelves. If you're having trouble finding it, try clicking the arrows in the same row.

This will open up the render view in a new window. If you're editing attribute values and want to compare
them, click the Keep Image button (![]() ) at the top of the render view, then re-render.
This allows you to scroll back and forth between your kept renders.
) at the top of the render view, then re-render.
This allows you to scroll back and forth between your kept renders.
NOTE: Make sure you are rendering using Arnold and NOT Maya Software!!!
- Check if the Arnold renderer is enabled. You should see [Arnold] displayed in the menu near the top of the screen. If not, go to Windows > Settings/Preferences > Plug-in Manager, scroll down to the bottom of the popup, and check the box next to mtoa.mll.
- To apply a shader, select an object, right click and hold, then select "Assign New Material" by releasing the button. While there are many types of shaders available in the menu, the Arnold renderer uses a standard shader which is capable of producing a variety of materials. Search for "aiStandardSurface" and click on it.
-
If the Attribute Editor does not already display the newly-created shader, right click the object and select "Material Attributes..."
From here, we can see the attributes of the aiStandardSurface shader.
Documentation on what the attributes of an aiStandardSurface Shader do can be found at Solid Angle. These attributes control the shader, which, as previously mentioned, affect the color, texture, shininess, and various other attributes of an object. -
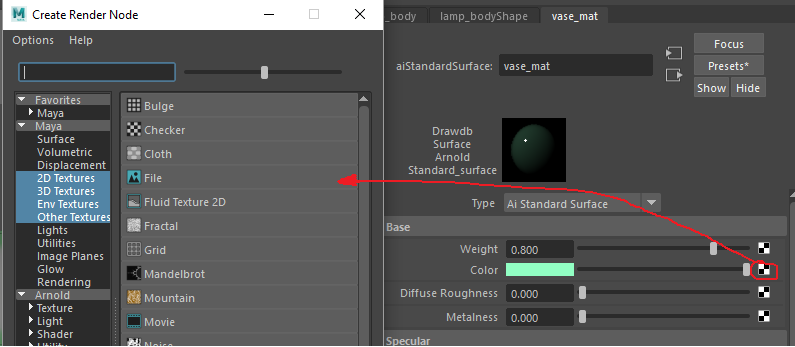
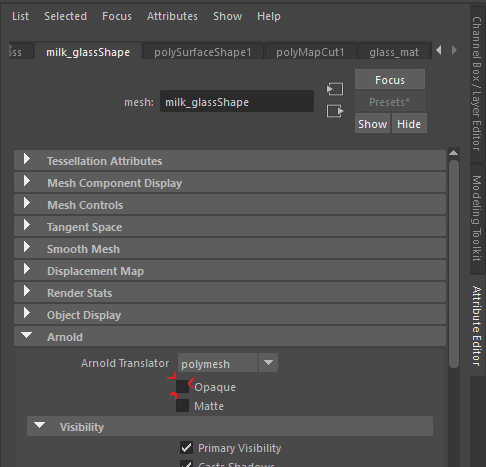
Apply an aiStandardSurface shader to the "milk_glass" object. Name the shader something descriptive, such as "glass_mat".
Give the glass a light blue color by clicking in the colored rectangle next to "color" under the "Base" tab.
Since we expect the glass to be transparent, adjust the "Weight" value under the "Transmission" tab. This Transmission Weight determines if light can scatter through the object. A value around 0.95 works. The "Dispersion Abbe" controls the Abbe number of the material. Solid Angle recommends a value between 0 and 30 for glass. Additionally, lower the 'IOR' (Index of Refraction) under the 'Specular' tab. A value of around 1.2 will do. - If the glass were to be rendered out right now, the shader would not look correct. This is because Arnold assumes that a given object is opaque. To fix this, navigate to the milk_glassShape tab in the Attribute Editor, and find the Arnold tab. Uncheck the box next to "Opaque".
- Next, apply the aiStandard Surface to the "milk" object. Name the shader. Next to the name there is a button that reads 'Presets*'. Once clicked, a drop-down list will appear, revealing a preset for milk. Hover over it, and click 'Replace'. This applies preset Base, Specular, and Subsurface values to the shader. While it might be tempting to leave the shader as is, it is best to avoid completely black or white colors when shading, which the preset has used. A light cream, however, will do for the Base and Transmission color. The Scale value under Subsurface is dependent on the scene scale, and determines how far light can travel through the object before being emitted. We can turn this value down to somewhere around 0.05 to keep our milk from looking too translucent.
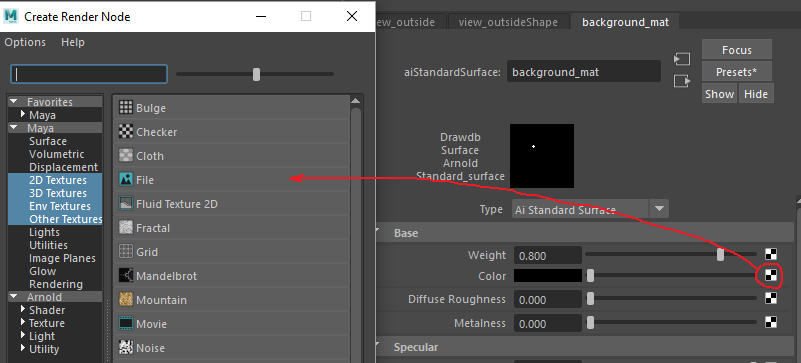
- Next, we're going to add a material to the plane outside the window labeled "view_outside" in the outliner. Apply an aiStandardSurface to the plane. Click the black and white checkered box beside "Color" under the "Base" tab in the Attribute Editor. Select the file node and set it to outside_view.png. You may also find a texture online, as long as it's a realistic setting.
-
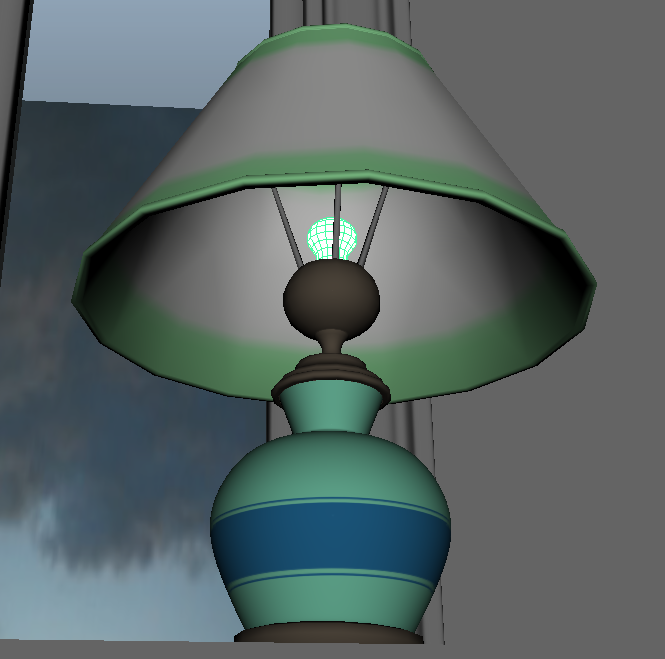
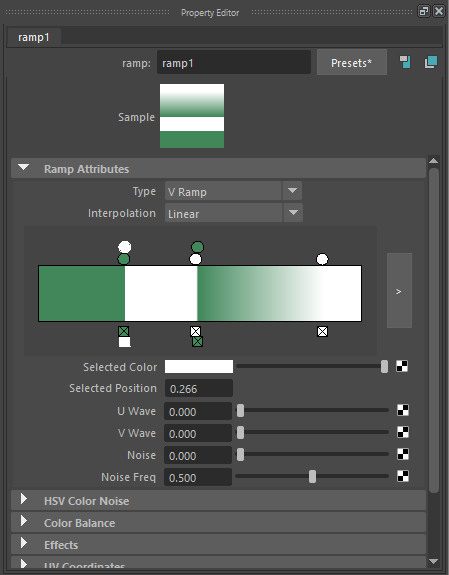
Next, we're going to shade the lampshade. We're going to use a ramp texture, which allows you to create colored patterns on your material.
To get to the Hypershade, click the blue circular icon in the menu on the top. This will open in a new window.

To make an aiStandardSurface shader, go to the 'Create' box and search for the aiStandardSurface shader. Click on it, and it should show up in the Hypershade. Name the shader.

Select your lamp shader, and show the input and output connections.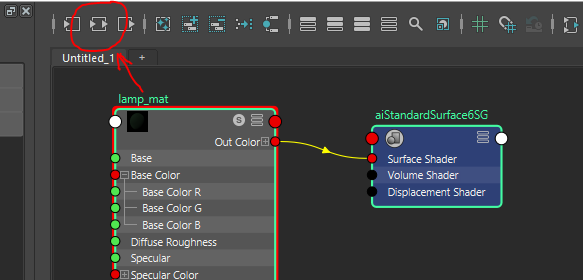
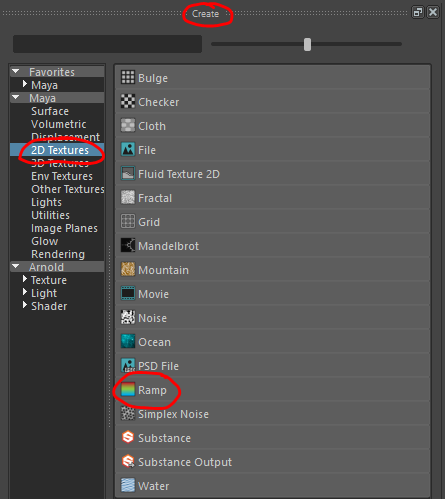
To make a ramp texture, go to the "Create" subsection, click on 2D Textures, and click "Ramp."
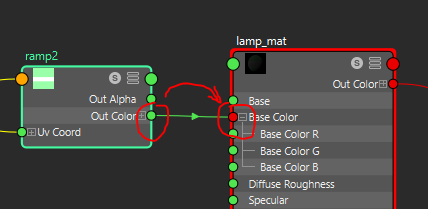
Link the Ramp node to the aiStandardSurface by dragging the dot next to the Ramp node's 'Out Color' to the dot next to "Base Color" on the aiStandardSurface.
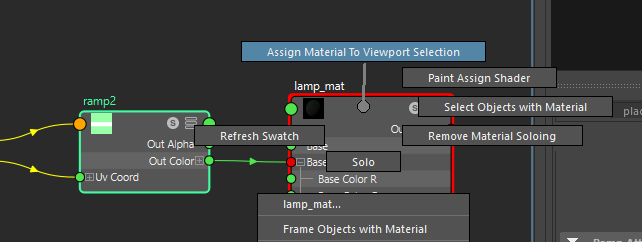
Back in the main viewport, click on the lampshade. Then, in the Hypershade, right click the lamp shader node and drag up to select "Assign Texture's Material to Viewport Selection."
Now modify the Ramp's attributes to match the image below or devise your own color scheme and pattern. Try playing around with the U and V wave, noise, and noise frequency to get cool effects.
If you want to get really tricky, you can even map image files or other Ramp nodes into the individual color channels of the lamp shader's Ramp. Be careful about not to make the shading network too crazy, though.
Currently, if rendered, the lampshade looks a bit like plastic. We can drop the Specular Weight and add a bit of Subsurface in the aiStandardSurface to make the material look softer.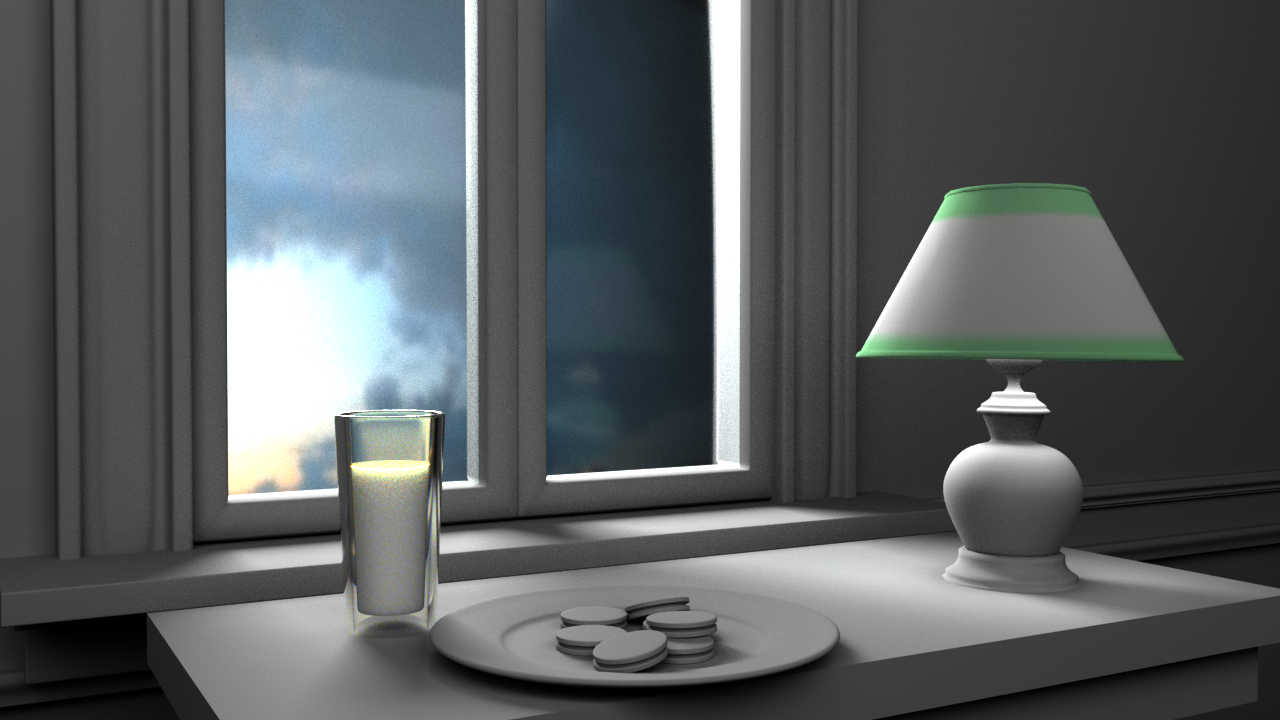
-
Apply an aiStandardSurface shader to the body of the lamp. Remember that you should be naming your materials.
We are going to map an image into the color channel. You can use one of the images provided
(green_lamp_border.png, or orange_lamp_border.png) or create your own in Photoshop.
In the attribute editor, click the black and white checkered box next to color and click "File." Set it to the image of your choice.
If you find that the image isn't looking quite as you expected (squashed or stretched), try messing with "Repeat UV" x and y axis until it looks how you want. You can access this by clicking on "place 2dTexture" in the Hypershade ( ).
You can also access it by going to (Windows → Rendering Editors → Hypershade).
).
You can also access it by going to (Windows → Rendering Editors → Hypershade).

If the image is incorrect, you can right click on the name of the attribute to which you have attached an input (such as a file node), and select "Break connection" to remove the input.
Apply an aiStandardSurface to the metal parts of the lamp and turn up the 'Metalness' value under the 'Base' tab. To get the color seen in the image below, double click on color in the 'Base' tab and in the HSV tab and insert these numbers: H: 33.56 S: 0.239 V 0.97. For the Specular color, insert these numbers in the HSV tab: H: 45.7 S: 0.082 V 1.0. You can use a different color appropriate to your theme, but at minimum your material should appear metallic. Solid Angle does provide a table of real-world metal values, found here -
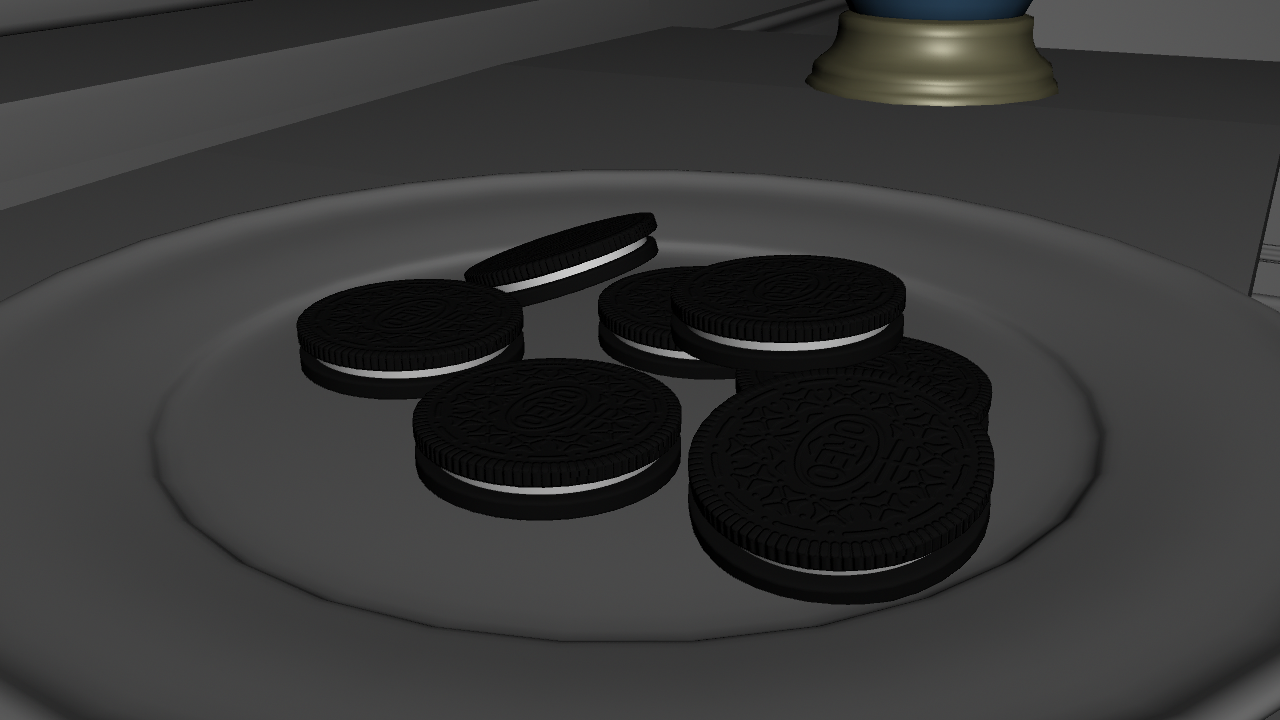
Now we're going to shade the oreos and add a bump map. To better understand how a bump map works,
read the shading exercises.
First, make the oreos an aiStandardSurface and change the color to black, but don't make it too dark. Here is a good shade: H:0 S:0 V: 0.081. Additionally, raise the Specular Roughness value to keep the oreo from looking shiny.
Under the aiStandardSurface Geometry tab, click on the checkered square next to Bump Mapping, and select the file node.
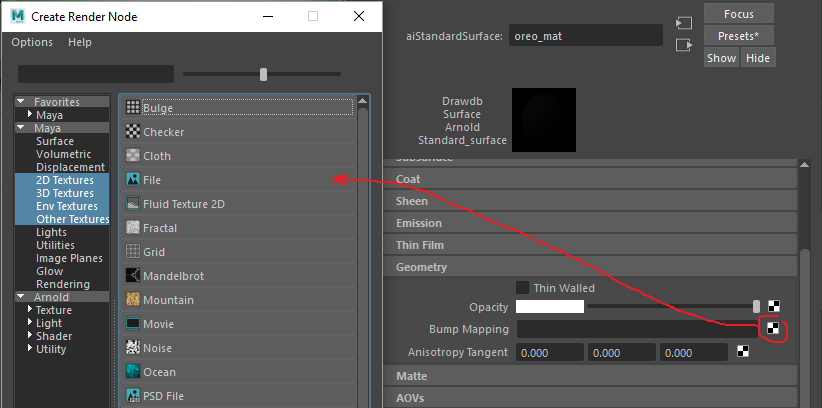
To set your image, click the "file" tab, click on the folder icon, and select oreo_bump_map.tif.
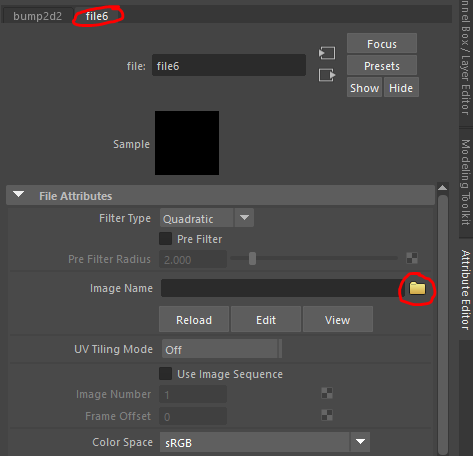
If you want to adjust the intensity of your bump map, click on the "bump2d2" tab and adjust the Bump Depth.
Now, using another aiStandardSurface, shade the fillings of your oreos. -
Next, we'll shade the plate by assigning an aiStandardSurface. Make sure that it's off white and not a true white.
Like with the oreos, navigate to the Geometry tab of the shader, and click the checkered square. This time, right click the file node, and select "Create as projection".
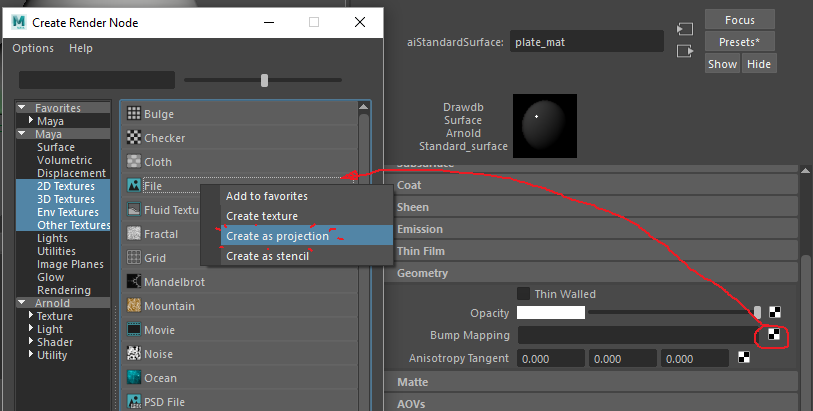
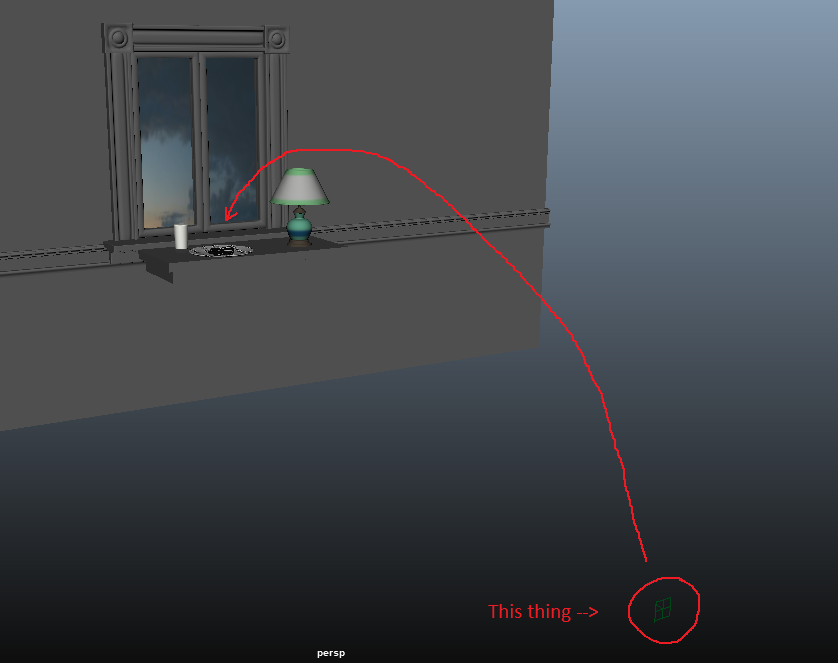
To get to the file node, select the arrowed box next to Bump Mapping, then Bump Value, and then Image, until you are prompted to input a file like you did with the oreo. Set the file to plate_bump.jpg. Adjust the bump depth accordingly. You might notice that the plate now has horizontal stripes going across it, quite unlike the bump map illustrated in the texture file. Scroll out in perspective view until you see the "place3dTexture" node. Move and scale this until the circular texture lines up with the rim of the plate.
-
Now we are going to shade the dresser. Apply an aiStandardSurface.
Just click the checkered box next to color and select "File." Set this to wood.jpg (or your own texture) again.
Next, in the Hypershade, select “place2dTexture.” Increase the value of "Repeat UV" until it looks good. Do the same for the trimming on the walls and around the windows.
Additional wood textures, wood2.png, wood3.jpg, and wood4.png are also available, but feel free to search for your own.
-
For the wall, set the color to be a File. There are two wall paper textures provided for you, but you can also find one or make one yourself in Photoshop.
Make sure it is tiled. Adjust the Repeat UV until it is a reasonable size and proportion. Note that the U and V repetition don't need to be the same.
-
We are mostly done for now. For a more realistic look, you could try playing with a ramp to drive the emission value of the lampshade to make it appear like
the lamp is on, but is not required for this project.
-
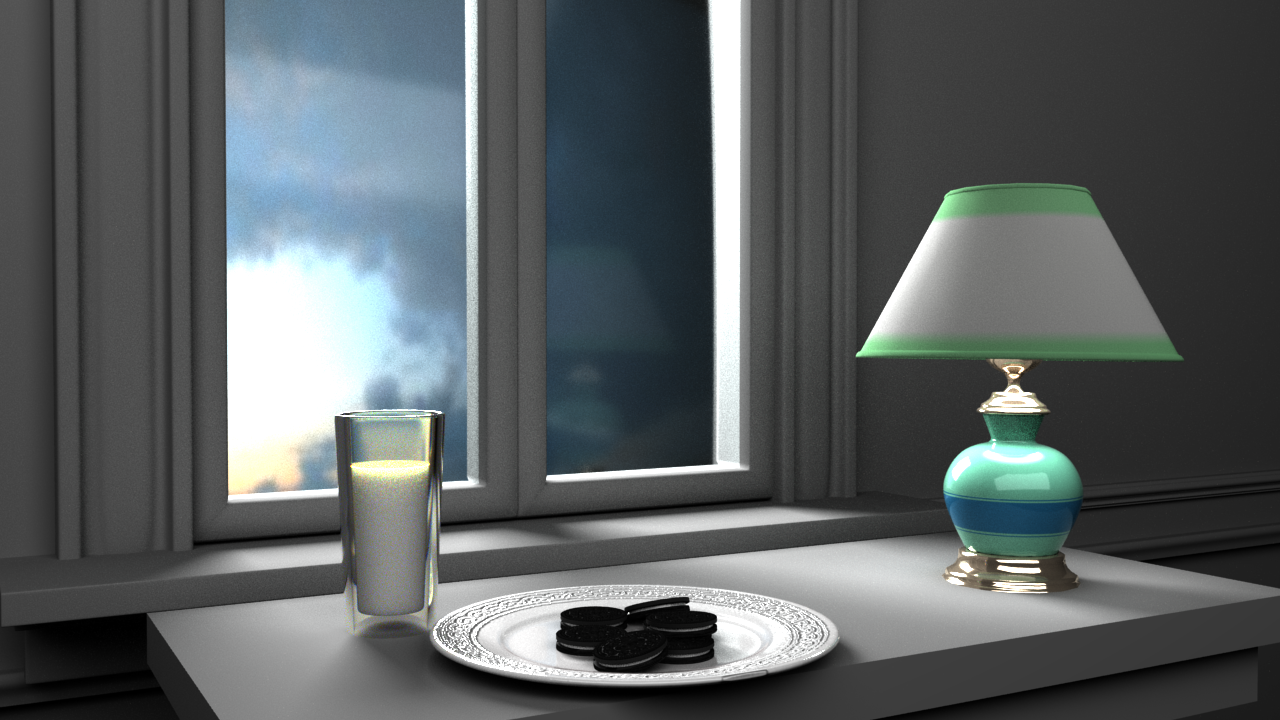
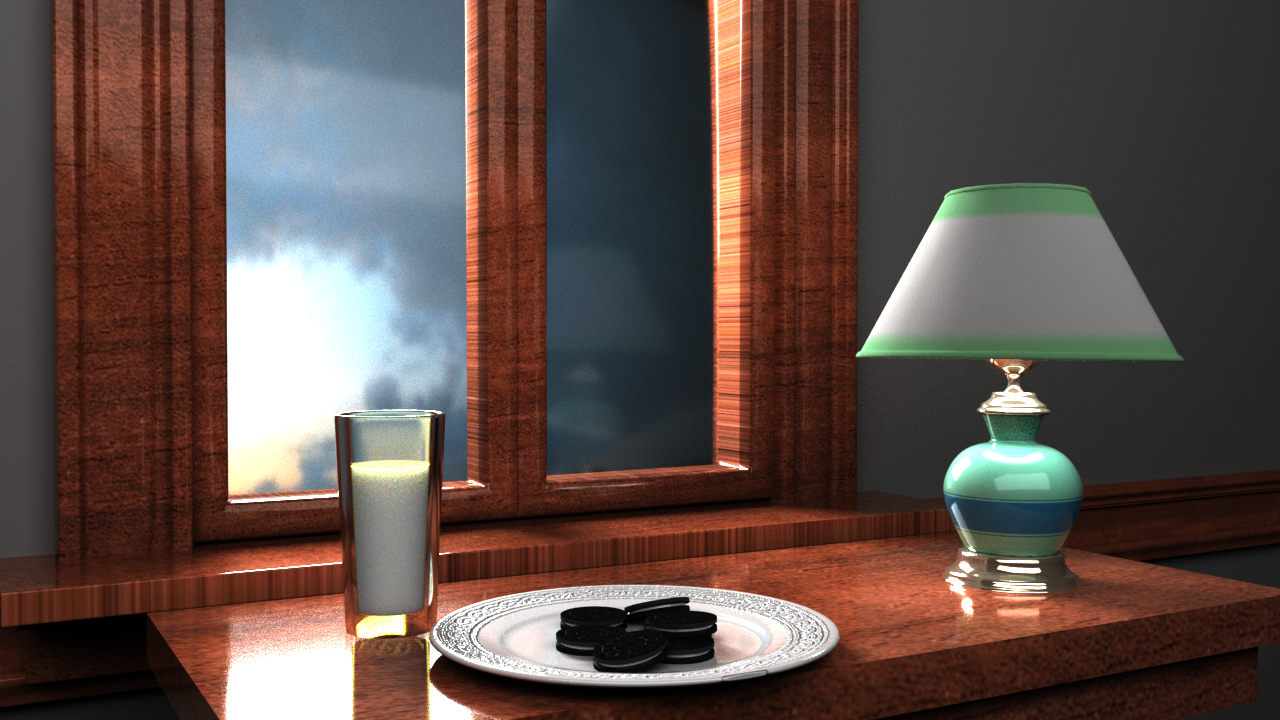
Render an image of your scene looking through the render_cam in your outliner.

Now shade your window similarly to how you shaded the glass of milk, applying a new aiStandardSurface material. Like the milk glass, be sure to turn off "Opaque" in the object shape node.
Note: If you want your window or glass to reflect the image of something that does not appear in the scene, you can map a file to the reflected color channel under specular shading, but this is entirely optional.


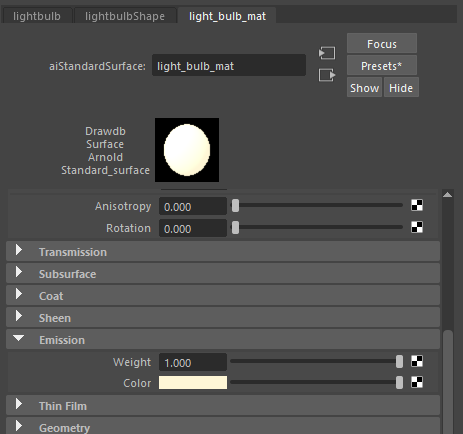
Don't forget to shade the prongs and the light bulb. You can give the light bulb the same material as your windows, or create a new shader and turn up the emission weight to give the impression that the bulb is on.