Project 3b: Texturing
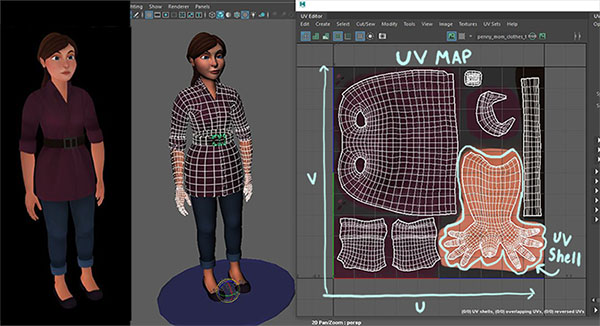
UV unwrapping and texturing is a lot like papercraft. In order to texture an object, you must first deconstruct it into workable pieces (the head, the torso, the arms etc.), then unwrap them into flat, 2d pieces called UV shells. These shells are organized into a UV map and imported into programs like Photoshop. After texturing, you apply the new texture to your object.
Below is some information about UVs, UV Maps, and UV Shells, explaining what they are and the connection between them each. The Assignment will begin below this explanation. There are several explanation sections on this tutorial. Click the button to expand each for more information.
UV UNWRAPPING AND TEXTURING A DRAGON
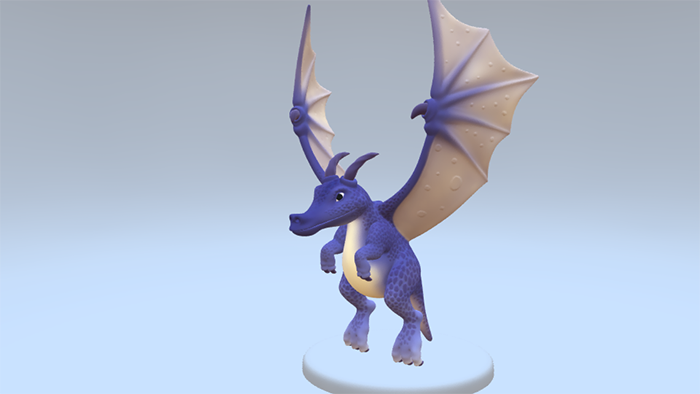
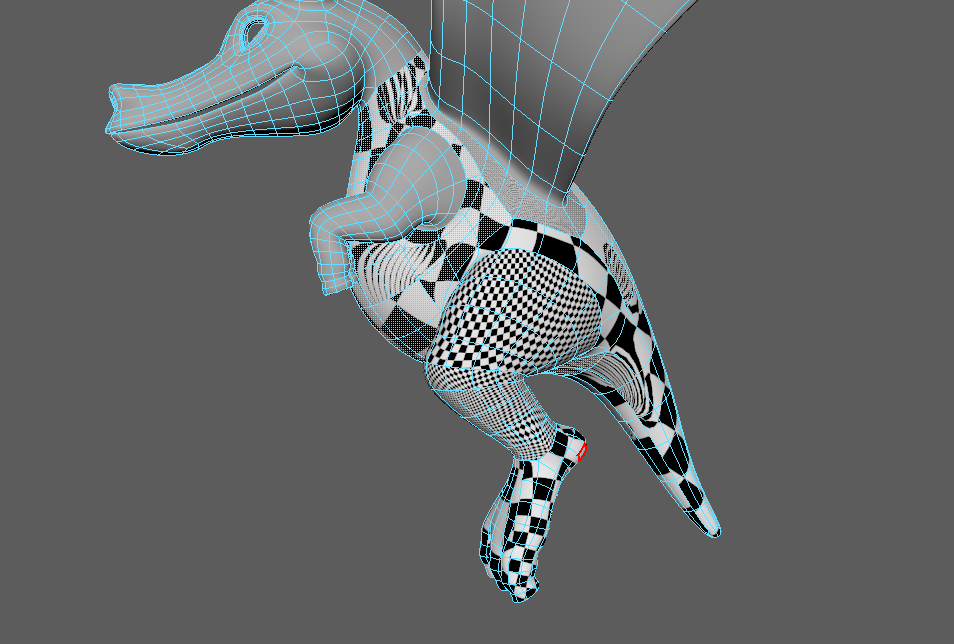
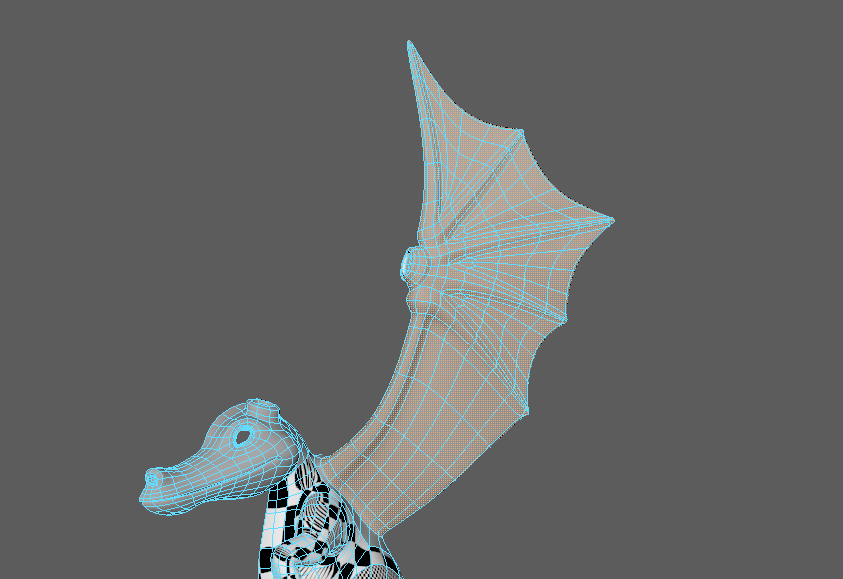
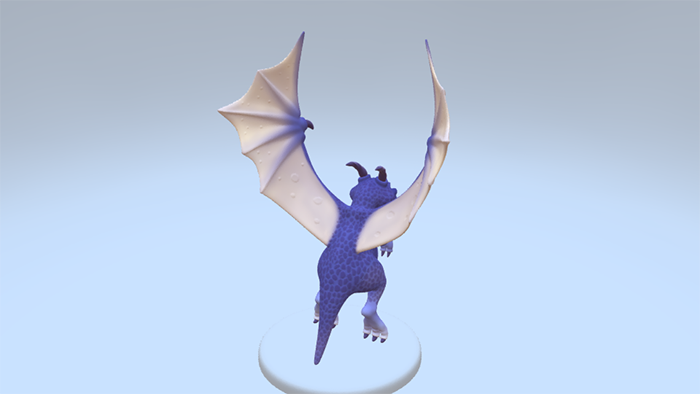
For this assignment, you will be UV unwrapping and texturing a dragon model! You will learn the complex process of unwrapping an object, texture the dragon in a painting program, go back and forth between the program and Maya to cover up any scenes, and finally, turn in a rendered image of your custom-textured Dragon Character. There are several complex steps ahead, but don't lose heart! The process of UV unwrapping is routine. We will show you a few different ways to unwrap different shaped objects, but the base process applies with each step.
You will be using the Dragon Whelp file for this assignment. Save and open it to begin. You'll need to open Dragon Cove towards the end of your assignment. Don't worry about it now.
-
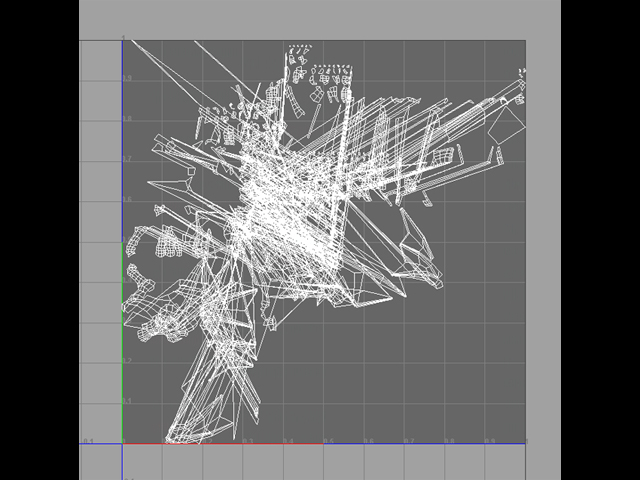
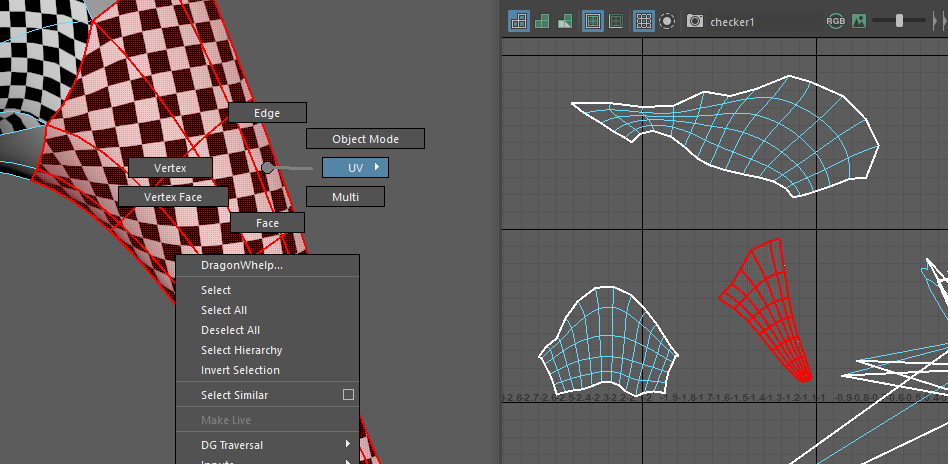
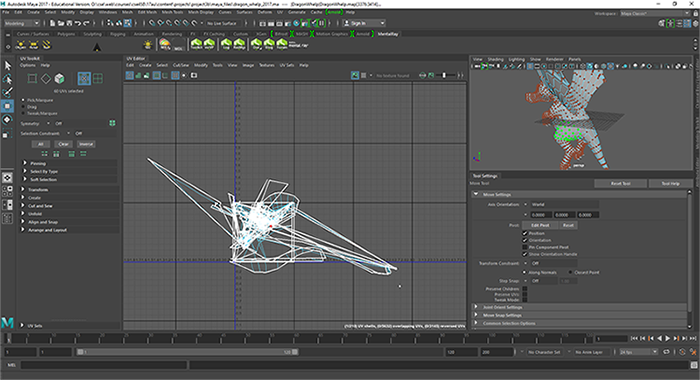
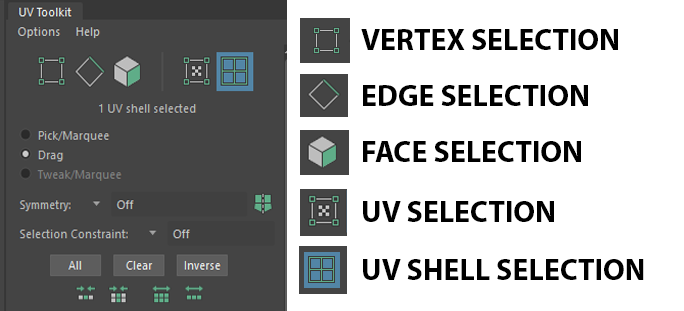
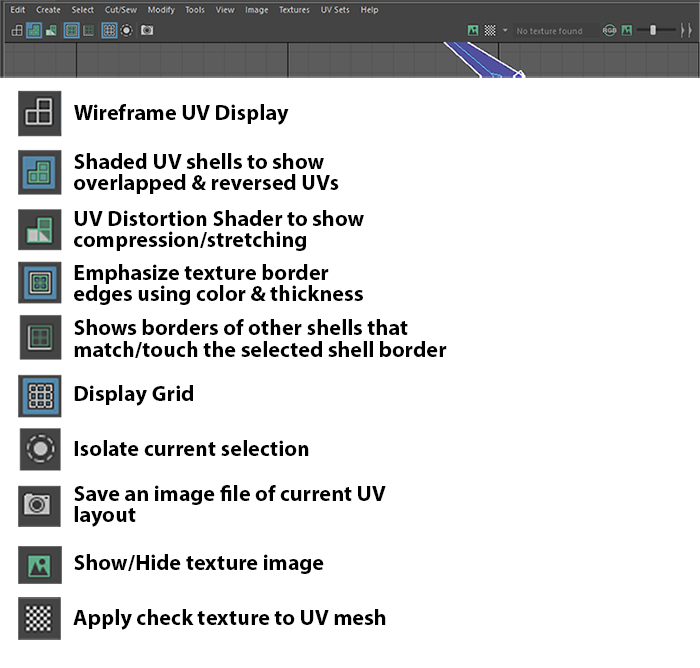
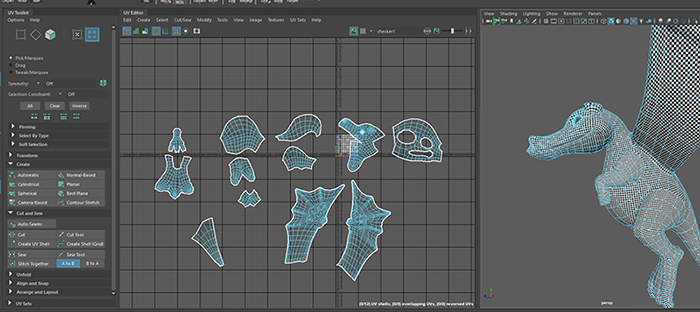
Most of the work of unwrapping the model will be done in the UV Editor (Window → Modeling Editors → UV Editor).
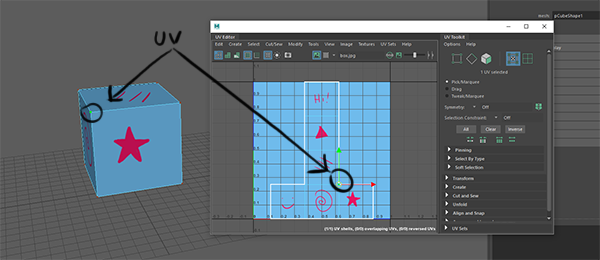
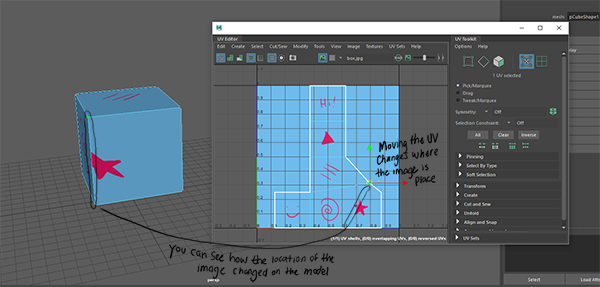
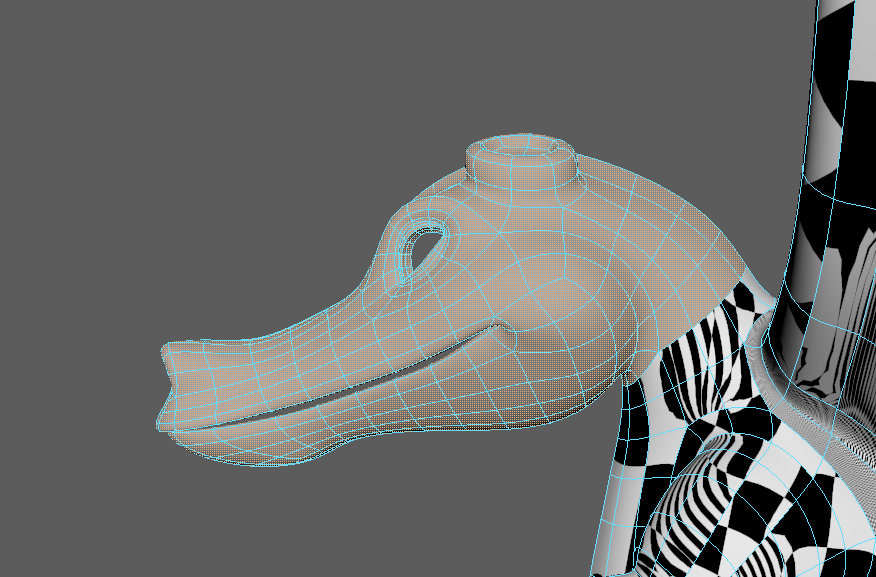
After you open the UV editor, you'll notice the UV map isn't very clean or organized. That's because none of the UVs have been mapped and unwrapped into organized shells yet. Placing a texture onto this current UV map will make the texture look very distorted on the geometry. -
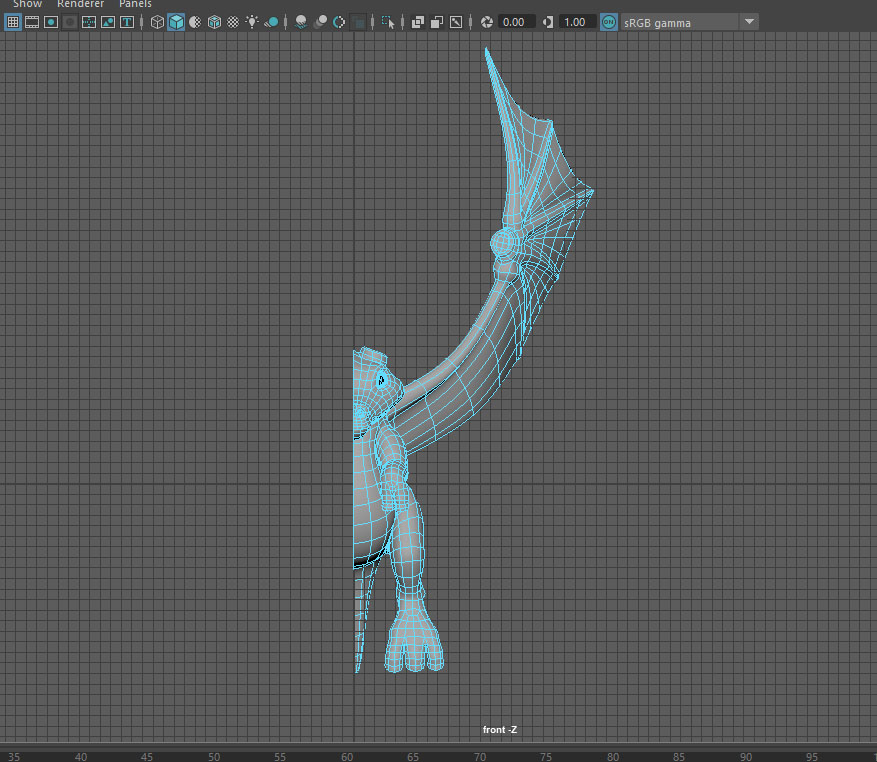
To make the UV unwrapping process faster, first delete half of the model. You'll then unwrap half the dragon and duplicate the other half over later. The duplicated half will have the same UV layout as the other side.
a) Don't worry about unwrapping the eyes, claws, or horns. Go to the outliner and hide (Ctrl + h) the "HornsandClaws" group until render time.
b) Go to front view, select half the dragon and delete the mesh.
-
Next, you'll need to start segmenting parts of the dragon into UV shells, since the UVs are all in separated pieces within the UV map.
For this dragon, you'll be making UV shells for the tail, face, front of hand, back of hand, upper arm, lower arm, bottom of wing, top of wing, body, leg (can be the entire thing or top and bottom), top of foot, and bottom of foot.


a) Go to the UV Editor (UV → UV Editor under the Modeling menu set). Keep it on the side as you work. This is where you'll be working the most.
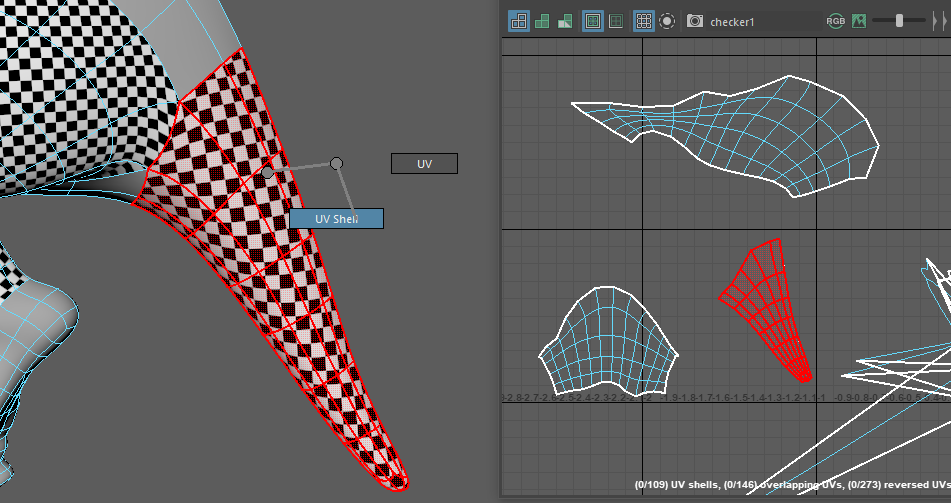
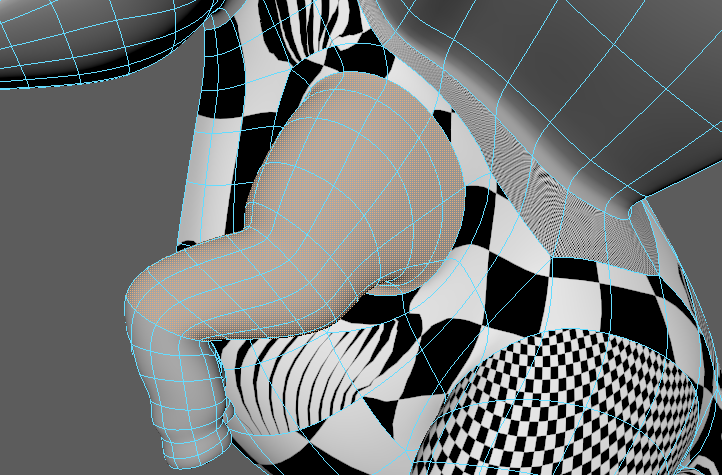
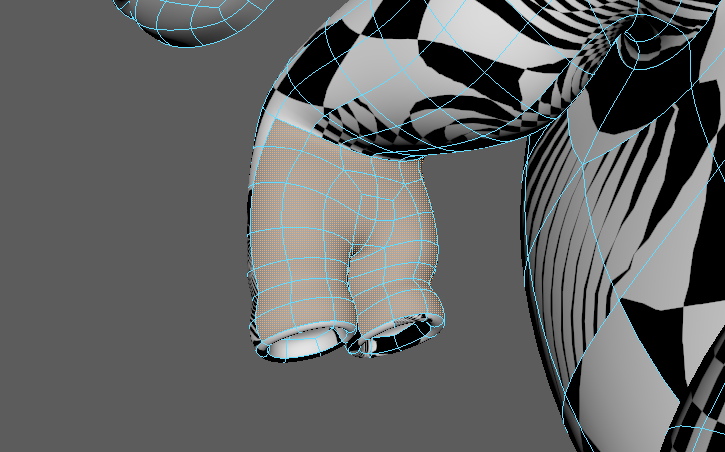
b) Select a group of faces on your model that you would like to turn into a UV shell. To help get you started, let's begin by selecting all the faces of the upper leg.
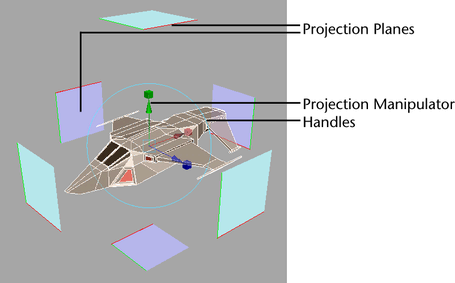
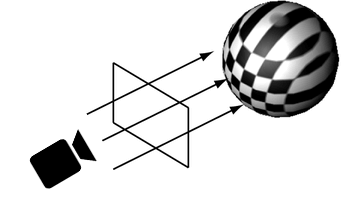
c) You'll notice selecting faces of the geo also selects the faces of UVs in the UV Editor. These selected UVs in the UV Editor need to be grouped together, by using a type of projection from the UVs menu. This will make your initial UV shell.
Now, let's continue making UV shells.
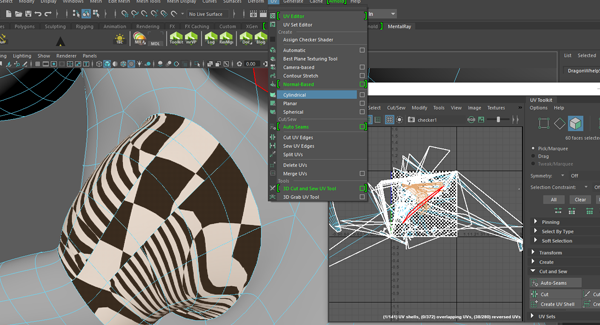
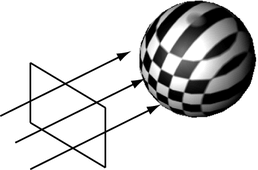
To make a UV shell for the upper leg, let's try a cylindrical projection for the selected upper leg faces. The leg is pretty cylindrical, so this type of projection could work well. *If not, you can try something else. There's no right answer to this.*
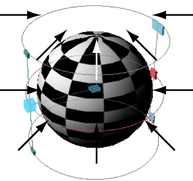
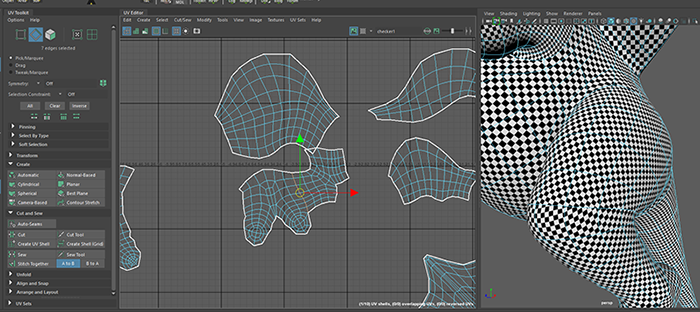
Your Cylindrical Mapping Manipulator will most likely appear vertical contrary to the upper leg angle. It's best to have the projection wrap flush around the leg. To fix this, click the little red T on the corner of the manipulator to toggle between scale/rotate/move. To rotate, first click the blue circle on the manipulator to access all the rotation axes.
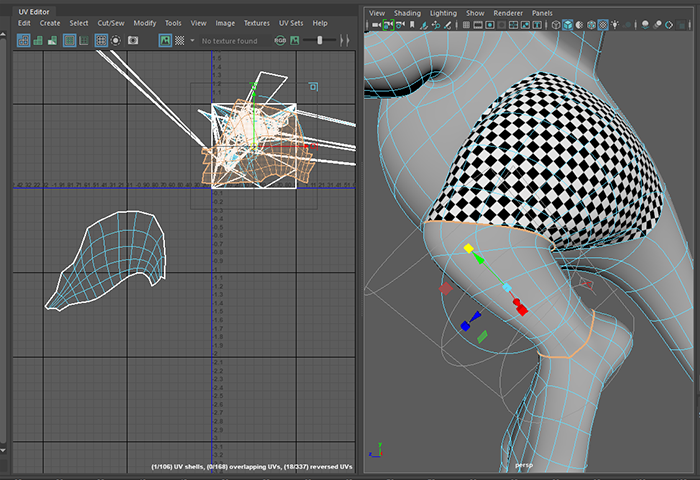
d) Move the UV shell over to the side in the UV Editor for more space to work. Later on, we will fit all the pieces into the graph in the UV Editor between (1,1) on the axes. For now, it's okay to work outside of this space until all the shells are ready to be organized within the UV Map.
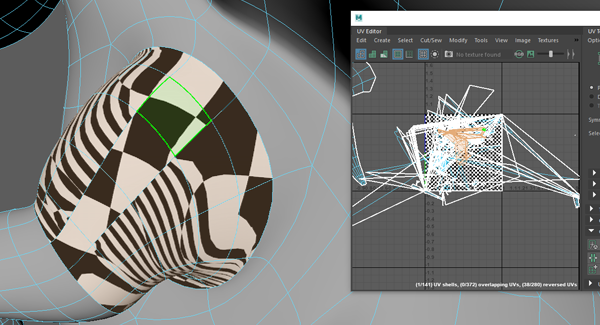
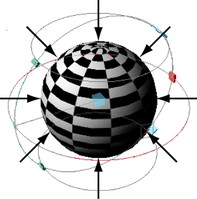
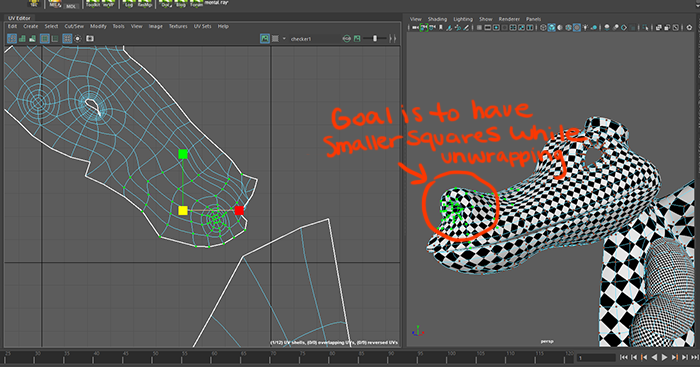
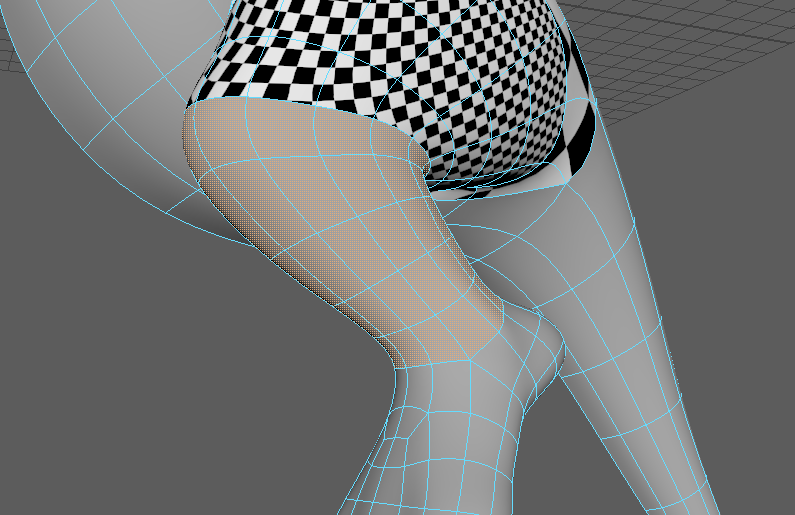
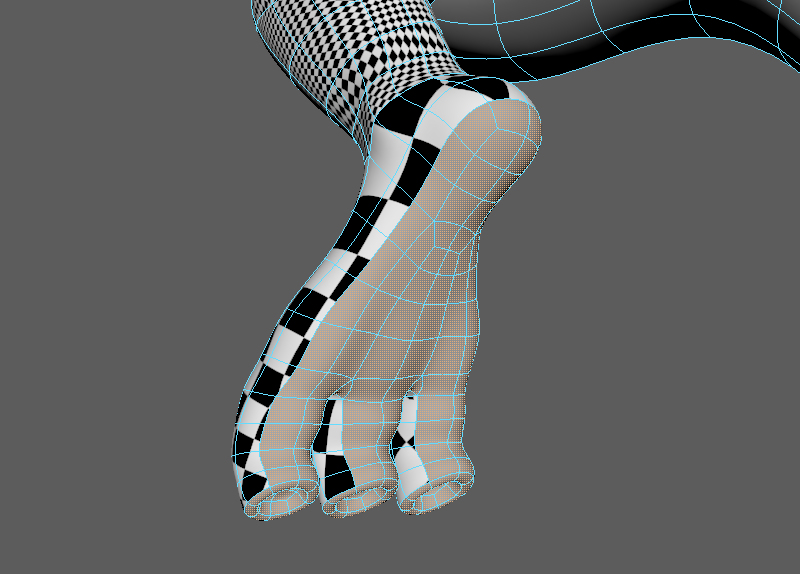
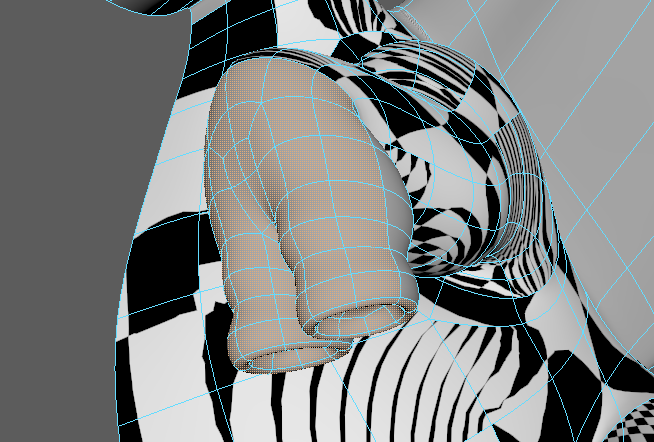
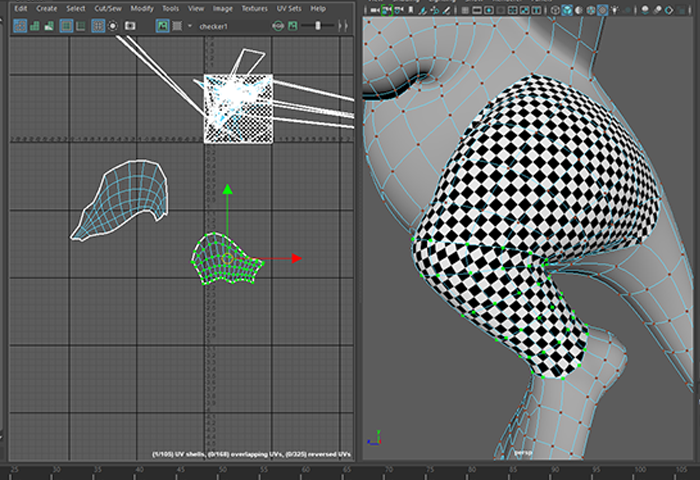
e) Next, you're going to make a temporary checker texture for the newly created UV shell. This will make it easier to see what parts of the model you've already made shells for and see any texture distortion on the model when unwrapping the UV shells. It's also good to keep all the UV shells about the same size, so you can combine UV shells together if need be. The size of the checkered pattern on the model can show you how much you need to scale the UV shells so that they are all relatively the same size.
Assign a new lambert shader to the upper leg and name it "checker_mat".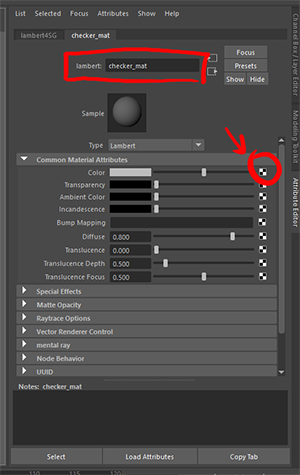
f) Click on the checker square for the lambert's color attribute to bring up a list of color nodes to choose from. Select "checker" node from the list.

g) In the UV editor, you should see the checker pattern in the background of the UV map. The checker texture on the leg may look distorted, since the UVs aren't made into unwrapped and organized shells yet. Right now the checkered pattern is a bit too large, so it's harder to see any distortion. We can fix this by adjusting the way the checker pattern is repeated on the body.
Go into the Material Attributes for your checker material in the Attribute Editor. Click the arrow next to the Color attribute. Under the UV Coordinates drop down menu, click on the arrow next to Uv Coord.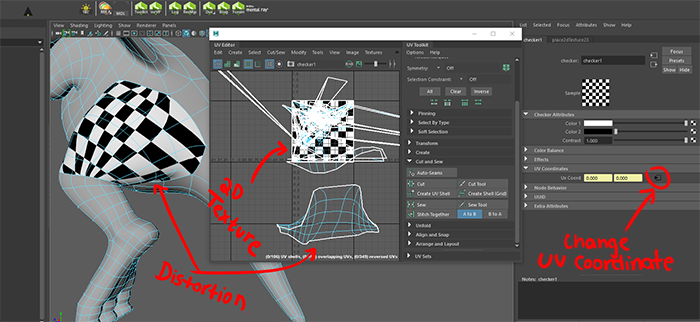
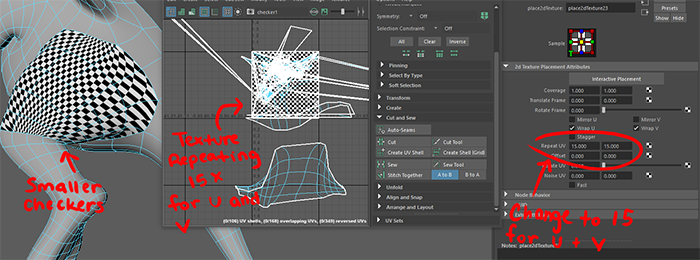
h) Change the Repeat UVs for both U and V to 15. *Any high number will work.
-
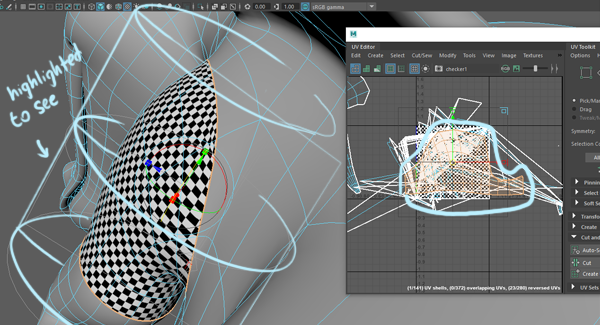
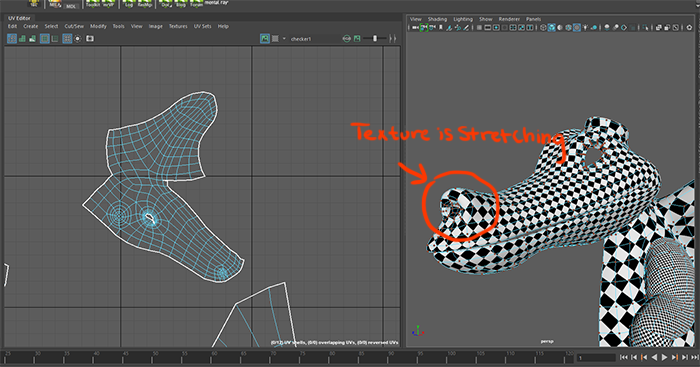
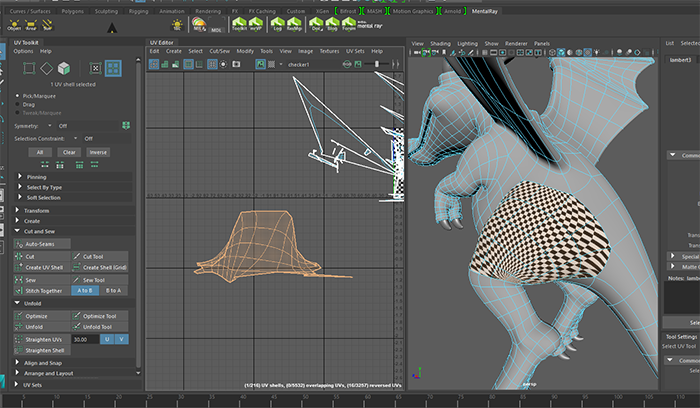
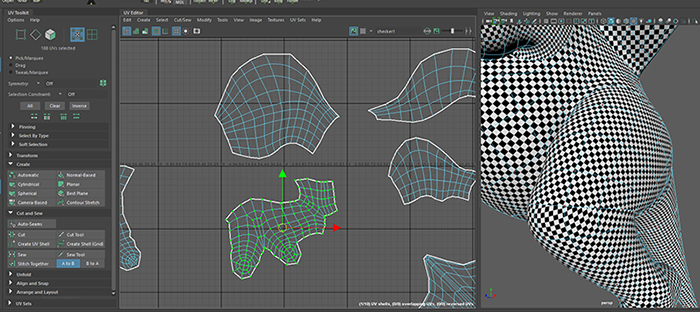
Unwrap the UV shells to eliminate texture distortion on the model, starting with the upper leg.
Now that you've made a UV shell for the upper leg, it's time to unwrap it to eliminate any texture distortion on the model. If you look at the dragon's upper leg, you'll notice some of the squares are stretching weirdly. Texture distortion can happen when UVs overlap or are badly distributed. They need to be unfolded to be a true 2d representation of the 3d piece the texture needs to wrap around.
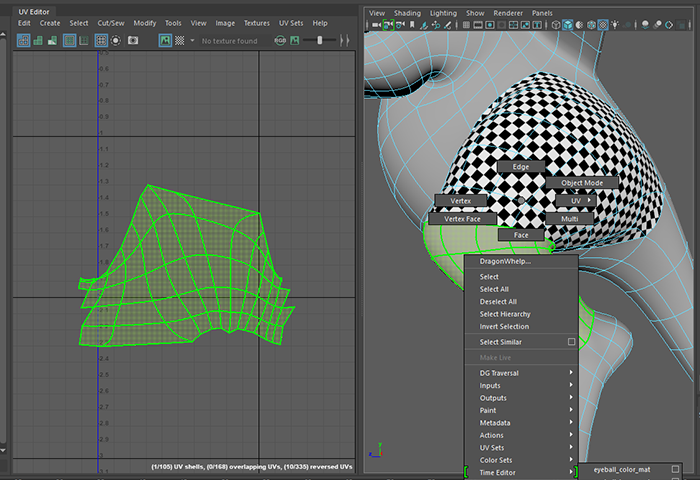
Let's start unwrapping the upper leg UV shell that was made.
- Select the upper leg UV shell.
- Shift + Right-click > Unfold
- The UV shell should now be unfolded. If not completely, then use other tools to further unwrap.
-
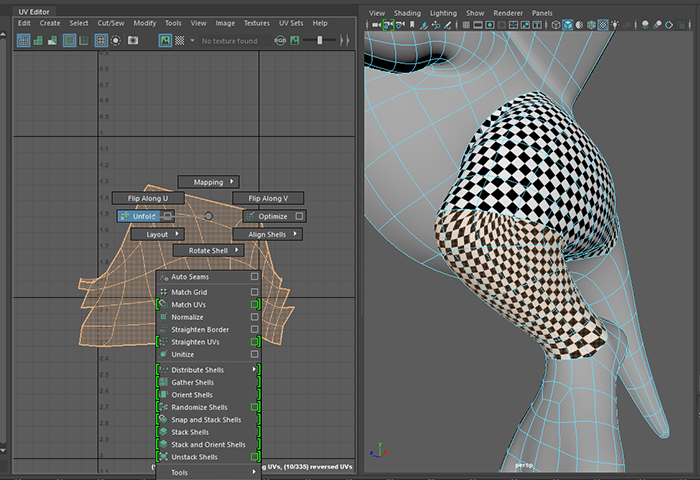
Inspect around the model and see if there's any distortion.
Usually just one unfold isn't enough to unwrap the UVs completely, depending
on the geo's complexity.
If there is distortion, continue using tools to unfold. The upper leg UV shell seems to be unfolded enough, since the texture doesn't look distorted around the leg.
**Remember to be saving along the way. Now is a good time to do that.
-
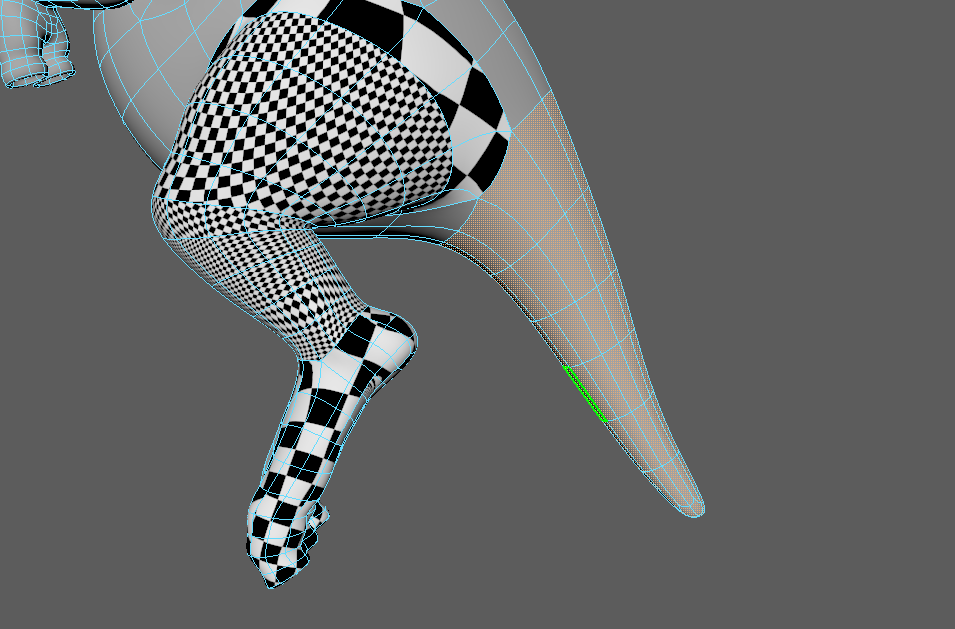
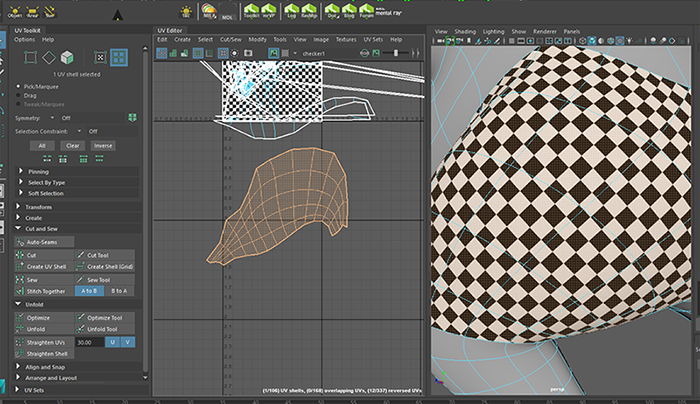
Repeat the previous process to make a UV shell and unwrap the lower leg
NOTE: Your UV shell may look different after the projection, or you might have to unwrap differently as you continue to follow the directions. That's okay. Unwrapping isn't a linear process where you get the same results every time. The point in the end is to have a nicely distributed UV shell that's unwrapped, has proper seams, is the proper size, and ready for a texture.
a) Select the faces of the lower leg.
b) Use a projection to group the UVs of the lower leg together. Cyclindrical Projection should work well for this.
c) Right-click hold on the model and "Assign Existing Material". Select the checkered shader that you made.
d) In the UV Editor, select the lower leg UV shell. Shift + Right-Click and unfold the shell.
e) My UV shell doesn't have a clean seam and looks a bit jagged. Your result might be different. To fix this issue, the jagged UV pieces need to be cut off for a straighter seam.

f) Just like a puzzle piece, the chunk of UVs cut from the shell need to placed on the opposite side and sewn into place.
g) Increase or decrease the scale of the lower leg UV shell so that the size of the square texture is the same as the upper leg.
-
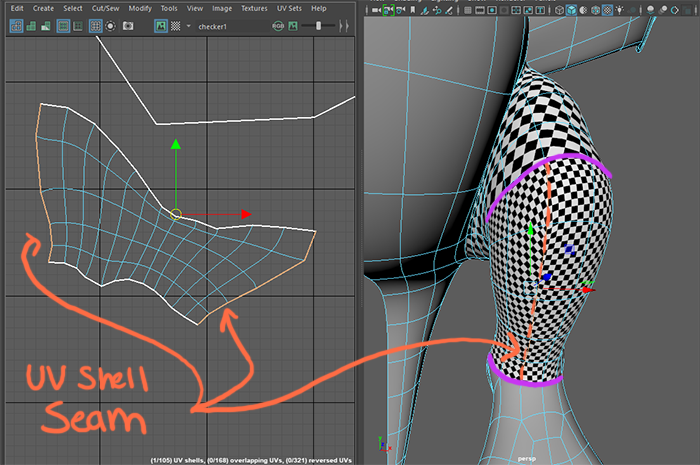
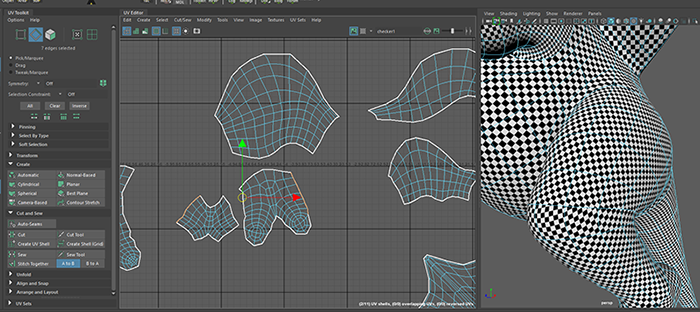
Place seams on hidden parts of the model as you make UV shells and Unwrap.
It'll be best to place the seam along the inner part of the model for the arms and legs of the dragon, since it's harder to see.
It's also sometimes best to have seams align incase you want to merge shells
together later on.
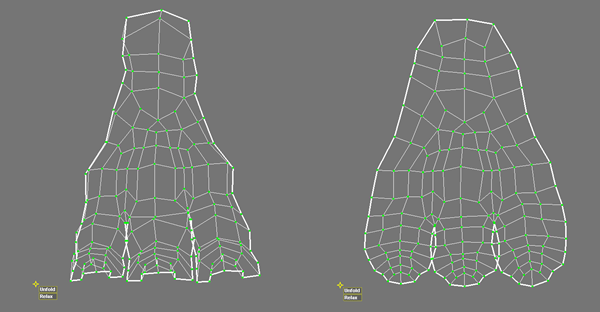
The seam of the upper leg shell has the same seam edge as the lower
leg shell right now, so we don't have to follow this step. The seam is also on the inner part of the model. However, let's say the seam
of the lower leg isn't aligned like the image below. The seam is somewhere else on the leg.
a) You'll have to examine and decide where the new seam needs to be on the UV Shell.
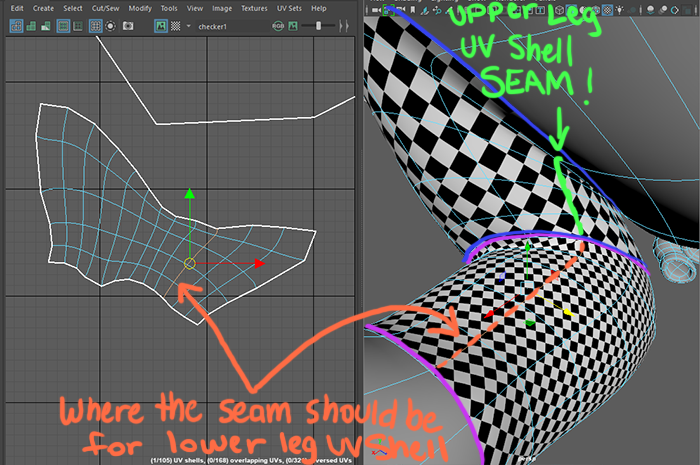
b) Select the edges where you want the seam to be and cut along those edges. Move one of the pieces of the UV shell to the opposite side and stitch the edges together until the two pieces are one whole piece again.
-
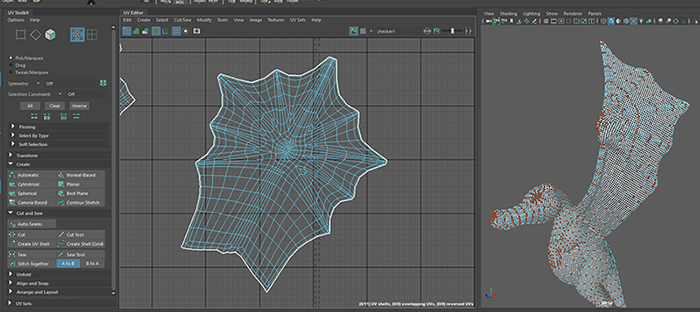
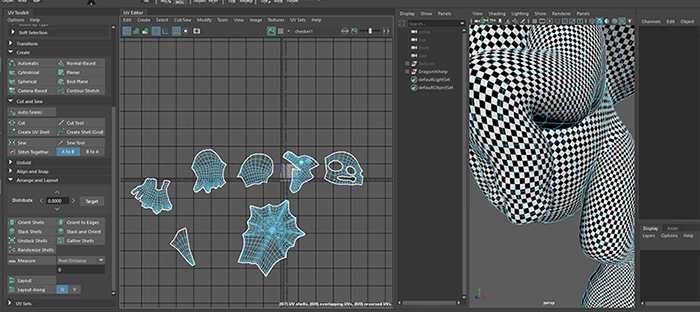
Make the rest of the UV shells for the dragon and unwrap them.
Once you have all your UV shells made, now it's time for sewing. Make sure the UV shells are all scaled appropriately so that the texture is the same size for all parts of the dragon.
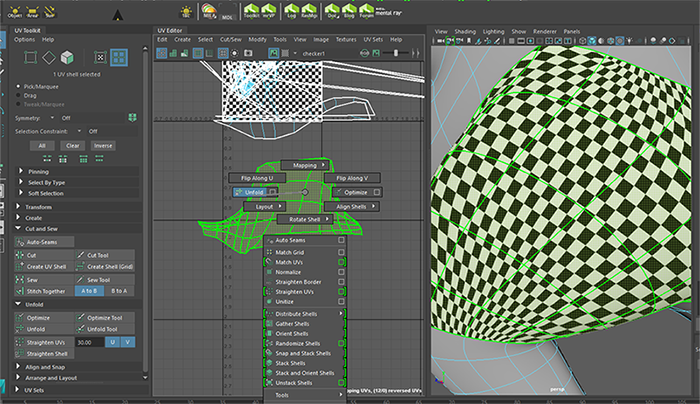
a) You definitely want to start thinking about how you can reduce the seams, since there are a lot of UV shells. For this dragon, it might be best to later combine the wings together, upper and lower leg, arm to hand, and so forth. First move the shells around so that certain parts of the dragon are grouped together that will later be sewn. For example: bottom foot and top foot, arm, top of hand and bottom of hand, upper leg and bottom leg.WARNING! If you are overzealous in combining shells, your UV layout and texture may suffer. Some shells probably shouldn't be sewn to other shells, so that they can be larger in scale for higher resolution. So try to strike a balance.
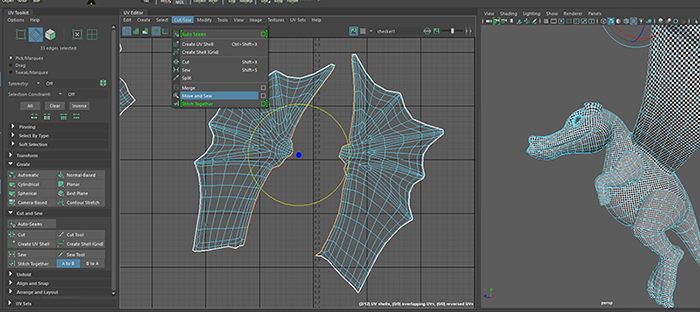
c) Select the edges of shell borders you would like to sew together. Click "Sew Together" tool, and then unfold the newly formed UV shell.For example, the wings:
The upper and lower hand:
d) In the end, you should have fewer UV shells. In the example, the following groups were sewn together: the upper and lower foot, top of hand bottom of hand and the whole upper arm, upper and lower leg , both wings. The head, torso and tail were not sewn.
-
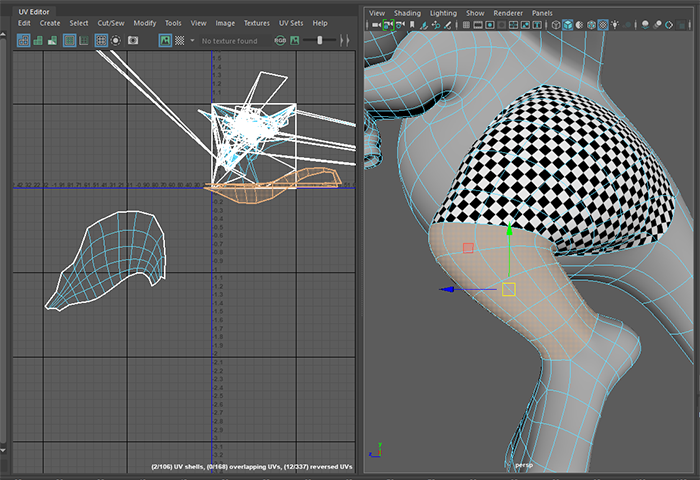
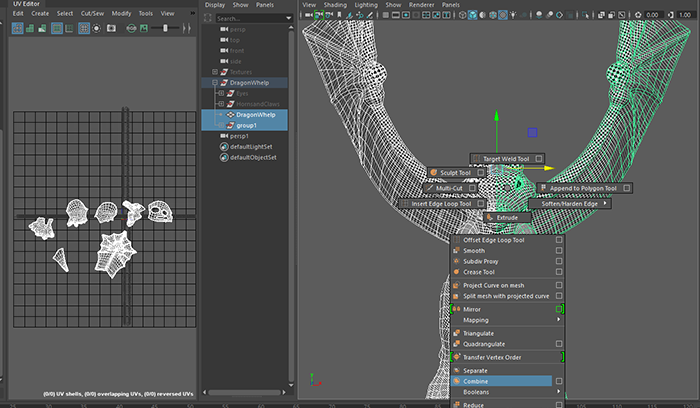
Now that the UV shells are ready for half the dragon, it's time to mirror the other half of
the model so that it will have exact same UVs as the other side. The UV shells of the new
half will overlap perfectly on top of the layout for the first half.
a) Click the half-model you finished unwrapping and duplicate (Ctrl-D). Group the duplicated mesh. Change its "Scale X" input from 1 to -1 in the attribute editor. Then, Combine and Merge Vertices down the center.
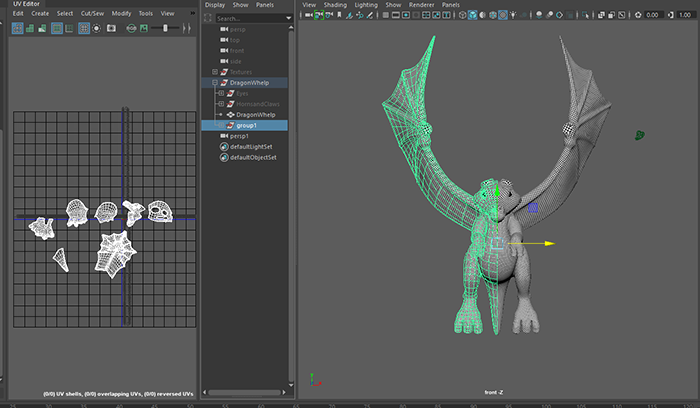
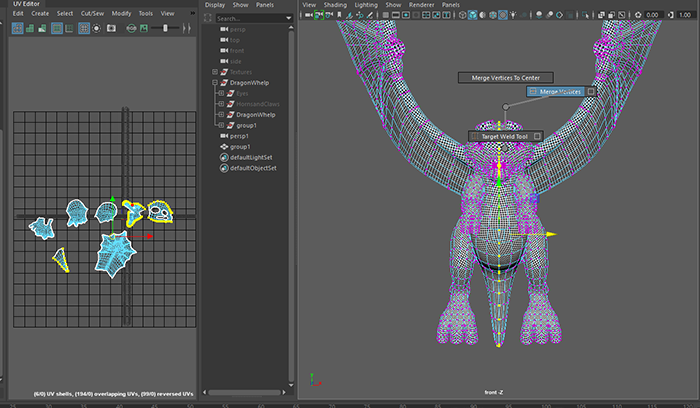
b) When you go back into the UV editor, it seems like nothing has changed. But if you Select Shells and move something, you'll see that the other half of the model's UVs have duplicated directly underneath.
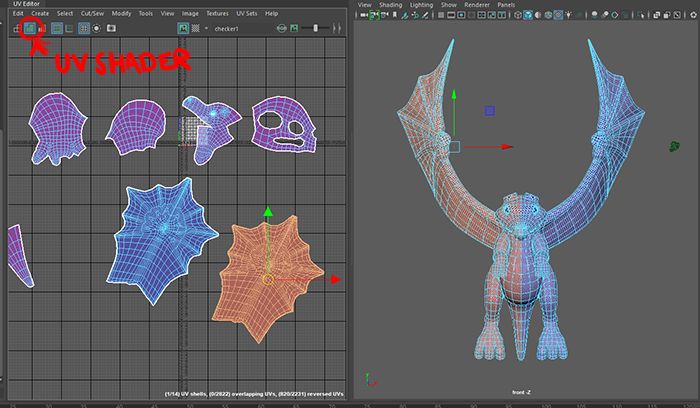
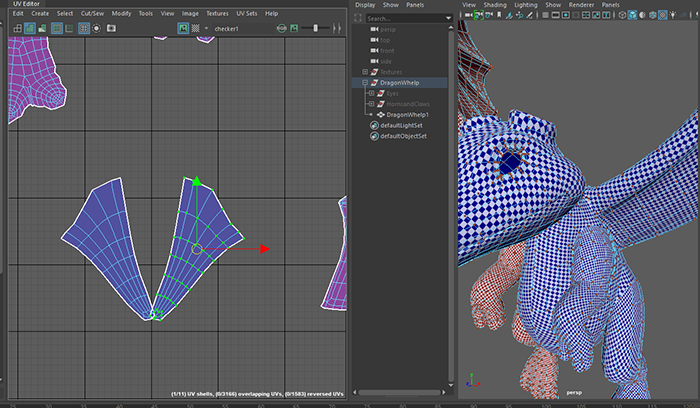
Turn on "Shaded Shells" to see the flipped shells. Red indicates a flipped UV. Non-flipped UVs are blue.
-
Overlapping UV shells are fine for parts of the dragon that will be symmetrically shaded,
as they reduce the work done in Photoshop and maximize UV space usage. This usually applies
to parts like the feet, hands, and wings. However, you do not want the UVs to overlap for areas
that need be asymmetrically shaded (for example, one hand having a tattoo), or for parts that
would work better as single pieces (head, torso, etc. ) This helps to eliminate seams.
So in summary, if you want it to be symmetrical, keep it overlapped. If you prefer asymmetrical textures, move it and sew the pieces together.
a) Flip the duplicated UV shells for the head, torso and tail.
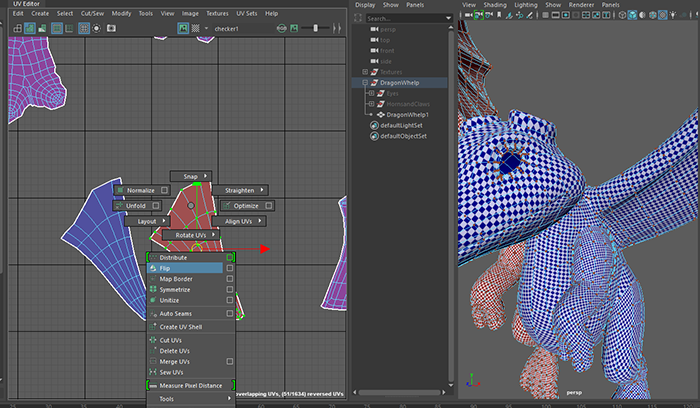
b) Sew and unfold (if needed) the flipped pieces together for the tail, head and torso.

c) Move the head, torso, and tail pieces together. Then sew and unfold (if needed) those shells together.


-
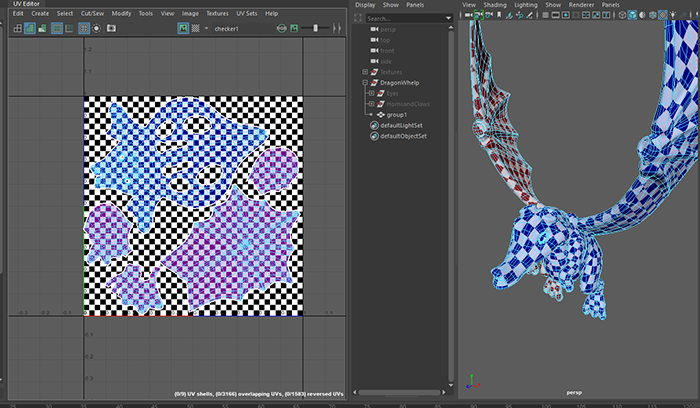
Lay out all the shells between 0 and 1 in UV space, then scale and arrange them to maximize the amount of space used. You will also want to leave at least a little space between the shells so that the texture does not bleed between them.
-
Save a UV snapshot that can be used as a basis for texturing.
Go to Image → UV Snapshot to save a snapshot.
Set Size X and Size Y to 1024, change the Image
Format to PNG, and save the file.


-
Now to paint! The best part!
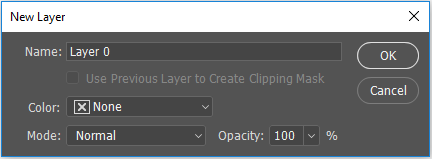
Open the UV snapshot in Photoshop. Double-click the Background layer to convert it to a normal layer. A window will pop up with new layer settings. Name the layer whatever you'd like and press 'OK'.

Your background layer should now look like this:

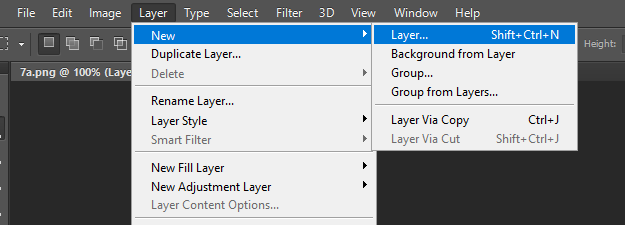
Create a new layer by going to Layer → New → Layer....
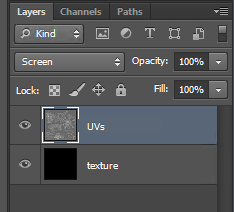
There are several ways to arrange your layers when painting your texture. The simplest is to paint on a layer on top of the UV map. Another way is to place the UV map above your texture layer and set it to "Screen" so that the UVs overlay the paint. Make sure to name your layers.
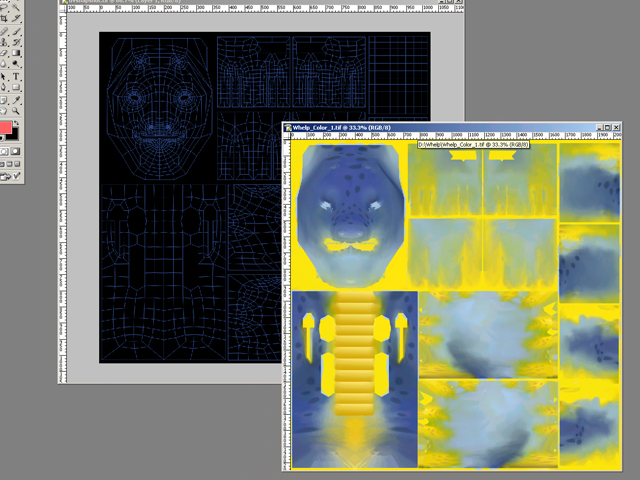
Paint your dragon however you'd like. It's generally easier to paint in the basic colors, then save out a version of the texture to test in Maya to make sure everything is where you want it. Look for seams, or places where the UV sections are visible in the texture. Try to paint these out if you can. Once you've cleaned that up, it's easier to go back in and add more detail if desired.
If you're not comfortable with Photoshop, or have never used it, here is a link to a reference that has some tips to get you started: How To Use Photoshop.
-
Once you are done painting your texture maps, save them to the network
as .png files. Be sure to turn off the UV layer before you save them so
you don't have the grid mapped on your dragon.

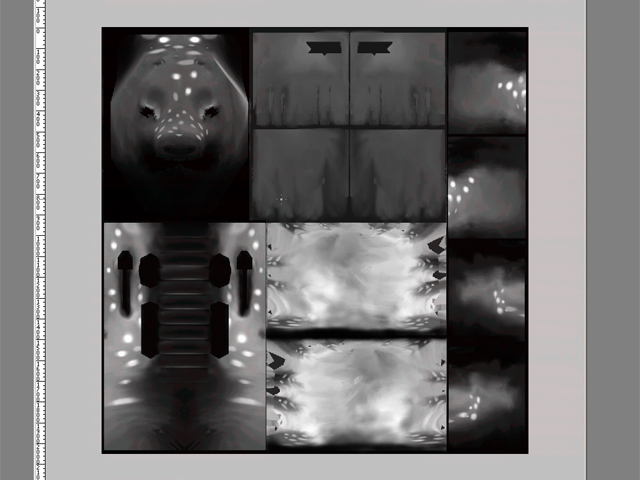
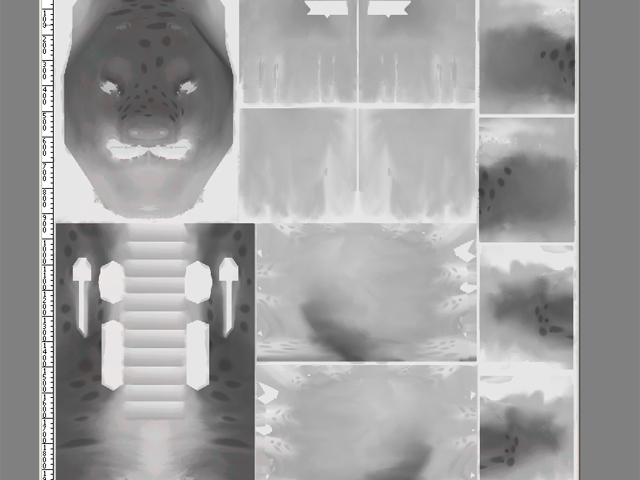
Shown below are example color, bump, and specular maps. The bump and specular maps are extra credit. Bump and specular maps are grayscale. A bump map effects the way light hits the surface of the model. A white area indicates a high part on the map while a black area is low. In the specular map, white areas are shiny while black areas are not.
-
Back in Maya, create a new material and assign it to the dragon. We will be rendering in Arnold and using Arnold shaders, so make sure the Arnold plugin is installed. This is a good time to apply your shader knowledge from Project 3A! Play with the Ai Standard, Ai Utility, and other shaders!
Then map a File render node into the Color for the material. Browse for your color map in the Image Name field for the file. Since your textures will be .png Maya is going to automatically link them to the shader's transparency channel as well. To get rid of this, disable Arnold's opaque in dragonwhelp_Shape.
Do the same for Bump Mapping and Specular Color if you have bump and specular maps.
a) If you are doing a bump map, you have to separate the shells of your UV map so nothing overlaps. If you are using AI Surface Standard, Bump map will be under geometry. Specular will be under speculate. You can add your images under base --> color.
b) Adjust your textures until you are happy with them. Unfortunately, the texture will not update automatically in Maya when you save a new copy of the texture file. To force an update, go to the file node that you mapped into the Color and click the Reload button.
-
Save your dragon as [lastname]_[firstname]_dragon.ma.
Open the Dragon Cove file provided for you at the beginning of the assignment.
Go to File → Import and choose your dragon file.
Open the Outliner. Create a group labeled "dragon_char"and and middle click drag your dragon model into the group. Next, select that group, and hit '3' to smooth it.
-
The dragon cove should be ready for rendering! There are four camera views
named LightcoveCamera, Closeup1, Closeup2, and
Closeup3. Open the Render View (click this button
 which is located at the top middle of the screen)
and make sure Render → Render All Layers is checked.
which is located at the top middle of the screen)
and make sure Render → Render All Layers is checked.
Now render each of the four camera views. You can do this by clicking each camera view in the viewport and then clicking the Render button, or from the Render View window go to Render →Render → [insert camera name here] for each camera.
Be sure to save each file as a .png using the naming conventions listed below when it is finished rendering.