Project 1a: Basic Modeling
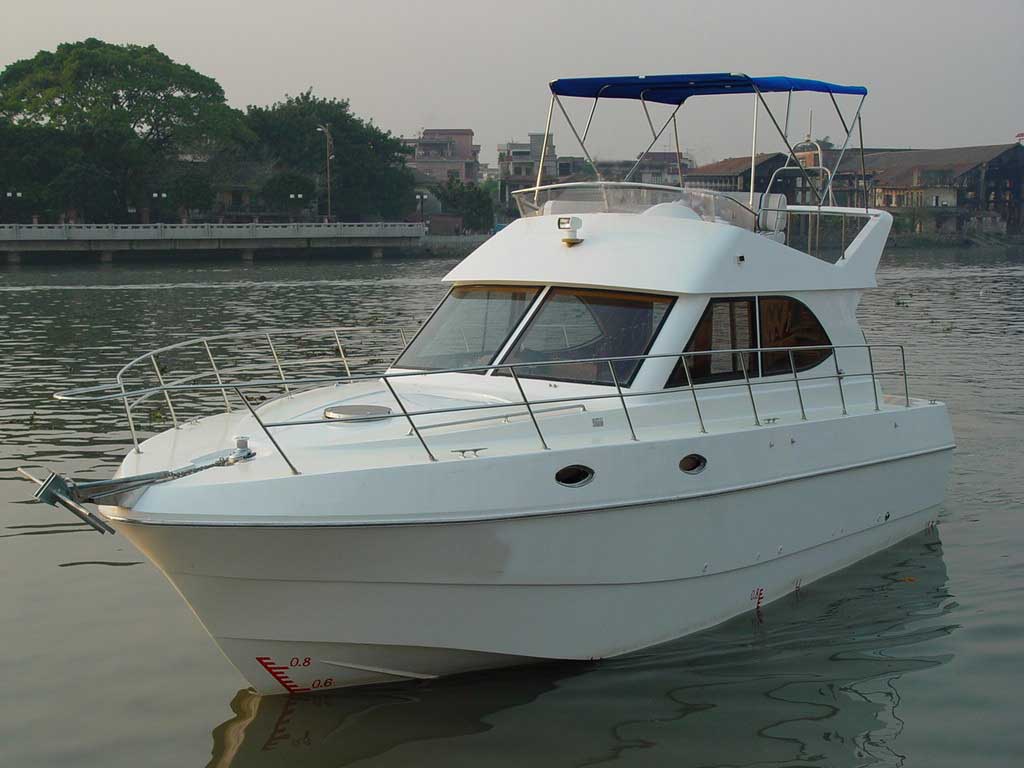
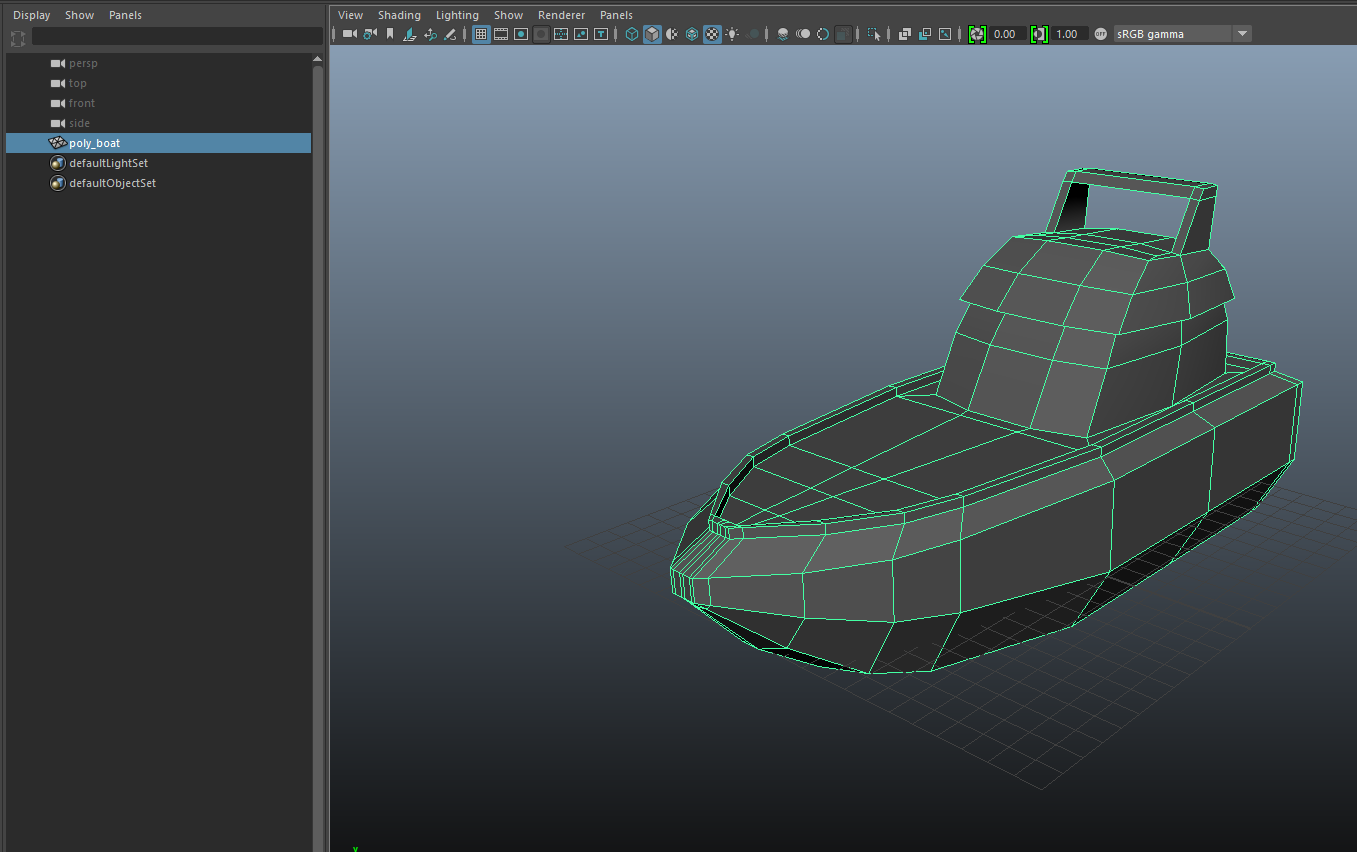
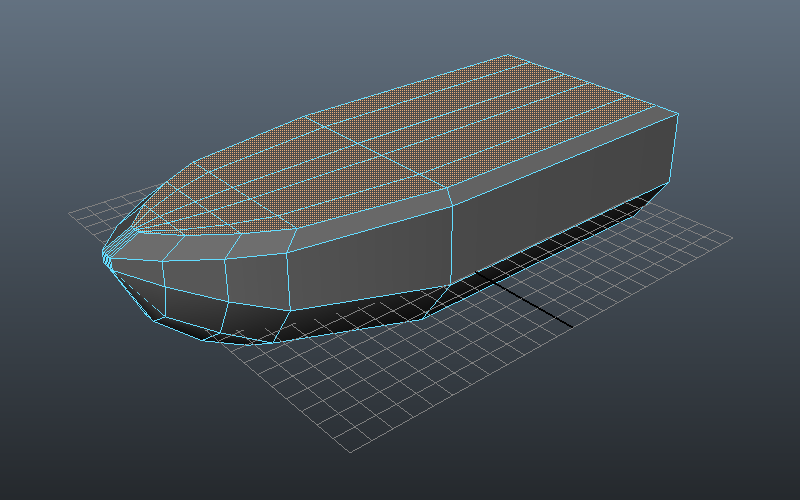
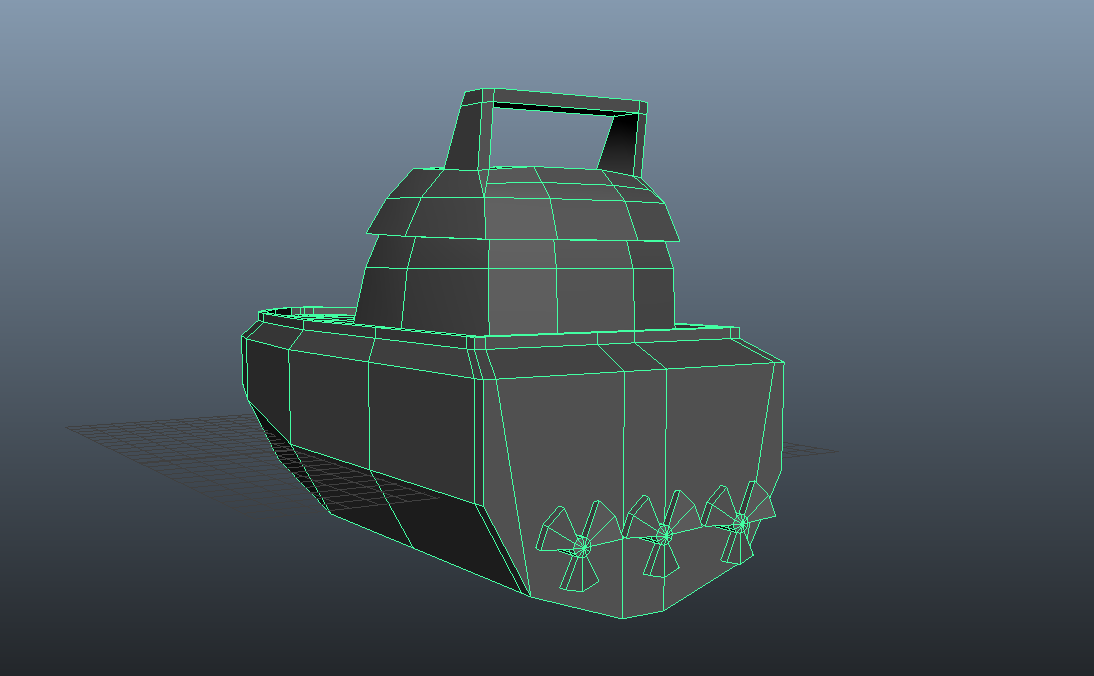
In this project we will create a boat using a polygon mesh. Shown below is our reference image as well as the final output. Create a new Maya file to begin. Save your file in \\csenetid\cs\unix\projects\instr\capstone2 under cse458_au18_student_files
Before you start, make sure you are using the "Modeling" menu set, as you will sometimes use commands from this menu set.
-
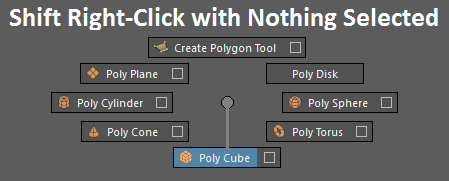
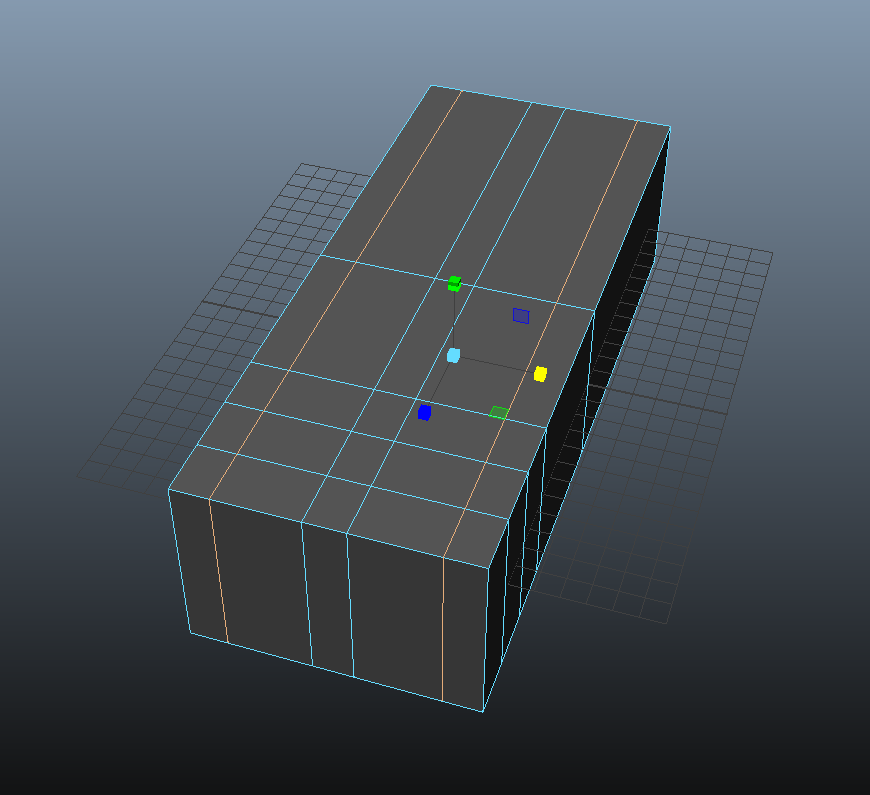
Create a cube.
Move and scale the cube so that it resembles the cube below.
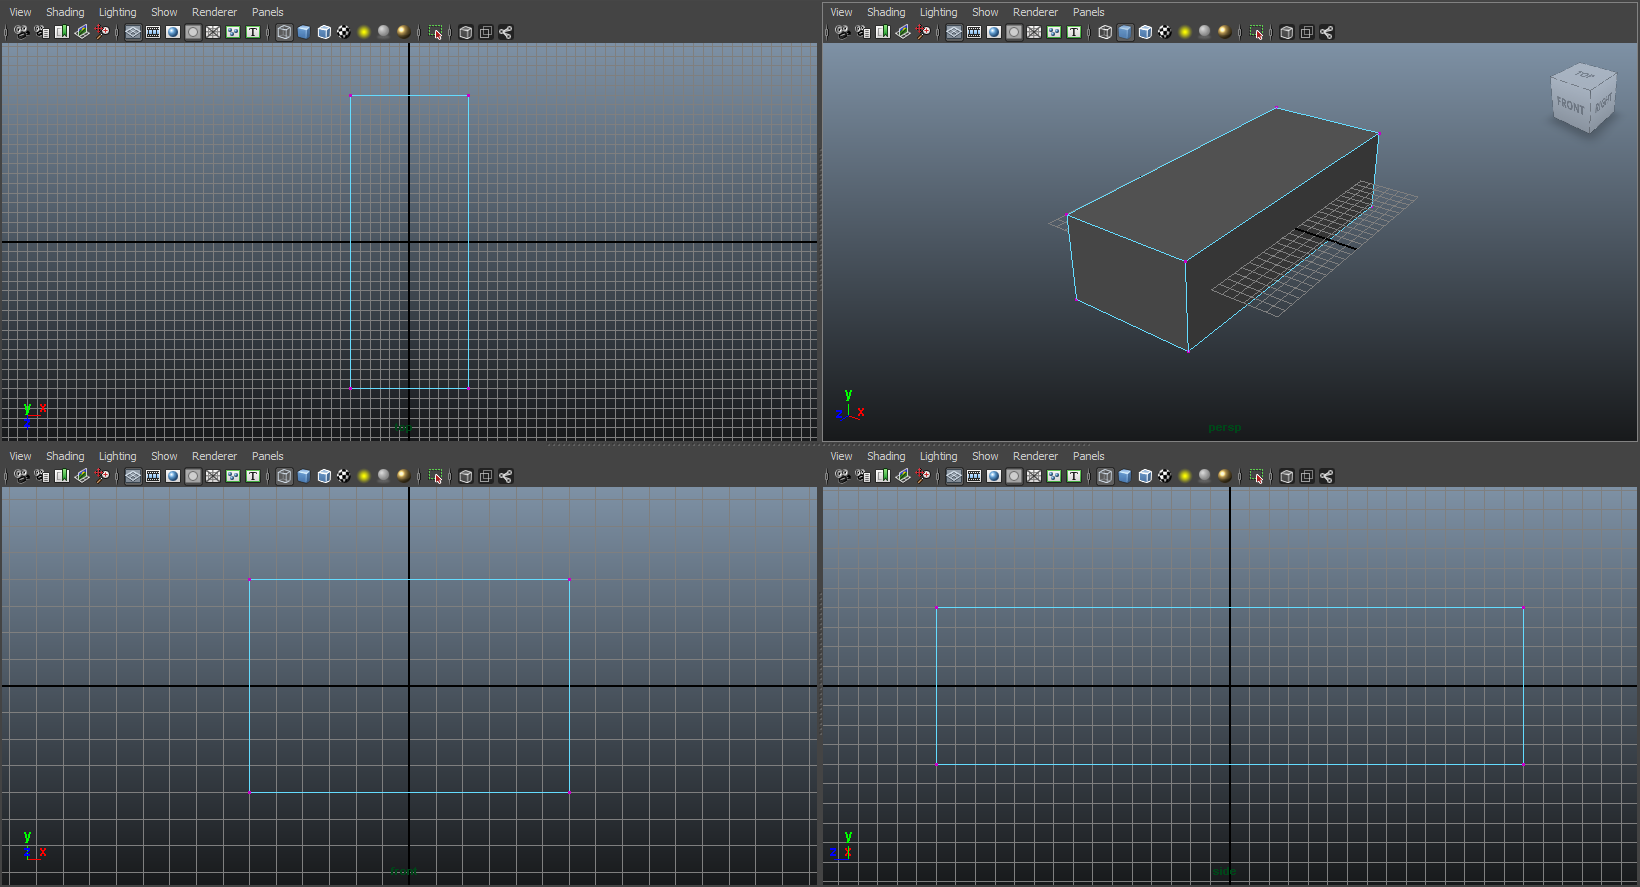
Start by centering the cube in the scene. Hit 'w' to activate the Translate Tool. Next, hold 'x' to enable grid snapping. Then, while continuing to hold x, drag the center tool handle to the origin of the grid and the cube will snap to there.
Now you can hit 'r' to activate the Scale Tool and resize the cube. You don't have to exactly match the size to the image, but be sure to approximate the relative proportions. -
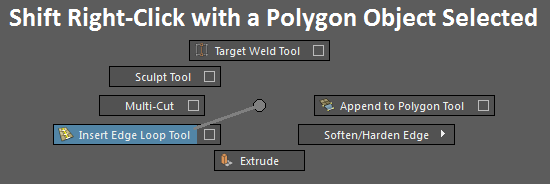
Add the indicated edge loops by activating the Insert Edge Loop Tool and clicking on one of the edges going down the length of the boat.
When accessing this tool through the marking menu make sure you are in Object Mode and the box is selected first.
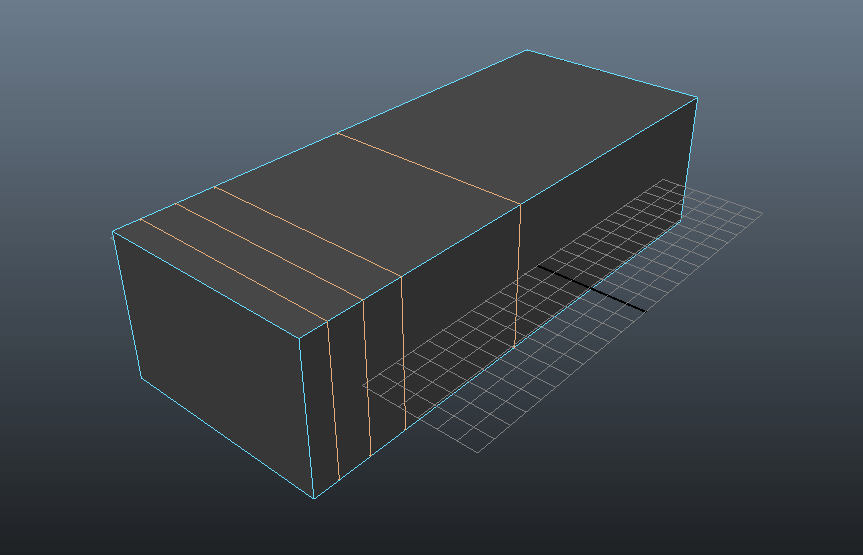
- Add four edge loops down the length of the boat.
You will want to insert all of them at once so they are evenly spaced. With the Insert Edge Loop Tool active click the Tool Settings button ( ) at the top right of the interface. Change the settings to what is shown below then insert the loops.
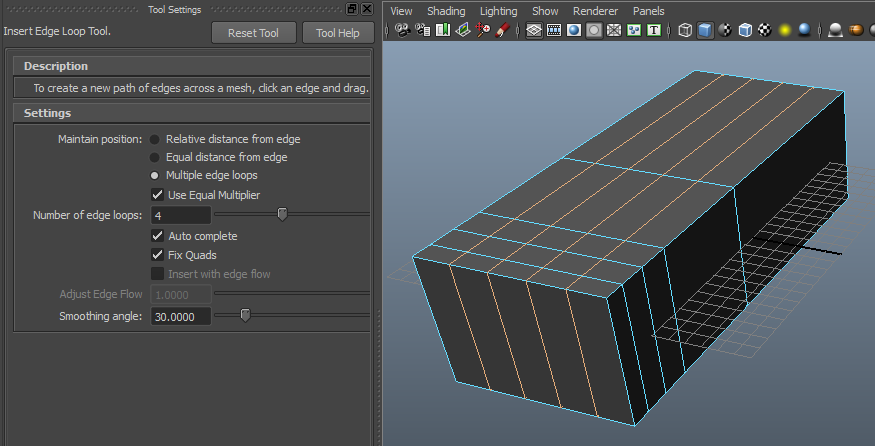
Click "Reset Tool" after you are done to revert the settings back to normal.
Now select the middle two edge loops of the four you just added and use the Scale Tool to shrink them inwards symmetrically. In Edge Mode you can double click an edge to select its loop, and then hold Shift and double click another edge to add its loop to the selection.
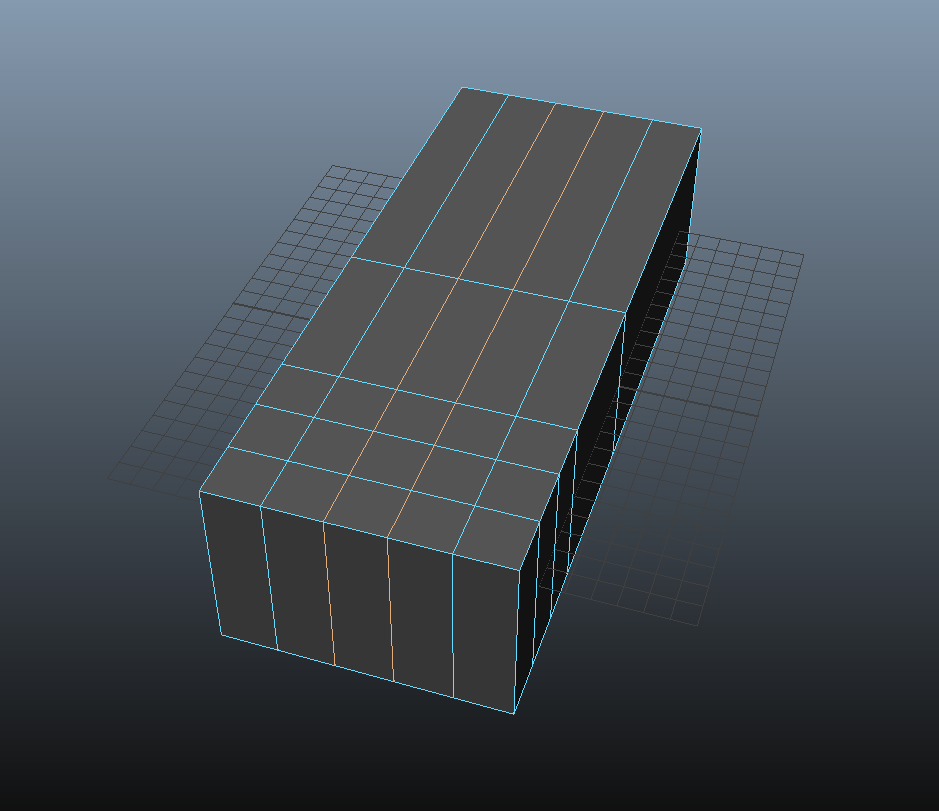

Similarly, select the outer two edge loops of the same four and use the Scale Tool to expand them outwards symmetrically.
-
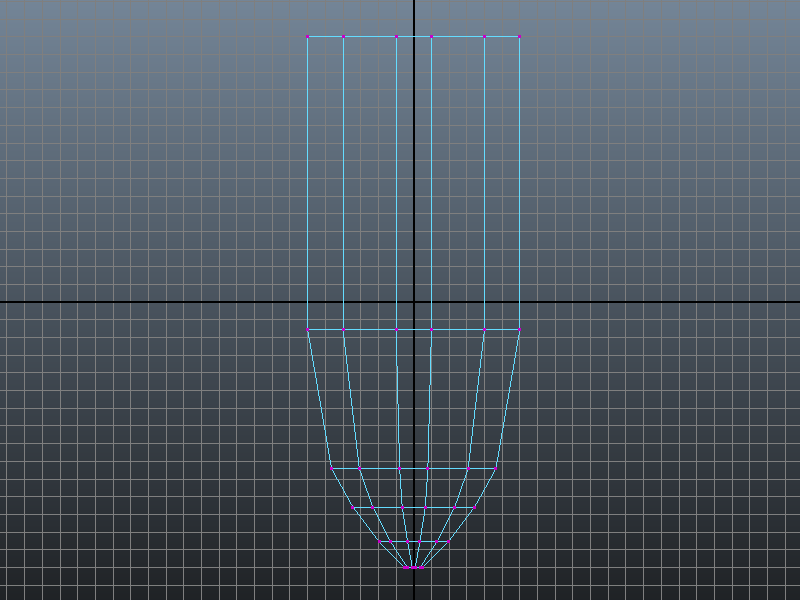
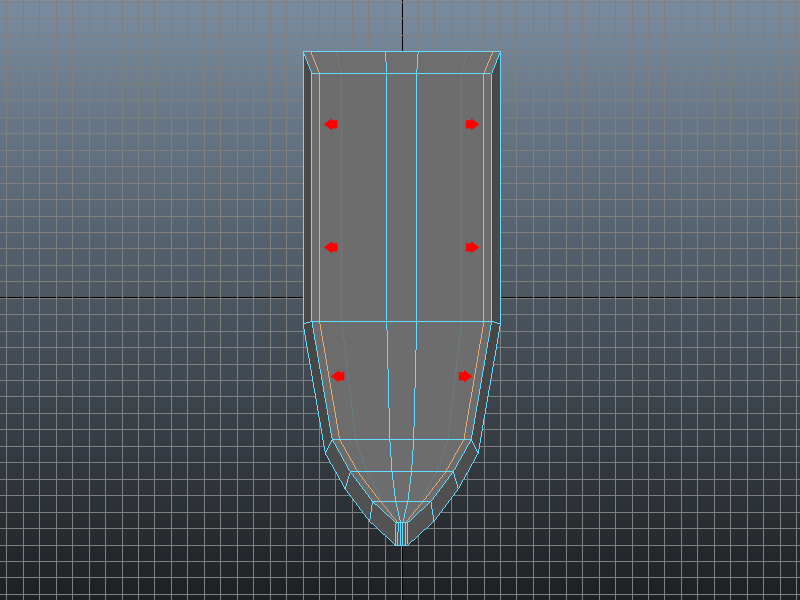
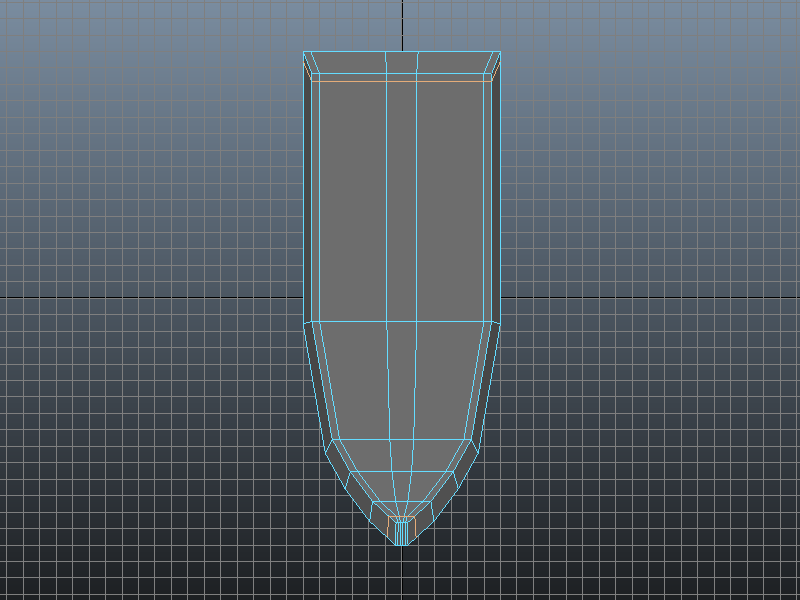
Go to the top camera to view the boat from above. Select each row of
vertices in the front of the boat and scale them inward to create a
tapered point.
-
Go to the side camera. Select the bottom vertices and move them up to create the slope of the hull in the profile.

-
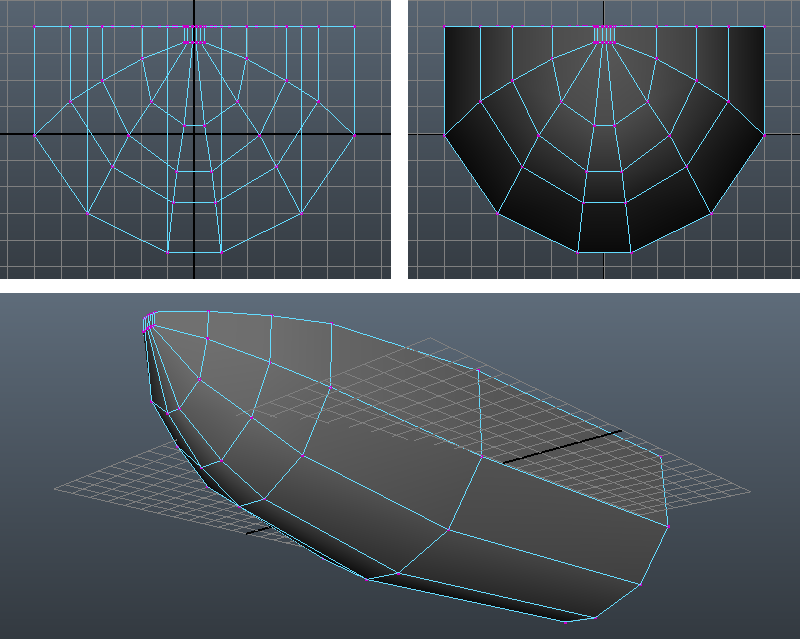
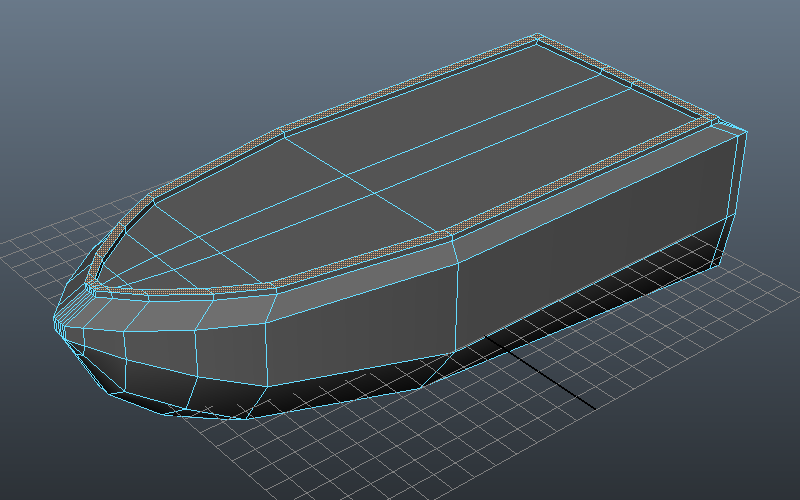
Right now the hull will only appear curved from the top and side views.
However, the perspective view reveals that there are very sharp creases
going down the sides of the boat. Using a combination of the
perspective and front views select the edges along the bottom of the
boat and move them up to create a curved hull.
-
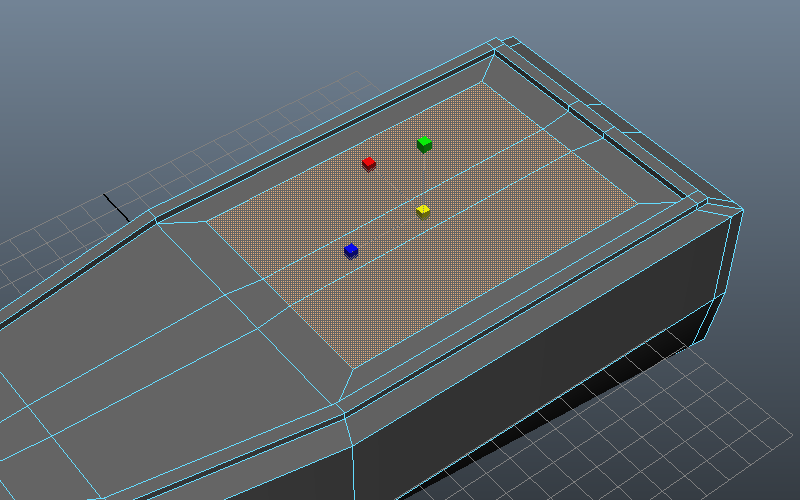
Select all of the top faces of the hull and extrude them upward.
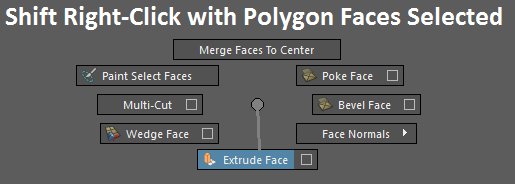
Immediately after extruding, use the Scale Tool to shrink them inward and then move them up slightly to create the deck of the boat.
- In the top view, move the edge loops specified in the
picture outward so they create a border of uniform width on the sides
of the deck.
- Add an edge loop to the front and back of the deck to complete the border.
-
Select all the faces in the border and extrude them straight up slightly to create a rim around the deck.
-
Select the faces toward the back of the deck and extrude them, then scale them inward.
-
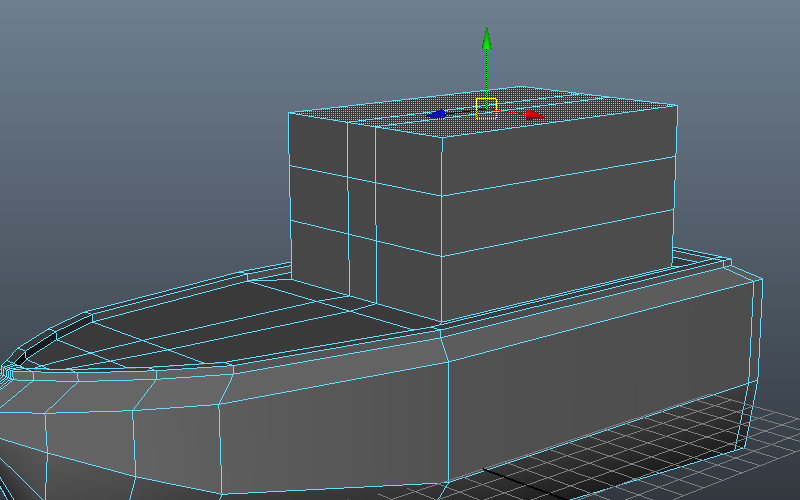
With the same faces selected, extrude them upward three times to create
the cabin. However, before doing so, you should be introduced to a very important and useful hotkey if you have not been already: the g key. This hotkey activates the last action/tool used so you do not have to repeatedly navigate the menus. Use the g key to complete the extrusions.
-
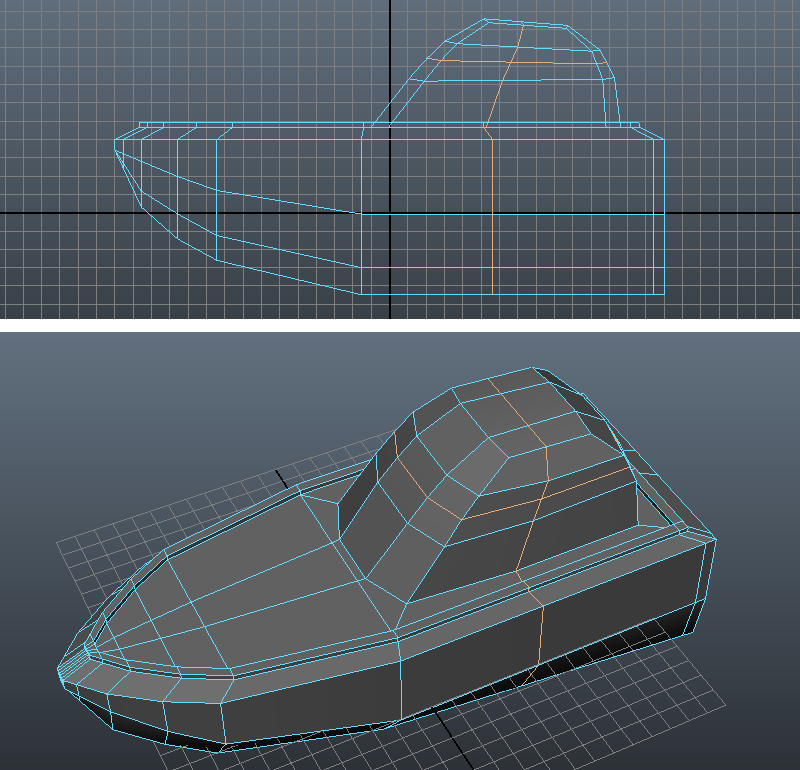
Using a combination of the scale and move tool adjust the vertices to
give the cabin a sleeker look. The front faces of the cabin should slant
and curve backwards. Add the edge loops shown in the picture once you
are done.
-
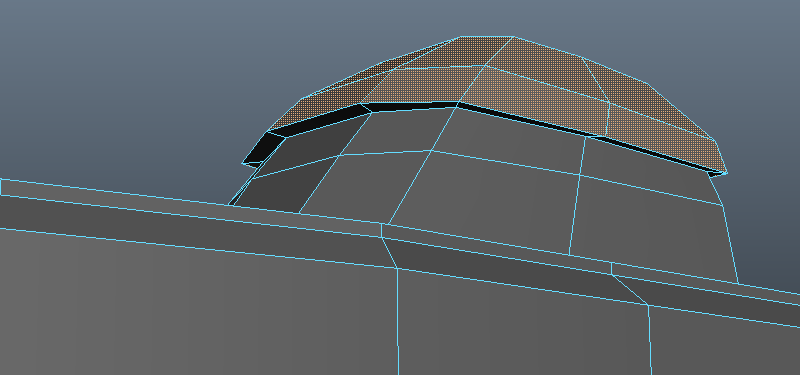
Select the top faces of the cabin, extrude them out and then move them down as necessary to create the lip of the roof.
-
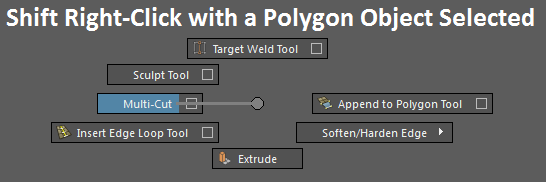
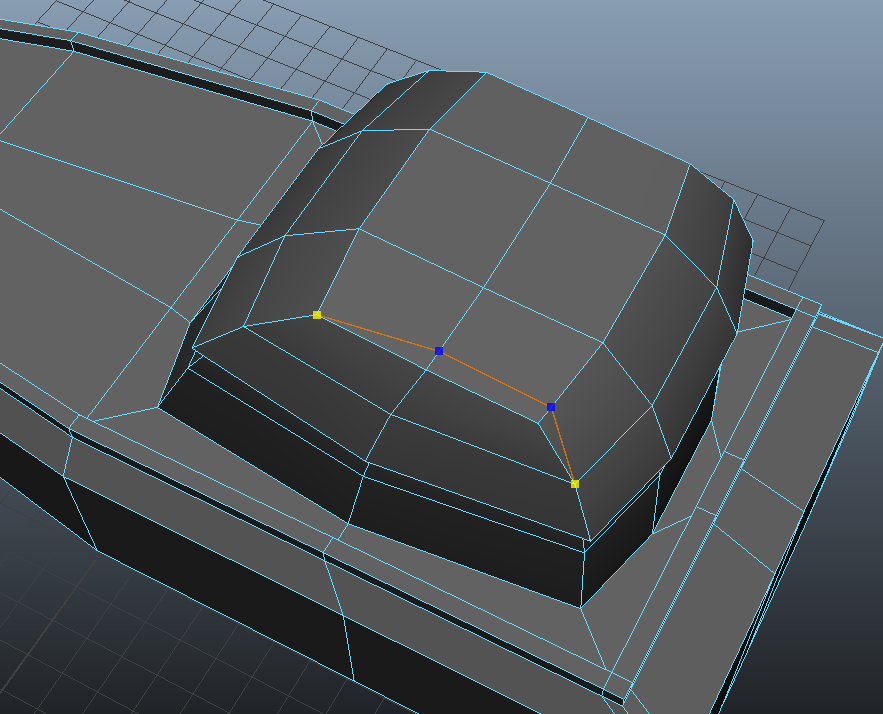
Use the Multi-Cut Tool to draw the lines shown in the picture on each side of the cabin roof. Activate the tool and left-click to create edges. Press 'Enter' when finished.
-
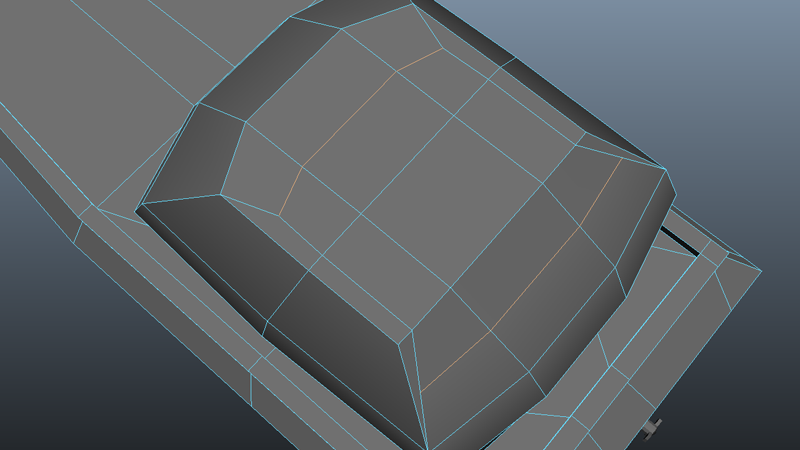
Since the previous step created triangular polygons, use Multi-Cut Tool again to create the following highlighted lines so the mesh stays in quads.
-
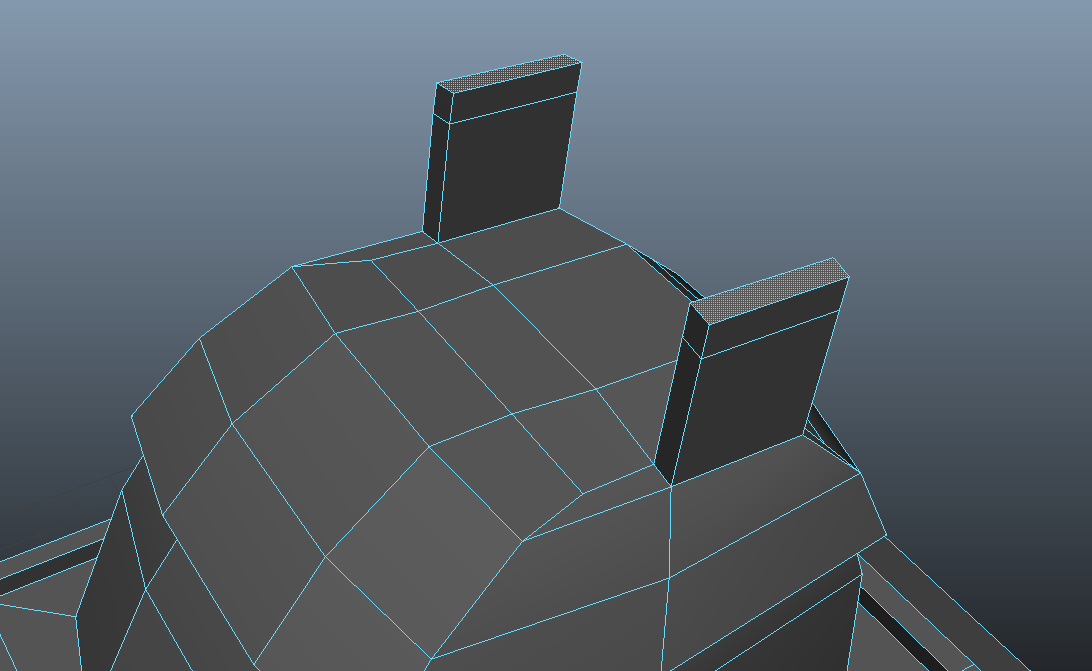
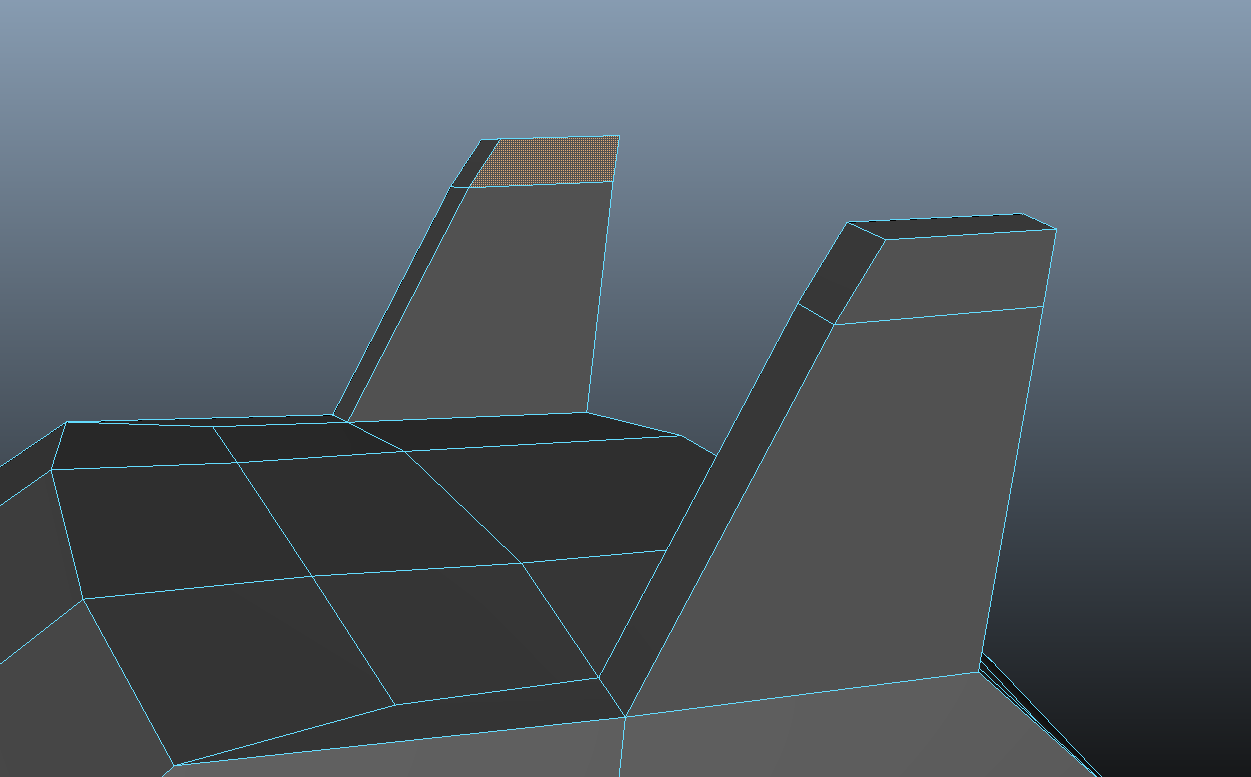
Extrude the newly created quads up twice and slant them slightly backwards.
-
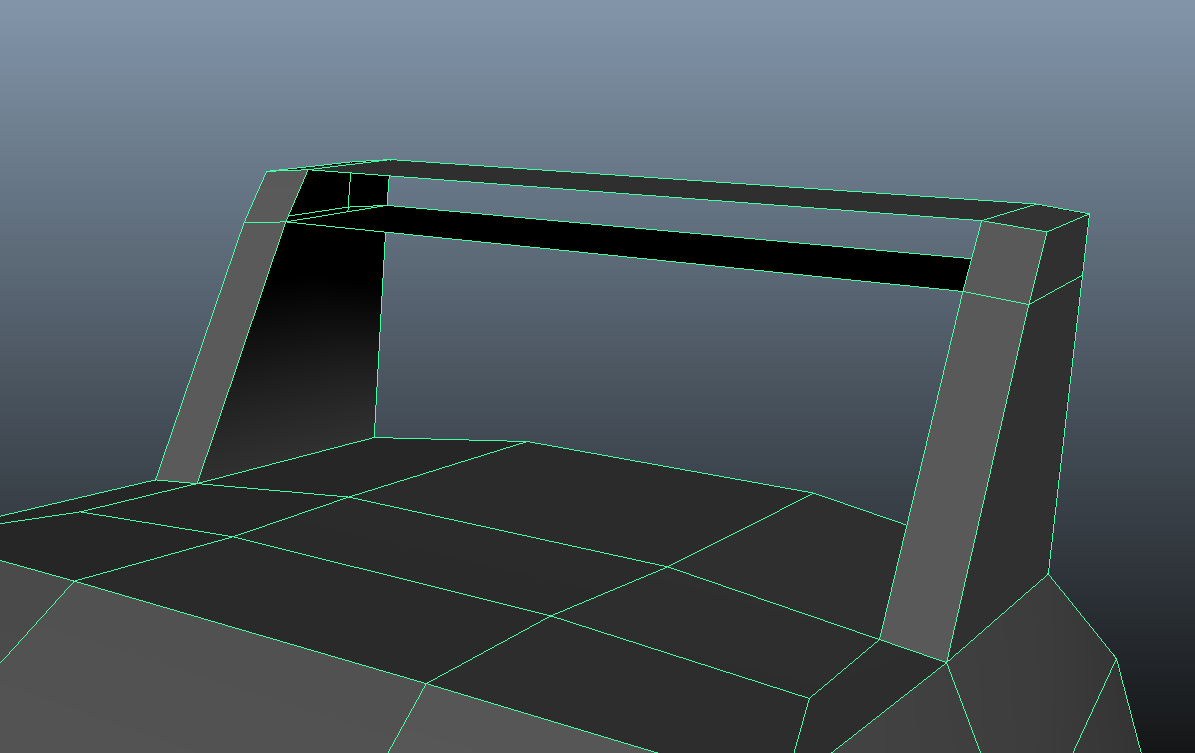
Scale and move the vertices as shown and then delete the inside faces of the fins.
-
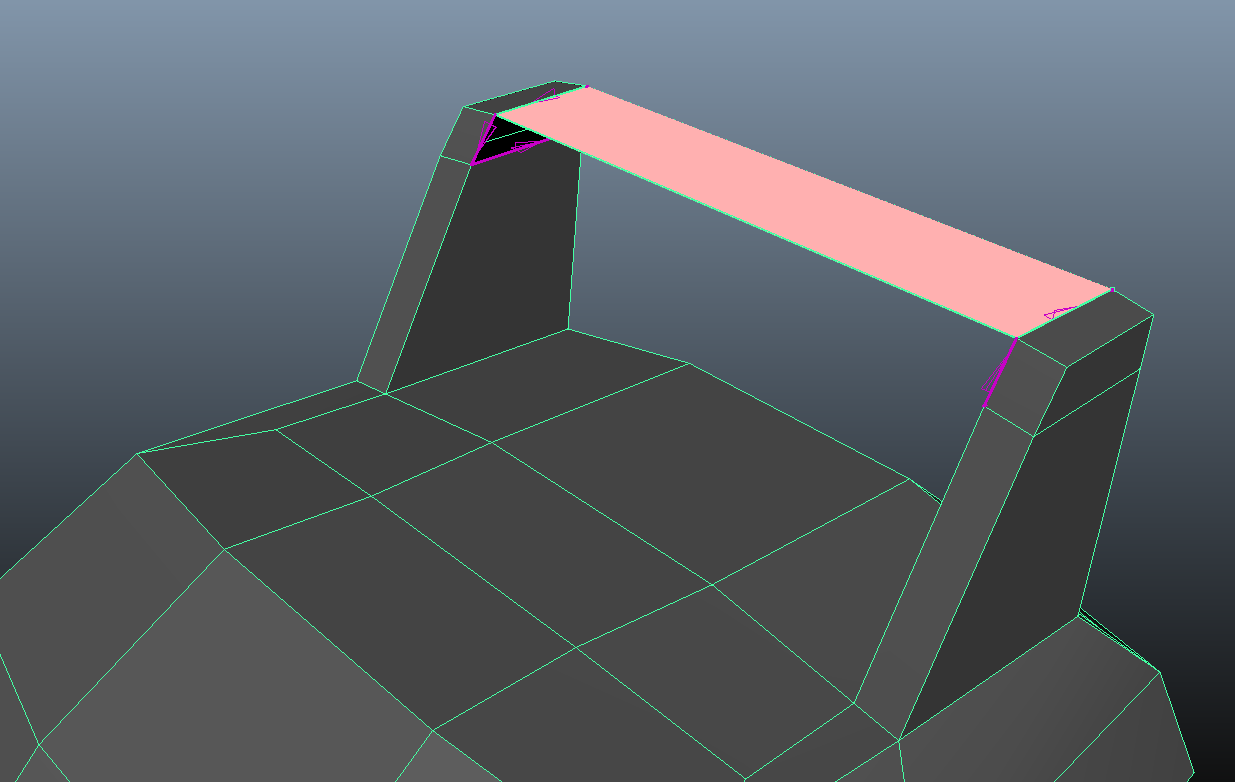
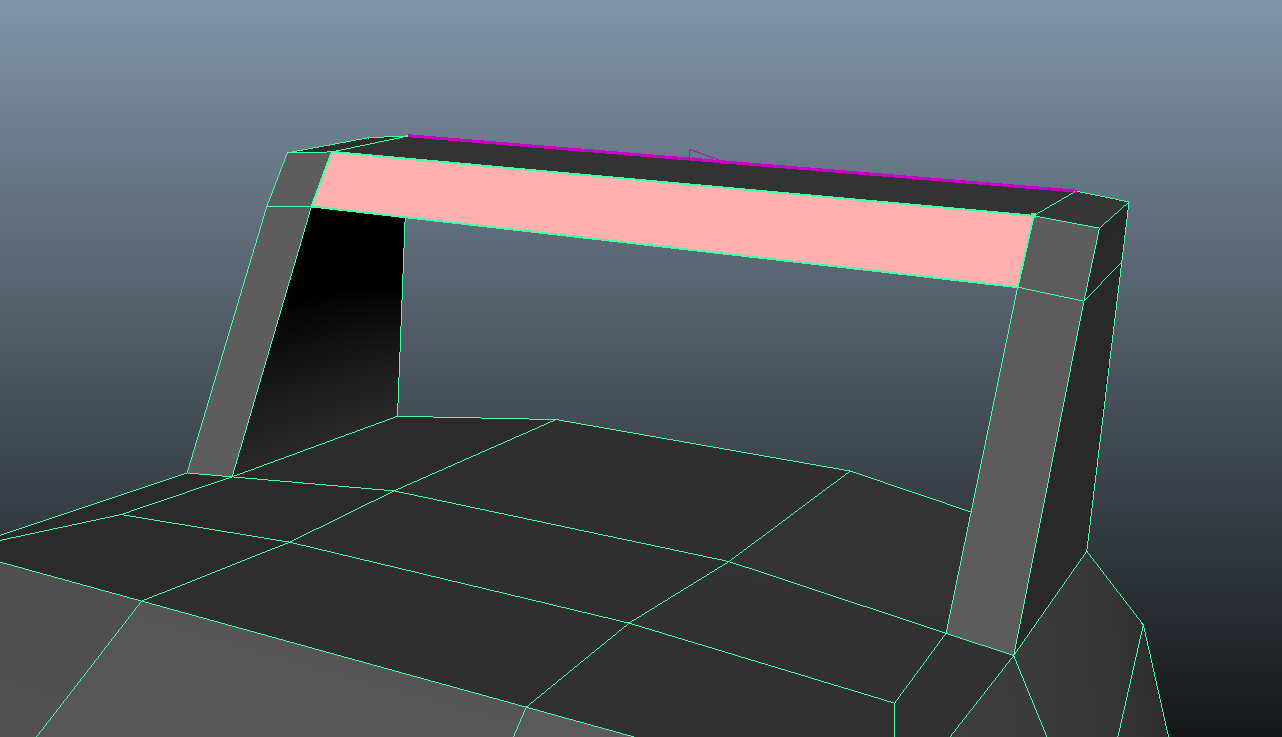
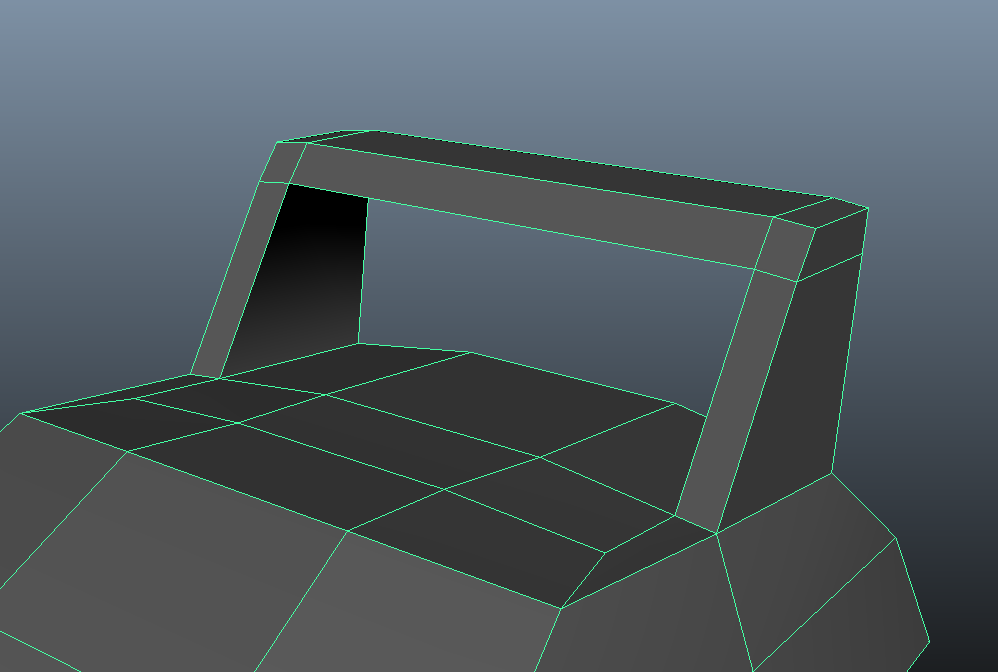
Activate the Append to Polygon Tool.
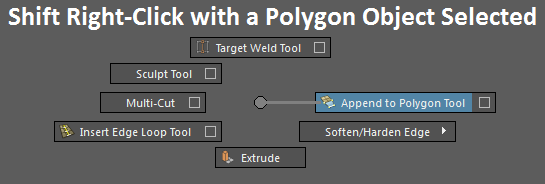
Select one of the edges on the border of the deleted face, then select the corresponding edge on the other fin and press 'Enter'. This should create a face that bridges the gap. Do this this for the other 3 edges. You may find that it's easiest to create the top and bottom faces first, then connect the long edges of top and bottom to each other.
NOTE: If you incorrectly select an edge in the Append to Polygon Tool, you can use the 'Delete' key to undo your selection. (The 'z' key does not work to undo selection in this tool.)
-
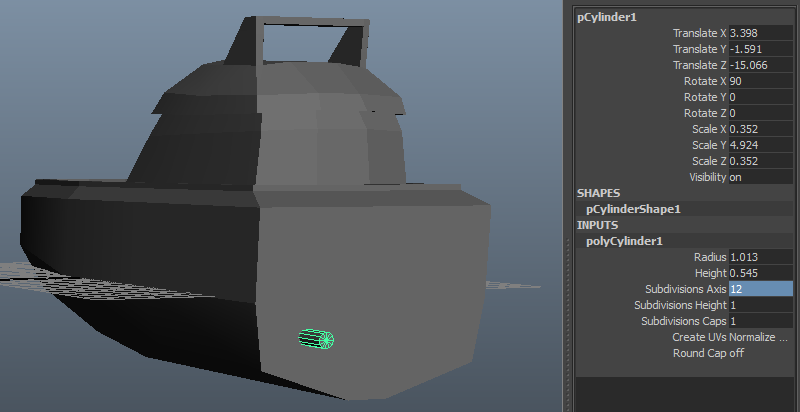
Create a cylinder.
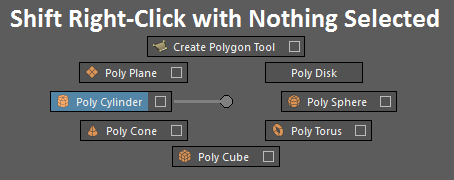
Move, scale, and rotate the cylinder until it is in the shown position. In the Channel Box, click polyCylinder1 in the Inputs section and make sure "Subdivisions Axis" is equal to 12. If a menu doesn't expand when you click on it, make sure that construction history is on when the cyclinder is created. This button along the very top of your Maya window should be toggled on so it's highlighted blue.
-
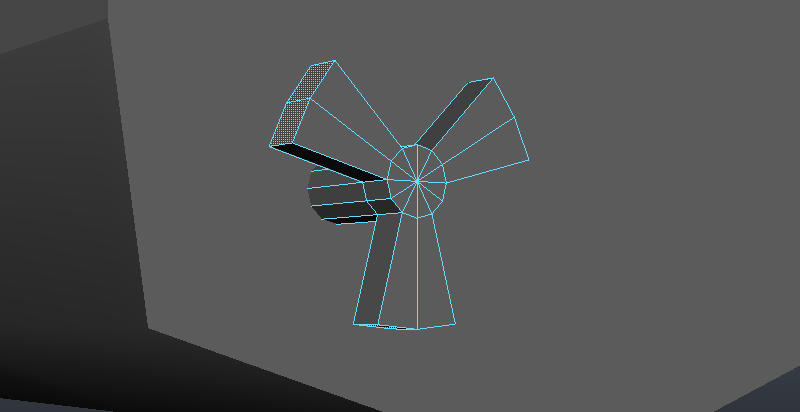
Using the Insert Edge Loop Tool, add an edge loop toward the end of the
propeller shaft. In groups of two, select every other group of faces and
extrude them outward to create the basic propeller shape.
-
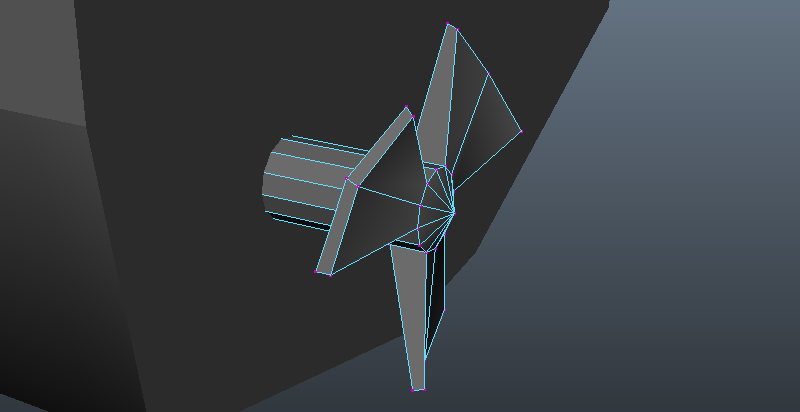
Scale and rotate the vertices on the edge of the propeller blades to give them a more turbine-like shape.
-
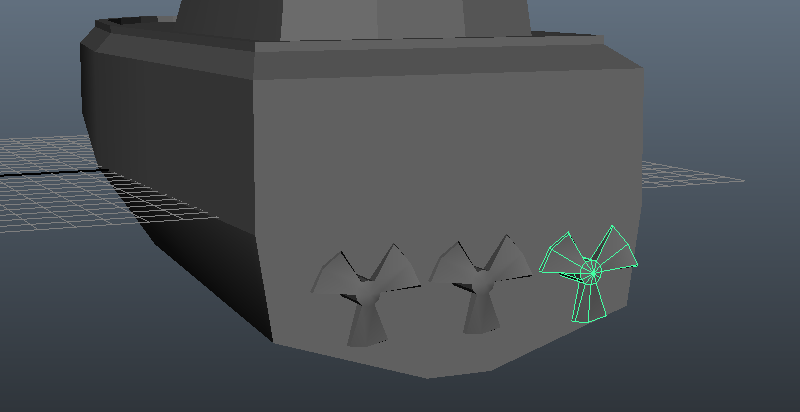
Select the newly created propeller and duplicate it (Edit → Duplicate or Ctrl+D). Move the new propeller over. Do this one more time so you have 3 propellers.
-
In object mode select all three propellers and the ship. Combine all four objects into one mesh to create the final boat model. (Mesh → Combine).
-
Now for a bit of clean up. With the boat selected, delete its History (Edit → Delete By Type → History).
In the Outliner or Channel Box, rename the boat to "poly_boat". You can
change its name by double clicking on its current name, which should be
something like "polySurface1".

With that, you should be finished.