Project #7: Basic Animation Principles
- Assigned: Thursday, Nov 8th, 2007
- Due: Wednesday, Nov 14th @ 11:59 PM
Reading: (Don't forget this!)
Additional Optional Reading & Reference:
- Animation in Maya 7.0 (From Alias)
- 1: Animation Basics
- 2: Keyframe Animation
- 4: Path Animation
- tutorial4.pdf - old tutorial, it but has good deformer information
- Video Demo: \\preproduction\course_material\demos_and_lectures - bouncing_ball_demo_11.30.05.mp4
This is a really good motion demo from a previous class.
Objective:
Learn basic animation principles such as timing, spacing, arcs, anticipation, and squash and stretch.
Part 1:
Find two balls of different weights -- the bigger the contrast in weight the better.
You will be using these as reference. Please bring them to class on Tuesday Nov. 13th. Plan each exercise on paper before beginning -
this may feel like a waste of time, but it will help you finish faster, easier, and with better results.
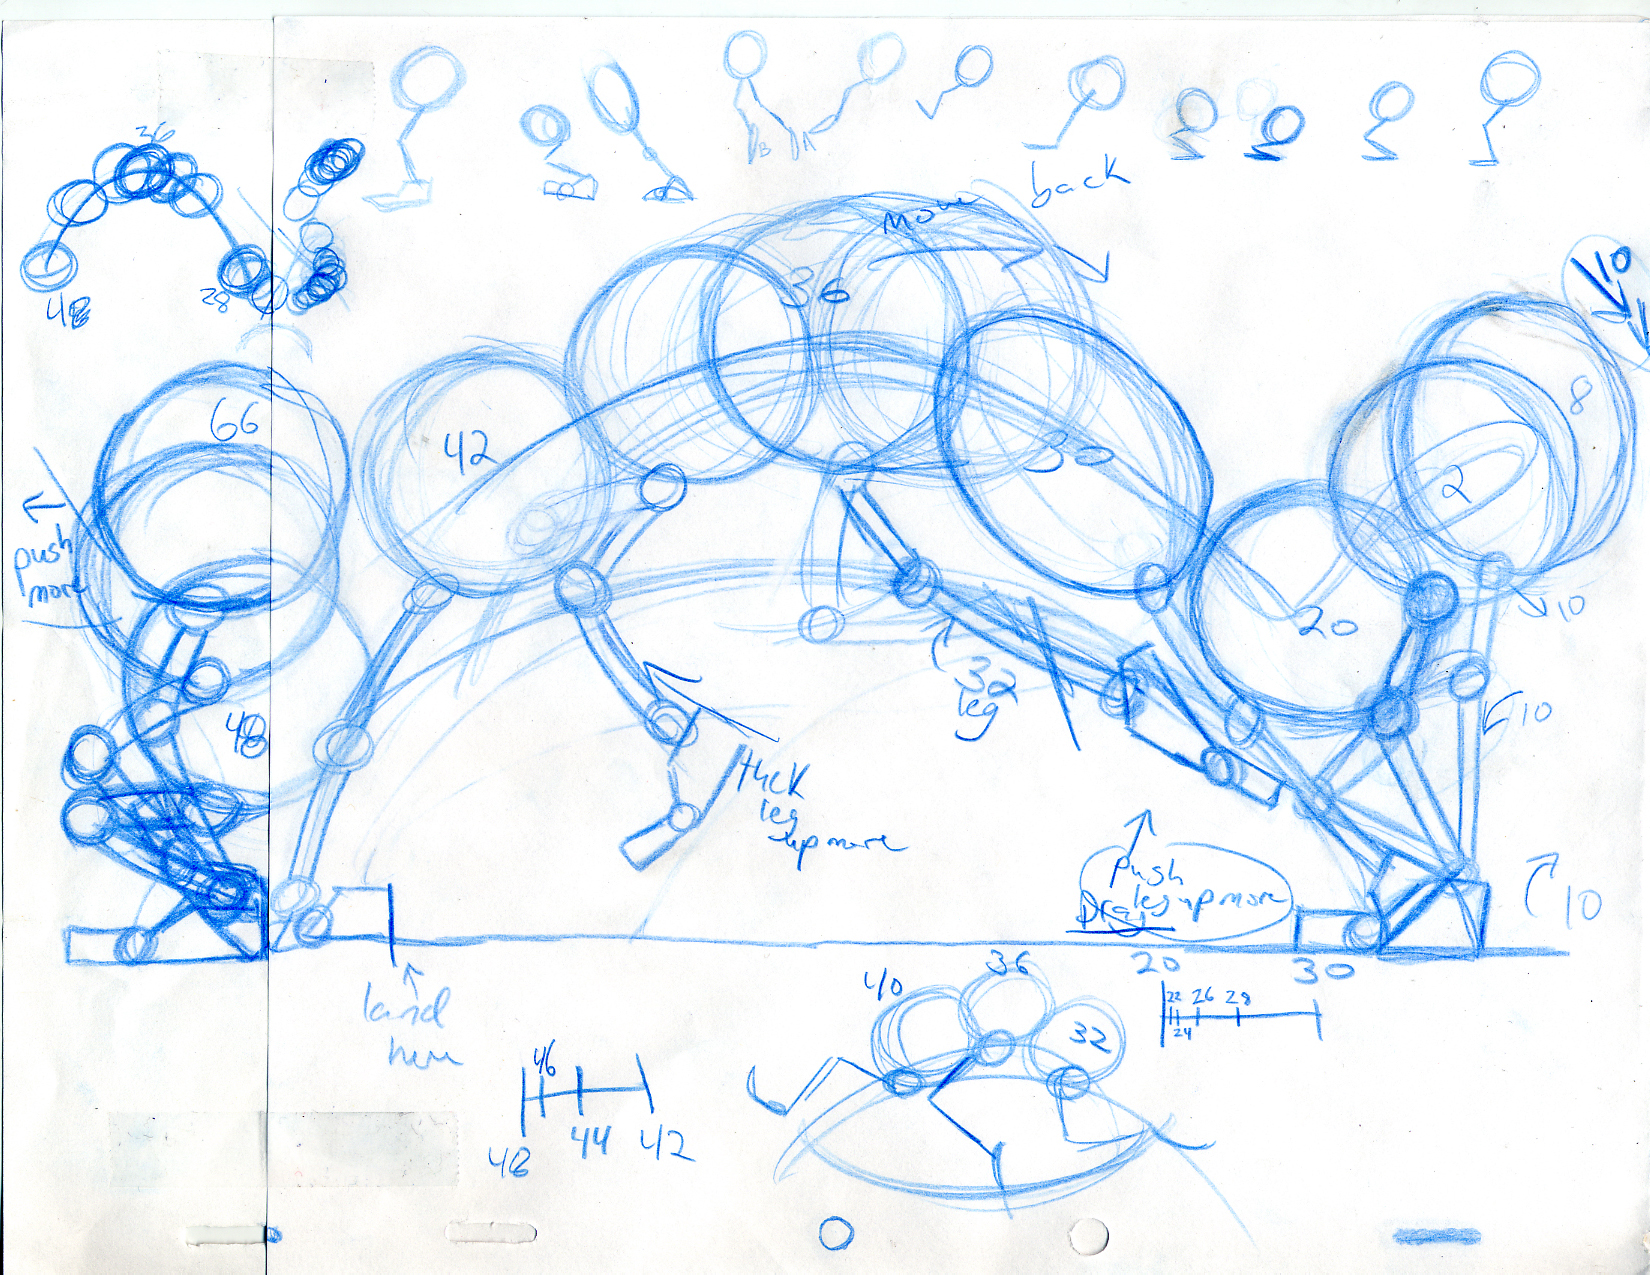
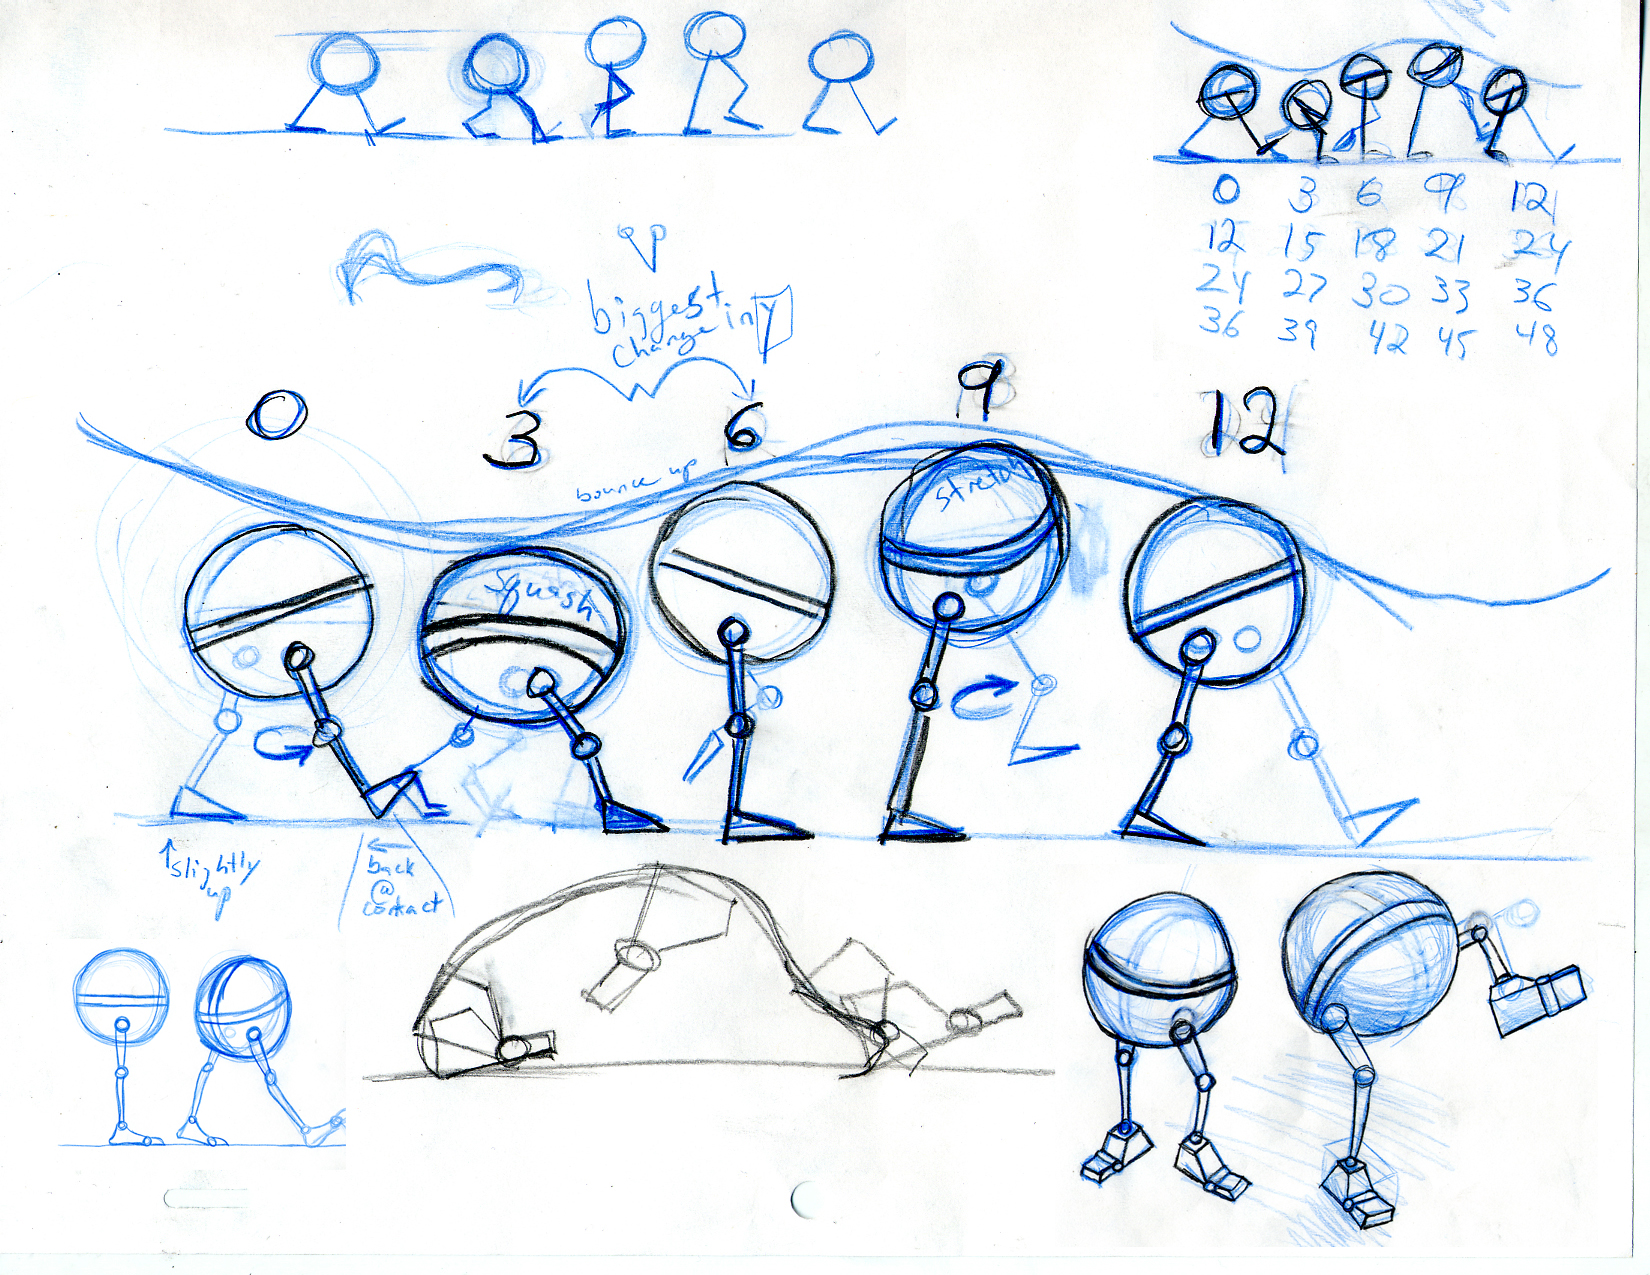
(Planning sheet examples found
HERE and
HERE) Make sure you animate at 30 frames per second, and it usually helps to set playback to realtime. These settings can be found in your preferences under 'Settings' and 'Timeline'.
Download the ball file HERE
Go through the ball tutorial HERE
What to do:
- Animate both balls in the same scene with no forward momentum. (only animating y-translation.)
- Pay attention to timing and spacing
- Include squash and stretch
- Animate both balls in the same scene with forward momentum, and have them slow to a stop.
- Find some way of showing the rotation of the ball (texturing or wire frame.)
- Pay attention to arcs.
- Animate a ball with intent and emotion. Tell a story with a ball as the character.
Every action the ball makes should have a reason and you should be able to see the ball thinking.
- Apply all the principles learned in the bouncing ball as well as anticipation.
Part 2:
Animate a bird's translation using a motion path.
Animate the translation based on the actions of the bird.
(Download the bird file HERE).
Concepts to learn:
- Drawing a motion path and attaching a character to it
- Motion paths with and without Follow
- Animating the U value of a motion path
- Understanding Front Twist, Up Twist, and Side Twist for motion paths with Follow
What to do:
- You will be given a scene with a bird animated in place. You must animate the bird's translation using a motion path. Animate the translation based on the actions of the bird, i.e. when the bird is jumping, it should be moving forward on its motion path.
- You will be attaching the rootControl (the ring around the feet) to the motion path.
- Experiment with Follow on and off to determine which works better.
- Try to minimize the slipping of the feet.
- The only thing you should be setting keys on is the U value of your motion path, and possibly the Front/Up/Side Twist channels if you have Follow on.
Playblast:
Playblast all animations and turn them in to the turn in folder, from the appropriate camera.
Make sure you have read and followed all the directions.
- Playblasts are Maya's way of creating a preview of your animation that runs in real time, and is much faster to create than a render.
- Go to Window > Playblast > OptionBox. Change the option for Viewer to 'Movieplayer', change the Display size to "Custom" and enter 640 and 480 for the two values. Change the scale to "1.00", and check "Save to File" and name it appropriately.
- Playblast the two bouncing balls from an orthographic view. You can use any camera for the other two parts.
Tips:
- Plan - your planning sheet should have everything you will need to know.
You should, in theory, be able to animate without ever referring back to your reference - just to your planning sheet.
- Use reference!!
- You generally shouldn't see squash and stretch when played at full speed, but you should be able to feel it.
- Try not to spend too much time in the Graph Editor. Focus on what your animation looks like, not what the curves look like. Don't be afraid to add more keys or breakdowns.
- Start with your keyframes first! Get those right, then add breakdowns (keys further defining the motion between your keyframes) as you need them.
- The more keys you have the harder it is to change motion - so be deliberate about what you key and when.
- Seperating translate, rotate, and scale into different nodes via grouping as shown in class is a good way to keep your motion clean and easy to work with.
Turn-in:
- Four playblasts as specified in the playblast directions. Do NOT turn in renders.
- Four .mb files
- Planning sheets (you can scan these in on the Mac in the corner of the room)
- Please name your files lastname_firstname_projectname.mb