Three-Point Lighting

In this tutorial you will use three-point lighting to light a simple scene. Before starting this tutorial, be sure to read Digital Lighting & Rendering - Ch. 3 "Three-Point Lighting" and an overview of the types of lights in Maya.
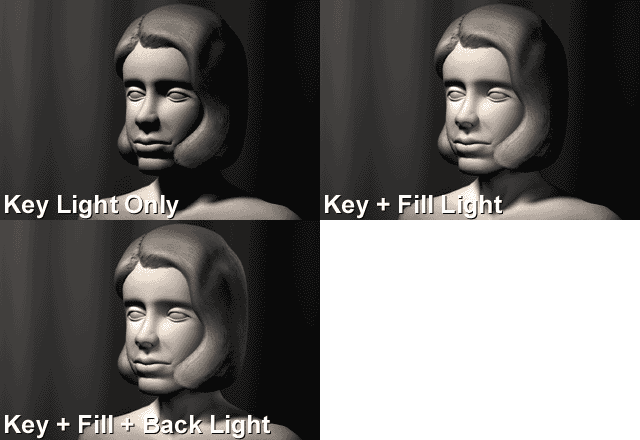
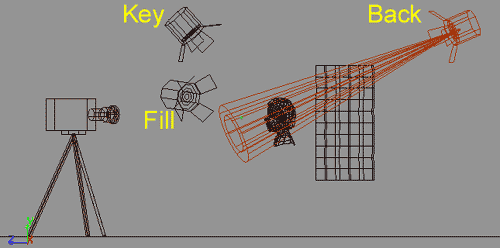
Three lights: the Key Light, Fill Light, and Back Light, are adjusted to achieve the classic Hollywood lighting scheme called three-point lighting.
- First off, open the file pawn.mb. You will see that it is a simple scene containing only a pawn with a backdrop surface behind it. If you look in the Outliner you will see that there are no lights in the scene.
- Default light source at render time
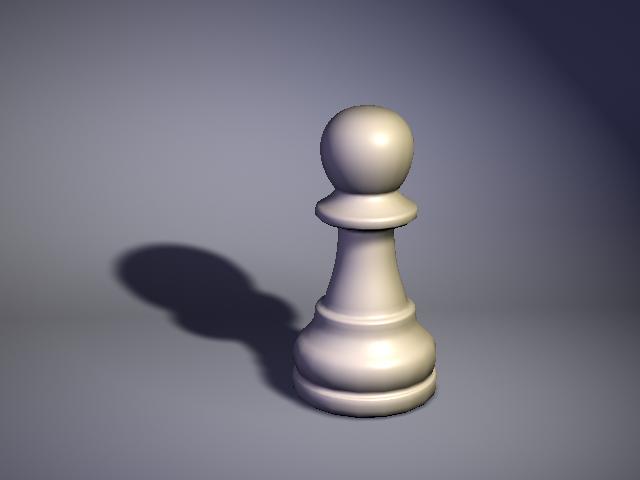
- Switch to the camera "render_cam" and do a quick render. You will see that the scene renders as though there was already a light source. This is a result of Maya's default light source.
- If you render a scene without a light, Maya creates a directional light during the render so that your objects can be seen. Without it, your objects would not be illuminated; that is, your render would be black.
- This default light is parented to the rendered camera. The entire scene is illuminated no matter where the camera is facing. The surface areas directly facing the camera are bright while the surface areas hidden from the camera are dark. This provides surface contours that look realistic.
- As soon as you add a light to your scene, the default light source is automatically disabled so that your scene will be lit by only the lights you've added.
- Add your Key Light
- The Key Light creates the subject's main illumination, and defines the most visible lighting and shadows. Your Key Light represents the dominant light source, such as the sun, a window, or ceiling light - although the Key does not have to be positioned exactly at this source.
- Create a spot light to serve as the Key. Go to Create > Lights > Spot Light. A spot light manipulator will appear at the origin. Select it and move

Spot Light manipulator. - A typical location for the Key Light is, from the top, about 15 to 45 degrees to the side (to the left or right) of the camera and, from the side, raised somewhat above the camera so that it hits the subject from about 15 to 45 degrees higher than the camera angle.
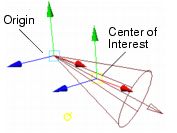
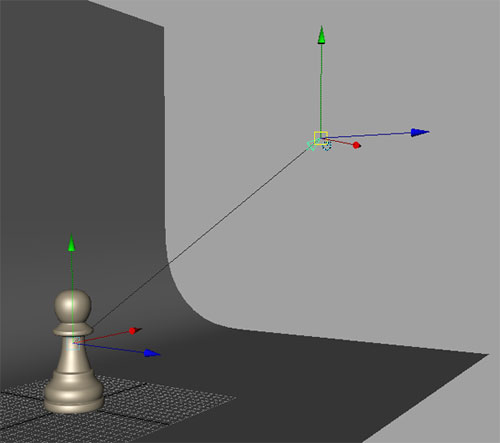
- For our scene, a good spot for the Key Light is at roughly x = 13, y = 27, z = 21 for the translation. Select the light and move it to about this location. This places the light at a good location, but not in the direction of the subject. There are a number of ways to aim a spot light at an object. One way is to simply rotate the light around. A better way is to hit "t" while the spot light is selected. This toggles on the Show Manipulator Tool, activating two manipulators: one for the origin of the light, and another for the light's center of interest.
- Move the center of interest so that it is right on the subject (the pawn). This will aim the spot light at the subject.
- Testing your lighting with the IPR
- IPR (Interactive Photorealistic Rendering), a component of the Render View rendering, lets you preview and adjust lights, shaders, textures, and 2D motion blur quickly and efficiently.
- IPR is ideal for visualizing your scene as you work because it almost immediately shows the changes you make. It is ideal for placing/aiming lights and fine-tuning light attributes because it provides immediate feedback.
- When you start an IPR session, Maya computes the initial IPR image, which is a deep raster format that contains more than just the final picture. Maya performs all the visibility calculations (only once), and stores the results in a file in the "iprImages" directory of your current project.
- It takes longer to perform an IPR render than it does to perform a software render because more information is written to disk. The IPR image contains the information needed to perform the shading calculations for each pixel in the image as you adjust scene parameters.
- After performing the initial IPR render, you can select a region to adjust and Maya will load all the necessary information into memory for all the pixels in the selected region. You can then modify scene attributes and Maya will re-compute the shading calculations, and the selected region in Render View will update on-the-fly.
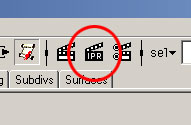
- Switch to the "render_cam" and click the IPR button to perform an IPR render.
- Your render should look something like this:
- Next, we will begin fine-tuning the settings of our Key Light. Select a region of the IPR render that includes both the pawn and part of the spot light's beam edge. This will be the active region of the IPR that will update on-the-fly as we make changes to the Key Light.
- Note that you can change your active camera to something else and the IPR render window will continue to update using the camera that it was originally generated from.
- Select the Key Light and open the Attribute Editor (Ctrl+A).
- Spot Light Attributes
- Color
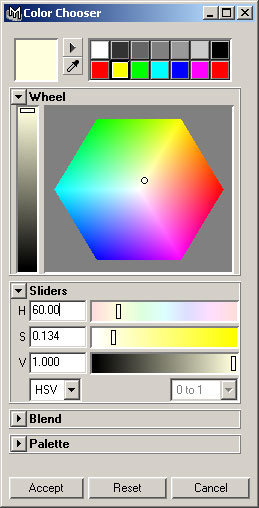
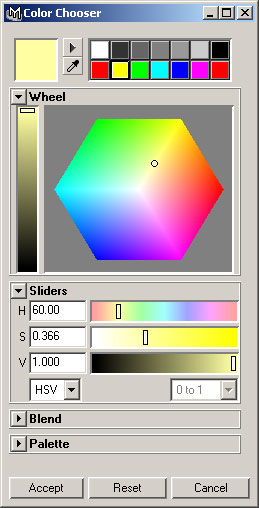
- Determines the light's color. Click the swatch either to change the light's color in the Color Chooser or to map a texture to the light. If you map a texture, the spot light projects it. The default setting is white.
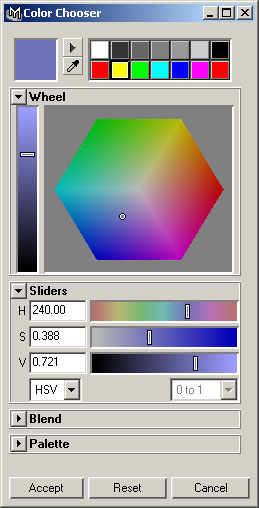
- For our Key Light, we'll choose a very light shade of yellow, something like shown below:
- Intensity
- Represents the brightness of the light. A light with an Intensity value of 0 produces no light. A light with a negative Intensity value removes light from a scene in the area of the light's influence. The slider range is 0 to 10, but you can type in a larger value for a brighter light (for example, 20). The default value is 1.
- Move the slider up to about 1.5 for the Key Light. Notice how the change in intensity is reflected automatically in the active region of the IPR window.
- Illuminates by Default
- If on, the light illuminates all objects and is included in the defaultLightSet. If off, the light only illuminates objects to which it is linked. Illuminates by Default is on by default. Leave this on for the Key Light.
- Emit Diffuse and Emit Specular
- Emit Diffuse and Emit Specular are on by default. Turning them off turns off the diffuse or specular shading results for the light.
- The backdrop plane in our scene has a Lambert shader so it only contains a diffuse channel. The pawn, however, has a Blinn shader so it contains both diffuse and specular channels. Leave both Emit Diffuse and Emit Specular checked for our Key Light so that it will produce specular highlights on the pawn.
- Decay Rate
- Controls how quickly the light's intensity decreases with distance. The Decay Rate setting has no effect at distances less than 1 unit. The default setting is No Decay.
- In the real world, a light's brightness is strongest at the light source and decreases or decays further away from the light source. In Maya, a light's brightness decays only if decay is turned on. The light's color, however, remains the same no matter how far it is from the light source.
- Leave this at No Decay for the Key Light.
- Cone Angle
- The angle (in degrees) from edge to edge of the spot light's beam. The valid range is 0.006 to 179.994. The default value is 40.
- For the Key Light, move the slider down from 40 to about 20. Watch the IPR window to see how the spot light's beam decreases in radius.
- Penumbra Angle
- The angle (in degrees) from the edge of the spot light's beam over which the intensity of the spot light falls off linearly to zero. The valid range is -179.994 to 179.994. The slider range is -10 to 10. The default value is 0.
- For example, if the Cone Angle value is 50 and the Penumbra Angle value is 10, the spot light has an effective spread of 70 (50 + 10 + 10) degrees; however, the spot light intensity decreases to 0 between the angles of 50 and 70 degrees. If the Cone Angle value is 50 and the Penumbra Angle value is -10, the spot light has an effective spread of 50 degrees and the spot light intensity decreases to 0 between the angles of 30 and 50 degrees.
- For the Key Light, move the slider up as far as it goes (10) and watch in the IPR window how the beam edge seems to expand as it gradually gets softer and softer. Then enter in a value of 25 for the Penumbra.
- Dropoff
- Controls the rate at which light intensity decreases from the center to the edge of the spot light beam. The valid range is 0 to -. The slider range is 0 to 255.
- Typical values are between 0 and 50. Values of 1 or less produce almost identical results (no discernible intensity decrease along the radius of the beam). The default value is 0 (no dropoff).
- Enter a value of 0.250 for the Key Light.
- Your IPR render should now look something like this:
- Adding Shadow
- Shadows work with lights to add realism to your scenes. Shadows help to define the location of objects, whether they rest on the ground or hover in space, for example. Shadows can be soft-edged or hard-edged, and their presence (or absence) can be used to add balance and contrast to objects in your scene.
- To create a shadow, a scene must contain a shadow-casting light, a shadow-casting surface, and a shadow-receiving surface. The light must illuminate both the shadow-casting surface and the shadow-receiving surface.
- By default, lights in Maya do not cast shadows. You need to specify which, if any, lights cast shadows in your scene. If no lights in your scene cast shadows, all surfaces facing a light source are illuminated, even if obstructed by another surface.
- Depth map vs. raytraced shadows
- In Maya, an individual light source can produce no shadows (default), depth map shadows, or raytraced shadows.
- A depth map represents the distance from a specific light to the surfaces the light illuminates. A depth map is a data file that contains the depth data rendered from a light's point of view. Each pixel in the depth map represents the distance from the light to the nearest shadow casting surface in a specific direction. If a scene contains a depth map shadow casting light source, Maya creates a depth map file (stored as a Maya IFF File) for that light source during rendering and uses the depth map file to determine which surfaces are in shadow.
- Raytraced shadows can produce soft and transparent shadows but can be very time consuming. Raytracing is a type of shadow rendering where the path of individual light rays are calculated from their source (the light) to their destination (the camera).
- Depth map shadows and raytraced shadows produce similar results, though depth map shadows usually take less time to render. Generally, choose depth map shadows unless they cannot accomplish your visual goal. Use raytraced shadows only to produce more physically accurate shadows (like those in the real world).
- It is important to note that IPR does not support raytraced shadows. If you have any raytraced shadows in your scene, they will not appear in your IPR render. Furthermore, depth map shadows will only appear in the IPR if you manually update the render. Most changes to depth map shadows will not be automatically updated in the active region of the IPR.
- In the Attribute Editor for our Key Light, expand the Shadows section. You will see that there are two subsections: One for enabling depth map shadows and another for enabling raytraced shadows. Enabling one will automatically disable the other. Turn on Use Depth Map Shadows for the Key Light.
- You will have to manually update the IPR render to see the shadows in the scene. In the IPR window, go to IPR > Redo Previous Render. Then select an active region that includes the pawn and its shadow.
- Depth Map Shadow Attributes
- Dmap Resolution
- The resolution of the light's shadow depth map.
- If the Dmap Resolution is too low, shadow edges appear jagged or pixelated (which is how the depth map shadow from our most recent render looks). Increasing the Dmap Resolution also increases rendering times, so set it to the lowest value that produces shadows of acceptable quality.
- As a starting point, it's a good idea to set Dmap Resolution to the rendering resolution. If the light moves during an animation, you may need to increase the Dmap Resolution to avoid flickering shadows. The slider range is 16 to 8192. The default value is 512.
- Increase the Dmap Resolution to 1024 for our Key Light. In the IPR window, go to IPR > Update Shadow Maps to see the improvement to the shadow edges.
- Dmap Filter Size
- Controls the softness of shadow edges. (The softness of shadow edges is also influenced by the size of the shadow and the Dmap Resolution.) Increasing Dmap Filter Size also increases rendering times, so set it to the lowest value that produces acceptable results. A Dmap Filter Size of 3 or less is usually sufficient. The valid range is 0 to -. The slider range is 0 to 5. The default value is 1.
- Increase this value to 8. The shadow will update automatically in the IPR.
- We are now done tweaking the Key Light and ready to move on to the Fill Light.
- Add your Fill Light
- The Fill Light softens and extends the illumination provided by the key light, and makes more of the subject visible. Fill Light can simulate light from the sky (other than the sun), secondary light sources such as table lamps, or reflected and bounced light in your scene. With several functions for Fill Lights, you may add several of them to a scene. Spot lights are the most useful, but point lights may be used. For our Fill Light we will use another spot light. Again go to Create > Lights > Spot Light.
- From the top view, a Fill Light should come from a generally opposite angle than the Key - if the Key is on the left, the Fill should be on the right - but don't make all of your lighting 100% symmetrical! The Fill can be raised to the subject's height, but should be lower than the Key.
- Move the Fill Light so that its translation is somewhat near x = -19, y = 17, z = 20.
- To aim the Fill Light at the subject, instead of hitting "t" and moving the center of interest manipulator, select the light, go to the Panels menu in your active camera window, and select "Look Through Selected." This essentially turns the light into a camera such that moving the view around actually translates and rotates the light. Leave the light in its current position (don't Alt+MiddleMouse or Alt+RightMouse), and simply rotate the camera (Alt+LeftMouse) until the pawn is in the center of the view.
- Change your camera to top view. Here is how your Key and Fill Lights should be positioned, looking from above:
- Open the Attribute Editor for the Fill Light.
- The primary purpose of the Fill Light is to lighten the pitch black shadows created by the Key Light. Sometimes shadows look richer and more interesting when they are rendered in a color that contrasts with the surrounding area or main light color. Remember that our Key Light is colored a light shade of yellow. So, let's make the Fill Light a dark shade of blue. Something like the following:
- At most, Fill Lights can be about half as bright as your Key (a Key-to-Fill ratio of 2:1). For more shadowy environments, use only 1/8th the Key's brightness (a Key-to-Fill ratio of 8:1). However, since our Fill Light is a much darker color than our Key Light, we can get away with a slightly lower Key-to-Fill ratio than 2:1. Remember that our Key Light has an intensity of 1.5. Set the Fill Light's intensity to 1.25. Check the IPR for results.
- Fill Lights are sometimes set to Diffuse only so that the Key Light is the only light picking up specular highlights. Uncheck "Emit Specular" for the Fill Light. Notice in the IPR how the specular highlights coming from the left side of pawn disappear.
- Move the Cone Angle slider down to 20. The Penumbra Angle we'll set way up to 70, softening and expanding the Fill Light's beam edges to outside the camera view. For Dropoff, enter a value of 1.25. Be sure to monitor the IPR to see the effect of each of these changes.
- Shadows from a Fill Light are optional, and often skipped. For this scene, we'll choose to have only the Key Light casting a shadow from the subject. So, leave both Depth Map and Raytraced Shadows disabled for the Fill Light.
- Here is how your IPR render should look at this point:
- Add your Back Light
- The Back Light (also called Rim Light) creates a "defining edge" to help visually separate the subject from the background.
- From the top view, the back light should be positioned behind the subject, opposite from the camera. From the right view, it should be above the subject.
- Create a spot light for the Back Light. Move it to a position of about x = -4, y = 14, z = -25. Hit "t" and move the center of interest on top of the pawn.
- Refresh your IPR render and open the Attribute Editor for the Back Light.
- We want to adjust the Back Light until it gives us a nice "rim" of light, that highlights the top or side edge of the subject. Set the color to a shade of yellow like the following:
- Back Lights can be as bright as necessary to achieve the glints you want around the sides of your subject. Move the intensity slider up to about 1.8.
- One big problem with the Back Light is the harsh beam of light it casts on the ground right in front of the pawn:
- To fix this, we need to unlink the Back Light from the ground so that the light does not interact with that surface at all. For this, we use the Light Linker.
- Light Linking
- When you create a light source, the new light source illuminates all surfaces in the scene by default. This is indicated in the light's Attribute Editor by the "Illuminates by Default" option set to on. Similarly, when you create a surface, all lights in the scene illuminate the new surface.
- You can link lights with surfaces so that only a specific light (or group of lights) illuminates a specific surface (or group of surfaces), or, conversely, only a specific object (or group of objects) receive illumination from a specific light (or group of lights).
- To open the Light Linker, go to Window > Relationship Editors > Light Linking > Light-Centric. In this window, all the lights in the scene are listed on the left and all objects in the scene are listed on the right. If you select a light from the left, all objects that it is linked to will become highlighted on the right. By default, all lights are linked to all objects.
- There are two ways to unlink an object from a light. One way is to simply select the light from the left, and then deselect the object you want to unlink from the right. The other way is to uncheck "Illuminates by Default" in the light's Attribute Editor, which will unlink every object from the light. You must then use the Light Linker to select only those objects you want linked to the light.
- Open the Light Linker, select the Back Light from the left, and deselect the "bg" object from the right.
- Update your IPR render and you should see the bright beam from the Back Light disappear off the ground.
- Using the IPR window, perform any minor tweaks in position (of both the light's origin and the light's center of interest), until the rim of light is being cast in just the right position. Remember that you can change your camera to "persp" to move things around and still retain the same render view in your IPR window.
- Congratulations, you're done! Your scene should look similar to the image below. Render out a final image of your scene (using the regular Software Renderer, NOT the IPR).

A render of the scene with no lights is still lit, due to Maya's default directional light which is parented under the selected camera.
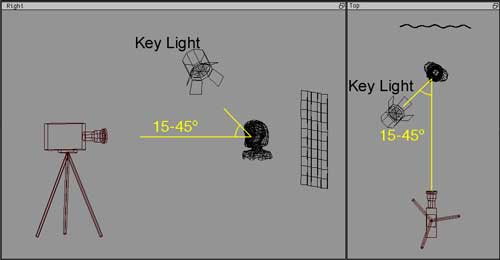
The key light is brighter than any other light illuminating the front of the subject, is the main shadow-caster in your scene, and casts the darkest shadows. Specular highlights are triggered by the Key Light.
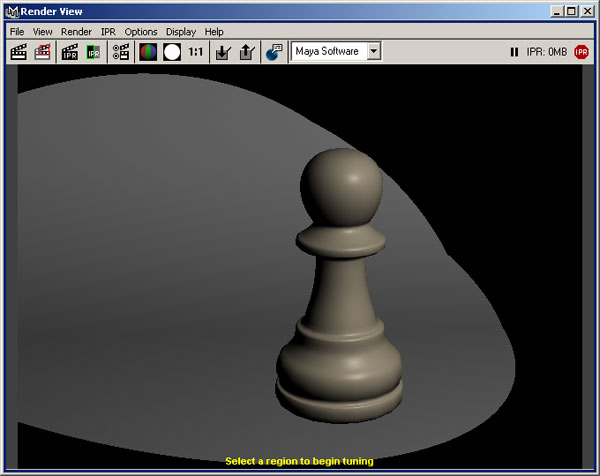
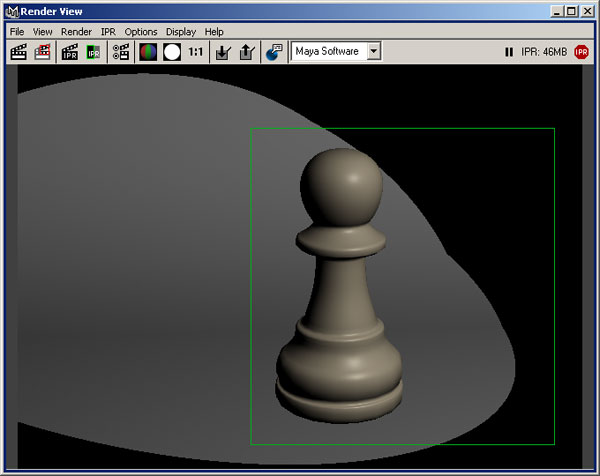
IPR Active Region

Effects of diffuse and specular settings for a light.
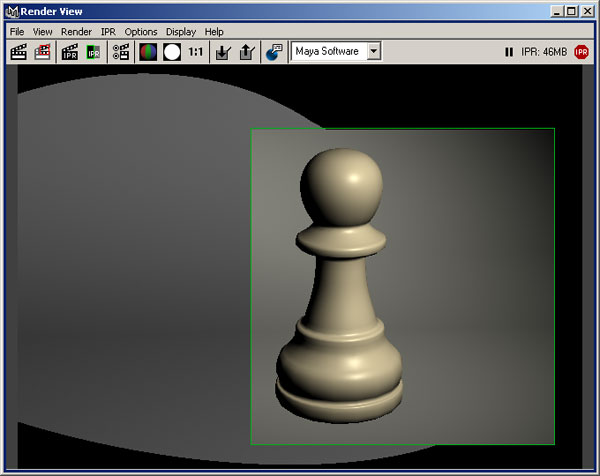
The changes to the key light are shown inside the active region, and the old settings are shown outside the active region.
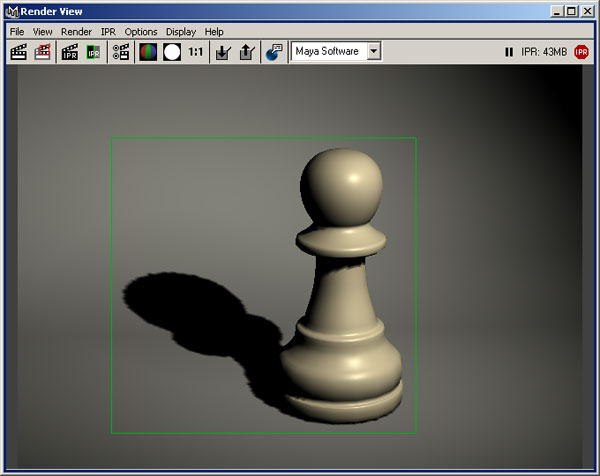
Active region encompassing the new depth map shadows

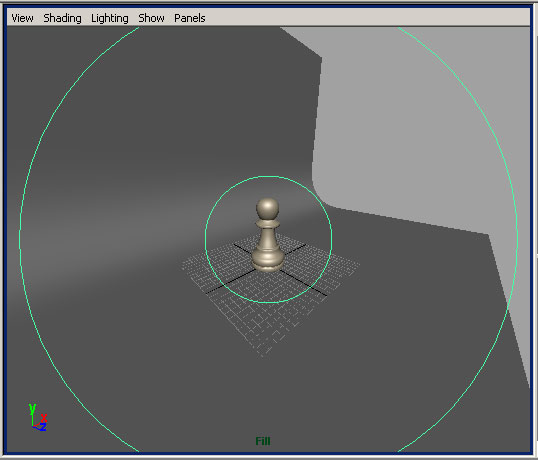
Aiming the Fill Light at the pawn by using "Look Through Selected".

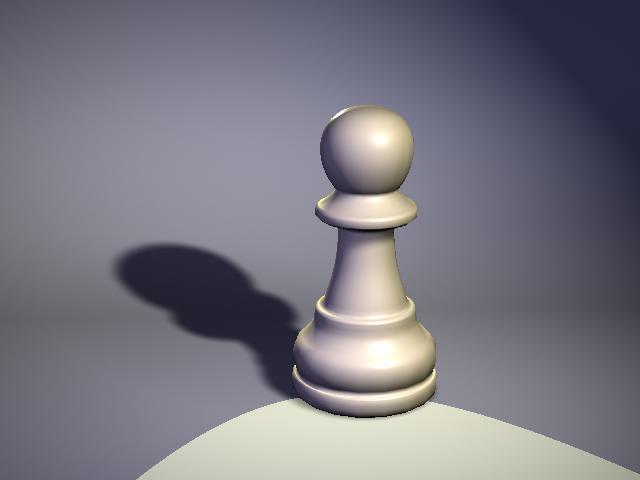
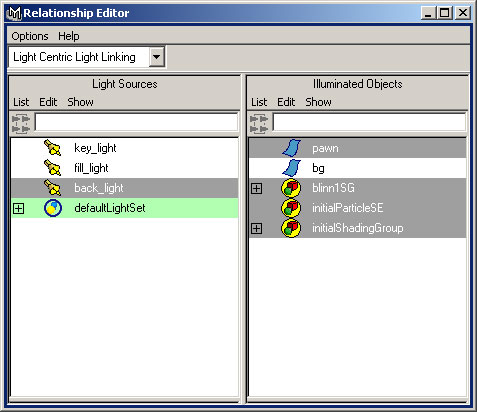
The "bg" object should be unlinked to the Back Light.
