Impressionist is an interactive program that creates pictures that look like impressionistic paintings. It is based on a paper and a program by Paul Haeberli. Here is a copy of his paper
"Paint by Numbers".
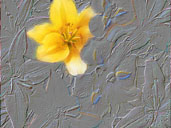
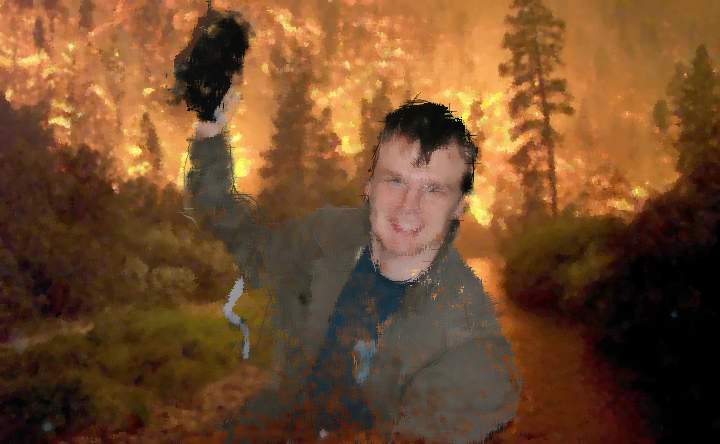
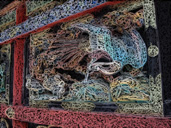
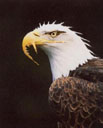
To create an impressionistic picture, the user loads an existing image and paints a seqence of "brush strokes" onto a blank pixel canvas. These brush strokes pick up color from the original image, giving the look of a painting.
See some examples of what you can do with Impressionist, from previous quarters:
examples,
examples,
examples.
This is motivated by impressionist paintings that artists have been making for centuries. Here are a few links to sites with impressionist paintings that are intended to help inspire you when creating new brush types, or when creating your artifacts.
You will add the functionality to a skeleton version of the Impressionist program, which we will provide. The purpose of this project is to give
you experience working with image manipulation, OpenGL primitives, user-interface design, and image processing.
To get going, you need to get the skeleton source code. This is distributed via SVN, which is all set up for you. In the labs, we will be using TortoiseSVN. In order to get the source code, follow the directions below:
If you plan to work from home, you will need to point Visual Studio to the correct include and library directories for the FLTK that came in your repository (since normally it points to the local one on each lab machine). /tools/fltk_install.html">Instructions for how to do this.
To open and build the project, double-click impressionist.vcxproj. If you want to work on a non Windows machine there are some instructions for how to set up your environment in the README.txt in the repository.
The skeleton program we provide does very little. It allows you to load the original image (which can be in BMP, PNG, or JPEG format), and
save the painted version. Brush selection is done via a drop down list on a separate window called up via the "File" menu. There is one brush implemented (points) and a slider for controlling the brush size.
To see what these features should look like when they're done, you can look at the sample solution (with some of the extra credit). Your implementations of brush strokes, brush direction controls, etc. do not have to behave exactly the same as the sample solution, but they should be fairly close.
Here is a list of suggestions for extending the program for extra credit. You are encouraged to come up with your own extensions. We're always interested in seeing new, unanticipated ways to use this program!
 To give your paintings more variety, add some additional brush types to the program. These brush strokes should be substantially different from those you are required to implement. You will get one whistle for each new brush (within reason).
The skeleton program allows the user to paint outside the boundary of the paint rectangle, then
erases this region when the stroke is completed. Change this to clip brush strokes to the region as they're being painted.
When using your program, you currently can't see what part of the original image you're
painting. Extend the program so that when the cursor is in the painting window, a marker appears on the original image showing where you're painting.
Sometimes it is useful to use the contents of the painting window as the original
image. Add a control to swap the contents of the painting window and the contents of the original image window.
For your filter kernel, add a "normalize" checkbox that will automatically divide by the sum of the weights when the user wishes it.
 Add controls that allow you to manipulate the color of the image. For example, you could implement
independent scaling of the red, green, and blue channels.
Add controls that allow you to manipulate the color of the image. For example, you could implement
independent scaling of the red, green, and blue channels.
Design a brush that selectively applies one or more filters from your filter kernel. This might require some UI changes to your filter kernel UI. Note: you must take into account the brush size.
Add an undo feature with at least one level of undo so that you can try a brush and decide to undo its effect on the canvas. This comes in very handy for experimenting with brush and filtering effects.
Add the ability to dissolve one image into another.
Fix the Red Line Bug in right mouse drag out direction line. It is possible for a series of odd mouse clicks during a right mouse drag to permanently draw the red line on the canvas (spoiling a possibly beautiful drawing). Eliminate this problem entirely by properly synchronizing mouse events.
 A different solution to the problem of not being able to see where you're painting is to show a dimmed version of the painting on the canvas. Add a slider that allows the user to fade in or fade out the original image beneath
the user's brush strokes on the canvas. (Beware, this bell and whistle is more difficult than it looks).
A different solution to the problem of not being able to see where you're painting is to show a dimmed version of the painting on the canvas. Add a slider that allows the user to fade in or fade out the original image beneath
the user's brush strokes on the canvas. (Beware, this bell and whistle is more difficult than it looks).
Add a "mural" effect to your Impressionist by implementing the ability to load in different images while preserving what has been drawn on the canvas. Add a "New Mural Image" or "Change Mural Image" to the controls window that allows the user to change images. The user may then load an image, draw in what he / she prefers on the canvas, and then load a different image and continue drawing on the canvas; thus, a "mural" effect.
To make your painting more interesting, add "alpha-mapped" brush strokes. In other words, allow the user to load a bitmap representing a brush stroke. This bitmap would contain an alpha value at each position. Then when this brush
is used to draw, a single color would be selected from the image, all pixels in the brush bitmap would be set to this RGB color (without changing the
alpha value), and this partially transparent bitmap would be painted on the canvas. A new color would be used each time the brush is drawn.
It can be time-consuming to paint an image manually. Add a feature so that a whole painting can be created automatically. The user should only have to specify a brush type, size, and angle to use. Then the program should
automatically paint brush strokes over the entire image, using a randomized brush order and varying the brush attributes slightly as it goes (to increase
realism).
At times, you may want the brush strokes to follow the gradient of a different image than the base image. Add a button(s) that will cause the direction of brush strokes to be automatically determined from a user specified image.
The "accuracy" of the painting can be also be improved by clipping long brush strokes to edges in the image. Allow the user to load a black-and-white image that represents the edges in the picture. Then add a checkbox so that the user can turn on edge-clipping, which will automatically clip brush strokes at edges in the image.
Use the image processing techniques described in class to automatically find the edges in the base image. Once you have found the edges, add a button to the user interface that will allow the user to select whether or not the brush strokes should be clipped to the edges in the picture.
Implement a curved brush that follows the image gradient. See Painterly Styles for Expressive Rendering.
Implement a multiresolution automatic painting technique. See Painterly Styles for Expressive Rendering.
Design a brush that can be used to stretch and pull the image as if it were rubber.
Implement
"animated" brush strokes that make the image appear to move in interesting ways. Ex. You could paint moving ripples over a picture of a lake,
or rustling motions onto grass or tree. Credit will vary depending on the success of your method.
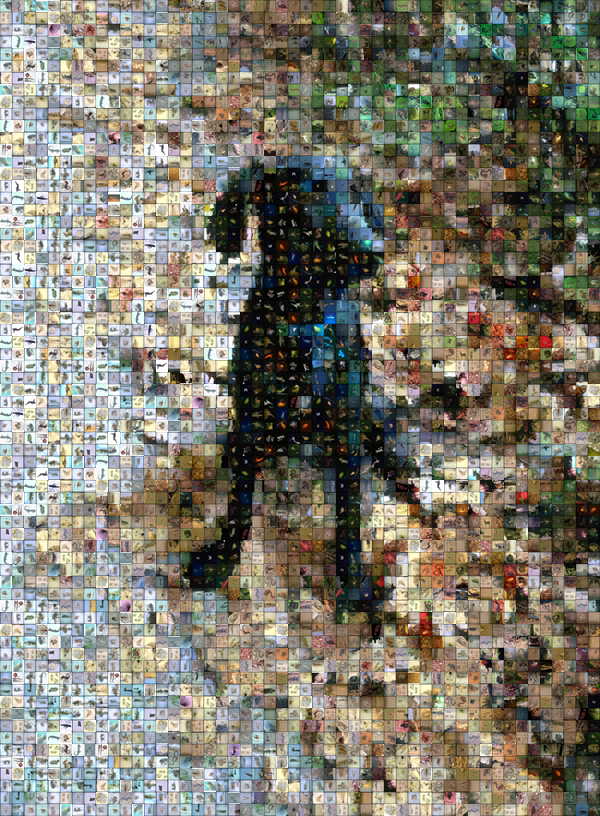
Given a source image, construct a new image that is really a mosaic of small (thumbnail) images. To do this, you need to partition the original into tiles and find new thumbnails that are reasonable matches to the tiles. Then draw the new image by substituting the thumbnails for the tiles. See, for example, Adam Finkelsteins Web Gothic. Mosaic sample solution (stand-alone command line executable). An image that was created using the sample solution. Credit will vary depending on the success of your method. To get full credit, you must perform some sort of edge detection to accurately determine which thumbnails to use, and you must use the original color of the selected thumbnails.
Disclaimer: please consult the course staff before spending any serious time on these. These are all quite difficult (I would say monstrous) and may qualify as impossible to finish in the given time. But they're cool.
Impressionist Video (8+ bells)

Implement a method to automatically create non-photorealistic video. One very simple method (that would not get a monster bell) would be to run
auto-paint on each frame of a sequence. For credit, your technique should exhibit temporal coherence.
Other artistic methods, such as charcoal sketch, often de-emphasize the background (or leave it out altogheter). When processing still images, it is practically impossible to distinguish the subject and the background without any human assistance; however, in a video stream, it may be possible to exploit movement to segment the image. For additional credit, implement a method that effectively uses this method to generate a convincing non-photorealistic version of live video.
For even more extra credit (and probably a conference paper) do all of this in real-time on a consumer PC.
Image collages (8+ bells)
Image mosaics are often pieced together by stitching together a bunch of tiny rectangular images. Although this produces a cool effect, it looks computer generated. Implement a method to build collages, given a sample set of images. The primary difference is that the shapes need not be rectangular and that they can also overlap. A while back, some graduate students here implemented a method to do this, ultimately resulting in building a face with pictures of fruit.
Another approach is to note that, when humans build collages, we usually clip shapes out of images (cutting out a picture of a red car and pasting it in as someone's upper lip, for instance). Given a set of data images, we wish to automatically build a collage of some input image, given that we can cut simple shapes from the data images. If you've seen The Truman Show, you may remember that Truman puts together a picture of a woman's face using magazine clippings. This took him a while.
Here's a paper from Siggraph 2002 Jigsaw Image Mosaics
Non-videorealistic transformation (8+ bells)
Okay, I completely made up that term. In artistic animations, the movement is often not completely realistic. One technique that has been used for some advertisements and music videos involves sampling the video at a very slow frame rate (say, two per second) and then filling in the disarded frames using
morphing. You may want to use the optical flow (see CSE490CV) to assist with the morph. You may also want to split up the image, morphing different regions and varying frame rate according to how much movement there is. After you perform this pass, maybe try running your impressionist program on each frame, using the morph and the optical flow to guide the direction of temporally coherent brush strokes.
For even more extra credit (and probably a conference paper) do all of this in real-time on a consumer PC.