Assignment #1 Lab
DUE: Tuesday, 7/2 Thursday, 7/4, turn in instructions updated.
For this assignment you will choose one of the stories you wrote for Thursday and draw a picture relating to each step on paper, in Photoshop, or by using a combination of both. If you did your drawings on paper, scan each image into Photoshop and save to your student folder (see scanner and Photoshop tutorial below). You will then import your images into After Effects, arrange them on the timeline in order, and render it out. You will also complete a couple of additional exercises exploring the capabilities of After Effects.
Photoshop
Using the Scanner
There are two scanners located in Sieg 329. Feel free to move whichever to the computer you are working on. To use them you will first need to install the drivers found here:
O:\unix\projects\instr\production1\scanner_drivers
- Note: To quickly access this folder, open up the Start Menu, paste the above path into the search field, and hit enter.
If it's the hybrid printer/scanner install DJ1050_J410_Basic_x64_231.exe, if it's the smaller more portable scanner install lide100win641403ej.exe. After the drivers have finished installing, go to Start → All Programs → Adobe Master Collection CS3 → Adobe Photoshop CS3.
Once Photoshop is open, go to either File → Import → WIA-HP Deskjet 1050 J410 series (the hybrid printer/scanner) or File → Import → CanoScan LiDE 200... (the smaller scanner).
This should open another window called ScanGear. On the right click the "Preview" button and wait while the scanner runs. Once it is done it will let you adjust the crop borders on the image, so go ahead and change them as necessary for your image then hit "Scan". It will give you a popup box asking if you want to scan more images, for now select "Retouch and save the image" then hit "OK".
Now that your image is in Photoshop, it would be a good idea to save before proceeding further. There is space available for you to save your files as you work on them. Go to File → Save As… and save it on the network located here:
O:\unix\projects\instr\production1\cse456_su13_student_files
- Note: Similarly to quickly accessing the scanner drivers folder, paste the above path into the file name field of the Save As dialog and hit enter. You'll jump immediately to that folder.
Go ahead and create a folder named lastname_firstname to store your files. Note that you'll eventually be turning your files into the Reference Tool.
Repeat the ScanGear step for the rest of your images, saving as you go. Save them all as either jpgs or pngs, naming them [yourlastname]_[yourfirstname]_board_1, [yourlastname]_[yourfirstname]_board_2, etc for all seven. Once you have them all saved close Photoshop and move on to the Premiere tutorial.
Touching Up Your Scans
If you want to avoid scanning or just touch up your drawings, you can use Photoshop to draw/paint. To start, go to File → New… or File → Open… → yourFile. In the ‘New’ window, change your units from pixels to inches and make your canvas size 8.5 X 11 and your resolution 72 pixels per inch (if you want/need really good resolution for some reason, 300 pixels per inch is generally a good size). Make your background contents transparent and then click ‘OK.’
You now have a completely blank canvas. On your left is your toolbar. For the purposes of this assignment you probably only need the pen or paintbrush tool, the eraser and maybe the paintbucket. On the lower right of your screen there should be a box labeled LAYERS, with a single layer in it called ‘Layer 1’ or possibly ‘background layer’ with a little lock symbol on the far right, if that is the case, double click on ‘background layer’ and then click ok on the dialogue box that pops up, it will now be called layer 0 and the lock symbol will be gone.
The first tool on your toolbar (looks like an arrow with the move tool symbol next to it) is your move and transform tool, if you want to move, resize or rotate a layer, you use this tool (if you want your layer to maintain its aspect ratio, hold down shift while using the resize tool).
The pen and paintbrush tool are on the same button on your toolbar, about a third of the way down, I think it usually starts as paintbrush. To change it, click and hold down on the paintbrush tool (left-click) and then select the pencil from the menu that appears. A few icons down is your eraser too and right below that is the paintbucket, though it might be set to the gradient tool, to change it to paintbucket, again, left click hold on the icon and select the paintbucket.
After Effects
Sequencing and Keying
You are now going to take the seven drawings you just scanned into or created in Photoshop and render them out in sequence using After Effects. Go to Start → All Programs → Adobe Master Collection CS3 → Adobe After Effects CS3. Right click in your project bin and choose ‘import’ from the dropdown menu that appear, select your files and import them (or just grab and drag the files and drop them into the bin).
Drag your first file into the composition below, then position your second underneath it, then the third underneath that and so on. Select the composition drop down tab and then select ‘composition settings,’ look for composition length and make it 7 seconds long, name the composition ‘sequencing’. Look for the frame rate and make it 24 fps. Exit the composition settings box.
Select the first layer of your composition and then hold down shift and click the last layer of your composition, this should select all of the layers in between as well. Now look at the timeline, grab and drag the layer lengths until they are 1 second or 24 frames long. Since you selected all the layers, you should be able to move them all at the same time. Now right click on your selected layers, select ‘keyframe assistant’ in the dropdown menu and then select ‘sequence layers,’ check ‘overlap’ in the box that pops up and make the time 10 frames, then hit ‘ok’. It will sequence you images in the order that you selected them.
Use the zoom in slider on the bottom of the screen to zoom into where the images are overlapped and then click on the arrows next to each layer name, a new menu will drop down under the layer called ‘transformation’ click the arrow next to transformation and another menu will drop down with position, scale, opacity etc. We are going to use opacity. Drag the red ‘current time indicator’ to the start of the first overlap and then click on the little stopwatch icon next to opacity for your top layer, this will put a little diamond marker on your timeline where the current time indicator is, this is called a keyframe. Open up the opacity for the next layer down and do the same thing, for this layer set the opacity to zero. Now move your current time indicator to the end of the overlap. For the top layer, change the opacity to zero, changing this number will automatically set a keyframe once the stopwatch icon is set. On the next layer down, set the opacity to 100%. You have created a cross fade. Now do the same for the rest of the overlaps.
Render it out as a file named [yourlastname]_[yourfirstname]_lab1_boards.mov. See below for instructions.
Hierarchical Faux Animation
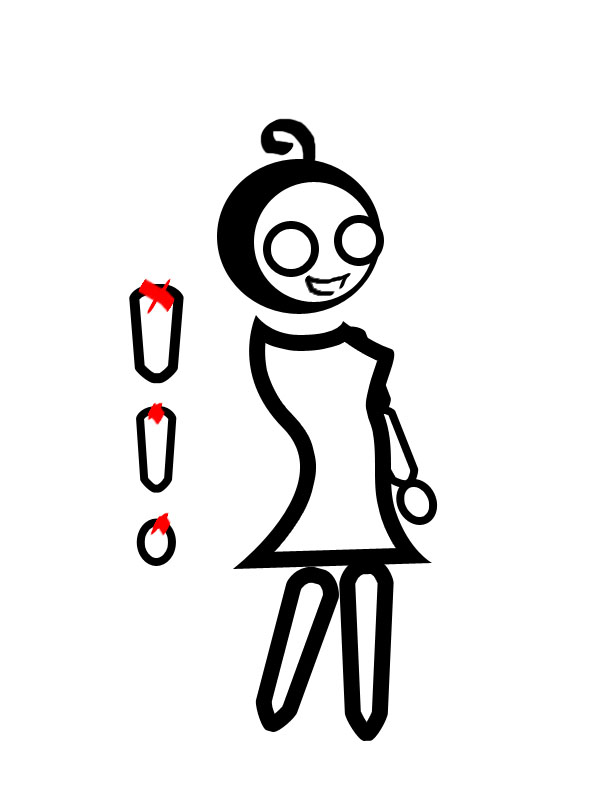
This next exercise will show you how to create more articulated 2D animation. You will rarely use this technique, but it is good to know how to do it all the same. This time we will make a character wave. You may use the puppet provided or make one of your own. Have a body layer and an arm layer, name the two layers appropriately by double clicking on the layer name. Save the Photoshop file.
In After Effects, create a new project and import your images like in the Sequencing and Keying exercise and layer them in the same order you had them in Photoshop on the timeline.
Select the arm layer. Now go to the tool box below the Menu bar and find the Pan Behind Tool (or just hit the "y" key). This allows you to directly move the pivot. Find the crosshairs in the middle of the box around your arm piece and click on it and drag it to the right place (the shoulder). Now select the arm layer and to the right of the layer name find the little spiral icon. To the right of the spiral is a drop down menu that should currently say "none". Change this to be your body layer. You have just parented your arm to the body so that if you re-position or rotate the body, the upper arm will follow. Now when you rotate a piece, you don't have to worry about the rest of the arm becoming disconnected and you don't have to re-position everything every time. Go ahead and key the rotation of the arm piece so you get a wave motion.
Replacement/Simple Movement
If you want to quickly change a facial expression or move the background but keep everything else the same, keying the transparency of a layer is a simple way of achieving this. Use the same puppet in the same composition, work after your wave in the timeline. In photoshop draw a different mouth for your character. In Photoshop add the new mouth on a new layer.
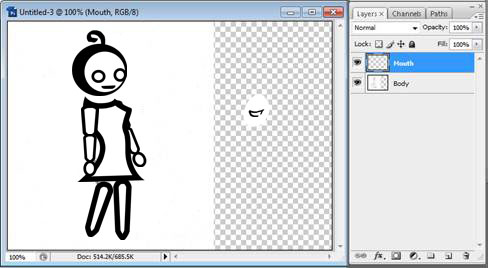
Go to File -> Import. When you import a Photoshop file select "Composition - Cropped Layers" from the dropdown menu and keep "Editable Layer Styles" clicked before hitting "OK". Drag the drag the mouth image above the body and arm layers. Move the mouth so that it is in the correct spot on the character's face. Click the arrow to the left of the mouth layer's name and click the arrow next to "Transform". You should see "Opacity" as an option at the bottom of the list. Put the time indicator at about the halfway point in your clip, change the opacity percent to 0% and click the stopwatch icon. Your mouth will disappear and you will have a diamond shape on your timeline. Advance the time indicator a very small amount and change the opacity to 100%. A second diamond should appear. Now when you scrub through your mouth should appear in the middle of your clip.
Render it out as a file named [yourlastname]_[yourfirstname]_lab1_wave.mov. See below for instructions.
Color Masking
Find two images on the internet, a landscape and a stock portrait with a solid background. Import these two images into your project bin. Go to composition settings > new composition. Set the fps to 24, the aspect ratio to fit your landscape and the length to 2 seconds, name it ‘color_masking’. Drag the landscape and portrait into the new composition with the landscape on the bottom. You made need to resize the portrait to fit. Use the scale option under transformation for this. Right click on the portrait layer, go to effects > keying > color key. In the effect panel on the upper right, click on the eyedropper next to Key color and select the background of the portrait, then play with the color tolerance and edge feather until it looks good.
Render it out as a file named [yourlastname]_[yourfirstname]_lab1_colormasking.mov. See below for instructions.
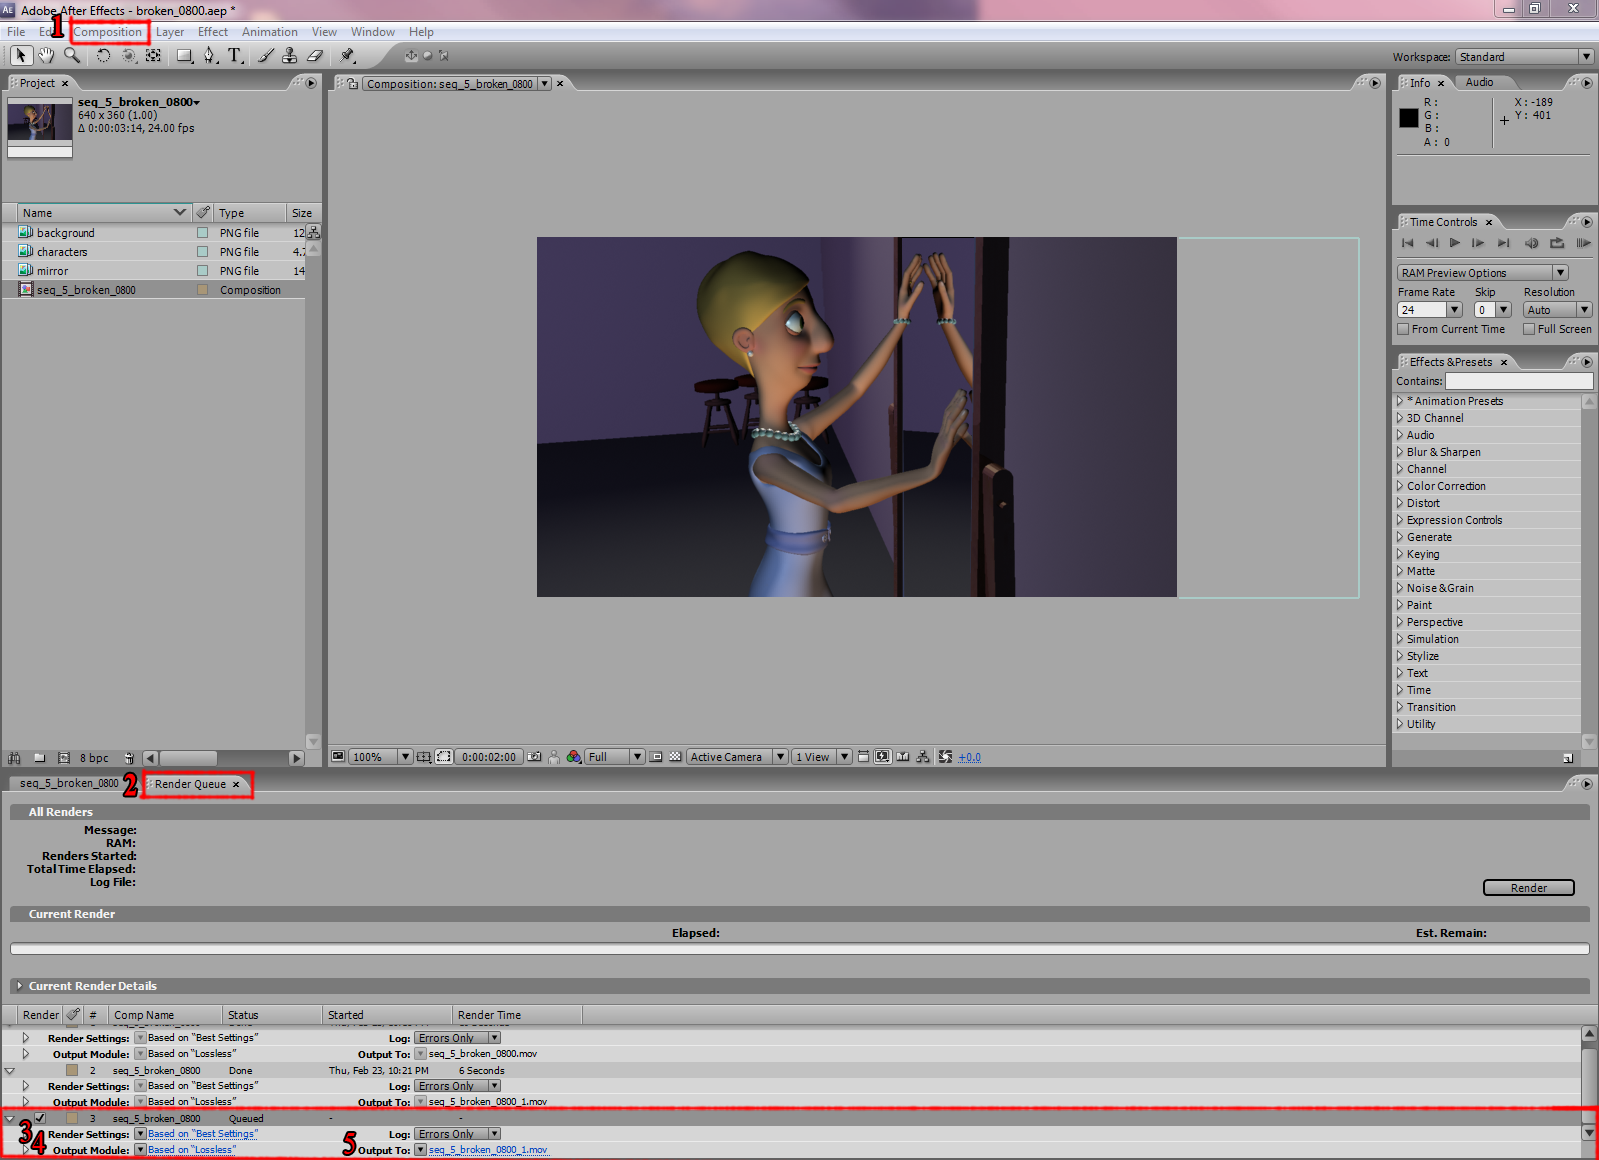
After Effects Rendering Instructions
- Composition -> Add to Render Queue
- Go to Render Queue
- Render settings: Don’t bother with this, you don’t need it for this lab
- Output mode:
- Lossless
- Format: Quicktime
- Video Output
- Uncheck audio output
- Output to:
- Your student folder -- Note: If you have problems saving to the folder (as
in it throws an error about running out of space), export to your desktop then just drag it to the network folder. It's an Adobe bug.
- Name: [name of the file specified]
See below for diagram:
Reference Reel Tool and Turn-In
(Updated, 7/3, turn-in to the Reference Reel Tool no longer required!)
You no longer have to turn in your files to betty.cs.washington.edu. Just leave the three videos in your student files folder somewhere, preferably in the same sub-folder, using the naming scheme specified above. This is now the official turn-in method.
You can find the reference reel editor at betty.cs.washington.edu. Important: Use Google Chrome, as it was developed on that. It works decently on Firefox but is fairly broken on Internet Explorer.
The first thing you’ll want to do is create an account. Hit the “request invite” button, then fill in the required information with a request description something along the lines of “I would like to be invited because I am in the CSE 456 class.” Your request will then be approved as soon as possible.
Once you get your e-mail confirming your log in, go back to the front page and log in. From there you’ll select the CSE 456 project and then hit “select as current.” From there go to the click on the project name in the upper right hand corner and select “folders.” There you’ll see a root folder on the right and an Assignment #1 Lab folder on the left. If you don't see the Assignment #1 Lab folder let the staff know.
- Under root folder, click "New Folder" and make a sub-folder called [lastname]_[firstname]_assignment1. If you already created a sub-folder named something different, that's also fine. You will basically just be using this sub-folder as a temporary container to store your files before turning them in. This is because there is currently a bug that causes assets created in the root folder to disappear, so you will need to create them in the sub-folder.
- Click on the sub-folder. For each file you have to turn-in, which should be the three movies you exported from After Effects, click "New Asset". You can drag and drop your movie into the space that says "Click or drop a file". In the dropdown menu for Type specify that it is a Video. Lastly, make the asset name the same name as the file. So using the [lastname]_[firstname]_[filename] pattern. Click "Submit", wait for it to upload, and repeat this process until the sub-folder has all three of your files in it.
- The final step is dragging your files into the Assignment #1 Lab folder. The key here is to not drag your sub-folder into the Assignment #1 Lab folder, but to drag each individual file from your sub-folder into that lab folder. If you drag your sub-folder in we won't be able to see your files.
- You should be finished turning in your files. The final step is to just make sure that you have a copy of each video file remaining in your student files folder in production1. If you have any further questions about turn-in or issues uploading your files, don't hesitate to send an e-mail to the staff alias!
|