Lab 5: file system and shell
Due: Tue, 06 Dec 2016 23:00:00 -0800
Introduction
In this lab, you will implement spawn, a library call that loads
and runs on-disk executables. You will then flesh out your kernel
and library operating system enough to run a shell on the console.
These features need a file system, and this lab introduces a simple
read/write file system.
Getting started
Use Git to fetch the latest version of the course repository, and
then create a local branch called lab5 based on our branch,
origin/lab5:
$ cd lab
$ git pull
Already up-to-date.
$ git checkout -b lab5 origin/lab5
Branch lab5 set up to track remote branch lab5 from origin.
Switched to a new branch 'lab5'
$ git merge lab4
Merge made by recursive.
.....
$
The main new component for this part of the lab is the file system
environment, located in the new fs directory. Scan through all the
files in this directory to get a feel for what all is new. Also,
there are some new file system-related source files in the user and
lib directories,
kern/pci.c: PCI initialization code.kern/nvme.c: minimal PIO-based (non-interrupt-driven) NVMe driver code.fs/fs.c: code that mainipulates the file system’s on-disk structure.fs/bc.c: a simple block cache built on top of our user-level page fault handling facility.fs/serv.c: the file system server that interacts with client environments using file system IPCs.lib/fd.c: code that implements the general UNIX-like file descriptor interface.lib/file.c: the driver for on-disk file type, implemented as a file system IPC client.lib/console.c: the driver for console input/output file type.lib/spawn.c: code skeleton of the spawn library call.
You should run the pingpong, primes, and forktree test cases from
lab 4 again after merging in the new lab 5 code. You will need to
comment out the ENV_CREATE(fs_fs) line in kern/init.c because fs/fs.c
tries to do some I/O, which JOS does not allow yet. Similarly,
temporarily comment out the call to close_all() in lib/exit.c; this
function calls subroutines that you will implement later in the
lab, and therefore will panic if called. If your lab 4 code doesn’t
contain any bugs, the test cases should run fine. Don’t proceed
until they work. Don’t forget to un-comment these lines when you
start Exercise 1.
If they don’t work, use git diff lab4 to review all the changes, making sure there isn’t any code you wrote for lab4 (or before) missing from lab 5. Make sure that lab 4 still works.
Lab requirements
As before, you will need to do all of the regular exercises described
in the lab. Additionally, you will need to write up brief answers
to the questions in a file called answers-lab5.txt
in the top level of your lab directory.
Remember you will need to finish at least two challenge problems or a project for lab X.
File system preliminaries
The file system you will work with is much simpler than most “real” file systems, but it is powerful enough to provide the basic features: creating, reading, writing, and deleting files organized in a hierarchical directory structure.
We are (for the moment anyway) developing only a single-user operating system, which provides protection sufficient to catch bugs but not to protect multiple mutually suspicious users from each other. Our file system therefore does not support the Unix notions of file ownership or permissions. Our file system also currently does not support hard links, symbolic links, time stamps, or special device files like most UNIX file systems do.
On-disk file system structure
Most UNIX file systems divide available disk space into two main
types of regions: inode regions and data regions. UNIX file systems
assign one inode to each file in the file system; a file’s inode
holds critical metadata about the file such as its stat attributes
and pointers to its data blocks. The data regions are divided into
much larger (typically 8KB or more) data blocks, within which the
file system stores file data and directory metadata. Directory
entries contain file names and pointers to inodes; a file is said
to be hard-linked if multiple directory entries in the file system
refer to that file’s inode. Since our file system will not support
hard links, we do not need this level of indirection and therefore
can make a convenient simplification: our file system will not use
inodes at all and instead will simply store all of a file’s (or
sub-directory’s) metadata within the (one and only) directory entry
describing that file.
Both files and directories logically consist of a series of data
blocks, which may be scattered throughout the disk much like the
pages of an environment’s virtual address space can be scattered
throughout physical memory. The file system environment hides the
details of block layout, presenting interfaces for reading and
writing sequences of bytes at arbitrary offsets within files. The
file system environment handles all modifications to directories
internally as a part of performing actions such as file creation
and deletion. Our file system does allow user environments to read
directory metadata directly (e.g., with read), which means that
user environments can perform directory scanning operations themselves
(e.g., to implement the ls program) rather than having to rely on
additional special calls to the file system. The disadvantage of
this approach to directory scanning, and the reason most modern
UNIX variants discourage it, is that it makes application programs
dependent on the format of directory metadata, making it difficult
to change the file system’s internal layout without changing or at
least recompiling application programs as well.
Sectors and blocks
Most disks cannot perform reads and writes at byte granularity and instead perform reads and writes in units of sectors, which today are almost universally 512 bytes each. File systems actually allocate and use disk storage in units of blocks. Be wary of the distinction between the two terms: sector size is a property of the disk hardware, whereas block size is an aspect of the operating system using the disk. A file system’s block size must be a multiple of the sector size of the underlying disk.
One can use a block size of 512 bytes, the same as the sector size of the underlying disk. Most modern file systems use a larger block size, however, because storage space has gotten much cheaper and it is more efficient to manage storage at larger granularities. Our file system will use a block size of 4096 bytes, conveniently matching the processor’s page size.
Superblocks
File systems typically reserve certain disk blocks at “easy-to-find” locations on the disk (such as the very start or the very end) to hold metadata describing properties of the file system as a whole, such as the block size, disk size, any metadata required to find the root directory, the time the file system was last mounted, the time the file system was last checked for errors, and so on. These special blocks are called superblocks.

Our file system will have exactly one superblock, which will always
be at block 1 on the disk. Its layout is defined by struct Super
in inc/fs.h. Block 0 is typically reserved to hold boot loaders and
partition tables, so file systems generally do not use the very
first disk block. Many “real” file systems maintain multiple
superblocks, replicated throughout several widely spaced regions
of the disk, so that if one of them is corrupted or the disk develops
a media error in that region, the other superblocks can still be
found and used to access the file system.
File metadata
The layout of the metadata describing a file in our file system
is described by struct File in inc/fs.h. This metadata includes
the file’s name, size, type (regular file or directory), and pointers
to the blocks comprising the file. As mentioned above, we do not
have inodes, so this metadata is stored in a directory entry on
disk. Unlike in most “real” file systems, for simplicity we will
use this one File structure to represent file metadata as it appears
both on disk and in memory.

The f_direct array in struct File contains space to store the
block numbers of the first 10 (NDIRECT) blocks of the file, which
we call the file’s direct blocks. For small files up to 10 × 4096 =
40KB in size, this means that the block numbers of all of the file’s
blocks will fit directly within the File structure itself. For
larger files, however, we need a place to hold the rest of the
file’s block numbers. For any file greater than 40KB in size,
therefore, we allocate an additional disk block, called the file’s
indirect block, to hold up to 4096 / 4 = 1024 additional block numbers.
Our file system therefore allows files to be up to 1034 blocks, or
just over four megabytes, in size. To support larger files, “real”
file systems typically support double- and triple-indirect blocks
as well.
Directories versus regular files
A File structure in our file system can represent either a regular
file or a directory; these two types of “files” are distinguished
by the type field in the File structure. The file system manages
regular files and directory-files in exactly the same way, except
that it does not interpret the contents of the data blocks associated
with regular files at all, whereas the file system interprets the
contents of a directory-file as a series of File structures describing
the files and subdirectories within the directory.
The superblock in our file system contains a File structure (the
root field in struct Super) that holds the metadata for the file
system’s root directory. The contents of this directory-file is a
sequence of File structures describing the files and directories
located within the root directory of the file system. Any subdirectories
in the root directory may in turn contain more File structures
representing sub-subdirectories, and so on.
Disk access
The file system environment in our operating system needs to be
able to access the disk, but we have not yet implemented any disk
access functionality in our kernel.
The GNUmakefile file in this lab sets up QEMU to use the file
obj/kern/kernel.img as the image for an IDE disk as before, and
to use the (new) file obj/fs/fs.img as the image for a separate
NVM Express (NVMe) disk.
NVMe is a recent interface specification used by many high-end
solid-state drives (SSDs).
In this lab our file system should only ever touch the NVMe disk; the IDE disk is used only to boot the kernel. If you manage to corrupt either disk image in some way, you can reset both of them to their original, “pristine” versions simply by typing:
$ rm obj/kern/kernel.img obj/fs/fs.img
$ make
or by doing:
$ make clean
$ make
PCI Interface
The NVMe disk is a PCI device, which means it plugs into the PCI bus on the motherboard. The PCI bus has address, data, and interrupt lines, and allows the CPU to communicate with PCI devices and PCI devices to read and write memory. A PCI device needs to be discovered and initialized before it can be used. Discovery is the process of walking the PCI bus looking for attached devices. Initialization is the process of allocating I/O and memory space as well as negotiating the IRQ line for the device to use.
We have provided you with PCI code in kern/pci.c. To perform PCI
initialization during boot, the PCI code walks the PCI bus looking
for devices. When it finds a device, it uses either (vendor ID, device ID)
or (device class, device subclass) as a key to search
in an array of struct pci_driver entries like this:
struct pci_driver {
    uint32_t key1, key2;
    int (*attachfn) (struct pci_func *pcif);
};
If the discovered device’s (vendor ID, device ID) or (device class,
device subclass) matches an entry in the array, the PCI code calls
that entry’s attachfn to perform device initialization.
Here’s more information of the NVMe disk for the file system.
We have provided a function nvme_attach in kern/nvme.c
for device initialization.
| vendor ID | 0x8086 |
Intel |
| device ID | 0x5845 |
QEMU NVMe controller |
| device class | 0x01 |
Mass storage controller |
| device subclass | 0x08 |
NVM controller |
| program interface | 0x02 |
NVMe |
Exercise
To help JOS discover the NVMe disk,
add an entry to either pci_attach_class[]
or pci_attach_vendor[] in kern/pci.c.
Now you should see the following output during boot-up:
PCI: 00:04.0 8086:5845 01.08.02 Mass storage controller
  BAR 0 [mem 0xfebf0000-0xfebf1fff]
  BAR 4 [mem 0xfebf3000-0xfebf3fff]
PCI function 00:04.0 (8086:5845) enabled
This describes the NVMe disk at bus 0, device 0x04, function 0.
Each function supports up to six Base Address Registers or BARs,
which point to either memory-mapped I/O regions or I/O ports.
Memory-mapped I/O
Software communicates with the NVMe disk via memory-mapped I/O (MMIO). You’ve seen this a few times before in JOS: the CGA console, the LAPIC, and the IOAPIC are devices that you control and query by writing to and reading from “memory.” But these reads and writes don’t go to DRAM; they go directly to these devices.
The nvme_attach function calls pci_func_enable to negotiate an
MMIO region with the NVMe disk.
This is a range of physical memory addresses assigned to the device,
which means you’ll have to do something to access it via virtual
addresses. MMIO regions are assigned very high physical
addresses, typically above 3GB; for example, the NVMe disk’s
MMIO region is from physical address 0xfebf0000 to 0xfebf1fff,
as indicated by its BAR 0.
We can’t use KADDR to access the region because of JOS’s 256MB limit.
Thus, nvme_attach creates a new memory mapping through mmio_map_region to use it.
The driver provides two functions, nvme_read and nvme_write, for
accessing the disk. Now let’s add system calls for user space to
use with the disk.
Exercise
Implement two new system calls, sys_blk_read and sys_blk_write,
to read from and write to disk, respectively.
Don’t forget to modify syscall() in kern/syscall.c to dispatch them.
Feel free to include necessary headers (e.g., kern/nvme.h).
Question
How many disks does this machine emulated by QEMU have? What are these disks?
Watch for the PCI: ... Mass storage controller lines in the boot log,
find the vendor device ID and device ID, and search for them
in a PCI database (e.g., pciutils/pciids on GitHub).
Challenge: interrupt-driven disk access
The given NVMe driver relies on polling. Implement interrupt-driven disk access. You can decide whether to move the device driver into the kernel, keep it in user space along with the file system, or even (if you really want to get into the micro-kernel spirit) move it into a separate environment of its own.
Challenge: PCIe
PCI Express (PCIe) is a new standard to replace PCI. Add PCIe support to JOS. You will need to parse the ACPI “MCFG” table to find the MMIO base address of the PCIe enhanced configuration mechanism.
The file system
The goal for this lab is not to have you implement the entire file system, but for you to implement only certain key components. In particular, you will be responsible for reading blocks into the block cache and flushing them back to disk; allocating disk blocks; mapping file offsets to disk blocks; and implementing read, write, and open in the IPC interface. Because you will not be implementing all of the file system yourself, it is very important that you familiarize yourself with the provided code and the various file system interfaces.
The block cache
In our file system, we will implement a simple “buffer cache” (really
just a block cache) with the help of the processor’s virtual memory
system. The code for the block cache is in fs/bc.c.
Our file system will be limited to handling disks of size 3GB or
less. We reserve a large, fixed 3GB region of the file system
environment’s address space, from 0x10000000 (DISKMAP) up to
0xD0000000 (DISKMAP+DISKMAX), as a “memory mapped” version of the
disk. For example, disk block 0 is mapped at virtual address
0x10000000, disk block 1 is mapped at virtual address 0x10001000,
and so on. The diskaddr function in fs/bc.c implements this translation
from disk block numbers to virtual addresses (along with some sanity
checking).
Since our file system environment has its own virtual address space independent of the virtual address spaces of all other environments in the system, and the only thing the file system environment needs to do is to implement file access, it is reasonable to reserve most of the file system environment’s address space in this way. It would be awkward for a real file system implementation on a 32-bit machine to do this since modern disks are larger than 3GB. Such a buffer cache management approach may still be reasonable on a machine with a 64-bit address space.
Of course, it would be unreasonable to read the entire disk into memory, so instead we’ll implement a form of demand paging, wherein we only allocate pages in the disk map region and read the corresponding block from the disk in response to a page fault in this region. This way, we can pretend that the entire disk is in memory.
Exercise
Implement the bc_pgfault and flush_block functions in fs/bc.c.
bc_pgfault is a page fault handler, just like the one your wrote
in the previous lab for copy-on-write fork, except that its job is
to load pages in from the disk in response to a page fault. When
writing this, keep in mind that (1) addr may not be aligned to a
block boundary and (2) nvme_read operates in sectors, not blocks.
The flush_block function should write a block out to disk if
necessary. flush_block shouldn’t do anything if the block isn’t
even in the block cache (that is, the page isn’t mapped) or if it’s
not dirty. We will use the VM hardware to keep track of whether a
disk block has been modified since it was last read from or written
to disk. To see whether a block needs writing, we can just look to
see if the PTE_D “dirty” bit is set in the uvpt entry. (The PTE_D
bit is set by the processor in response to a write to that page;
see Section 5.2.4.3 of the 386 reference manual.) After writing
the block to disk, flush_block should clear the PTE_D bit using
sys_page_map.
Use make grade to test your code. Your code should pass
check_bc, check_super, and check_bitmap.
The fs_init function in fs/fs.c is a prime example of how to use
the block cache. After initializing the block cache, it simply
stores pointers into the disk map region in the super global variable.
After this point, we can simply read from the super structure as
if they were in memory and our page fault handler will read them
from disk as necessary.
Challenge: block cache eviction
The block cache has no eviction policy. Once a block gets faulted
in to it, it never gets removed and will remain in memory forevermore.
Add eviction to the buffer cache. Using the PTE_A “accessed” bits
in the page tables, which the hardware sets on any access to a page,
you can track approximate usage of disk blocks without the need to
modify every place in the code that accesses the disk map region.
Be careful with dirty blocks.
Challenge: block cache prefetching
Currently bc_pgfault loads one block at a time; consequently,
there will be a number of page faults when loading a large file.
Can you reduce the number of page faults?
For example, you may load more than one blocks;
if you have implemented superpages in Lab 2,
you may try to load 4MB instead.
If you try to modify the disk driver,
be careful with the DMA addresses.
The block bitmap
After fs_init sets the bitmap pointer, we can treat bitmap as a
packed array of bits, one for each block on the disk. See, for
example, block_is_free, which simply checks whether a given block
is marked free in the bitmap.
Exercise
Use free_block as a model to implement alloc_block,
which should find a free disk block in the bitmap, mark it used,
and return the number of that block. When you allocate a block, you
should immediately flush the changed bitmap block to disk with
flush_block, to help file system consistency.
Use make grade to test your code. Your code should now pass
alloc_block.
File operations
We have provided a variety of functions in fs/fs.c to implement the
basic facilities you will need to interpret and manage File structures,
scan and manage the entries of directory-files, and walk the file
system from the root to resolve an absolute pathname. Read through
all of the code in fs/fs.c and make sure you understand what each
function does before proceeding.
Exercise
Implement file_block_walk and file_get_block. file_block_walk maps
from a block offset within a file to the pointer for that block in
the struct File or the indirect block, very much like what pgdir_walk
did for page tables. file_get_block goes one step further and maps
to the actual disk block, allocating a new one if necessary.
Use make grade to test your code. Your code should pass file_open,
file_get_block, and file_flush/file_truncated/file rewrite, and
testfile.
file_block_walk and file_get_block are the workhorses of the file
system. For example, file_read and file_write are little more than
the bookkeeping atop file_get_block necessary to copy bytes between
scattered blocks and a sequential buffer.
The file system is likely to be corrupted if it gets interrupted in the middle of an operation (for example, by a crash or a reboot). Consider how you can make the file system crash-resilient and demonstrate some situation where the old file system would get corrupted, but yours doesn’t (see lab X project ideas).
The file system interface
Now that we have the necessary functionality within the file system environment itself, we must make it accessible to other environments that wish to use the file system. Since other environments can’t directly call functions in the file system environment, we’ll expose access to the file system environment via a remote procedure call, or RPC, abstraction, built atop JOS’s IPC mechanism. Graphically, here’s what a call to the file system server (say, read) looks like:
      Regular env           FS env
   +---------------+   +---------------+
   |      read     |   |   file_read   |
   |   (lib/fd.c)  |   |   (fs/fs.c)   |
...|.......|.......|...|.......^.......|...............
   |       v       |   |       |       | RPC mechanism
   |  devfile_read |   |  serve_read   |
   |  (lib/file.c) |   |  (fs/serv.c)  |
   |       |       |   |       ^       |
   |       v       |   |       |       |
   |     fsipc     |   |     serve     |
   |  (lib/file.c) |   |  (fs/serv.c)  |
   |       |       |   |       ^       |
   |       v       |   |       |       |
   |   ipc_send    |   |   ipc_recv    |
   |       |       |   |       ^       |
   +-------|-------+   +-------|-------+
           |                   |
           +-------------------+
Everything below the dotted line is simply the mechanics of getting
a read request from the regular environment to the file system
environment. Starting at the beginning, read (which we provide)
works on any file descriptor and simply dispatches to the appropriate
device read function, in this case devfile_read (we can have more
device types, like pipes). devfile_read implements read specifically
for on-disk files. This and the other devfile_* functions in
lib/file.c implement the client side of the FS operations and all
work in roughly the same way, bundling up arguments in a request
structure, calling fsipc to send the IPC request, and unpacking and
returning the results. The fsipc function simply handles the common
details of sending a request to the server and receiving the reply.
The file system server code can be found in fs/serv.c. It loops
in the serve function, endlessly receiving a request over IPC,
dispatching that request to the appropriate handler function, and
sending the result back via IPC. In the read example, serve will
dispatch to serve_read, which will take care of the IPC details
specific to read requests such as unpacking the request structure
and finally call file_read to actually perform the file read.
Recall that JOS’s IPC mechanism lets an environment send a single
32-bit number and, optionally, share a page. To send a request from
the client to the server, we use the 32-bit number for the request
type (the file system server RPCs are numbered, just like how
syscalls were numbered) and store the arguments to the request in
a union Fsipc on the page shared via the IPC. On the client side,
we always share the page at fsipcbuf; on the server side, we map
the incoming request page at fsreq (0x0ffff000).
The server also sends the response back via IPC. We use the 32-bit
number for the function’s return code. For most RPCs, this is all
they return. FSREQ_READ and FSREQ_STAT also return data, which they
simply write to the page that the client sent its request on. There’s
no need to send this page in the response IPC, since the client
shared it with the file system server in the first place. Also, in
its response, FSREQ_OPEN shares with the client a new “Fd page”.
We’ll return to the file descriptor page shortly.
Exercise
Implement serve_read in fs/serv.c.
serve_read’s heavy lifting will be done by the already-implemented
file_read in fs/fs.c (which, in turn, is just a bunch of calls to
file_get_block). serve_read just has to provide the RPC interface
for file reading. Look at the comments and code in serve_set_size
to get a general idea of how the server functions should be structured.
Use make grade to test your code. Your code should pass
serve_open/file_stat/file_close and file_read.
Exercise
Implement serve_write in fs/serv.c and devfile_write in lib/file.c.
Use make grade to test your code. Your code should pass
file_write, file_read after file_write, open, and large file.
Challenge: new block device support
Extend your JOS to support more types of block devices, such as drivers for virtio-blk. Make sure your file system still works on these devices.
Challenge: user-space driver
Drivers don’t have to run in the kernel. Move the NVMe driver to user space to be part of the file system server. One benefit is that you don’t need system calls to perform disk reads and writes. Think carefully about how you will assign permissions to the pages of your file system server.
Once you move the driver to the user space, the file system server will have access to physical memory through the driver. In other words, a buggy or even malicious file system may abuse the driver to access arbitrary memory in the kernel and other processes. Design and implement some defense mechanism for your JOS.
If you feel adventurous, add
IOMMU
support (e.g., Intel’s VT-d)
to your JOS to sandbox the NVMe driver.
You will need to change -M q35 to -M q35,iommu=on
in your makefile.
The shell
Since we have a file system now, let’s write a shell for JOS. The shell will allow us to execute programs from disk and interact with them using keyboard.
Spawning processes
We have given you the code for spawn (see lib/spawn.c) which creates
a new environment, loads a program image from the file system into
it, and then starts the child environment running this program. The
parent process then continues running independently of the child.
The spawn function effectively acts like a fork in Unix followed
by an immediate exec in the child process.
We implemented spawn rather than a Unix-style exec because spawn
is easier to implement from user space in “exokernel fashion,”
without special help from the kernel. Think about what you would
have to do in order to implement exec in user space, and be sure
you understand why it is harder.
Exercise
spawn relies on the new syscall sys_env_set_trapframe to initialize
the state of the newly created environment. Implement sys_env_set_trapframe
in kernel/syscall.c (don’t forget to dispatch the new system call
in syscall()).
Test your code by running the user/spawnhello program from kern/init.c,
which will attempt to spawn /hello from the file system.
Use make grade to test your code.
Challenge: exec
Implement Unix-style exec.
Challenge: memory-mapped files
Implement mmap-style memory-mapped files and modify spawn to map
pages directly from the ELF image when possible.
The Unix file descriptors are a general notion that also encompasses
pipes, console I/O, etc. In JOS, each of these device types has a
corresponding struct Dev, with pointers to the functions that
implement read/write/etc. for that device type. lib/fd.c implements
the general Unix-like file descriptor interface on top of this.
Each struct Fd indicates its device type, and most of the functions
in lib/fd.c simply dispatch operations to functions in the appropriate
struct Dev.
lib/fd.c also maintains the file descriptor table region in each
application environment’s address space, starting at FSTABLE. This
area reserves a page’s worth (4KB) of address space for each of the
up to MAXFD (currently 32) file descriptors the application can
have open at once. At any given time, a particular file descriptor
table page is mapped if and only if the corresponding file descriptor
is in use. Each file descriptor also has an optional “data page”
in the region starting at FILEDATA, which devices can use if they
choose.
We would like to share file descriptor state across fork and spawn,
but file descriptor state is kept in user-space memory. Right now,
on fork, the memory will be marked copy-on-write, so the state will
be duplicated rather than shared. This means environments won’t
be able to seek in files they didn’t open themselves and that pipes
won’t work across a fork. On spawn, the memory will be left behind,
not copied at all. Effectively, the spawned environment starts
with no open file descriptors.
We will change fork to know that certain regions of memory are used
by the “library operating system” and should always be shared.
Rather than hard-code a list of regions somewhere, we will set an
otherwise-unused bit in the page table entries (just like we did
with the PTE_COW bit in fork).
We have defined a new PTE_SHARE bit in inc/lib.h. This bit is one
of the three PTE bits that are marked “available for software use”
in the Intel and AMD manuals. We will establish the convention that
if a page table entry has this bit set, the PTE should be copied
directly from parent to child in both fork and spawn. Note that
this is different from marking it copy-on-write: as described in
the first paragraph, we want to make sure to share updates to the
page.
Exercise
Change duppage in lib/fork.c to follow the new convention. If
the page table entry has the PTE_SHARE bit set, just copy the mapping
directly. (You should use PTE_SYSCALL, not 0xfff, to mask out the
relevant bits from the page table entry. 0xfff picks up the accessed
and dirty bits as well.)
Likewise, implement copy_shared_pages in lib/spawn.c. It should
loop through all page table entries in the current process (just
like fork did), copying any page mappings that have the PTE_SHARE
bit set into the child process.
Use make run-testpteshare to check that your code is behaving
properly. You should see lines that say “fork handles PTE_SHARE
right” and “spawn handles PTE_SHARE right”.
Use make run-testfdsharing to check that file descriptors
are shared properly. You should see lines that say “read in child
succeeded” and “read in parent succeeded”.
The keyboard interface
For the shell to work, we need a way to type at it. QEMU has been
displaying output we write to the CGA display and the serial port,
but so far we’ve only taken input while in the kernel monitor. In
QEMU, input typed in the graphical window appear as input from the
keyboard to JOS, while input typed to the console appear as characters
on the serial port. kern/console.c already contains the keyboard
and serial drivers that have been used by the kernel monitor since
lab 1, but now you need to attach these to the rest of the system.
Exercise
In your kern/trap.c, call kbd_intr to handle trap
IRQ_OFFSET+IRQ_KBD and serial_intr to handle trap
IRQ_OFFSET+IRQ_SERIAL.
We implemented the console input/output file type for you, in
lib/console.c. kbd_intr and serial_intr fill a buffer with the
recently read input while the console file type drains the buffer
(the console file type is used for stdin/stdout by default unless
the user redirects them).
Test your code by running make run-testkbd and type a few lines. The system should echo your lines back to you as you finish them. Try typing in both the console and the graphical window, if you have both available.
I/O redirection
Run make run-icode or make run-icode-nox.
This will run your kernel and start user/icode. icode execs init,
which will set up the console as file descriptors 0 and 1 (standard
input and standard output). It will then spawn sh, the shell. You
should be able to run the following commands:
echo hello world | cat
cat lorem |cat
cat lorem |num
cat lorem |num |num |num |num |num
lsfd
sysinfo
sysinfo
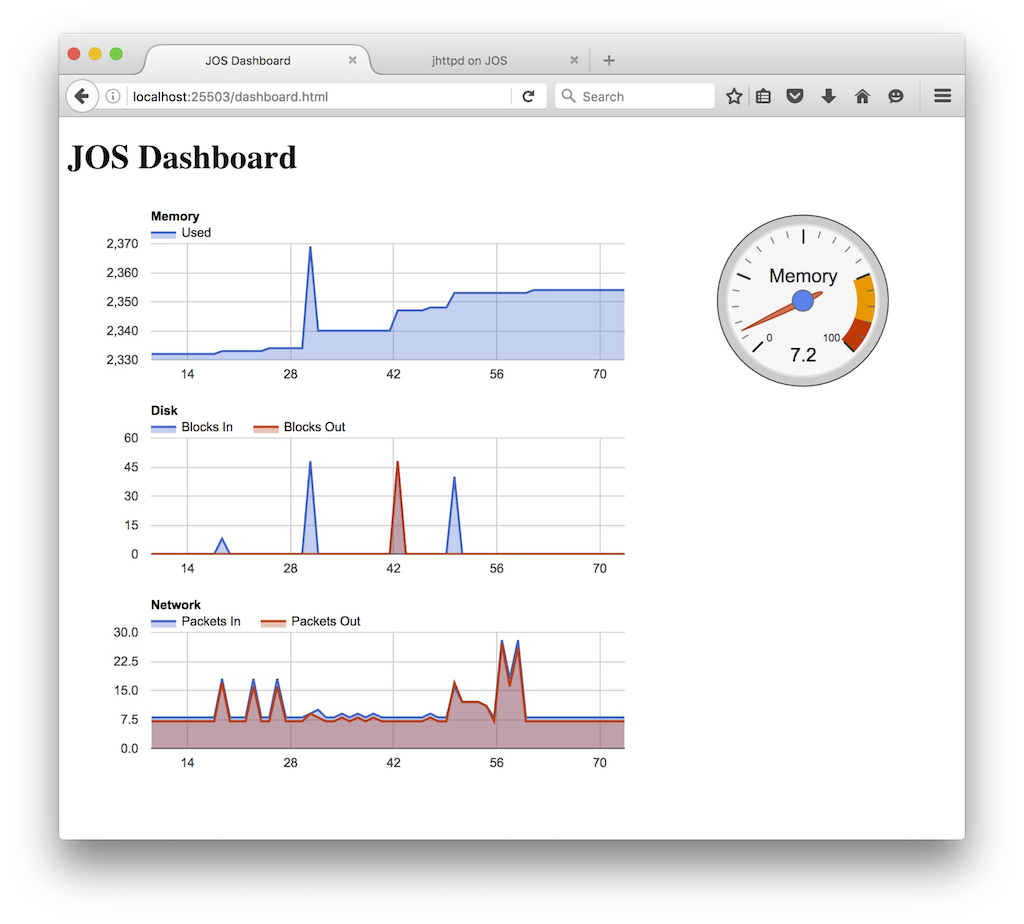
For now your sysinfo command prints zeros for several items.
You’ll need to complete it to support the JOS dashboard
in lab 6 if you choose it as your lab X.
Note that the user library routine cprintf prints straight to the
console, without using the file descriptor code. This is great for
debugging but not great for piping into other programs. To print
output to a particular file descriptor (for example, 1, standard
output), use fprintf(1, "...", ...). printf("...", ...) is a short-cut
for printing to FD 1. See user/lsfd.c for examples.
Exercise
The shell doesn’t support I/O redirection. It would be nice to run
sh <script instead of having to type in all the commands in the
script by hand, as you did above. Add I/O redirection for < to
user/sh.c.
Test your implementation by typing sh <script into your shell.
Run make run-testshell to test your shell. testshell simply feeds
the above commands (also found in fs/testshell.sh) into the shell
and then checks that the output matches fs/testshell.key.
Challenge: shell
Add more features to the shell. Possibilities include (a few require changes to the file system too):
- backgrounding commands (
ls &) - multiple commands per line (
ls; echo hi) - command grouping (
(ls; echo hi) | cat > out) - environment variable expansion (
echo $hello) - quoting (
echo "a | b") - command-line history and/or editing
- tab completion
- directories,
cd, and aPATHfor command-lookup - file creation
- Ctrl-c to kill the running environment
Feel free to do something not on this list.
Your code should pass all tests at this point. As usual, you can grade your submission with make grade.
This completes the lab. As usual, in answers-lab5.txt,
don’t forget to
write up your answers to the questions,
how much time you spend on this lab, and
the names of your team members if you work in pairs.
Before handing in, use git status and git diff to examine your changes. When you’re ready, commit your changes, type make handin, and upload the tarball through the course dropbox.