Setup Seaside
For this assignment, you must use your account on seaside.cs.washington.edu. We will use the CSE systems to evaluate submitted work, and you need to verify that everything you submit works correctly there. See the Setup page from hw0 for more information about how to get started. We recommend that you use Visual Studio Code for this homework.
Setup cse374 on Seaside for changing permissions
You should have cse374 set up from hw1. See the Setup page from hw1 if you need help. Once you have mounted the ~/udrive/cse374 in ~/cse374, just cd ~/cse374 to work in that directory.
Setup Git on Seaside for git operations
Exercise 5 has detailed instructions on how to set up SSH keys to GitLab. Recall that seaside is essentially a load balancer in front of two other machines: cancun(cancun.cs.washington.edu) and calgary(calgary.cs.washington.edu). In that exercise, you should have set up a SSH key on either cancun or calgary already, but probably not both.
You can ssh -T git@gitlab.cs.washington.edu to check whether you are on the machine with SSH key setup. If you see a welcome message, that means you are good to go. If you see a prompt about passwords, that means you need to redo the steps in that exercise to set up another SSH key on the machine.
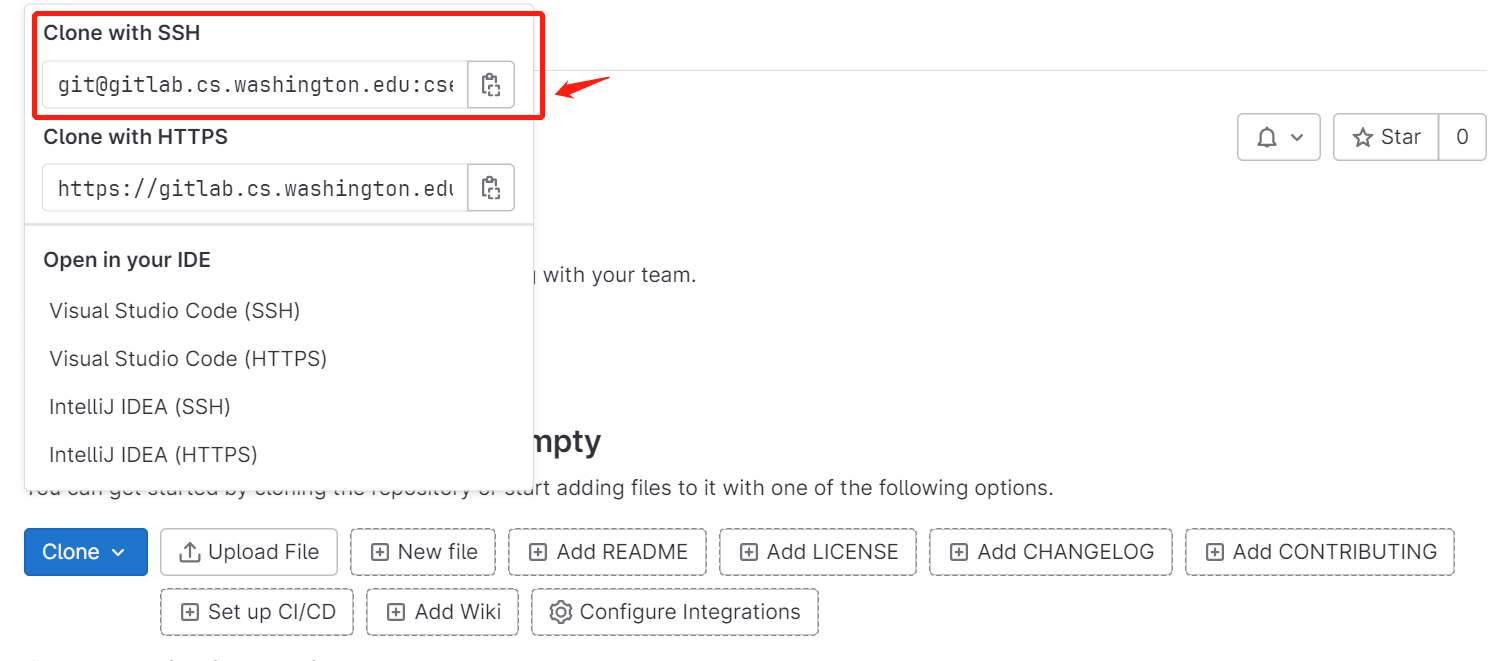
Clone your own git repo
- Open your own repository URL in a web browser. It should be in your GitLab, ending with your own UW NetId. The format should look like “https://gitlab.cs.washington.edu/cse374-23su-students/cse374-23su-UWNetId”.
- Look for the “Clone” button on the page. Copy the repository URL.
- Go back to your terminal where you have log into
seaside. Make sure you are in~/cse374. Then, run the following command, replacingwith your copied repository URL:
git clone git@gitlab.cs.washington.edu:cse374-23su-students/cse374-23su-UWNetId.git
-
Git will download the repository to your seaside machine. You now have a local copy of your repository.
-
Change directory to the local copy of your repository:
cd cse374-23su-UWNetId
Caution
If you get an error saying “Permission denied (publickey)…”, then there is a problem with your GitLab configuration. Check to make sure you have your SSH key setup correctly, your private key is in your SSH directory (~/.ssh), and that you can view the repository through the website.
Set cse374-23su-hw repo as an upstream remote
Once you clone the empty reposity onto your machine you’ll run a couple of commands to get the actual files (and upload it!):
git remote add upstream git@gitlab.cs.washington.edu:cse374-23su-students/cse374-23su-hw.git
Git will add the cse374-23su-hw repository as an upstream remote to your repository.
The copy on your file system is a local copy, and the copy on GitLab is referred to as the origin remote copy. You can view a list of these remote links as follows:
git remote -v
See the documentation for more details on working with remotes – they can be confusing!
For reference, your final remote configuration should read like the following when it’s setup correctly (run git remote -v):
origin  git@gitlab.cs.washington.edu:cse374-23su-students/cse374-23su-UWNetId.git (fetch)
origin  git@gitlab.cs.washington.edu:cse374-23su-students/cse374-23su-UWNetId.git (push)
upstream        git@gitlab.cs.washington.edu:cse374-23su-students/cse374-23su-hw.git (fetch)
upstream        git@gitlab.cs.washington.edu:cse374-23su-students/cse374-23su-hw.git (push)
In this configuration, the origin (default) remote links to your repository where you’ll be pushing your individual submission. The upstream remote points to our repository where you’ll be pulling subsequent homework and bug fixes (more on this below).
Pull starter code from the upstream repo
You will need to pull updates from the cse374-23su-hw repository to get the actual files for hw3, and then upload it.
git pull upstream main
git push
In the future, we will be releasing homework to the repository that you just added as an upstream remote. If you have made any changes to your own repository, commit them before proceeding to the git pull. Otherwise, the merge step might fail.
When you pull the code, Git may open a text editor to allow you to specify a merge commit message; you may leave this as the default. Note that these changes are merged locally, but we will eventually want to push them to the GitLab repository (git push).
Note
It’s possible that there aren’t any pending changes in the upstream repository for you to pull. If so, git will tell you that everything is up to date.
🎉 Congratulations! You have successfully set the cse374-23su-hw repository as an upstream remote and pulled starter code from it into your own repository. Spend a few minutes getting familiar with the directory layout and file structure. Then, you can cd hw3 and start working on hw3!
Tip
Commit early and often! Any time you commit and push your local changes, they will appear in the GitLab repository. Since you’ll be submitting the homework to Gradescope via the GitLab repository, it’s important that you remember to push all of your changes!
(Optional) Test out the origin remote
Let’s test out the origin remote by doing a push of your main branch to GitLab. Do this by issuing the following commands in the git repo:
touch empty_file
git add empty_file
git commit empty_file -m "Testing git with an empty file"
git push # ... to origin by default
The git push tells git to push all of your committed changes to a remote. If none is specified, origin is assumed by default (you can be explicit about this by executing git push origin). Since the upstream remote is read-only, you’ll only be able to pull from it.
After executing these commands, you should see something like the following:
Enumerating objects: 4, done.
Counting objects: 100% (4/4), done.
Delta compression using up to 32 threads
Compressing objects: 100% (2/2), done.
Writing objects: 100% (3/3), 315 bytes | 45.00 KiB/s, done.
Total 3 (delta 0), reused 0 (delta 0), pack-reused 0
To gitlab.cs.washington.edu:cse374-23su-students/cse374-23su-UWNetId.git
   5c12e02..e2aa7f7  master -> master
We pushed a blank file to our origin remote, which isn’t very interesting. Let’s clean up after ourselves:
# Tell git we want to remove this file from our repository
git rm empty_file
# Now commit all pending changes (-a) with the specified message (-m)
git commit -am "Removed test file"
# Now, push this change to GitLab
git push
If you don’t know Git that well, this probably seemed very arcane. Just keep using Git and you’ll understand more and more.
