Projects
Project instructions and specifications.
Why does 373 + 1 evaluate to 374 while "373" + "1" evaluate to "3731"? Underlying this question is the concept of a data type. In Java, every variable has a data type like int or String. Data types combine representation and functionality. An int can only represent integer numbers within a certain range and the plus operator computes the sum of the two values. A String, on the other hand, represents data as a sequence of characters and the plus operator appends the two strings.
Abstract data types (ADT) are data types that do not specify a single representation of data and only include a specification for the functionality of the data type. In Java, abstract data types are often represented using interfaces like List, Set, or Map. Java provides implementations or specific representations of each interface through classes like ArrayList, TreeSet, or HashMap.
The projects in this course aim to highlight the relationship between abstractions, implementations, and problems. The purpose of programming in this course is to explore the capabilities and design effort that goes into writing a specification. But programming is only a small portion of the projects: a much larger emphasis is placed on comparing the qualities of different solutions. The goal of the projects is learn the how and the why hidden within the project specifications through a synthesis of programming, analysis, and communication.
To start working on the projects, follow the setup steps below.
Project Setup
Install Git
Git is a version control system (VCS), a tool for distributing, managing, and sharing code with other people. Install Git by following the instructions according to your computer’s operating system.
- Windows
- Download and install Git. All the default settings will work.
- macOS
- From Finder, navigate to Application | Utilities | Terminal. Type
git --versioninto the terminal and pressEnter. If you see a download prompt, follow the instructions. - ChromeOS
- At the bottom right, select the time. Then, select Settings | Advanced | Developers and Turn On the Linux development environment. Finally, follow the Linux instructions for all remaining setup.
- Linux
- Install
gitusing your package manager. On Debian, Ubuntu, or other apt-managed systems, typesudo apt install gitinto the terminal and pressEnter.
The sudo command may require a password prompt. When you type into the password prompt, nothing will appear. This is a security feature: your typing is intentionally hidden!
Install IntelliJ
Download and install the latest version of IntelliJ IDEA Community Edition for your computer’s operating system. IntelliJ is an integrated development environment that is helpful for writing complex programs that span multiple Java classes. Open the Standalone installation guide, select your computer’s operating system, and follow the steps.
When downloading IntelliJ, we only need the completely free IntelliJ IDEA Community Edition. The download site promotes IntelliJ IDEA Ultimate; scroll down to find IntelliJ IDEA Community Edition. If you already have IntelliJ installed, be sure to update it to the latest version before proceeding.
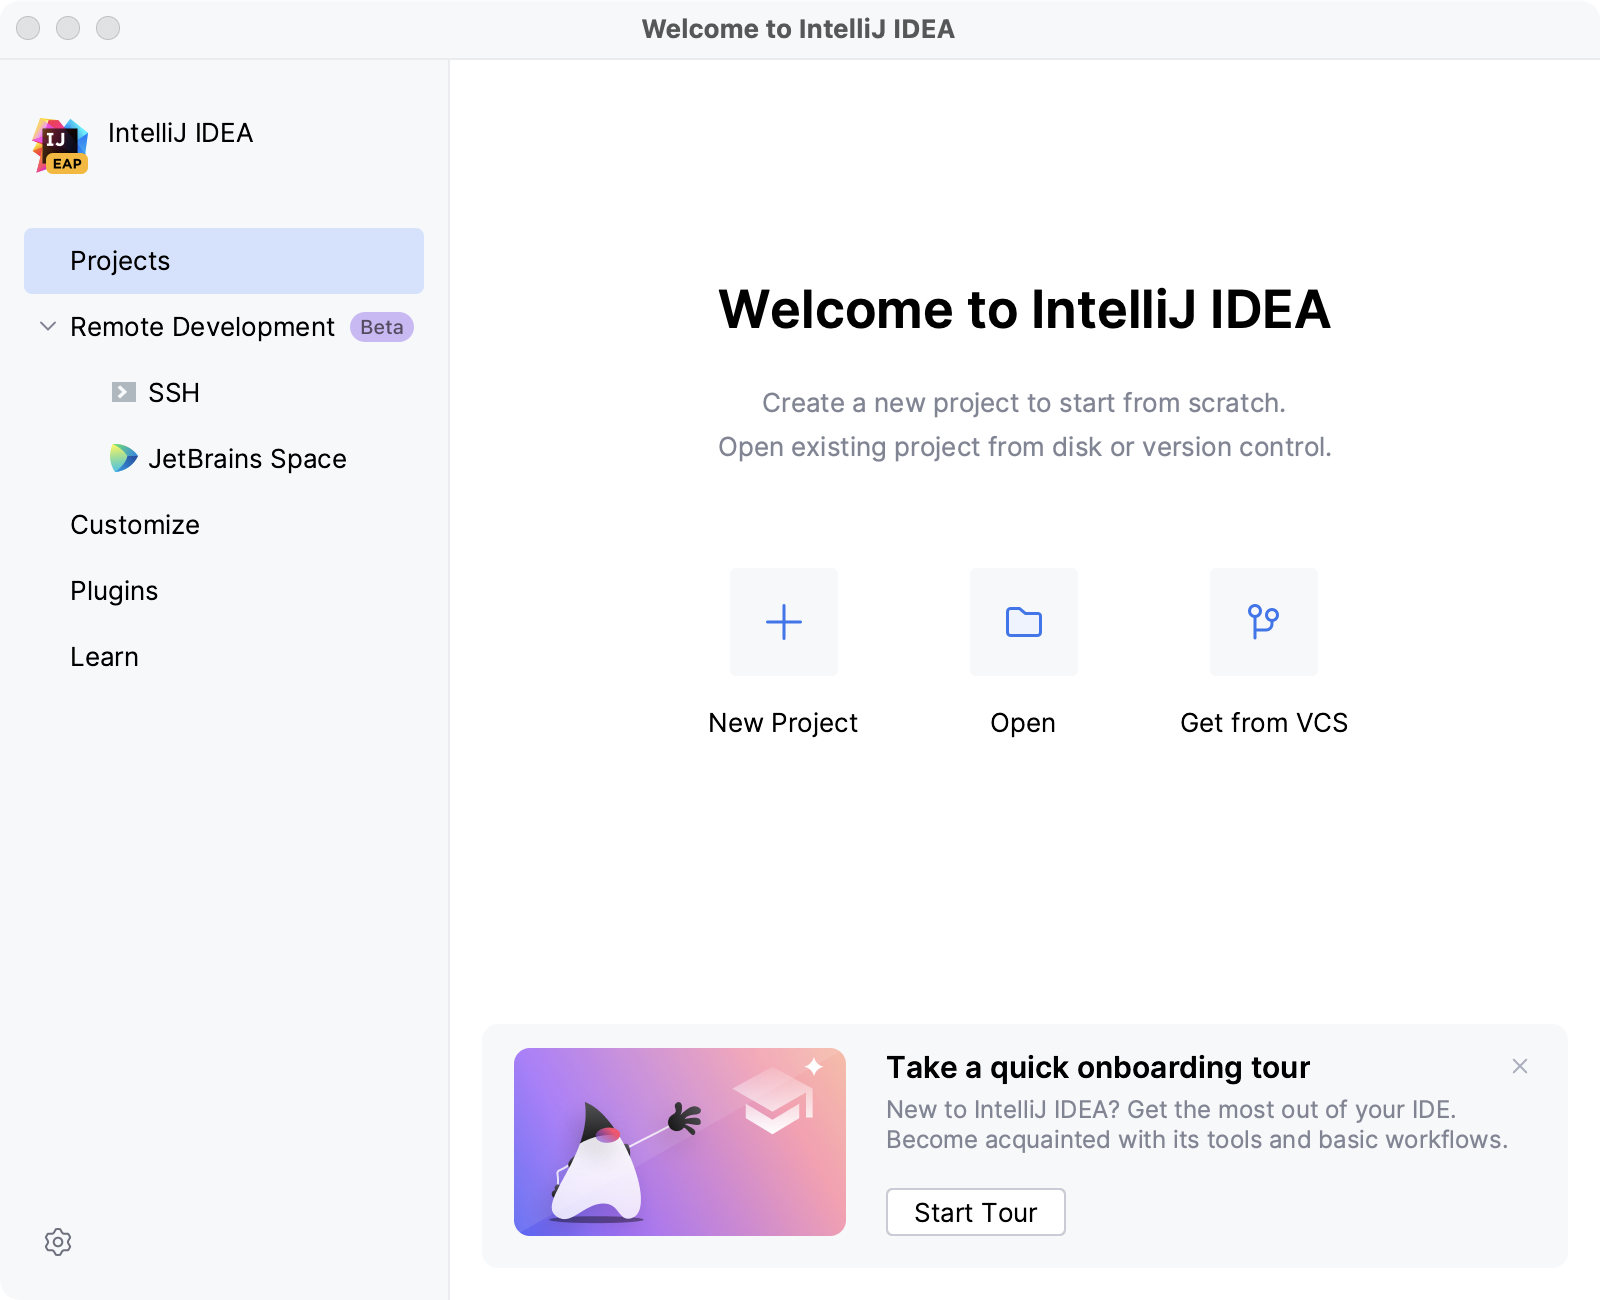
Once IntelliJ is installed, run IntelliJ IDEA and select Skip Remaining and Set Defaults. You should see the Welcome to IntelliJ IDEA screen.
Next, we have a few more setup steps before we can proceed with obtaining the project code. From the Welcome to IntelliJ IDEA screen:
- In the banner at the bottom, choose Enable New UI and restart IntelliJ.
- In the left sidebar, select Plugins, search for “jGRASP” in the marketplace, and then install the jGRASP plugin.
- In the left sidebar, select Projects. In the space at the bottom, choose Start Tour and complete the onboarding tour.
Generate SSH keys
Your project code will be stored on CSE GitLab, a service provided by the Allen School to securely and privately store your coursework. CSE GitLab requires SSH keys: computer-generated passwords used to securely authenticate your computer to CSE GitLab.
- In IntelliJ, open the Terminal tool window.
- In the terminal, generate an SSH key pair with the command
ssh-keygen -t ed25519 - At each prompt, press
Enterto continue and accept the default settings.- When promoted to “Enter file in which to save the key”, do not enter a file name. Press enter to accept the default file name and location.
- When prompted to “Enter a passphrase”, press enter without entering a passphrase.
- Copy your public SSH key with the command
cat ~/.ssh/id_ed25519.pub - In your browser, sign into CSE GitLab using your UW NetID.
- Visit the SSH Keys user settings and paste the public SSH key in the Key field.
- Give it a title if it doesn’t already have one and then press Add key.
Obtain and run project code
Now that we’ve installed the required software and configured our computer so that it can securely communicate with CSE GitLab, let’s get the code!
- Visit CSE GitLab and you’ll be greeted by a repository named with the name
cse373-projectsfollowed by your UW NetID. - Visit your private repository, press the blue Code button, and copy the Clone with SSH address. Don’t copy the “Clone with HTTPS” address! The correct address should begin with
git@. - Open IntelliJ on your computer. From the Welcome to IntelliJ IDEA screen, select Projects from the sidebar and then Get from VCS. Paste your SSH address and choose a directory on your computer to store your private repository.
- If you see an SSH Confirmation window pop-up, check that the fingerprint matches the CSE GitLab fingerprint. Compare the value to the table entry ED25519 SHA 256. If it matches, then accept the connection. If it doesn’t match, do not accept the connection and write an Ed Discussion question with the two different fingerprint values.
The first time you open the project, IntelliJ will ask you whether to trust the project. Choose Trust Project so that IntelliJ has your permission to run code.
IntelliJ says "Could not read from remote repository" and won't let me clone the project!
If your console also says “Your SSH Key has expired” or “Make sure you have the correct access rights and the repository exists”, check your GitLab account to make sure you don’t have any expired SSH keys! Delete any expired keys before trying to clone the project again.
After a few seconds, IntelliJ will open the main editor screen. If IntelliJ asks you to Load Gradle Project, please accept this.
Please make sure that IntelliJ has the correct settings to run on
IntelliJ IDEAand notGradle.Go to IntelliJ settings ->
Build, Execution and Deployment->Build Tools->Gradleand change BOTHbuild and runusing andrun testsusing to theIntelliJ IDEAoption instead ofGradle.
Please check that you are using JDK 17, and not any other version.
From the main menu select File | Project Structure. In the Project Structure window, check that the SDK option says 17.
Otherwise, open the SDK dropdown, select Add SDK | Download JDK and choose Version 17.
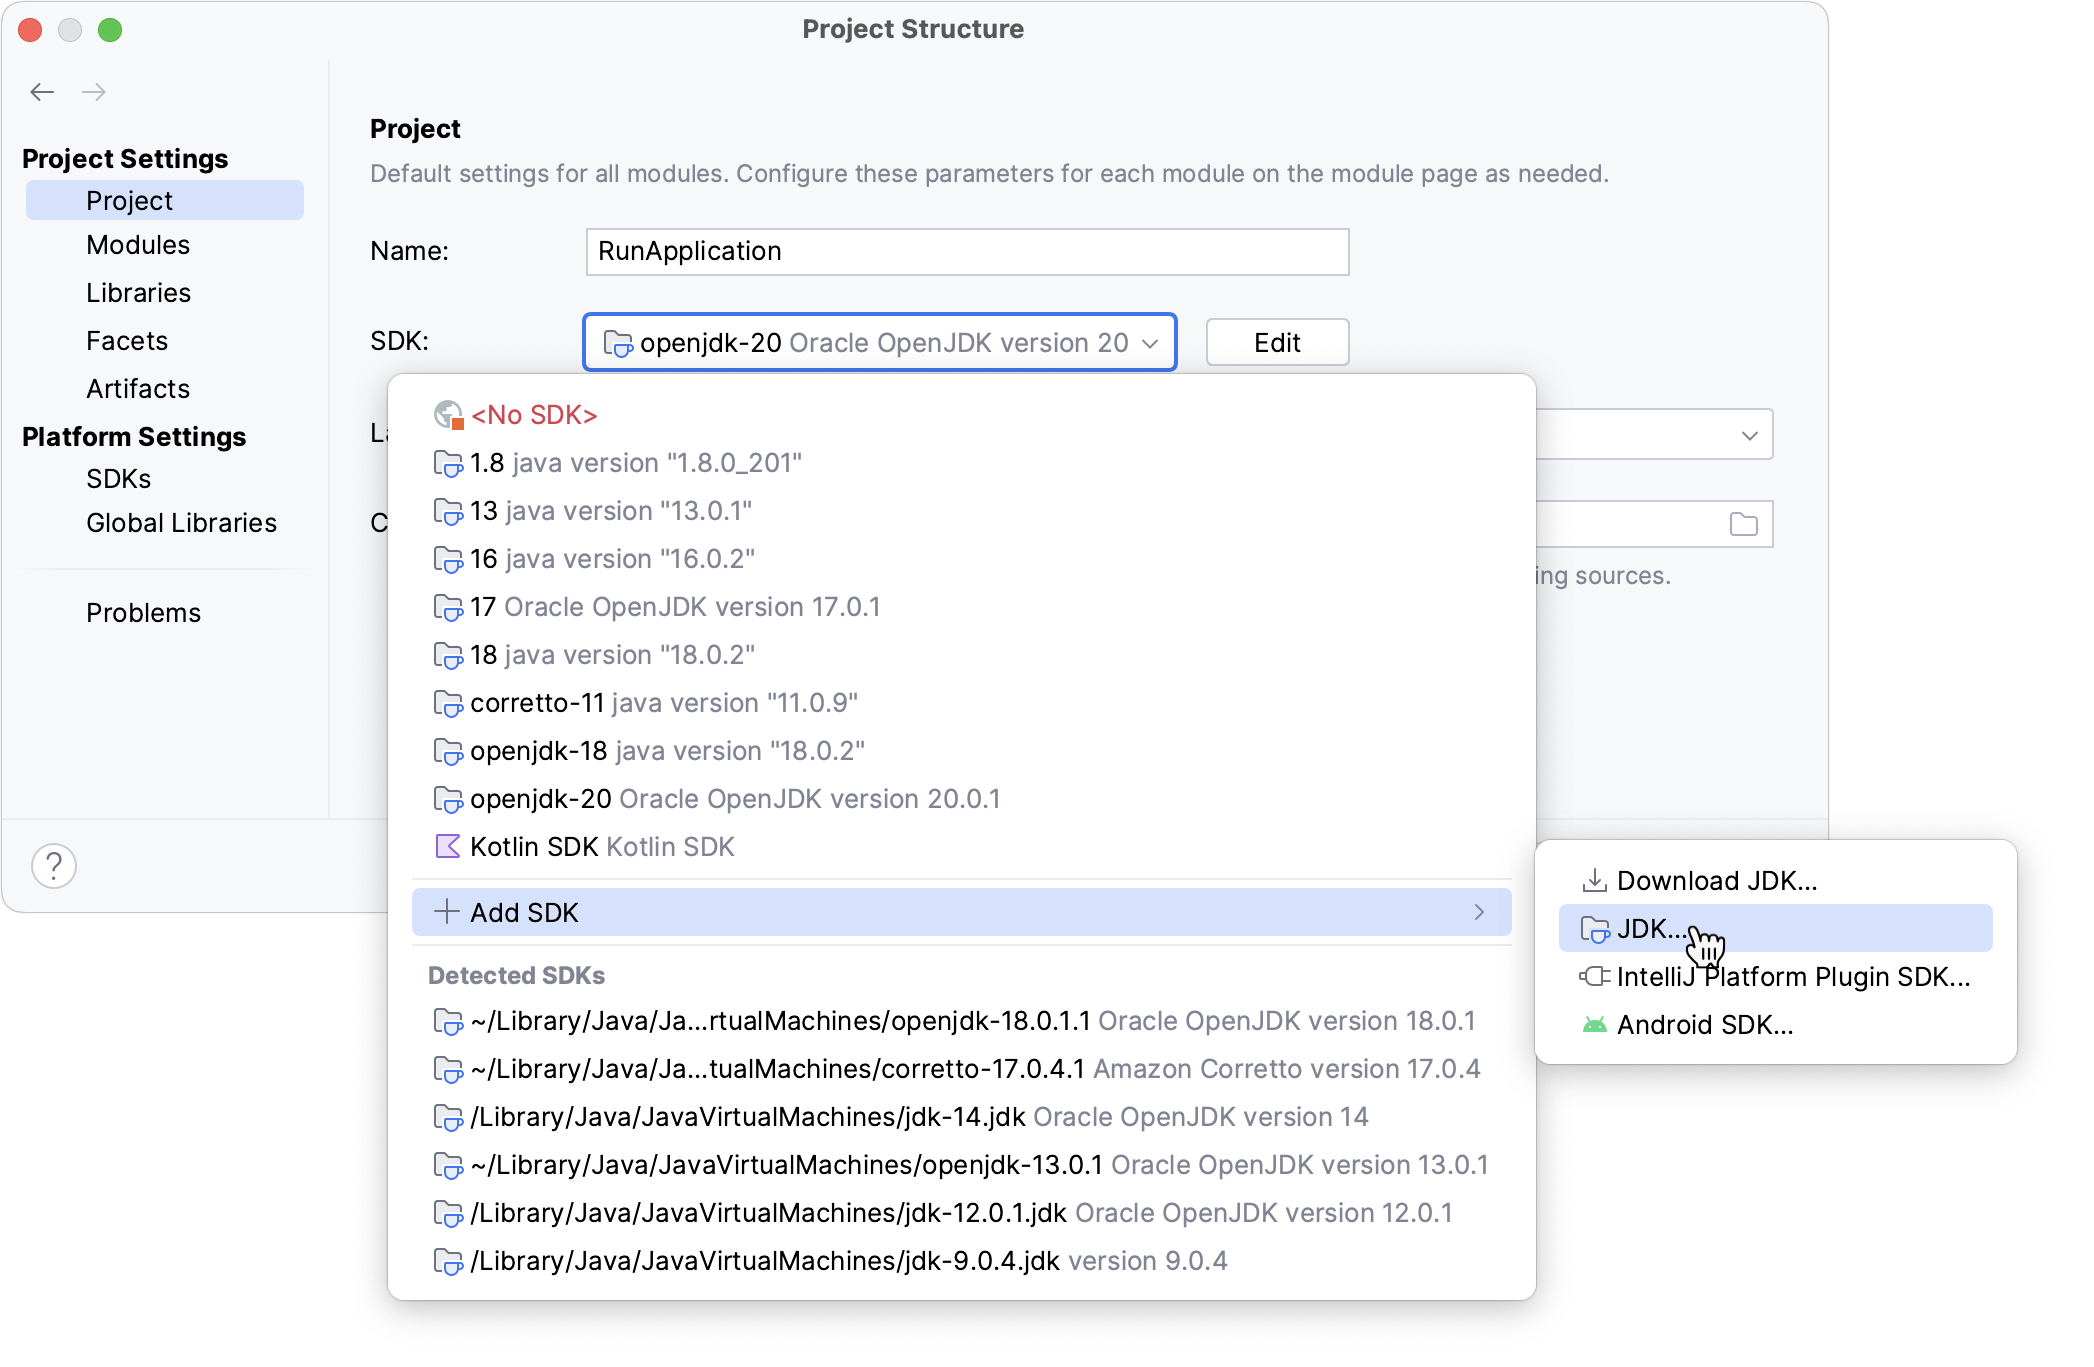
Click OK and try running the BrowserHistory class in IntelliJ.
- Look at the left side of the screen for the Project tool window that shows all the files in the project.
- In the project tool window, double-click to open the src folder.
- In the open folder, double-click the © BrowserHistory class. The © icon to its left indicates that it’s a Java class.
- In the new tab for the
BrowserHistoryclass, click the green play ▶️ in the gutter. In the dropdown, select the option to Run ‘BrowserHistory.main()’.
If you see the following output in the run tool window, you’re all set!
[uw.edu, my.uw.edu, cs.uw.edu, canvas.uw.edu]
[cs.uw.edu, notify.uw.edu]
Pushing to Git
Now that we’ve setup the project, this last step is to help ensure a smoother collaborative software development process. In the Git version control system, there isn’t just one history of all the changes to a codebase. Git is designed to allow multiple developers to work together and view the same codebase by merging code together onto “branches.” For this project, all of the work you will do should be committed and pushed to the main branch.
As you work on the projects, you can share your code with the staff by:
- Clicking
Git | Commitfrom the menu bar - On the left, check the boxes of the changes you would like to stage
- Write a descriptive commit message below the checked boxes, then click
Commit - Click
Git | Pushfrom the menu bar
Any of the staff can then visit your private GitLab repository to access your version of the code.
Here is a video made by TA Aelysha going over pushing to Git!
Pipeline Tests
Now you are set to start implementing the projects. Once you make the final commit and push for your project, on Gitlab, please find your repository online. Then,
- Click the
Buildbutton on the leftside bar - Click
Pipelineson the leftside bar
The topmost status will show whether you passed any of the project tests in this class. Each stage represents the following stages: Project Deques, Project Autocomplete, Project Priority Queues, Priority Shortest Paths, and all Projects. Make sure there is a green checkmark for the stage for the associated project you are submitting.
While you can run the tests locally on your own computer (in src/test/java) and check that you pass them, TAs will be using this pipeline to ensure that your code passes the tests.
Running Husky Maps
Husky Maps is a web app for mapping the world, searching for places, and navigating around Seattle. Three projects, after Deques, will help implement it (MapServer)!
We have made a major update earlier to the project that didn’t allow MapServer to run correctly before, let’s fix MapServer to allow it to run. Please move the resources folder to be inside src/main, but still be outside of src/main/java. Now run MapServer. If everything is successful, you’ll see this flurry of messages appear in the Run tool window indicating that the app has launched.
[main] INFO io.javalin.Javalin - Starting Javalin ...
[main] INFO org.eclipse.jetty.server.Server - jetty-11.0.13; built: 2022-12-07T20:47:15.149Z; git: a04bd1ccf844cf9bebc12129335d7493111cbff6; jvm 11.0.16+8-post-Debian-1deb11u1
[main] INFO org.eclipse.jetty.server.session.DefaultSessionIdManager - Session workerName=node0
[main] INFO org.eclipse.jetty.server.handler.ContextHandler - Started i.j.j.@683dbc2c{/,null,AVAILABLE}
[main] INFO org.eclipse.jetty.server.AbstractConnector - Started ServerConnector@2b6856dd{HTTP/1.1, (http/1.1)}{0.0.0.0:8080}
[main] INFO org.eclipse.jetty.server.Server - Started Server@3c72f59f{STARTING}[11.0.13,sto=0] @4349ms
[main] INFO io.javalin.Javalin -
       __                  ___          ______
      / /___ __   ______ _/ (_)___     / ____/
 __  / / __ `/ | / / __ `/ / / __ \   /___ \
/ /_/ / /_/ /| |/ / /_/ / / / / / /  ____/ /
\____/\__,_/ |___/\__,_/_/_/_/ /_/  /_____/

       https://javalin.io/documentation

[main] INFO io.javalin.Javalin - Listening on http://localhost:8080/
[main] INFO io.javalin.Javalin - You are running Javalin 5.6.1 (released June 22, 2023).
[main] INFO io.javalin.Javalin - Javalin started in 309ms \o/
You’re done! All the app features work because we’ve provided reference implementations for each interface that we’ll learn in this class. The goal of this approach is to enable you to compare different ways to implement the same functionality, each with their own trade-offs. Through studying interfaces and implementations, we’ll gain a deeper understanding about why programs are designed the way they are. You can now visit localhost:8080 to try the web app for yourself, but the map images won’t load without the optional steps below.
How do I enable map images in Husky Maps?
To see the map images, sign up for a free MapBox account to get an access token. Once you have your access token, in the IntelliJ toolbar, select the “MapServer” dropdown, Edit Configurations…, under Environment variables write TOKEN= and then paste your token. Re-run the MapServer class to launch the web app and enjoy the “Ice Cream” map style by Maya Gao.
How do I let other people visit my Husky Maps?
Running Husky Maps in IntelliJ will only allow you (or whomever is using your computer) to access the app. In order to allow anyone on the internet to use your app, we’ll need to deploy it to the web. Optionally, you may follow the Deployment instructions in the project README.md to learn how to deploy the app to the web for free.
Explore Projects
- Deques - Designing and analyzing double-ended queues.
- Autocomplete - Designing and analyzing autocomplete.
- Priority Queues - Designing and analyzing priority queues.
- Shortest Paths - Designing and analyzing shortest paths.