What is Testing?
You’ll see testing—checking the correctness of code—used extensively throughout both industry and the projects in this course: all our projects include some test code for the classes you’ll be implementing, our grading will similarly be automated using programmatic tests.
In particular, our tests focus on checking individual units of your code—usually individual instances of the class you write—to ensure that they behave as expected in each given scenario; this style of testing is called unit testing. Usually, each unit test follows a simple process:
- Arrange the unit and set up a test scenario (e.g. adding 3 items to a list).
- Act on the test by calling the method (e.g.
remove(5)). - Assert that the result matches up with what we actually want (e.g.
assertThat(returnValue).isEqualTo(15)).
In most unit testing frameworks (including the one we use in our projects), each test is contained within a single method, and any incorrect assertion will cause the assertion method to throw an exception to indicate that the test failed. On the other hand, test methods that return normally indicate that the test passed.
- Test case
- A particular scenario to test; essentially corresponds to the “arrange” and “act” steps above.
- Test suite
- A collection of test cases. Usually, we collect all tests for a particular class in another class, so we can refer to that test class as the “test suite.”
JUnit
JUnit is the unit testing framework we use in this class, and it’s also the most commonly used testing library for Java. Note that we’re using JUnit 5, which differs slightly from earlier versions of JUnit.
We write JUnit tests by simply adding test methods to a regular Java class. JUnit test methods must satisfy a few requirements:
- They must have JUnit’s
@Testannotation to that JUnit should treat them as tests. - They must have a
voidreturn type. - They usually shouldn’t have any parameters. (There are some JUnit extensions that allow you to add parameters but you won’t need to use these for our projects.)
- They must not be private. By convention and for simplicity, JUnit 5 tests are usually written with default visibility (often called package-private; with no
public/private/protectedaccess modifier).
Aside: what are annotations?
Annotations are a form of metadata that you can attach to declarations, types, and certain expressions. They have no direct effect on what the program does when run. Rather, they’re used to do one of the following:
- Provide information to the Java compiler
- Provide compile-time information to certain tools and libraries
- Attach extra information that can (sometimes) be inspected during runtime when doing meta-programming related things.
The @Test annotation has no special meaning to the Java compiler—it’s used primarily by the JUnit library.
Another annotation you might have encountered already is the @Override annotation. When you mark a method with this annotation, you’re telling Java that method is supposed to have overridden some other method in a superclass. Once everything is compiled, the @Override annotation has zero impact on your code. It exists mainly to help the compiler catch mistakes you might have made.
Example Test File
package mypackage;

import edu.washington.cse373.BaseTest;
import org.junit.jupiter.api.Test;                  // Import @Test

import java.util.ArrayList;
import java.util.List;

public class SampleTests extends BaseTest {         // Extends `BaseTest`
    @Test                                           // Apply @Test
    void remove_afterAddFew_returnsCorrectItem() {  // Naming convention
        // Set up the unit to test.
        List<Integer> list = new ArrayList<>();
        list.add(3);
        list.add(7);
        list.add(9);

        // Execute the method on the unit under test.
        Integer output = list.remove(2);
        // Run an assertion method.
        assertThat(output).isEqualTo(9);            // AssertJ assertion
    }

    @Test
    void size_afterAddMany_returnsCorrectSize() {
        List<Integer> list = new ArrayList<>();
        int amount = 5134;
        for (int i = 0; i < amount; i++) {
            list.add(i);
        }

        int size = list.size();
        assertThat(size).isEqualTo(amount);
        assertThat(list).hasSize(amount);           // Specialized assertion
    }
}
- Line 4
- Here, we import JUnit’s test annotation
@Test. - Line 9
- All of our provided tests extend
BaseTest, from our rootsrcmodule.BaseTestimplementsWithAssertionsfrom AssertJ, providing all our test classes with the defaultassertThatmethods without need for imports. - Line 11
- Our test naming convention roughly corresponds to the 3 steps in unit testing. We have 3 parts separated by underscores, - where the first describes the “act” step, - the middle describes the “arrange” step, - and the last describes the “assert” step.
Sometimes, we also break up the middle segment into multiple underscore-separated parts to make long names easier to read. (Note that underscores in method names are allowed in test files, but will trigger Checkstyle errors in main source files.)
- Line 21
- Our checks take the form of
assertThat(output).isEqualTo(9);
The assertThat call creates an object that stores output and provides many assertion methods.
The isEqualTo assertion method checks that output.equals(9) is true.
- Line 34
- AssertJ also provides specialized versions of
assertThatwith additional for particular types—in this case, aList. This assert is equivalent to the one above it, but also provides extra feedback if it fails: the error message will include not only the expected and actual sizes, but also the contents of the list (which will be truncated if the list is too large).
AssertJ similarly allows us to add our own assertThat implementations for custom data types; future projects will include assertion classes for these in their test modules.
Tip
Since all assertion methods in AssertJ are instance methods on some “assert object,” you can check out all available assertion methods for any given type by using IntelliJ’s code completion feature: in a test method, typing assertThat(myVariable). should be sufficient to get IntelliJ to suggest all assertion methods that AssertJ has for values with the same type as myVariable.
Running Tests in IntelliJ
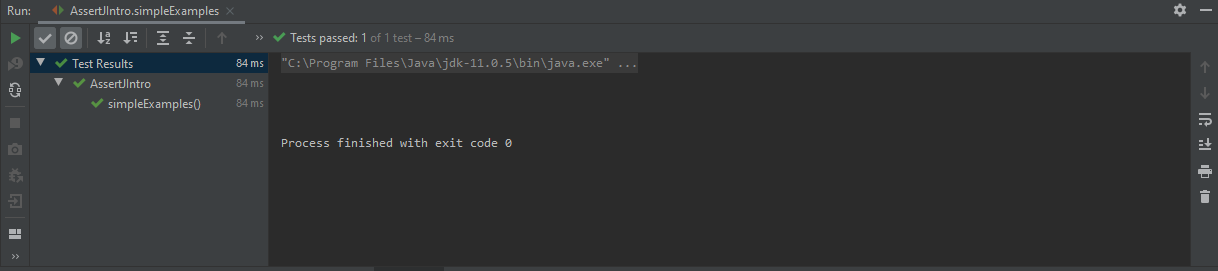
Open the AssertJIntro test class in the root test module of our project. This file contains a few basic assertions showing off some capabilities of AssertJ. Notice that the file icon has a red-green diamond, indicating that IntelliJ recognizes it as a JUnit test suite.
You can run the unit tests by following the same procedure as we did for running code: click on the play button by the AssertJIntro class, and choose Run ‘AssertJIntro’.

You can also run an individual test method (e.g., simpleExamples) by clicking into the green play icon next to the method’s declaration (line 9).
Note
By default, IntelliJ may hide passing tests. You can change this by finding and clicking the Show Passed button (with the checkmark icon) in the top left of the tool window.
Tests for This project
For this project, we’ve provided all the tests you’ll be graded on inside the cse143review.test module. There’s one test class for each class in problems, each filled with many unit tests for the methods you’ll be implementing.
For the most basic verification, run these tests on your implementations. If you notice it’s not producing the expected result, there’s a couple different ways to solve the problem.
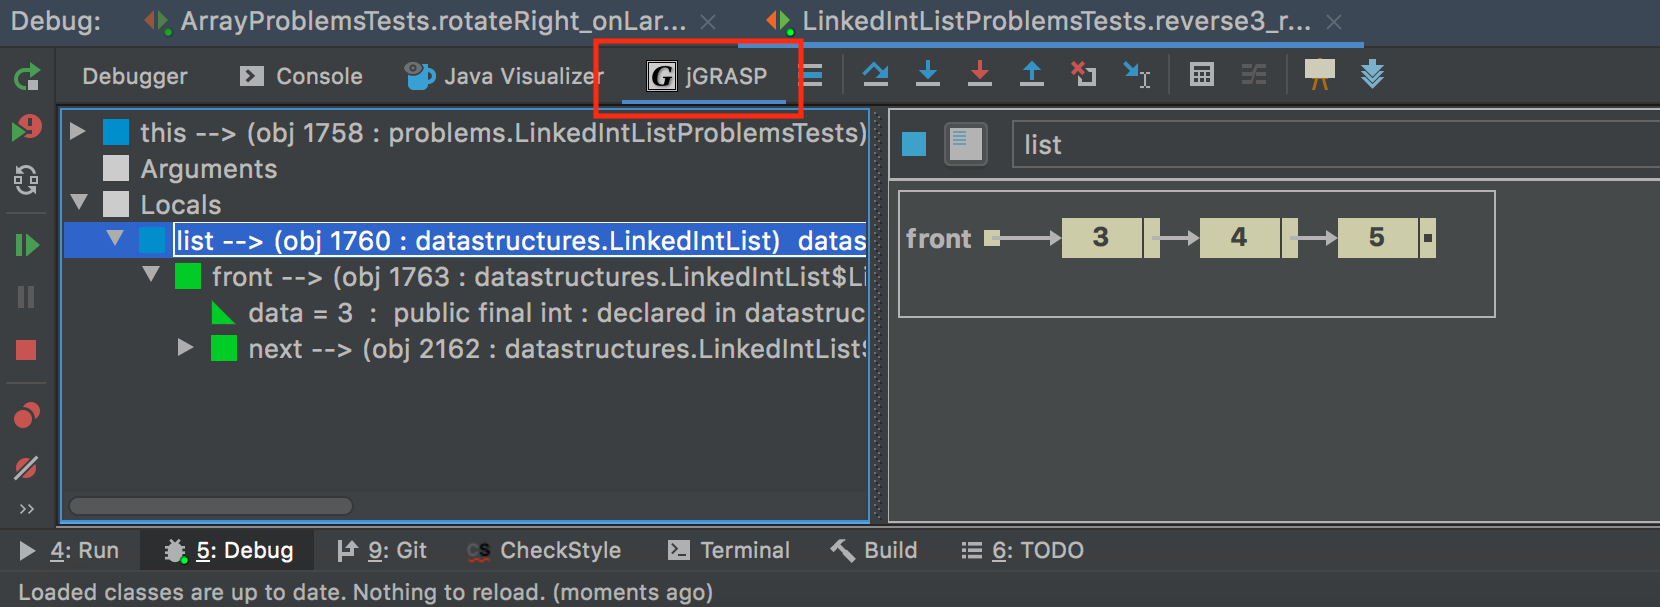
The Debugger and the jGRASP Plugin
IntelliJ includes a built-in Java debugger, and we’ve enhanced it by installing the jGRASP plugin. We can run the program in debug mode by choosing Debug … instead of Run … when you click on a play icon. Like jGRASP, the IntelliJ debugger runs your program exactly like it would when running it normally, but it allows you to pause execution on breakpoints.
To try this out, open datastructures.LinkedIntList and place a breakpoint on line 49 (the end of the array constructor). Afterwards, open LinkedIntListProblemsTests and start the debugger for reverse3_returnsCorrectList.
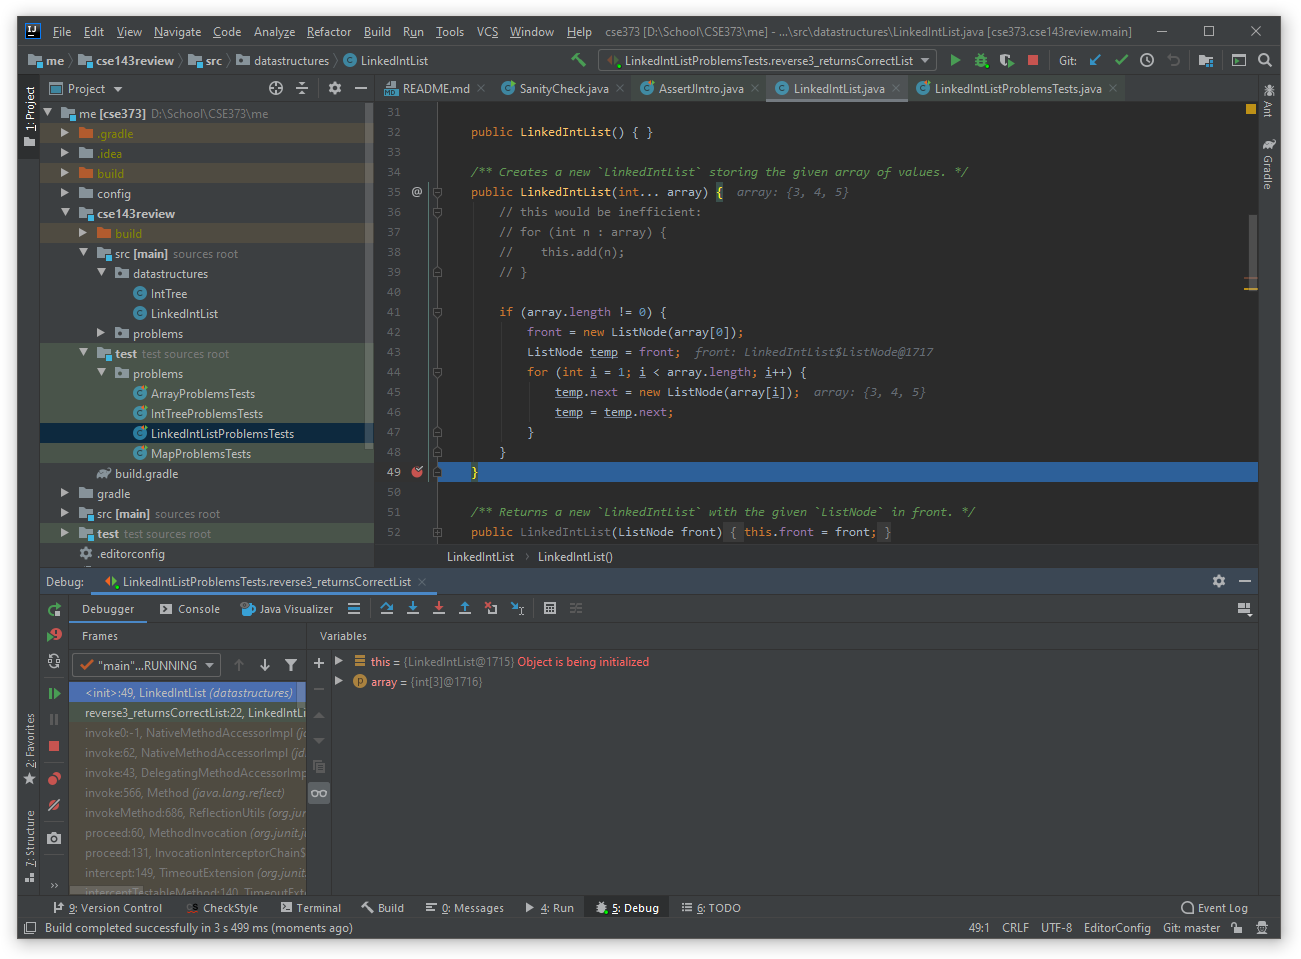
When the debugger stops at the specified breakpoint, the IntelliJ will bring up the Debug tool window. Here, you can see the paused state of the program. At the top of the Debug tool window are small icons for controlling the debugger, including the two most common operations to Step over and Step into the next statement. This is similar to how the jGRASP debugger works.
We can visualize the debugger output by clicking on the jGRASP button at the top of the Debug tool window. This will draw a box-and-pointer diagram representing the paused program state. You can step through the execution of the program, or use the green continue icon on the left side of the Debug tool window to resume normal execution.