In this class, we submit to Gradescope through GitLab, so before we get to the actual submission process, let’s take a moment to formally introduce Git.
Git Strikes Again
Note
If you are already familiar with Git, feel free to skip the crash course, but do skim the IntelliJ/GitLab instructions below.
Git has a number of features to support different workflows among developers. For this class, we will describe the minimum set of features necessary to get started with and use Git. If you ever run into any Git issues, please post on Ed or come into office hours for support.
Warning
Git is a powerful tool and some of the more advanced functionality may destroy your local repository if used incorrectly. While you may use functionality that you find online, you should be cautious about running random Git commands you find.
How Does Git Work?
After cloning your repository from GitLab using Git, the resulting directory on your device contains the current version of the repo’s files, but with an extra .git folder (this may be hidden by default if you’re using Mac or Linux). The .git folder contains a local version of what’s stored on Gitlab and makes up what we call the local repository. Meanwhile, the parent folder (contains .git and your code files) is called the working directory.
This means that there are really two versions of code on your machine:
- the local repository will store the entire history of the project as a series of changes between sequential versions,
- and the working directory will contain the copy of the code that you’re actively working on.
Regular Git usage involves syncing changes between the working directory and the local repository, and between the local repository and the remote repository. Syncing changes in Git always works in a single direction at a time — new changes get copied from one place to another.
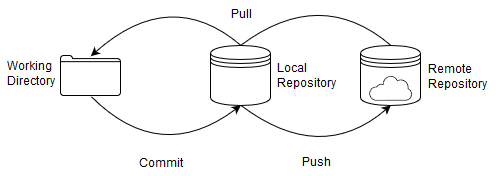
There are three main commands:
- Committing adds changes from the working directory to the local repo.
- Pushing copies changes from the local repo to the remote repo.
- Pulling first copies changes from the remote repo to the local repo, then applies those changes to the working directory.
Committing
Git requires us to commit our changes manually (there are no autosave features). Whenever you want to make a commit, click the green checkmark icon in the navigation bar or through the Git | Commit menu item. You’ll have the option of reviewing your changes to ensure that the commit you’re about to make contains exactly what you want to include. Then, write a helpful commit message to remind yourself what changes you made.
When you make a commit, IntelliJ can also run some basic checks for you, including reformatting code to pass indentation and spacing style guidelines. In the Git commit dialog window, make sure the following checkboxes under Before Commit are ticked:
- Reformat code
- Scan with Checkstyle
The screen should look something like this:
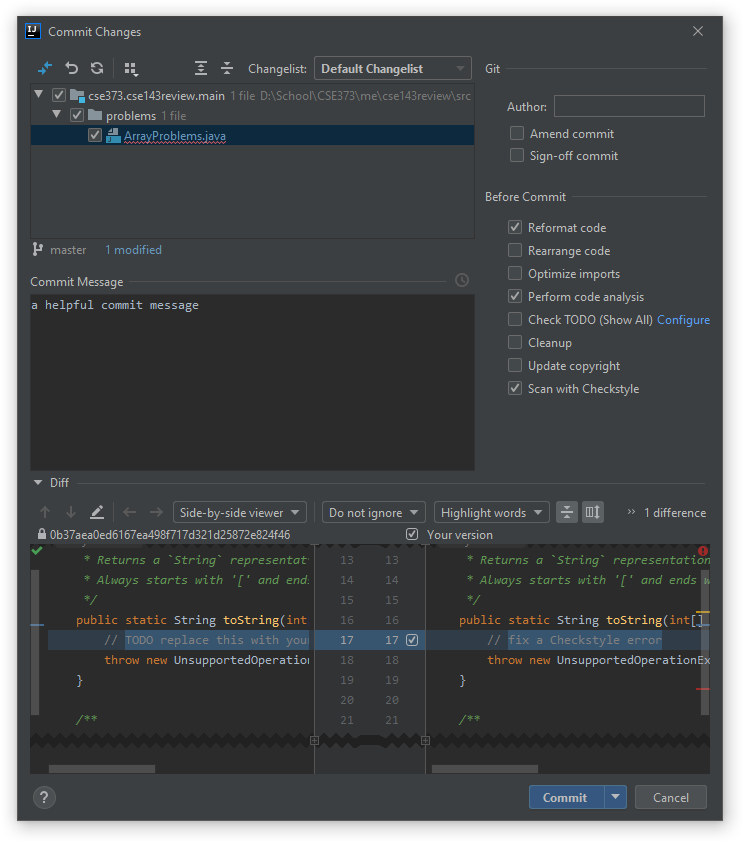
After pressing Commit, IntelliJ may ask you to enter your name and email address.
Pulling
You shouldn’t need to do this while working on this project, but if you have a partner for future projects, you’ll need to pull the changes they push to GitLab in order to acquire them on your own machine.
Open Git | Pull and click Pull in the popup window.
You’ll also need to go through a slightly different pull process in order to get future project code, but we’ll cover that when we get there.
Pushing
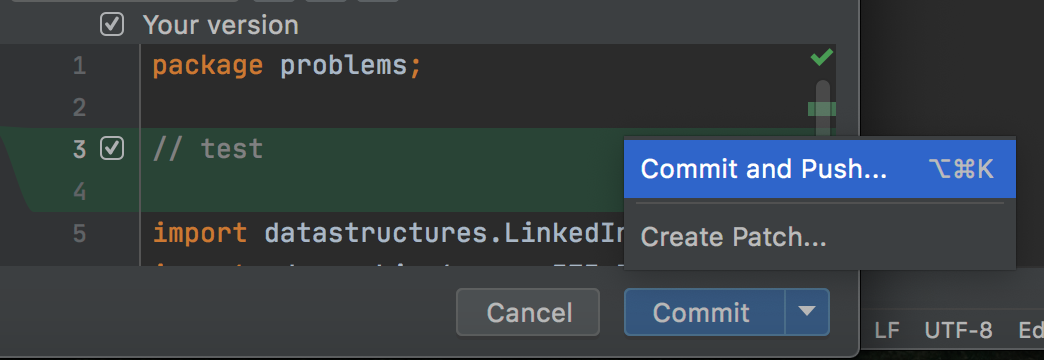
Once you’ve committed your changes, you’ll also need to push them to your personal GitLab repository by navigating to Git | Push.
We recommend that you commit and push frequently! If you ever suffer a sudden data loss, you can retrieve your files seamlessly. It’s also helpful for TAs to be able to look at your code directly when helping you debug projects.
Tip
You can also commit and push in one step by clicking small arrow next to the Commit button in the “Commit Changes” dialogue and then Commit & Push.
GitLab Commit History
Git stores versions of your code and lets you control them which allows us to view old versions (commits), and potentially revert back to them. This might be useful if you introduced a new bug and can’t remember what you changed, and maybe even need to run an older version of code to determine when the bug was created.
To see your commit history on GitLab, first go to the repository whose history you want to view, then click on the commit counter (circled in red in the screenshot below).
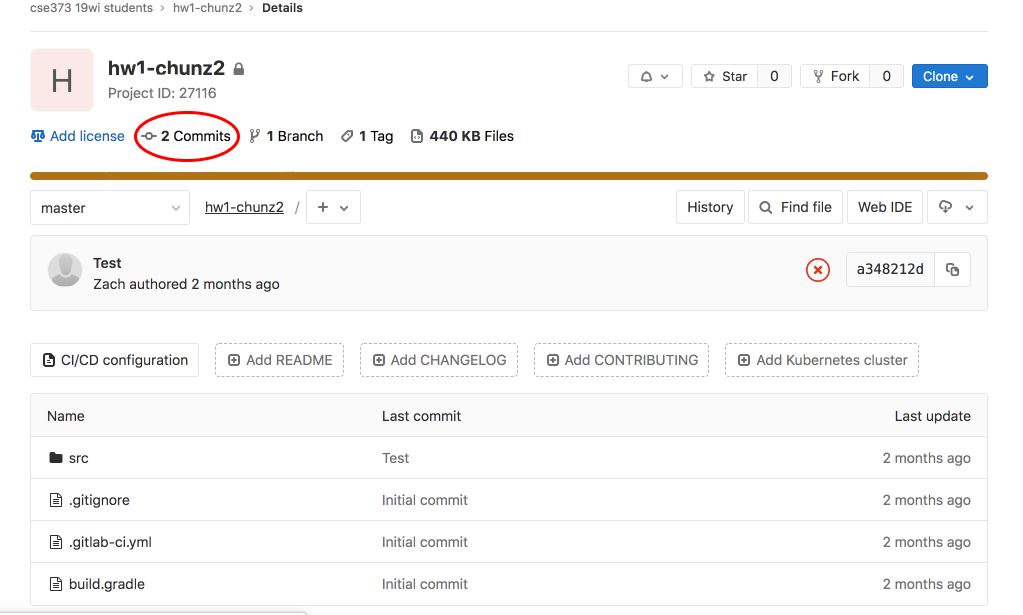
You will be brought to a page that shows a list of your commit history. The most recent commits are at the top and the oldest commits are at the bottom.
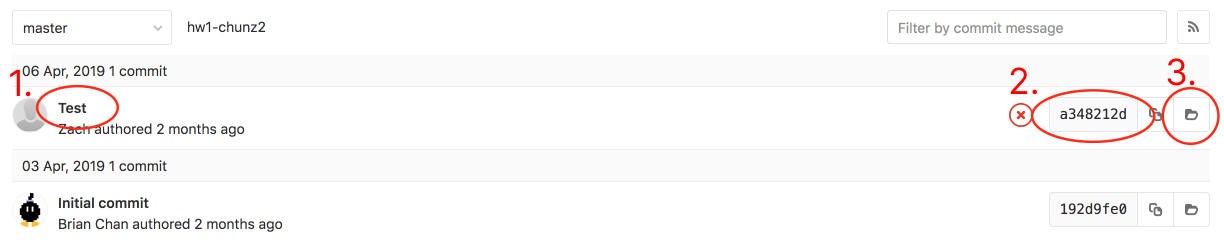
Here you can access some useful information:
- Commit message: Clicking this will bring you to a page that shows the changes made in this commit.
- Commit hash: This is basically an ID for each commit. When you get your feedback on projects, we will say at the top which commit was graded.
- Folder icon (‘Browse Files’): Clicking this will bring you to a file explorer view where you can click through all your files as they were at that commit.
If you want to revert a file or multiple files back to an old commit version, you can
- copy and paste the file text from GitLab into your file locally,
- use IntelliJ (single file, entire working directory),
- or through the command line.
Submitting on Gradescope
The last step is to submit your work to Gradescope. Gradescope is the site that you’ll use to submit project projects and view all of the graded work in this course. You should already have access to Gradescope via your UW email. If you don’t have access yet, use the Missing Permissions Form to notify the course staff.
From the CSE 373 dashboard, click on the P0: CSE 143 Review project. In the pop-up that appears, select the GitLab button at the bottom:

Find your repository in the list, make sure to leave the branch on main or master, and click Submit Project.

Info
Students from past quarters have reported that the “Last Updated” time on Gradescope isn’t frequently updated. As long as the changes are visible in your own repository, which you can verify by visiting GitLab, Gradescope will be able to see the latest files just fine.
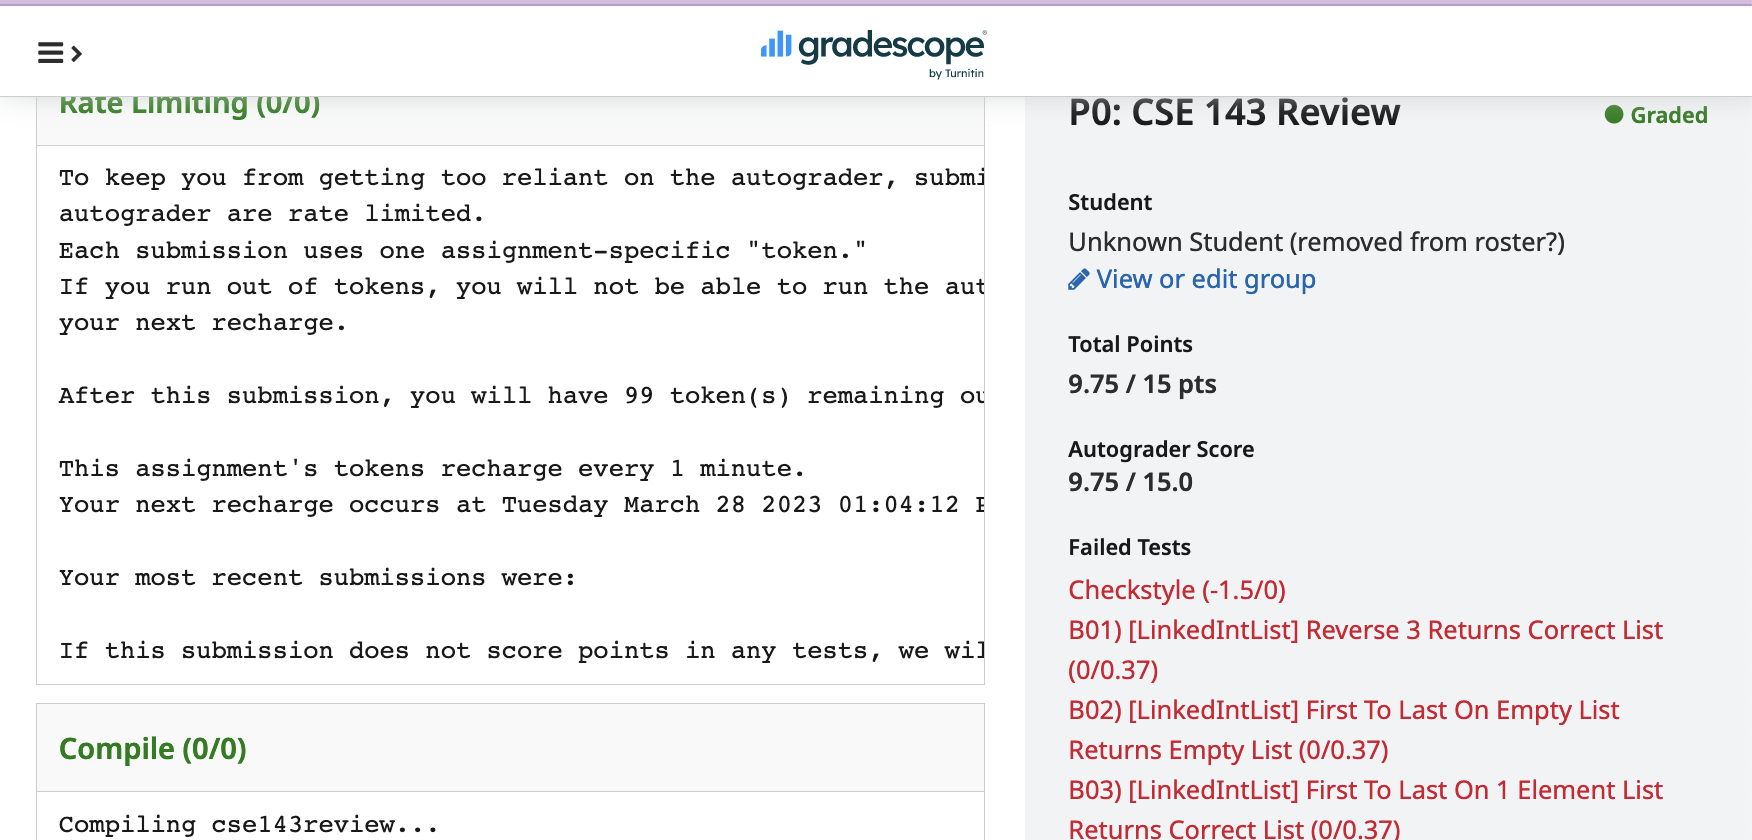
Once you submit your work, you’ll be shown a waiting page while Gradescope grades your submission. After about a few minutes, the autograder will finish running your code and automatically update the page with the test output and your overall project score:
For this project, you can submit to Gradescope as many times and as frequently as you like. If you make more than one submission, you can mark the submission you’d like to use as your final score. The final score on Gradescope is the score you will receive on the project for any programming portions (before any possible deductions for lateness).
Important Notes
- You should only ever commit changes to files we explicitly tell you to modify. Our autograders may fail if you change other files.
- Future projects will include extra tests (in addition to those provided to you in the skeleton code) only provided on Gradescope. We encourage you to submit ahead of the due date to check these tests.
- Future projects will also have stricter time-based submission limits to prevent you from spamming submissions in quick succession.