Git
Git is a version control system (VCS), a tool for tracking changes between versions of code and sharing those changes with other people. A VCS allows us to not only see changes from old code, but also revert back to older versions and manage many different team members contributing to a project at the same time. Every student in this course gets their personal repository (repo), in which all code and its history are stored.
In this course, we will be using CSE GitLab, a CSE-supported alternative to GitHub, which you may have heard of before. Keeping your repo backed up on CSE GitLab not only makes it convenient to find past versions of your work in case your computer crashes, but it also simplifies the process for turning in projects and allows you to collaborate with others.
Windows
Windows users must download and install Git manually. You can grab the latest version from Git’s official Windows release download page and follow the installation wizard afterwards.
All of the default settings are acceptable for this course. You can choose different settings if you have a particular preference. If you do intend to change any preferences, make sure to leave Configuring the line ending conversions to the default option, Checkout Windows-style, commit Unix-style line endings, to ensure compatibility with our Linux-based (Unix-style) autograders.
macOS
macOS generally comes with Git included, but sometimes there might be an extra download step.
From Finder, navigate to Application | Utilities | Terminal. Type git into the terminal and hit Enter. If you get a download prompt, follow the prompt. Otherwise, you will see a help message if git is successfully installed.
Linux
Users of Unix-like operating systems can generally install git from their package manager (the package is usually just named git).
SSH Keys
You will need to generate SSH keys to use the CSE GitLab. SSH keys fill the same role as a username and password, but they are very long and randomly generated.
Generate a New SSH Key Pair
If you already have an SSH key pair, you can use that if you prefer. Otherwise, here are the steps:
- Open a terminal on Linux or macOS, or Git Bash on Windows (which comes with the Git installation).
-
Generate a new SSH key pair:
ssh-keygen -t ed25519 -
Next, you will be prompted to input a file path for your SSH key pair. Accept the defaults by pressing Enter on your keyboard. You can optionally choose a passphrase, but it is not required (especially if you are using a personal computer).
- If you are prompted that a key already exists, it means you already have a key. You can type
n-Enter to exit and go to the next section.
- If you are prompted that a key already exists, it means you already have a key. You can type
Add the SSH Key to Your GitLab Account
-
Copy your public SSH key (from your home directory,
.ssh/id_ed25519.pub). You can view the contents of a file from the terminal:cat ~/.ssh/id_ed25519.pub -
Visit the CSE GitLab SSH keys settings page.
- Paste your copied public key into the Key field. Give it a title if it doesn’t have one already. Then, click Add key.
IntelliJ
IntelliJ is the IDE (integrated development environment) that we’ll be using in this course. If you’ve used jGRASP before, IntelliJ is its real-world, production-ready equivalent.
Download IntelliJ
-
Download and install IntelliJ Community Edition according to your computer’s operating system. If you are using an Apple M1/M2-based computer (most Apple computers sold after 2021), be sure to download the Apple Silicon version. When installing, the default options for everything should work fine.
-
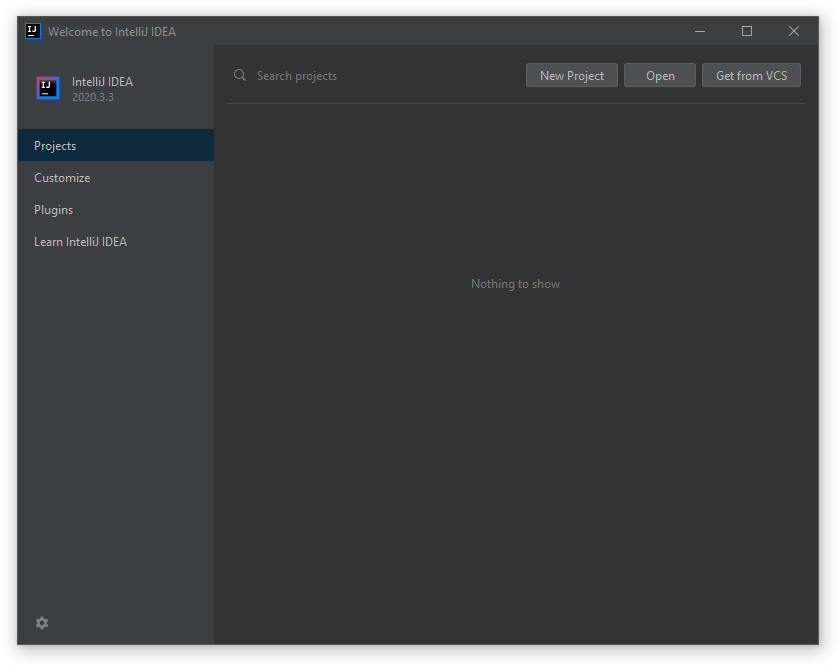
Once IntelliJ is installed, run IntelliJ IDEA and select Skip Remaining and Set Defaults. You should see the Welcome to IntelliJ IDEA screen.
-
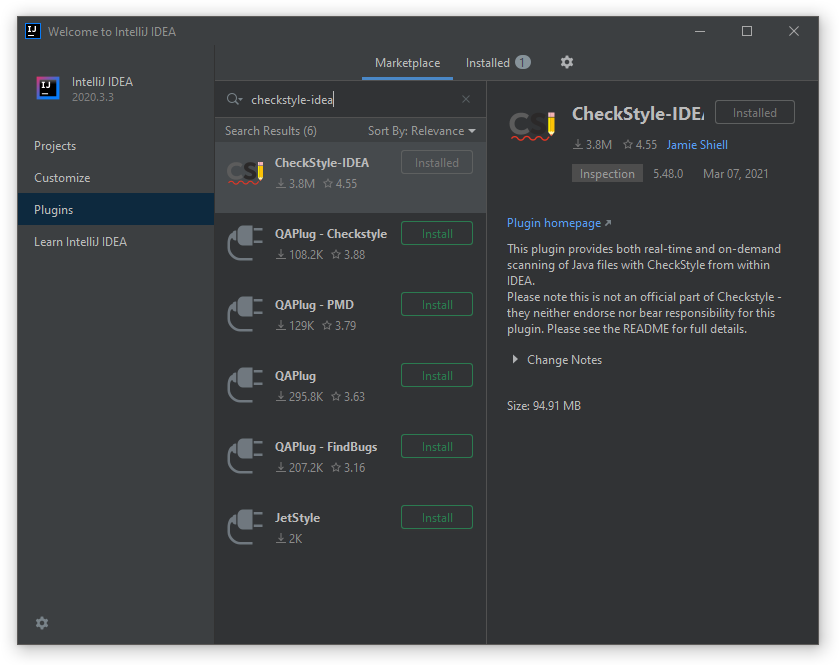
On the same welcome screen, click the Plugins item in the navigation pane on the left, and then the Marketplace tab. From here, we’ll install two plugins:
- Checkstyle-IDEA: A plugin that spots style errors and common bugs.
- jGRASP: A data structures visualizer, by the same team that made the IDE.
- After installing the plugins, you may be asked to restart IntelliJ. Heed its advice.
Get Your Repository
Now that the initial IntelliJ setup is done, we can download a copy of the code by cloning your personal CSE GitLab repository.
- Visit GitLab, and you’ll be greeted by a repository named after your UWNetID. This repository is what you’ll be using for this course and should already have some files and folders inside including the skeleton code for the first project,
cse143review. -
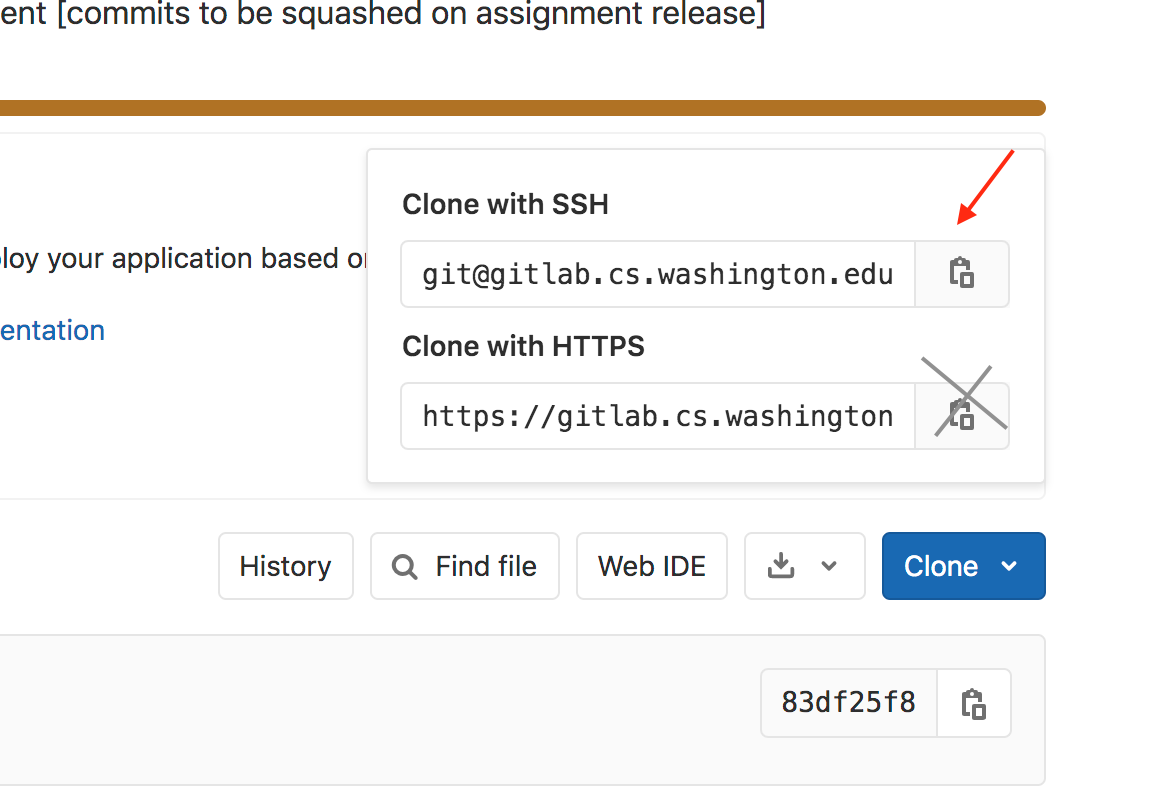
Click the blue Clone button and copy the Clone with SSH Git address. The address should look something like this:
git@gitlab.cs.washington.edu:cse373-23sp-students/YOURUWNETID.git
- In the IntelliJ welcome window, click on the Get from VCS. Paste the Git address from earlier and choose a directory to store your personal repository.
- Once IntelliJ finishes cloning your repository, a new window will ask if “Trust and Open Gradle Project.” Click Trust Project to continue.
- Afterwards, the main IDE window will open, and IntelliJ will start importing the Gradle project; this process may take a few minutes to complete, and not all IDE functions will work properly until it does. You may need to wait for the progress bar on the bottom-right of the screen (which is very subtle) to finish before moving on to the next step:

Install Java JDK 17
We use Java JDK 17 for our projects; later versions of Java may also work, but the course staff may be unable to provide support for issues relating to JDKs other than 17.
First, check what version of Java IntelliJ is using for the project by opening File | Project Structure from the top menu bar.
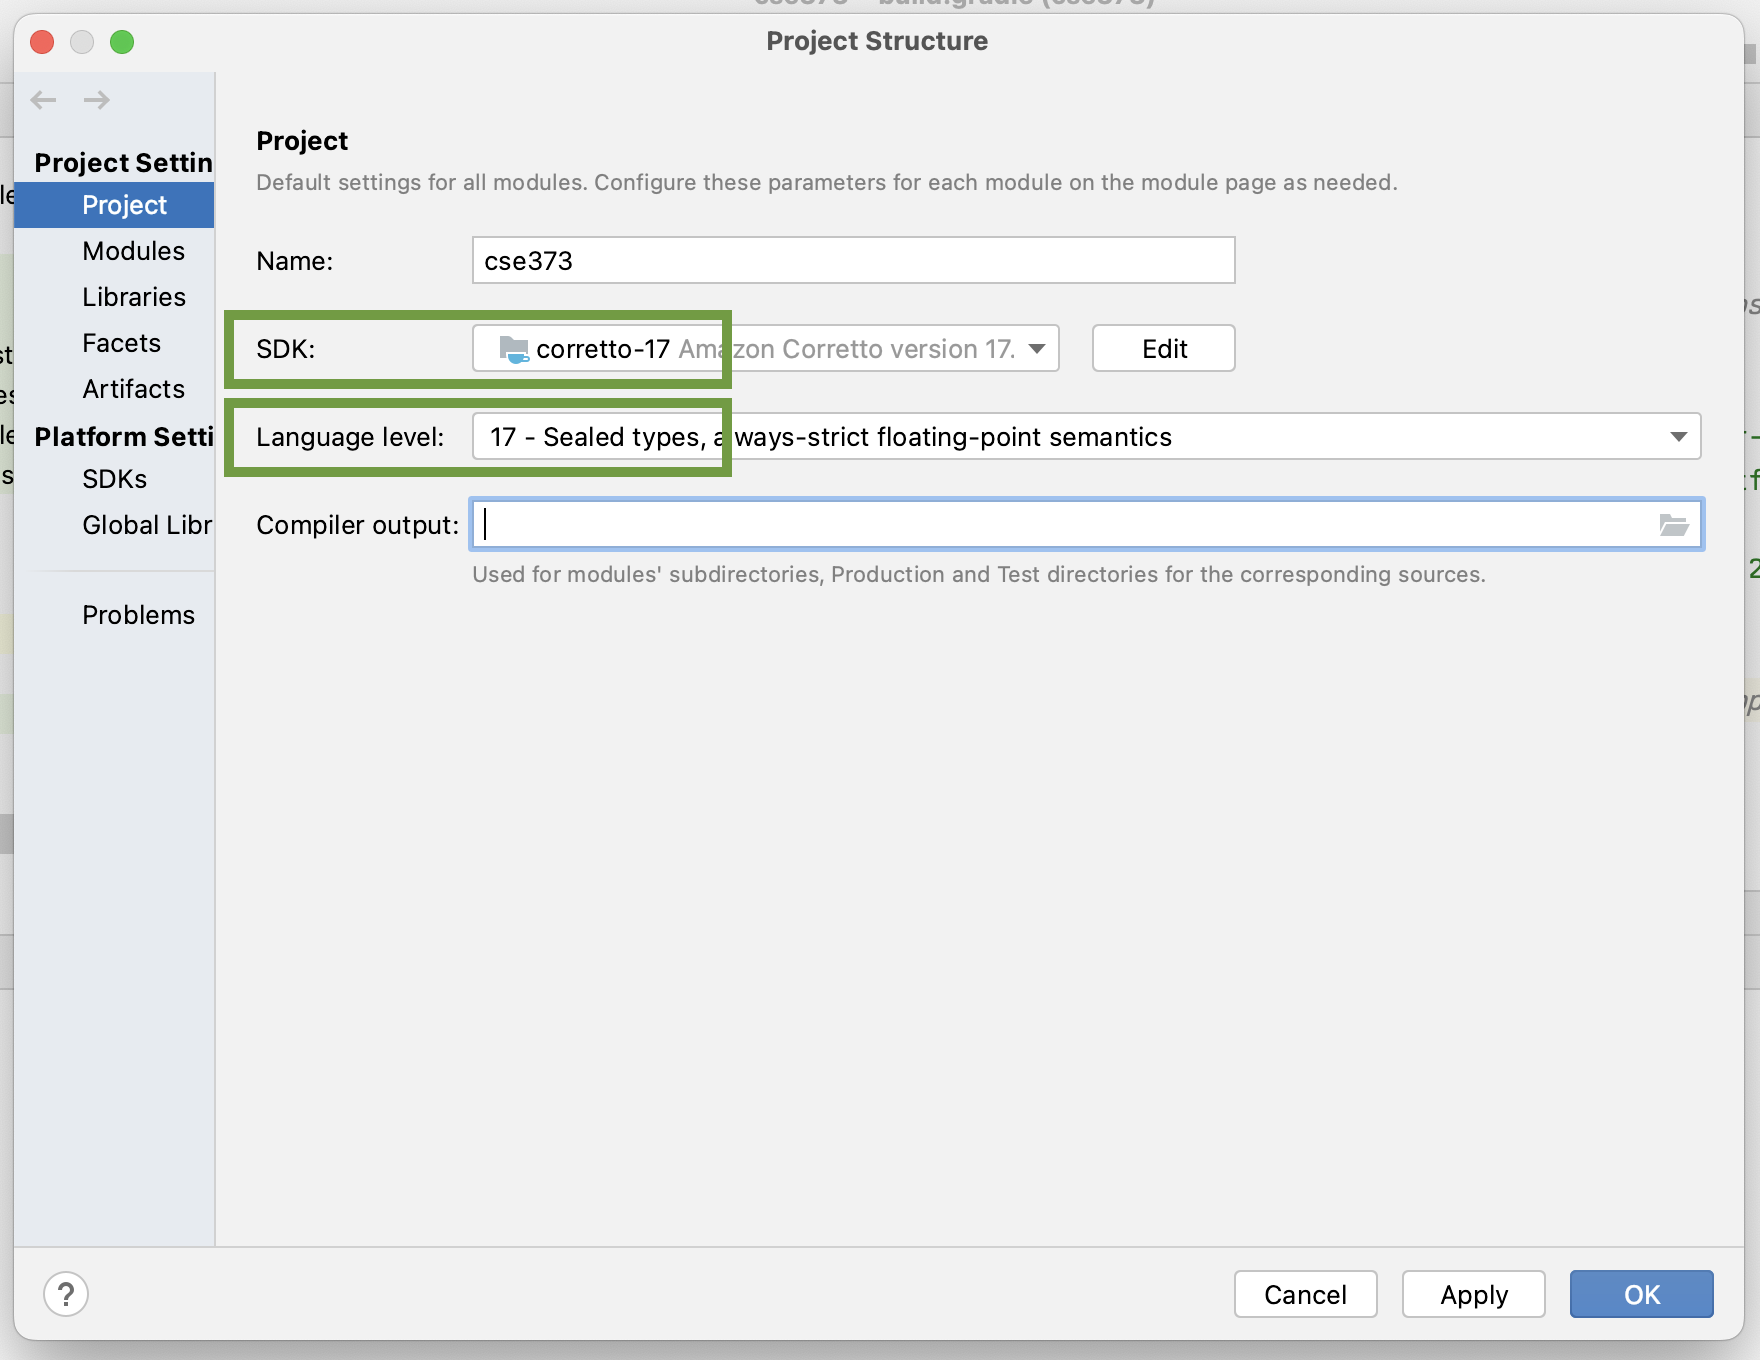
If IntelliJ detected an existing Java SDK, it will be listed under Detected SDKs.
- If an SDK version 17 or greater is available, select it.
- If there are no SDKs or the SDKs listed are below version 17, select Add SDK | Download JDK and choose the latest from any vendor. We like Eclipse Temurin (AdoptOpenJDK HotSpot), but for this course, there are no concrete differences.
If you are using an Apple M1/M2-based computer (most Apple computers sold after 2021), take care to choose an SDK marked with the aarch64 architecture—it has significant performance implications.
Also make sure that Project language level is set to SDK Default.
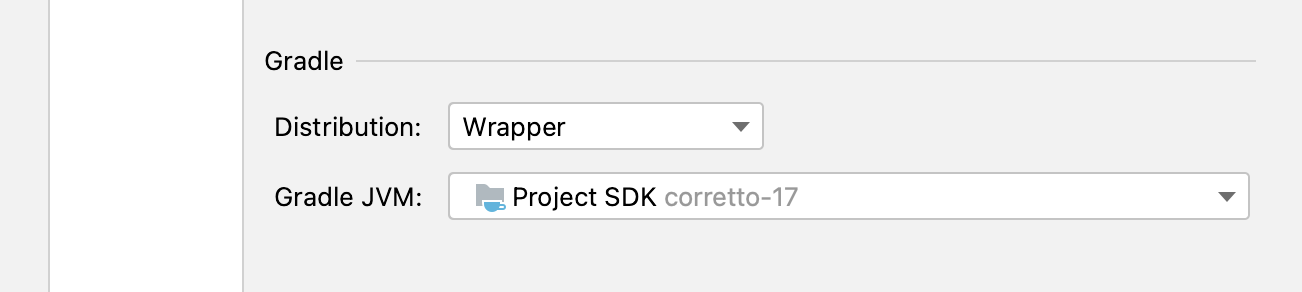
Finally, close out this window and open the Settings dialog (On macOS IntelliJ IDEA | Preferences, otherwise File | Settings). Navigate to Build, Execution, Deployment | Build Tools | Gradle, and make sure that the Wrapper and Gradle JVM options are set to “Distribution” and “Project SDK” respectively:
Configure Checkstyle
In this course, there are no manually graded style points. Instead, you will get full credit on code style as long as you fix all Checkstyle warnings. We’ll need to set up the Checkstyle plugin with CSE 373-specific settings.
- Open the Settings dialog (On macOS IntelliJ IDEA | Preferences, otherwise File | Settings).
- Navigate to Tools | Checkstyle.
- Make sure the Checkstyle version selected is 8.36.2 or greater.
- Change the Scan Scope dropdown in the top right to Only Java sources (including tests).
-
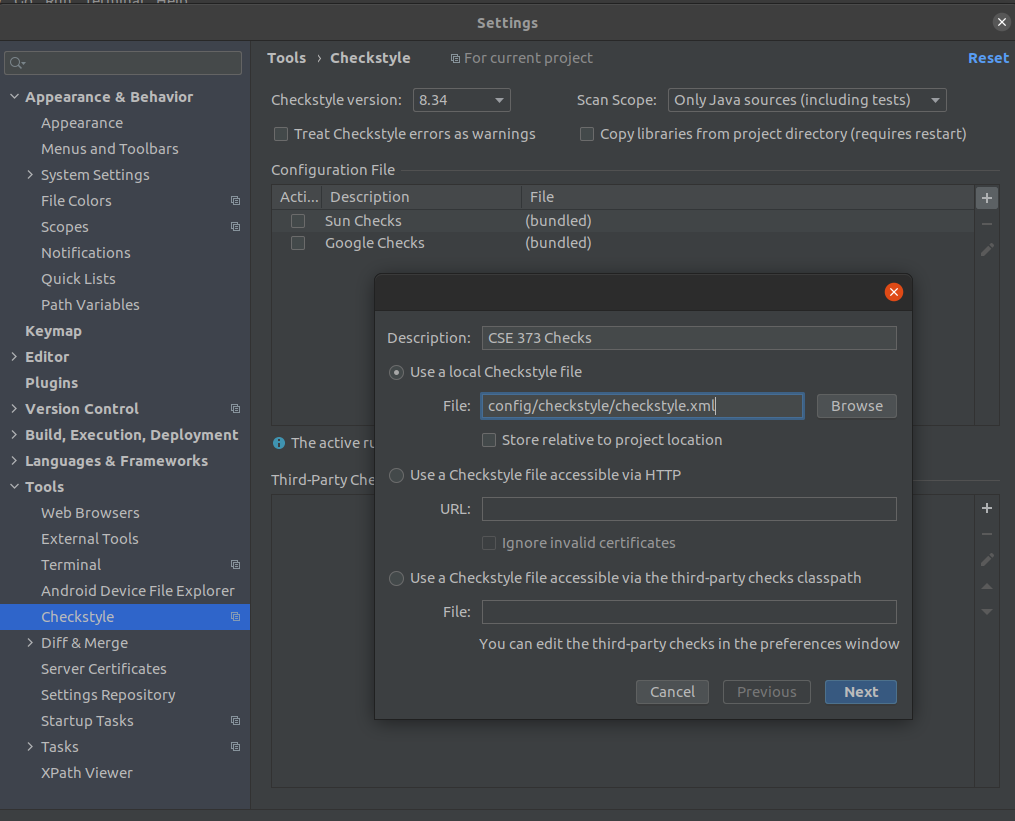
Add the CSE 373 checkstyle configuration by clicking the + icon on the right side under Configuration File section. In the window that appears, enter a description like “CSE 373 Checks”. Make sure select Use a local Checkstyle file is selected and paste in the following path:
config/checkstyle/checkstyle.xml
(Enable Store relative to project location if you plan to ever move or rename the project directory; otherwise, it doesn’t matter whether this is enabled or not.)
- Back in the Checkstyle settings, mark the checkbox next to “CSE 373 Checks” (or whatever name you chose) to enable it. This would also be a good time to hit Apply.
Configure Generics Checks
Finally, we’ll configure IntelliJ to prevent you from making a common generics-related issue. With the Settings window still open:
- Navigate to Editor | Inspections.
- Open the Java | Java language level migration aids | Java 5 section.
- Enable Raw use of parameterized class. If it’s already enabled, click its row to reveal more options.
- Change Severity to Error, and change the other Options below to match this image:
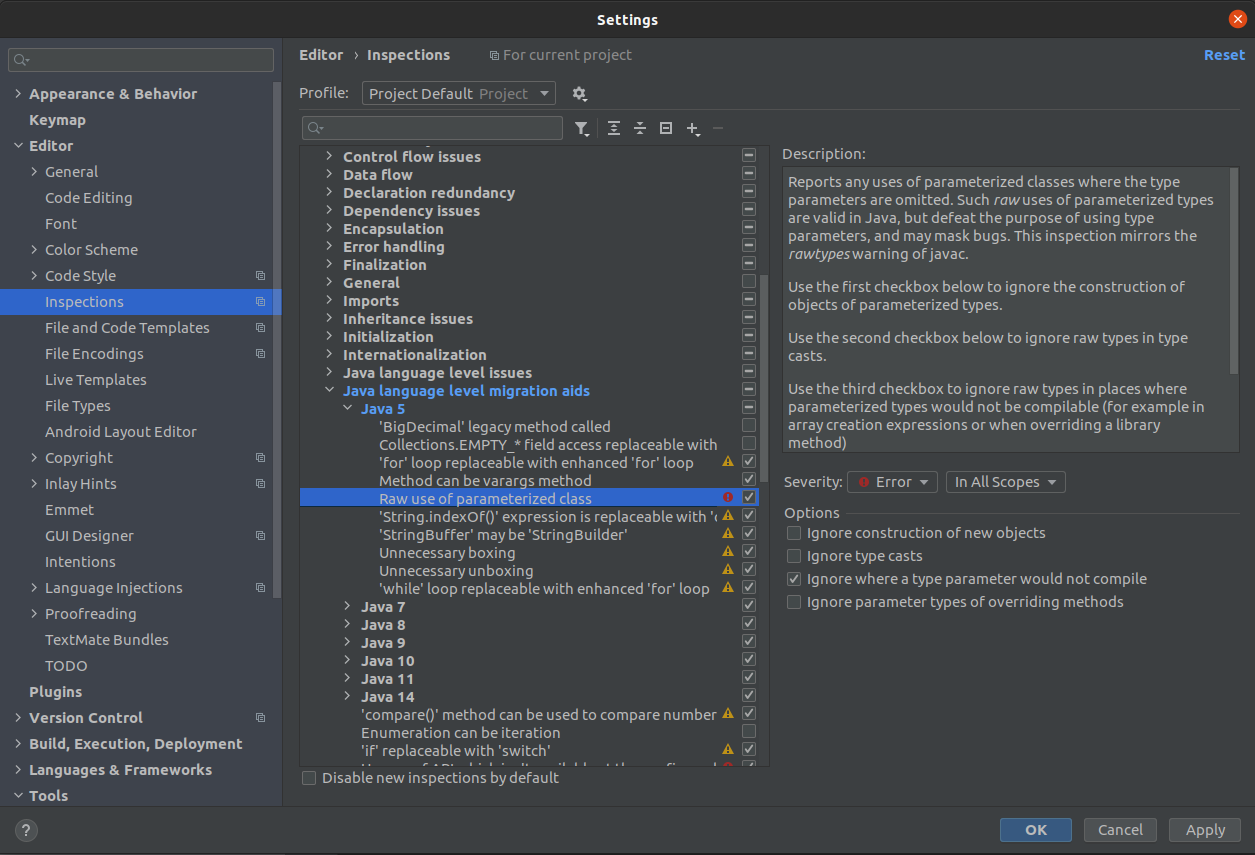
Now, you can click OK to save and apply the settings.