Welcome to IntelliJ IDEA! This guide will provide an overview of how to use IntelliJ to work on P0. If you experience any issues, Googling or visiting IntelliJ’s online help reference usually yields helpful solutions.
Layout of the Land
After you’ve imported code as a new project (and finished waiting for IntelliJ to finish doing Gradle things), the default user interface looks as follows:
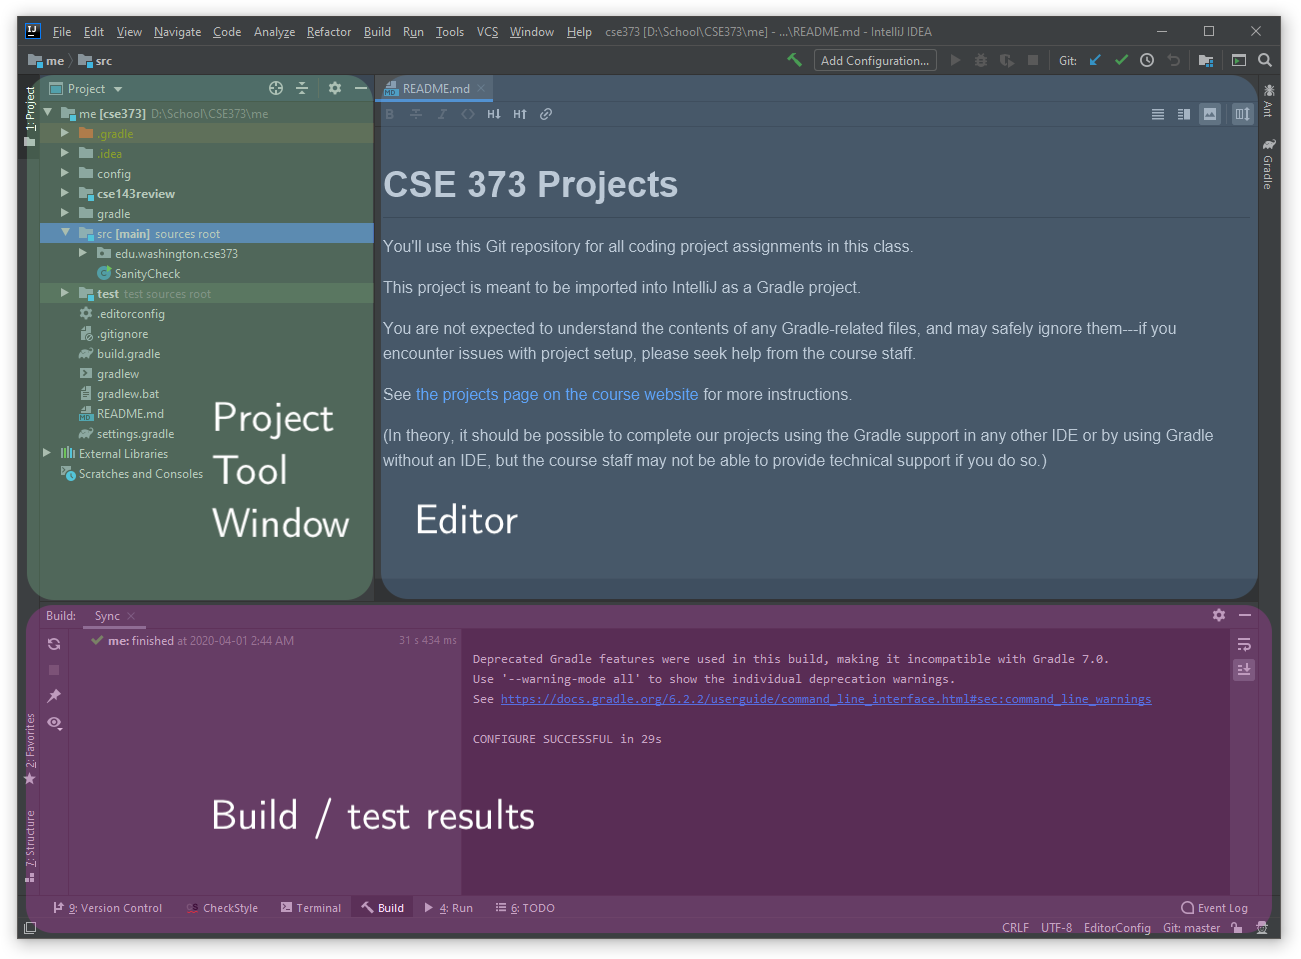
In the center of the screen is the Editor. By default, IntelliJ may open the README.md file.
To the left of the editor is the Project tool window, which shows the structure of the project. You should see a few IntelliJ modules, indicated by folder icons with blue squares, along with a bunch of miscellaneous Gradle files (which you can safely ignore for the projects in this class).
As you explore IntelliJ, here’s a list of helpful commands and shortcuts to help you in the programming projects.
SanityChecking Our Editor
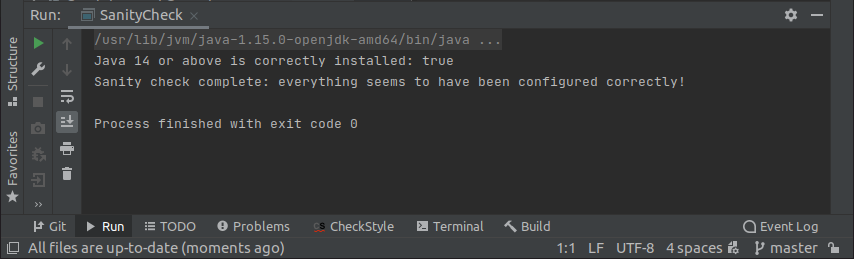
To test if you configured Checkstyle correctly, open SanityCheck.java by double clicking it in the project tool window. Next to the main method in the Editor, there should be a green play button that allows you to run code. After clicking it and running SanityCheck.main(), you should see results similar to this:
The class contains a number of Checkstyle violations. Expand the Checkstyle tool window at the bottom of IntelliJ. Checkstyle tool window will display all Checkstyle errors in the current file. (If you correctly set up Checkstyle earlier, this will use the project’s Checkstyle configuration by default.)
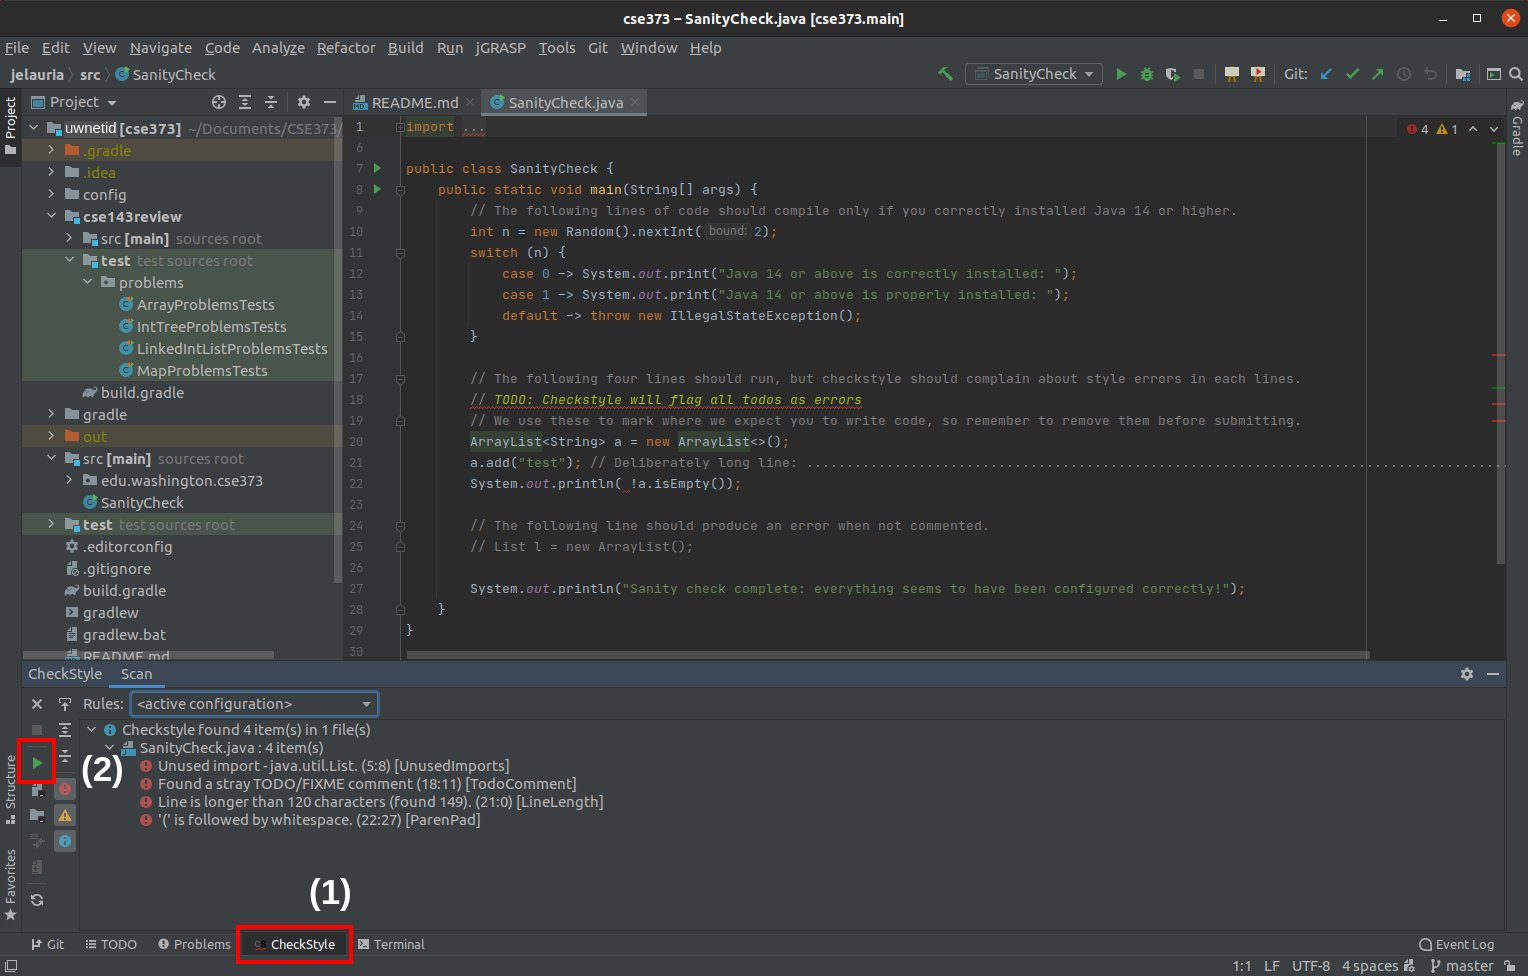
For most projects, a percentage of the final score is allocated to code style. However, unlike CSE 143, our code style is managed entirely by Checkstyle. Once you resolve all of the Checkstyle violations, you will receive full credit on the style portion of the project.
Project Layout
Now, let’s take a look at the code for this project—expand the cse143review module (or folder) in the project tool window. You will actually see src and test modules nested inside.
Each of our projects will be structured like this: a single module named after the project, with src and test modules nested inside.
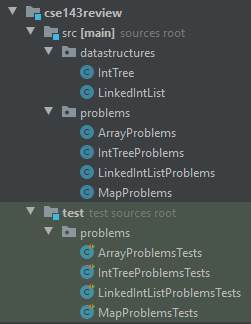
Organizing our modules this way allows us to separate our main source code from the test code, which helps reduce clutter—both within the main module itself, and when we share our main module with other modules.