Welcome to IntelliJ IDEA! This guide will provide an overview of how to use IntelliJ to work on P0. As the quarter moves on, we’ll learn more advanced features of IntelliJ. If you experience any issues, Googling or visitng IntelliJ’s online help reference usually yield helpful solutions.
Layout of the Land
After you’ve imported code as a new project (and finished waiting for IntelliJ to finish doing Gradle things), the default user interface looks as follows:
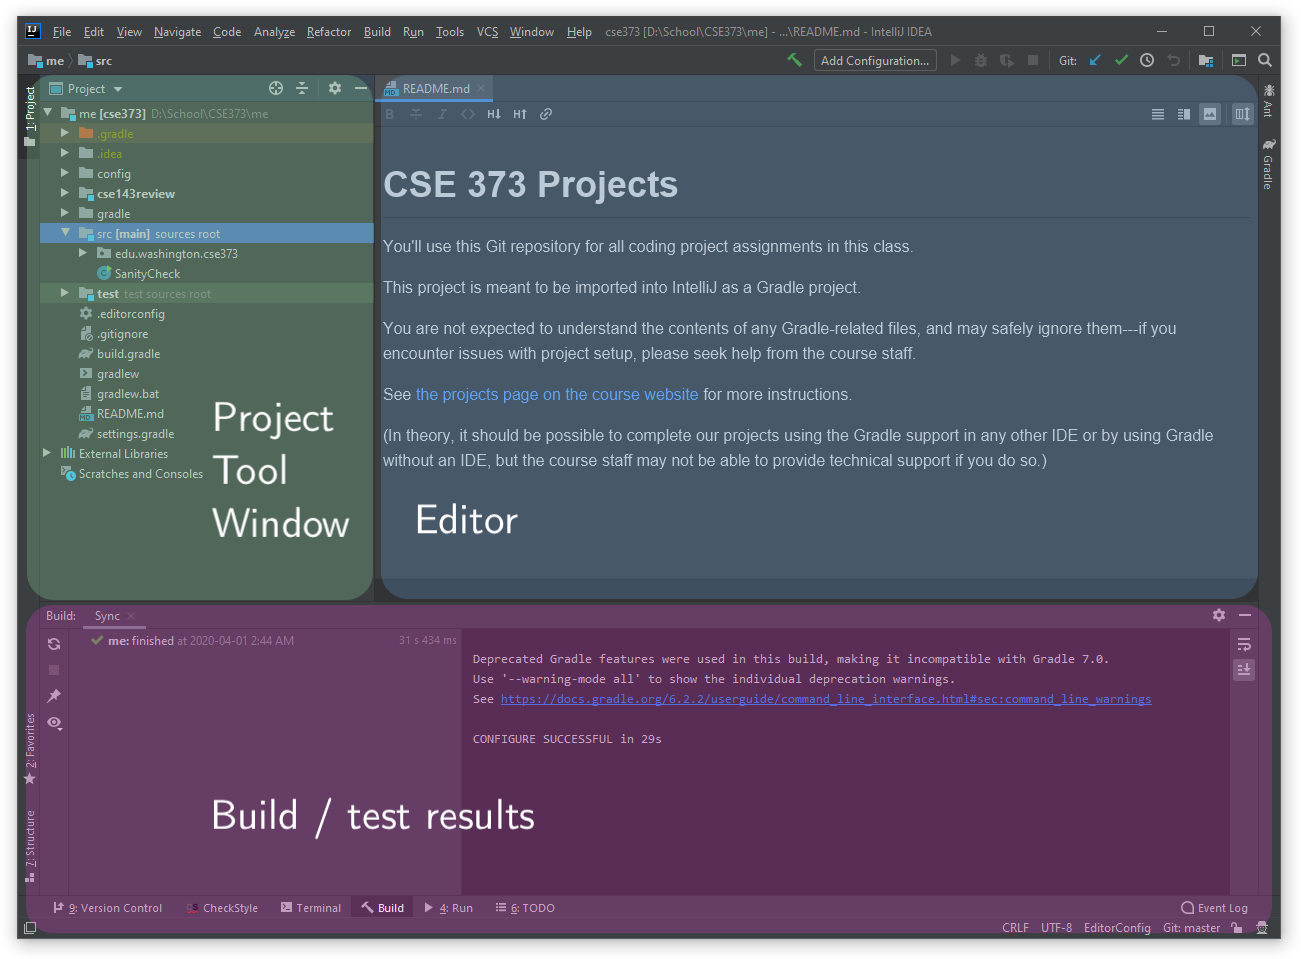
In the center of the screen is the Editor. By default, IntelliJ may open the README.md file.
To the left of the editor is the Project tool window, which shows the structure of the project. You should see a few IntelliJ modules, indicated by folder icons with blue squares, along with a bunch of miscellaneous Gradle files. For the assignments in this class, you should always be able to safely ignore the contents of Gradle files; if you ever need assistance with Gradle issues, post on Piazza or visit office hours.
SanityChecking Our Editor
Let’s perform a small exercise to see if you’ve configured Checkstyle correctly. Open SanityCheck.java by double-clicking it in the project tool window. The SanityCheck class will appear in the editor.
This class contains a number of Checkstyle violations. Expand the Checkstyle tool window at the bottom of IntelliJ. By default, there won’t be anything in it, but tapping the green play icon on the left side of the Checkstyle tool window will display all Checkstyle errors in the current file. (If you correctly set up Checkstyle earlier, this will use the project’s Checkstyle configuration by default.)
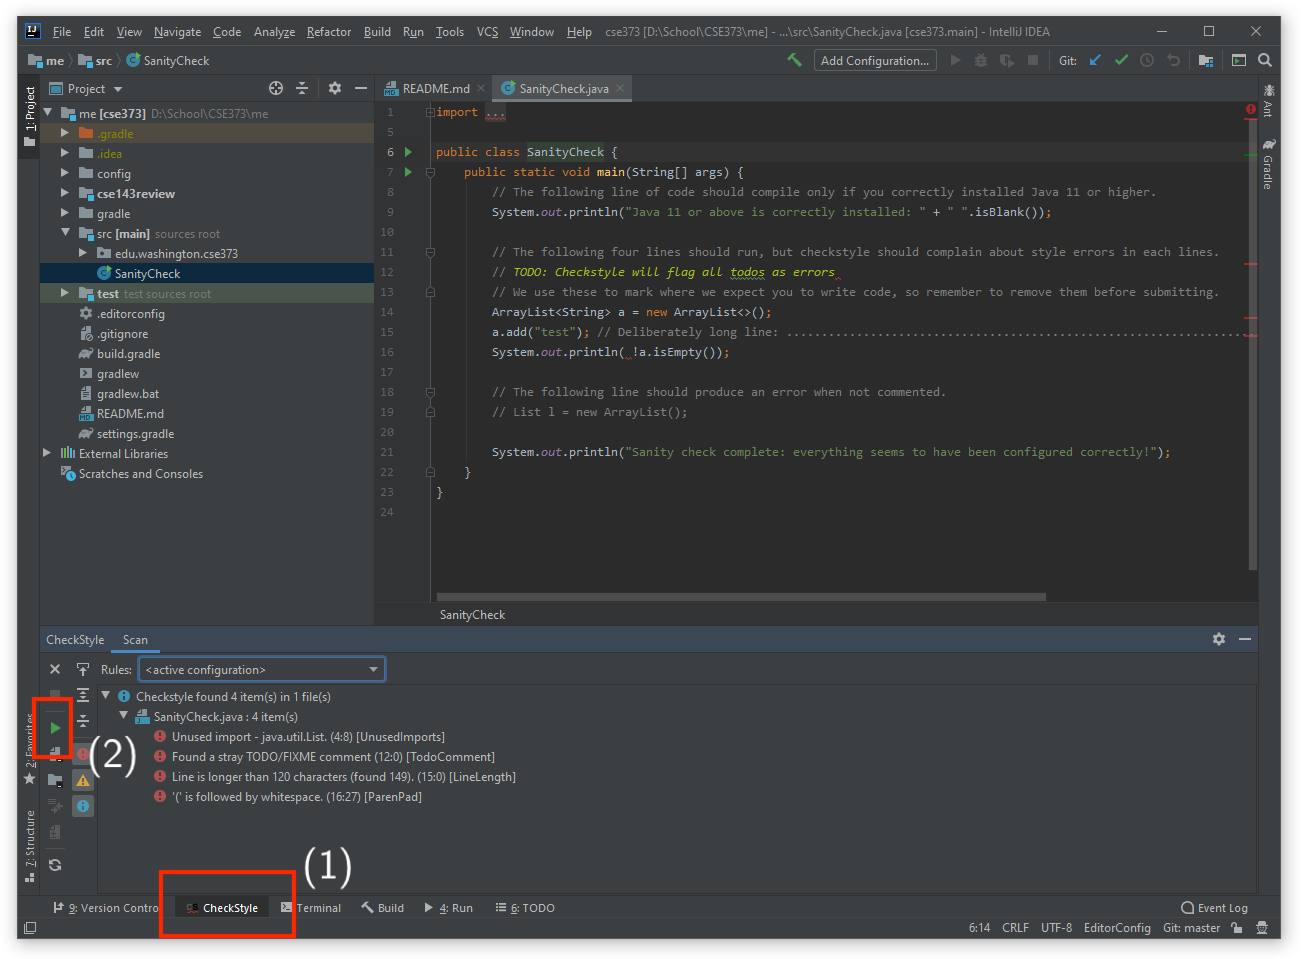
For most assignments, a percentage of the final score is allocated to code style. However, unlike CSE 143, our code style is managed entirely by Checkstyle. Once you resolve all of the Checkstyle violations, you will receive full credit on the style portion of an assignment.
Running Code
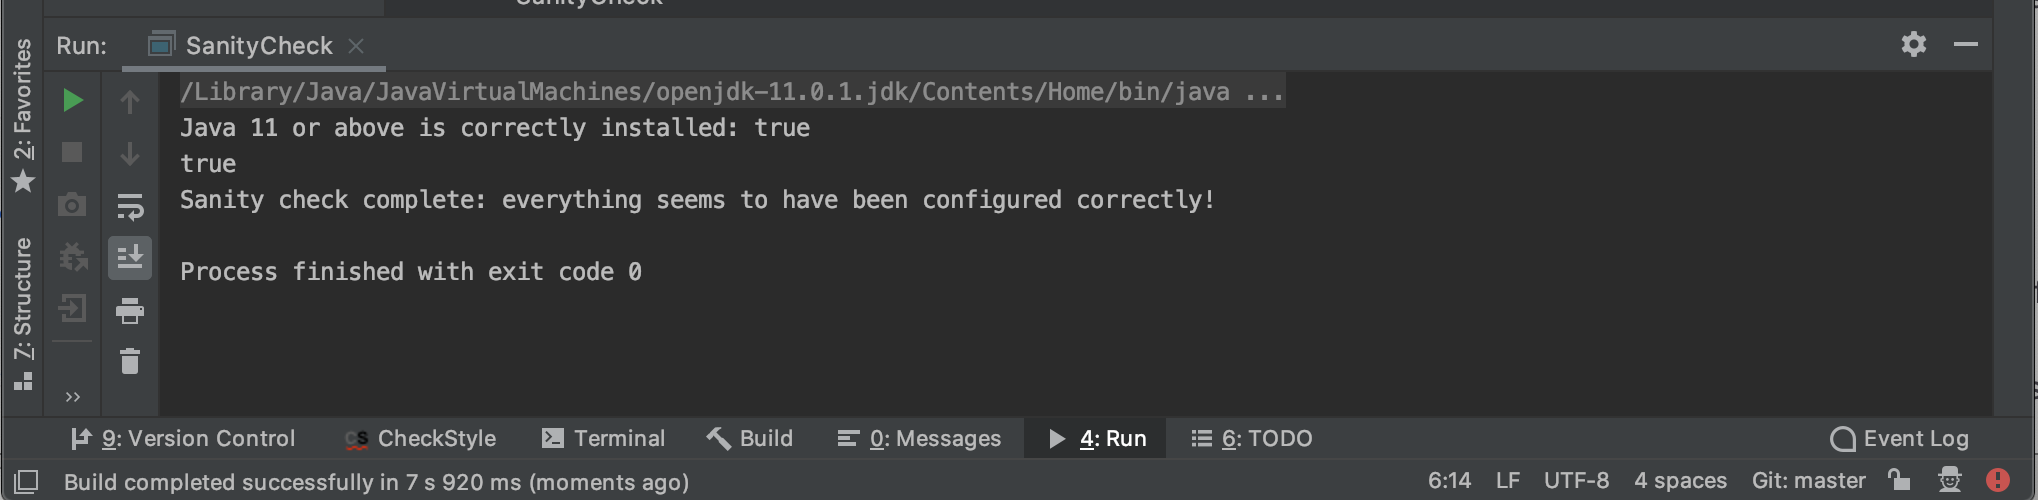
None of these style errors should affect our ability to run code, however. Next to the main method in the Editor, there should be a green play button that allows you to run code. After clicking it and running SanityCheck.main(), you should see results similar to this:
Assignment Layout
What do all of these folders do?
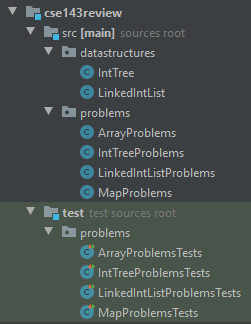
Now, lets take a look at the code for this assignment—expand the cse143review module in the project tool window. You will actually see src and test modules nested inside.
Each of our assignments will be structured like this: a single module named after the assignment, with src and test modules nested inside. The next page will cover testing in more detail, so for now, just accept that these two modules exist.
Organizing our modules this way allows us to separate our main source code from the test code, which helps reduce clutter—both within the main module itself, and when we share our main module with other modules. This also prevents any dependencies specific to our test code (e.g., our testing framework library) from unnecessarily leaking into the main code, which should never use them.
Meanwhile, the test module is set up to depend on the main module, so IntelliJ allows us to access our main code from our test code by importing it normally. In fact, at runtime, Java doesn’t really distinguish between different modules, so we can use the same package name for both our main and test classes to allow the test classes to access the main classes without needing imports—even though they’re in different modules.
Some future assignments will also depend on past assignments, allowing you to import from their main modules.
What do I need to know?
For now, open up the cse143review.src module to see its packages. For this assignment in particular, we have two packages: a datastructures package containing basic linked list and binary tree implementations, and a problems package with a bunch of method stubs and TODOs.
You’ll be implementing the methods in problems as a client of the data structures in datastructures; this means that you won’t be changing the files in datastructures, but you’ll probably need to read what’s in there are some point while implementing methods in problems.
Before we move on to the actual assignment, let’s take a moment to learn about testing.