Assignment A2: Image Enhancement with Undo and Redo
Overview
In this assignment you'll add an Undo feature to a Java application for image enhancement. This feature should make use a of stack. Parts of the challenge will be the implementation of the stack operations, and integrating it into the application.
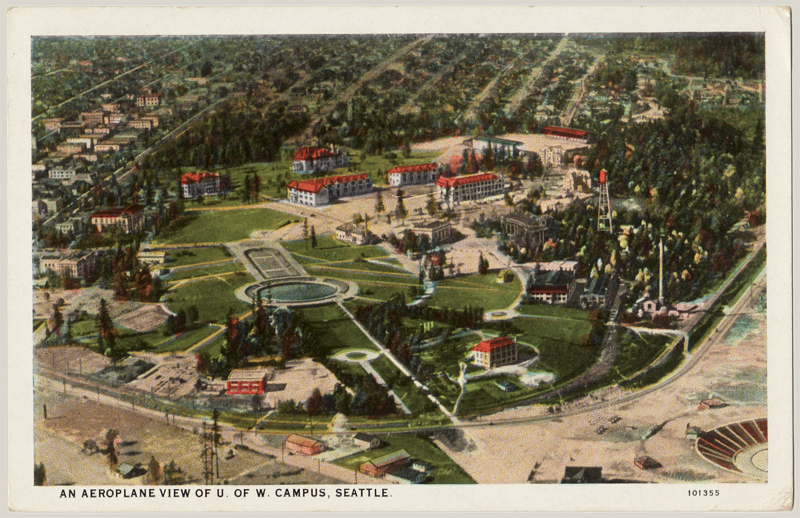
Start with the "Image Enhancer" program ImageEnhancer.java. Create a Java project in Eclipse with the same name. Put a copy of this UW campus image into the main project folder. Make sure you can compile and run this program. You operate it by choosing image transformations from the Image menu. The program will apply the selected operation to the image and show the result as the new "working" image. When you select a second transformation, it is applied to the working image, rather than the original image. A large number of different sequences can be tried. However, there is no way to undo an operation in this program (other than restarting the program, which is not very cool).
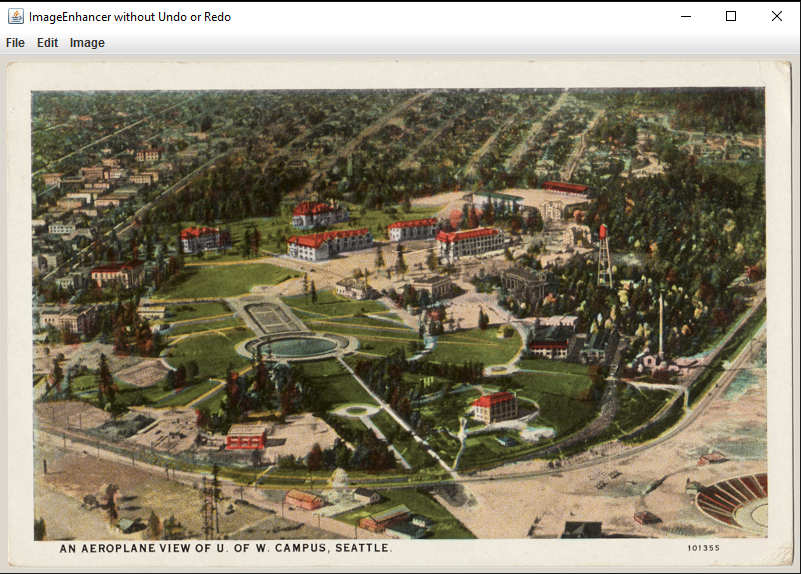
Here's a screen shot of the ImageEnhancer program that you'll start with.
Basic Specifications
Create another project, ImageEnhancerWithUndoAndRedo. Put a copy of the starter code in this project, but rename the file and public class to be ImageEnhancerWithUndoAndRedo. Also put another copy of the UW campus image in this folder, so the new version will work, too.
Change the title on the new application's window to be "Image Enhancer WITH Undo AND Redo by " followed by your full name. For example, it might be something like "Image Enhancer WITH Undo AND Redo by Mary-Lou Jones".
Create a new class, in a separate file named BufferedImageStack.java. This class must implement a stack of BufferedImage objects, and you must not import the built-in Stack class, but rather you will utilize the ArrayList class to hold the elements of your buffered image stack. Comment each method in this file. You are encouraged, but not required, to use standard JavaDoc conventions for this. Also provide a comment at the top of this file that gives the name of the file, your name, and an explanation for the purpose of this file as part of the whole application. The methods to provide are the following:
- push(BufferedImage someBufferedImage): enters the buffered image onto the stack and returns nothing.
- pop(): throws an exception if the stack is empty; otherwise returns the top buffered image, removing it from the stack. The exception should be an instance of java.util.EmptyStackException.
- peek(): throws an exception if the stack is empty; otherwise returns the top element of the stack. However, unlike pop, it does not change the contents of the stack.
- isEmpty(): returns true if there are no items in the stack; false otherwise.
- clearAll(): makes the stack empty.
- get(int index): returns the buffered image at the position given by the index. (This is not commonly available in a stack, but it facilitates the testing by our autograder.) If the index is out of range, the method should throw an IndexOutOfBounds exception. (Note: get(0) gets the bottom element of the stack -- the one that was pushed in first, but not yet popped out.)
- getSize(): returns the number elements currently in the stack.
Make use of your new BufferedImageStack class to implement the Undo feature in your application. If the user has not yet applied any operations to the image, or has undone all the operations performed, then the Undo menu item must be disabled. When disabled, it will be displayed as grayed out. The starter code sets this up for you by default.
The user should be able to undo all the operations that have been applied so far, so as to go all the way back to the original image. Thus your applications will have multiple levels of Undo. Whenever, there is an operation that can be undone, the Undo menu item must be enabled.
Once your Undo feature is working, figure out how to provide functionality for the Redo feature. The Redo menu item should only be enabled and do something if an Undo operation has just been performed.
There should also be multiple levels of Redo. However, if the user performs an Undo action and then applies some other operation to the image, there is a question of whether any remaining Redo options should persist or whether they should be deleted. For this assignment's basic functionality, assume they should be deleted. (Extra credit options A2E1 and A2E3 involve implementing more flexible ways of handling Redo.)
Whenever an Undo command or a Redo command is successfully performed, your application should print out a message (using System.out.println) that explains clearly how many elements are currently in the Undo stack and how many are currently in the Redo stack. Code to do this is provided in the starter code, but is commented out. After you have implemented your undo and redo functionality, you should uncomment this code.
Add a comment line after the first line of
ImageEnhancerWithUndoAndRedo.java that gives your name and a little
context.
That should also include a list of what features you got working.
For example:
/* ImageEnhancerWithUndoAndRedo.java
 * by John Glenn for CSE 373 Assignment 1, Winter, 2016.
 * This program is an enhanced version of one provided by Oracle.com and
 * subsequently modified by S. Tanimoto, instructor for the course.
Extra credit options
Each of the following options can earn you 5 points of extra credit. However, do not attempt the extra credit features until you have the basic features working correctly.
If you have implemented any of the extra credit features, add another comment line near the top of your ImageEnhancerWithUndoAndRedo.java file explaining which ones you finished. For example, you might write: "* I completed Options A2E1 and A2E2."
(Option A2E1) Add a "Load Image" menu item to the File menu. That should bring up a file dialog box that shows only the following types of images: .gif, .jpg, and .png. The app should then load in the selected image. This operation should be undoable and redoable, but redoing it means the already selected image will again be the current image; it will not mean that the dialog reappears.
(Option A2E2) Add image saving code so that there is a "Save As..." option in the File menu, and a file dialog box comes up that offers file extensions .gif, .GIF, .jpg, .JPG, .png, and .PNG. After the user chooses the folder, filename and extension, the program saves the image. The Undo and Redo stacks should not be affected by this operation, and it should not be executed during any undo or redo step.
(Option A2E3) Implement an additional file BufferedImageQueue.java similar to your BufferedImageStack.java, and use it to implement a Replay feature, that should be accessed from a separate "Replay" menu next to the File menu. This menu should contain three items: "Replay", "Enqueuing On/Off", and "Clear Replay Queue". If you implement this feature, then any time the user applies an operator to the image, loads an image, performs an Undo or a Redo, a copy of the current image should be entered into the queue, unless Enqueuing has been turned off. If the user selects "Replay", then a little movie should run, using a timed thread that goes through the queue once, dequeuing and showing each image for approximately 1 second. It should immediately re-enqueue each image (so that the user has the option to replay the same sequence again) but know when to stop. If enqueuing is disabled, then user operations are no longer added to the queue. The queue is not emptied just because enqueuing is disabled, though. The user may select the menu item again and then enqueuing will be back in force. If the "Clear Replay Queue" item is selected, then the queue is made empty. Whenever one of these menu items is selected, a message should be printed to the console telling something about the old and new states of the queue. For example, "Replaying a 12-step sequence." Or "Enqueuing now enabled. Queue contains 13 items." Or "Queue with 7 items being emptied. Enqueuing is enabled."
Turn-in
Turn in your source files through our Catalyst CollectIt dropbox. This assignment is due Wednesday, January 20 at 11:59 PM. Late penalties apply (see the policies page for details).
Grading Rubric
In this assignment, you can earn 100 regular points and up to 15 points of extra credit.
The regular credit will be awarded as follows.
- Window title change correctly handled: 5
- BufferedImageStack.java file and class exist and all specified methods work correctly: 40. (push, pop, peek, clearAll, isEmpty, get, getSize ). If any of these are missing or incorrect, subtract 5 for each one missing, but net points for this cannot go negative.
- Two instances of your BufferedImageStack class are created in your application: one for Undo an done for Redo, and these are clear in the code: 5.
-
40 points for correct implementation of functionality.
 Undo works properly from an undoable state.
 Redo works properly from a readoable state.
 (15 points deducted from the 40 for each of these two
  features unimplemented or not working properly.)

 Undo item grayed out and disabled when stack is empty.
 Undo item not grayed out and enabled when stack is not empty.
 Redo item grayed out and disabled when no operation is available to redo.
 Redo item not grayed out and enabled when some operation IS available to redo.
 (5 points deducted from the 40 for each of these four
  features unimplemented or not working properly,
  subject to cutoff at 0.)
- 10 points for writing very clear readable code with clear comments in English for each new class, method and function, and static variable. Any other variables should have names suggestive of their meaning, with comments unless the variable is a loop variable (i.e., int i) or a size or length (int n). JavaDoc format is fine but not required. The comments at the top of each file, described earlier, also contribute to these points.
Note: Some points (max 20) will be deducted if the program is particularly slow or it flashes multiple images on the screen when an Undo or Redo is performed.
Extra credit: There are three options worth 5 points each. In order to get the extra credit for a feature, the feature must be completely working, as specified on this Assignment webpage. (Partial credit for an extra-credit feature will not be given.)
An Explanation of the Image Processing Features
The stack data structure is generally considered to be an easy data structure to implement, especially in comparison to B-trees, AVL trees, etc. In order to make this assignment interesting, the implementation of the stack gets integrated with an application. The use of the stack turns out to be essential for a reasonable implementation of the Undo feature -- something we typically take for granted in usable interactive software involving editing of any kind.
The application here is an image enhancement program. It's pretty basic as such programs go, but it serves the purpose of providing a context in which to implement Undo. Five image-processing operations are provided: (0) Darken by 10%, (1) Convolve: Low-Pass, (2) Convolve: High-Pass, (3) Photonegative, and (4) RGB thresholds at 128. When the program is running, these operations are available from the "Image" menu. After an operation is performed on the image, the current image is replaced by the resulting image, and subsequent operations can be applied to this result. Thus long chains of these operations can be executed, if wanted by the user.
Knowing how the image-processing operations are implemented is not necessary for this assignment. However, here is some information about it for those interested. Three of the operations involve the use of a "lookup table" (LUT). A lookup table here is an array of 256 bytes that represent a mapping from [0, 1, ..., 255] to [0, 1, ..., 255]. The photonegative operation uses the mapping {0 -> 255, 1 -> 254, ..., 255 -> 0 }. The darken by 10% operation has its own mapping, as does the thresholding operation. Java's image module provides functionality for applying this kind of mapping to the R, G, and B color components of each pixel of a BufferedImage object. Two of the operations involve the use of Convolution filtering. This kind of operation computes each output pixel value as a weighted sum of the pixels in a (3 by 3) neighborhood. The low-pass filter is computing a weighted average, which leads to intentional blurring of the image. The high-pass filter is applying what's known as a Laplacian operator to the image and adding that result to the image thus "sharpening" it a little bit, which means making the "edges" that separate differently colored regions show up more prominently. These filtering operations are implemented in the program by instantiating java.awt.image.ConvolveOp.
For this assignment, the only type of image processing object that you really need to pay attention to is the BufferedImage class. When you look at the source code ImageEnhancer.java, you can see calls to its constructor. For example, there's this code:
biWorking = new BufferedImage(width, height, BufferedImage.TYPE_INT_RGB);
gWorking = biWorking.getGraphics();
gWorking.drawImage(biTemp, 0, 0, null);
This creates a new buffered image object for an image with width width and height height.That means width columns and height rows. The type of image is RGB meaning that each pixel will have three numbers associated with it: one for red, one for green, and one for blue. The buffered image is assigned to a variable biWorking, which is the working buffered image ... the one that the user sees on the screen most of the time.
The two lines of code that follow that constructor call above do something important: they put image data into the buffered image. This is done in two steps. First, a "graphics" object is obtained by calling the getGraphics() method of the BufferedImage object biWorking. The graphics object supports "painting" into the pixels of the buffered image, and one of the painting methods is drawImage. By invoking the drawImage method of the graphics object gWorking, the pixel values from another image, here biTemp, get written into the pixels of biWorking. The contents of biTemp are read from a file.
You will need to arrange for BufferedImage objects to be created and saved on your buffered image stack. You will need to arrange for BufferedImage objects to be created (typically as copies of biWorking) and given pixel data (using the same approach involving drawImage described above).
Comments on the use of AWT and Swing
The ImageEnhancer application uses a graphical user interface ("GUI"). It is implemented using a combination of Java AWT (Abstract Windowing Toolkit) and Java Swing (another library of components provided by the Java Runtime Environment).
The important thing to understand for this assignment is that user actions are handled primarily by one method, called actionPerformed. In order to add more functionality to the program, you should first add any needed components such as menus and menu items, and then add more cases to the body of the actionPerformed method. The method is called when the user clicks the mouse, etc., and information about the user-generated event is passed in as the ActionEvent object, bound to the variable e. The body of that method consists of some tests to find out what the user acted on (e.g., making a selection from one of the menus), and then some code that performs the requested action.
Miscellaneous Advice
Remember that a stack uses the LIFO access pattern: Last-In, First-Out. (Some say FILO -- First-In, Last Out). Understand what a buffered image is and how to create one and copy pixel data into it.
Think carefully first and then code. Drawing a graph or diagram on paper can help a lot when thinking about Undo and Redo.
Null pointer exceptions are common during development. One way to address them is to add code using the following pattern:
if (something == null) {
  something = new something();
}
return something;
Also check for null when checking the size of a collection.
For additional discussion of this and other assignments, check our GoPost discussion board.
Version 1.0. January 2, 2016. Adjusted the identification codes on the extra credit options
and adjusted the wording on the first extra credit option, on Jan. 19. Added note to
further explain the stack's get method on Jan. 19.