LabsLand Setup
Introduction
This quarter, we will not be distributing physical lab kits and instead be using a remote FPGA lab through the LabsLand web interface. This will avoid the need to carry the hardware around and also means that you don't need to individually procure the necessary peripherals that we will use.
The workflow for the quarter will involve developing, simulating, and debugging the logic of your SystemVerilog code locally in Quartus (as was done in EE 271 / CSE 369), but then instead of generating the bit file locally, you will upload your code to LabsLand to synthesize and run on a DE1-SoC setup.
Setup Instructions
Creating an Account
- Open this (UW login and class registration required).
- Select "Create a Student Account".
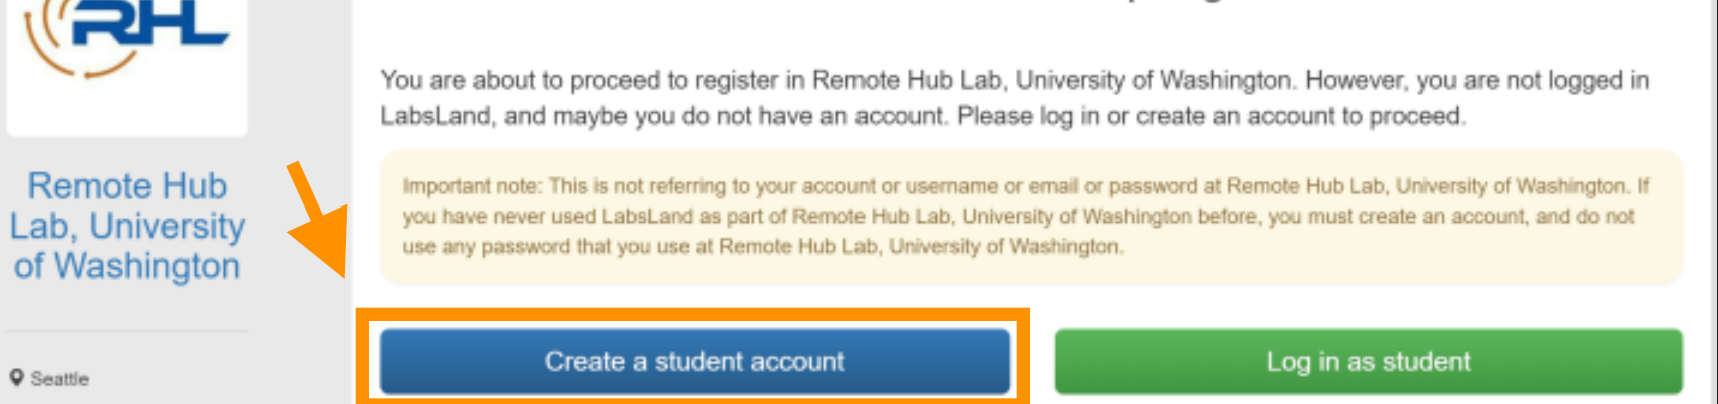
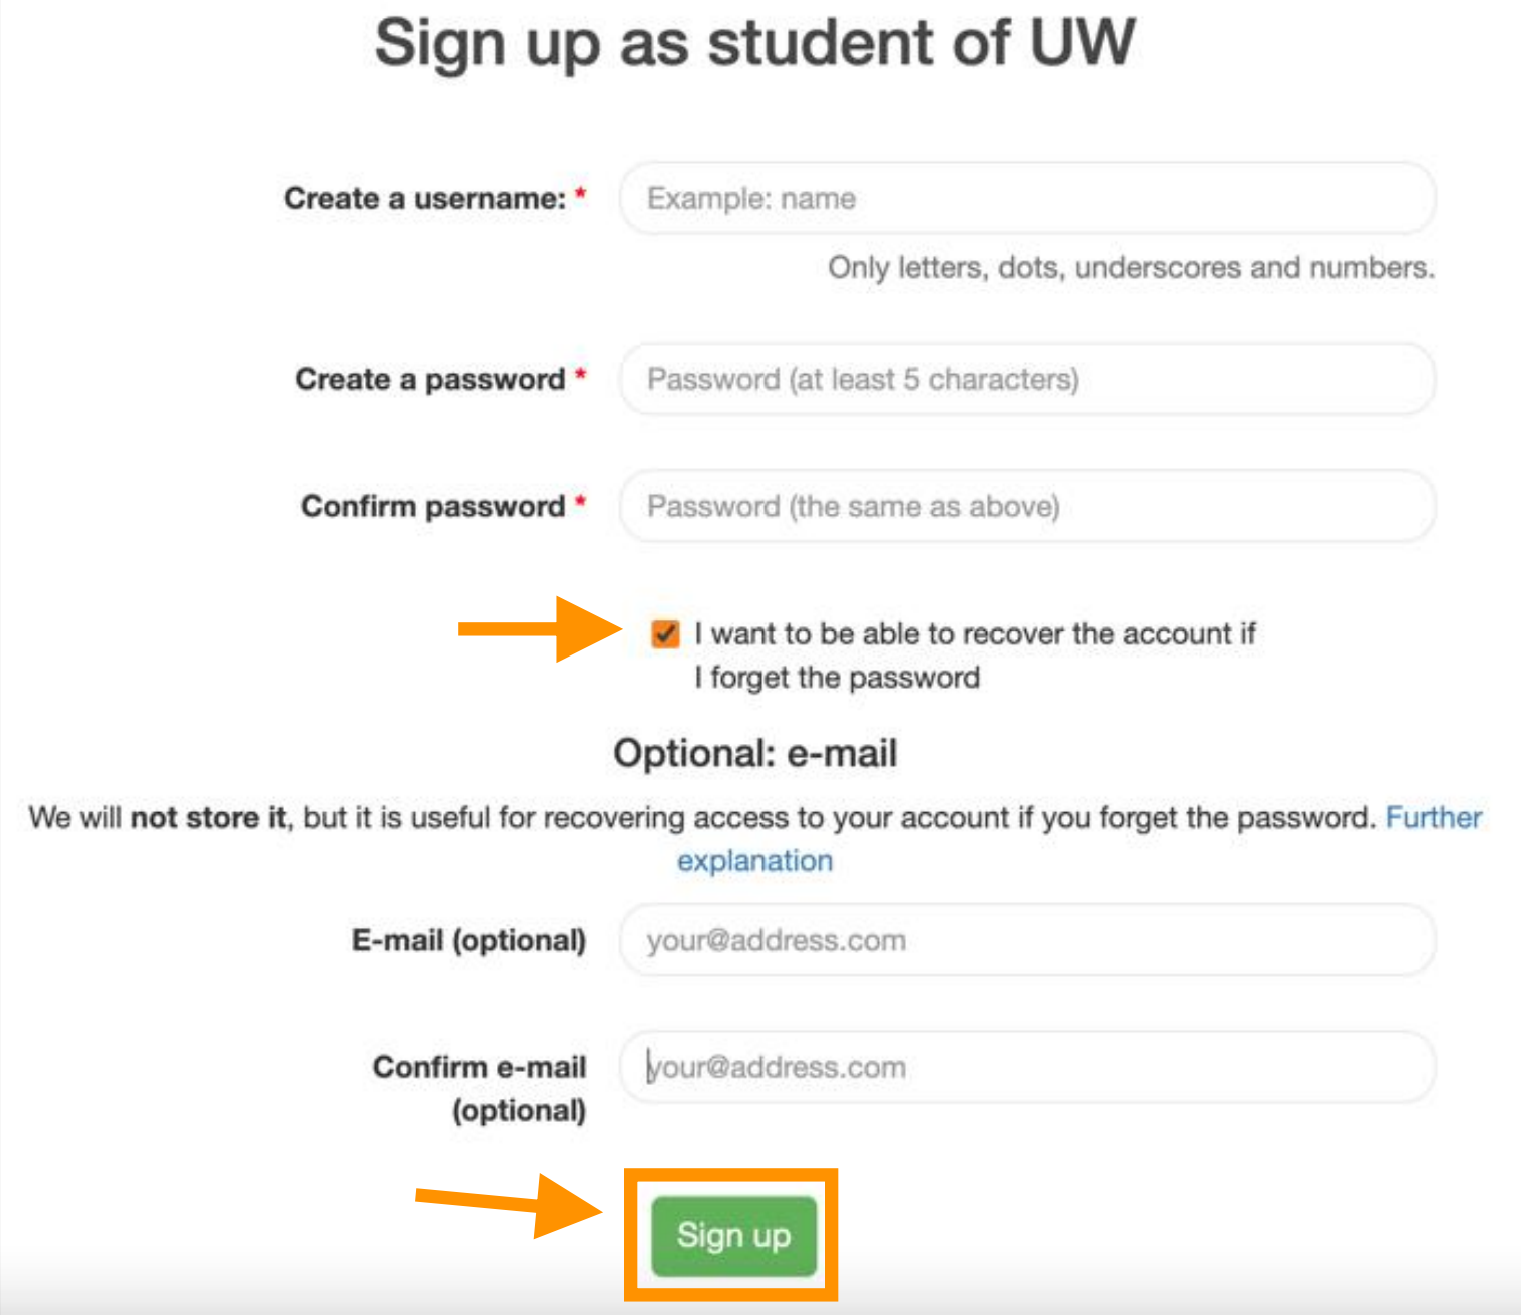
- Sign up using your desired username and password.
It is highly recommended that you also select the "I want to be
able to recover the account if I forget the password" and enter a
valid email in case you forget your password.
Then select "Sign up".
Logging into LabsLand
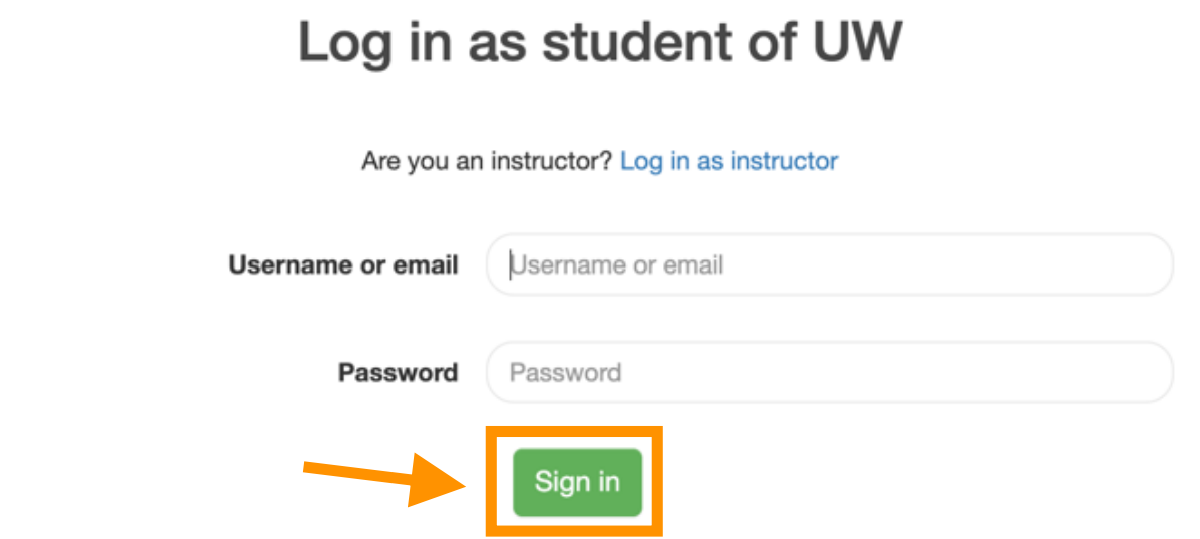
- Go to the
and click "Log in as student".

- Enter your credentials and click "Sign in".
- After logging in, you should be able to see the
EE/CSE 371's class page on LabsLand.
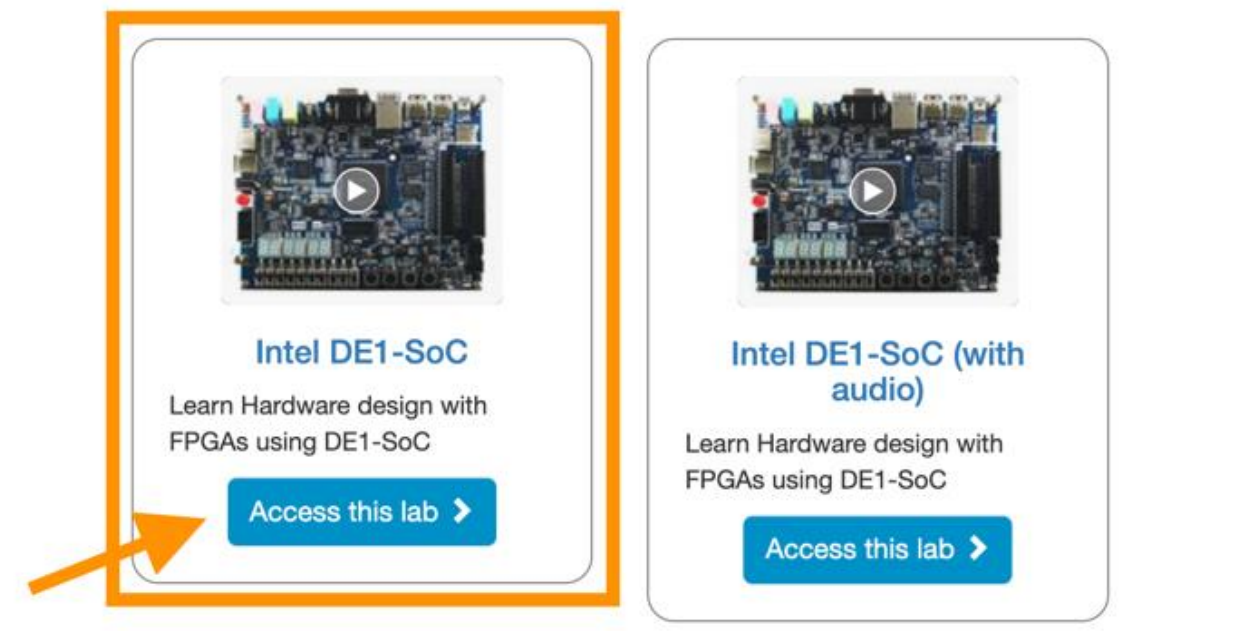
To access the lab workspace, locate "Intel DE1-SoC" and click the
"Access this lab" below it.
Later on in the quarter, you will need to access the "Intel DE1-SoC
(with audio)" lab.
Code Writing
This is the part where you create a Quartus project, write a SystemVerilog program, and simulate your program in ModelSim. You should have your program fully written and tested before proceeding.
Uploading Code to LabsLand
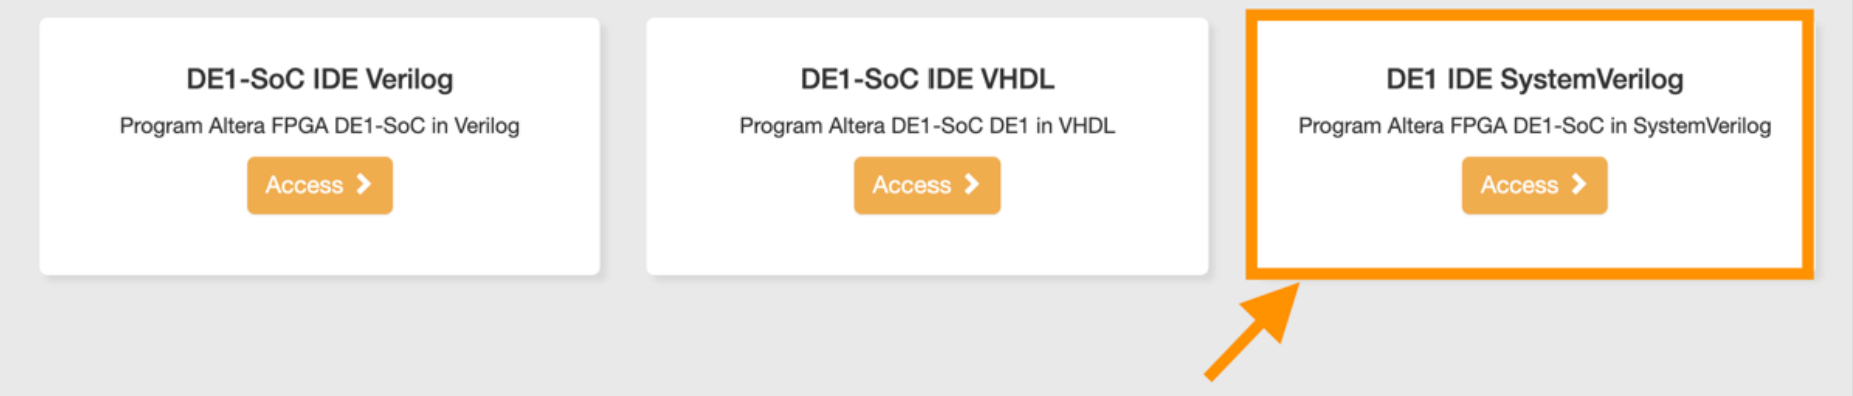
- Locate "DE1 IDE SystemVerilog" and click the "Access" button
below it.
You will be directed to a new page called "SystemVerilog IDE for
DE1-SoC".
- On the following page, select the "Add" button to
import all of your module .sv files.
- You do NOT need to upload your test bench files since your testing has already been done in ModelSim!
- Recall that you should add back the clock_divider module if you want to slow down your system on the hardware.
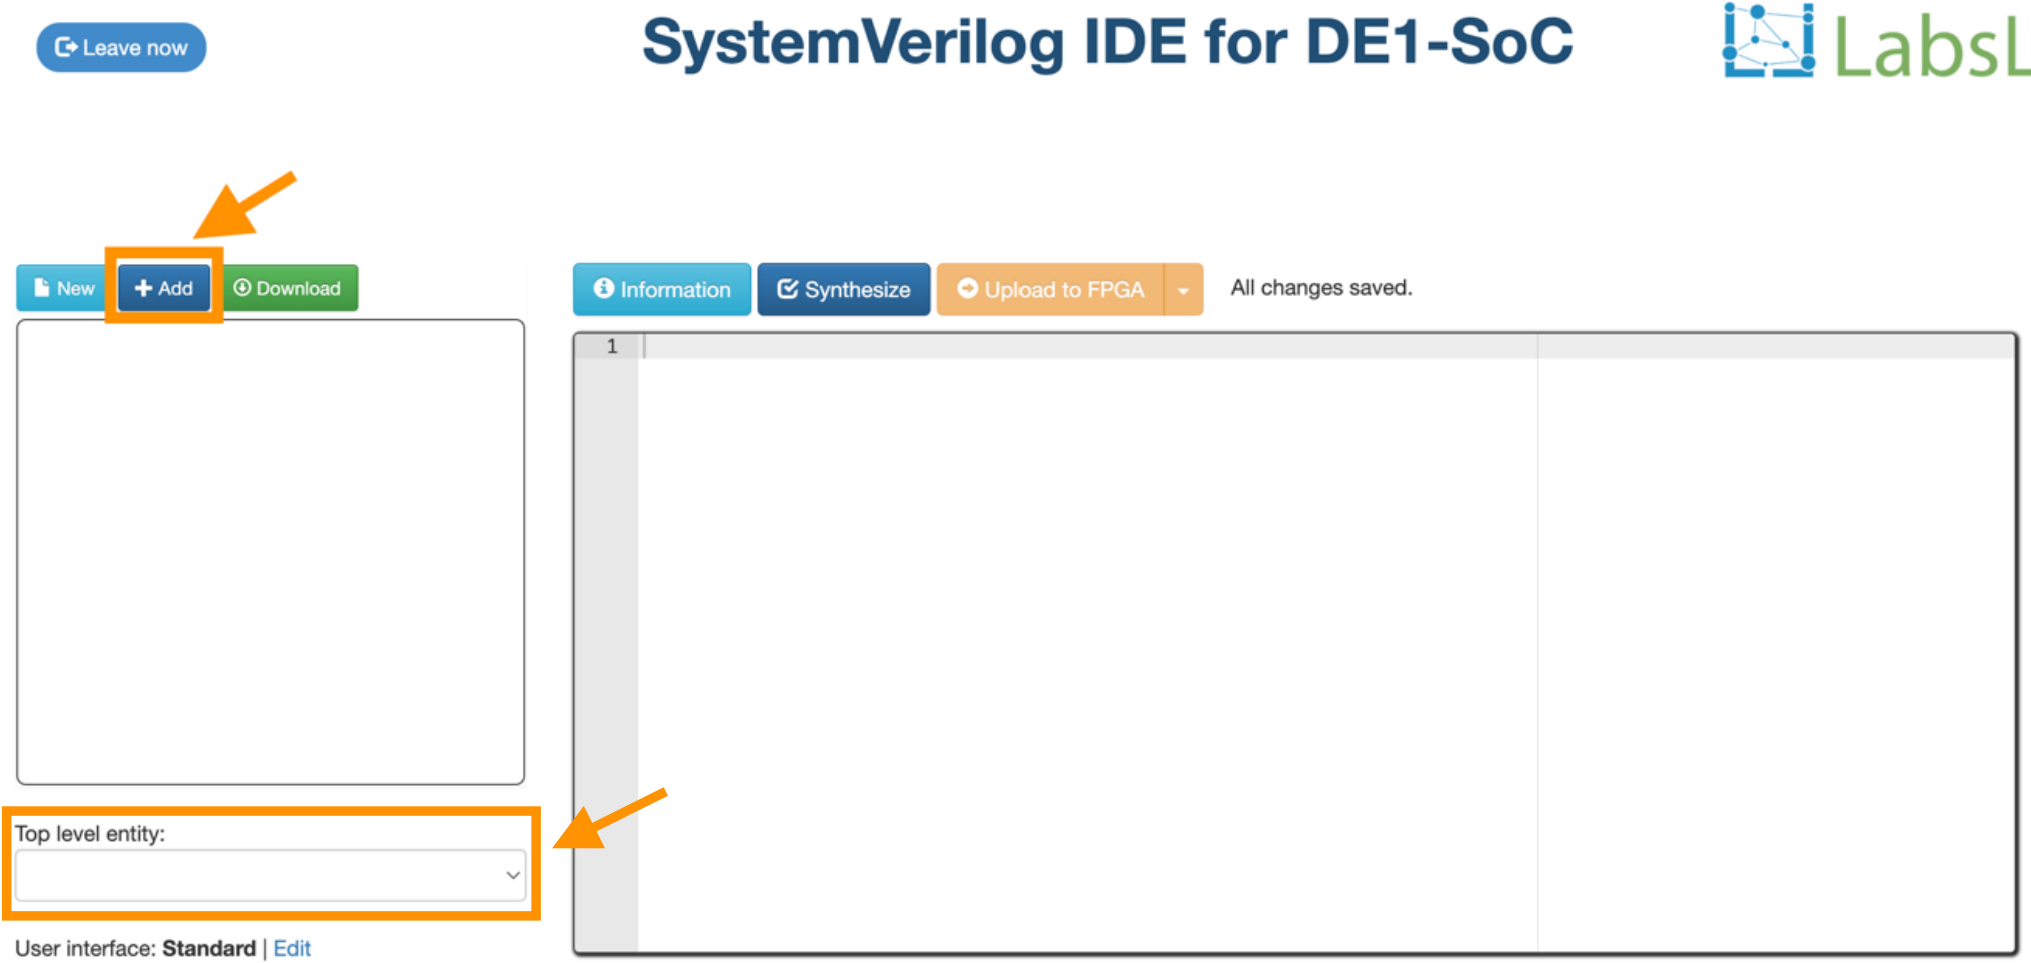
- Choose the top-level module using the dropdown menu under "Top level entity".
Synthesizing and Executing Your Code
- You are now able to synthesize the code using the "Synthesize"
button.
This will typically take a while, though LabsLand will cache bit
files so that subsequent presses of the "Synthesize" button will
complete much faster (assuming no changes to your code).
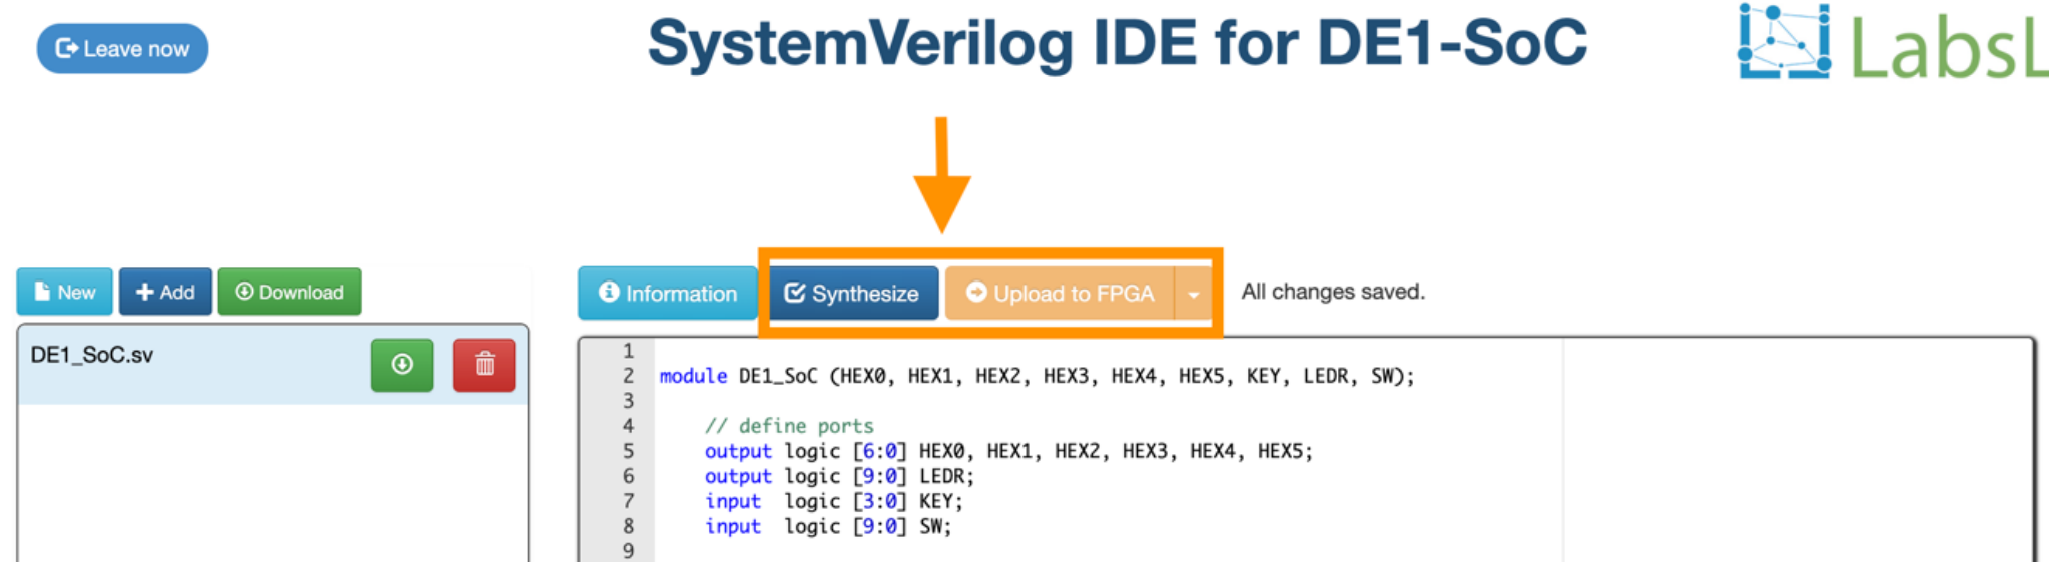
- Once the synthesis is complete and succeeds without errors, you can click on "Upload to FPGA" to load your design onto an FPGA.
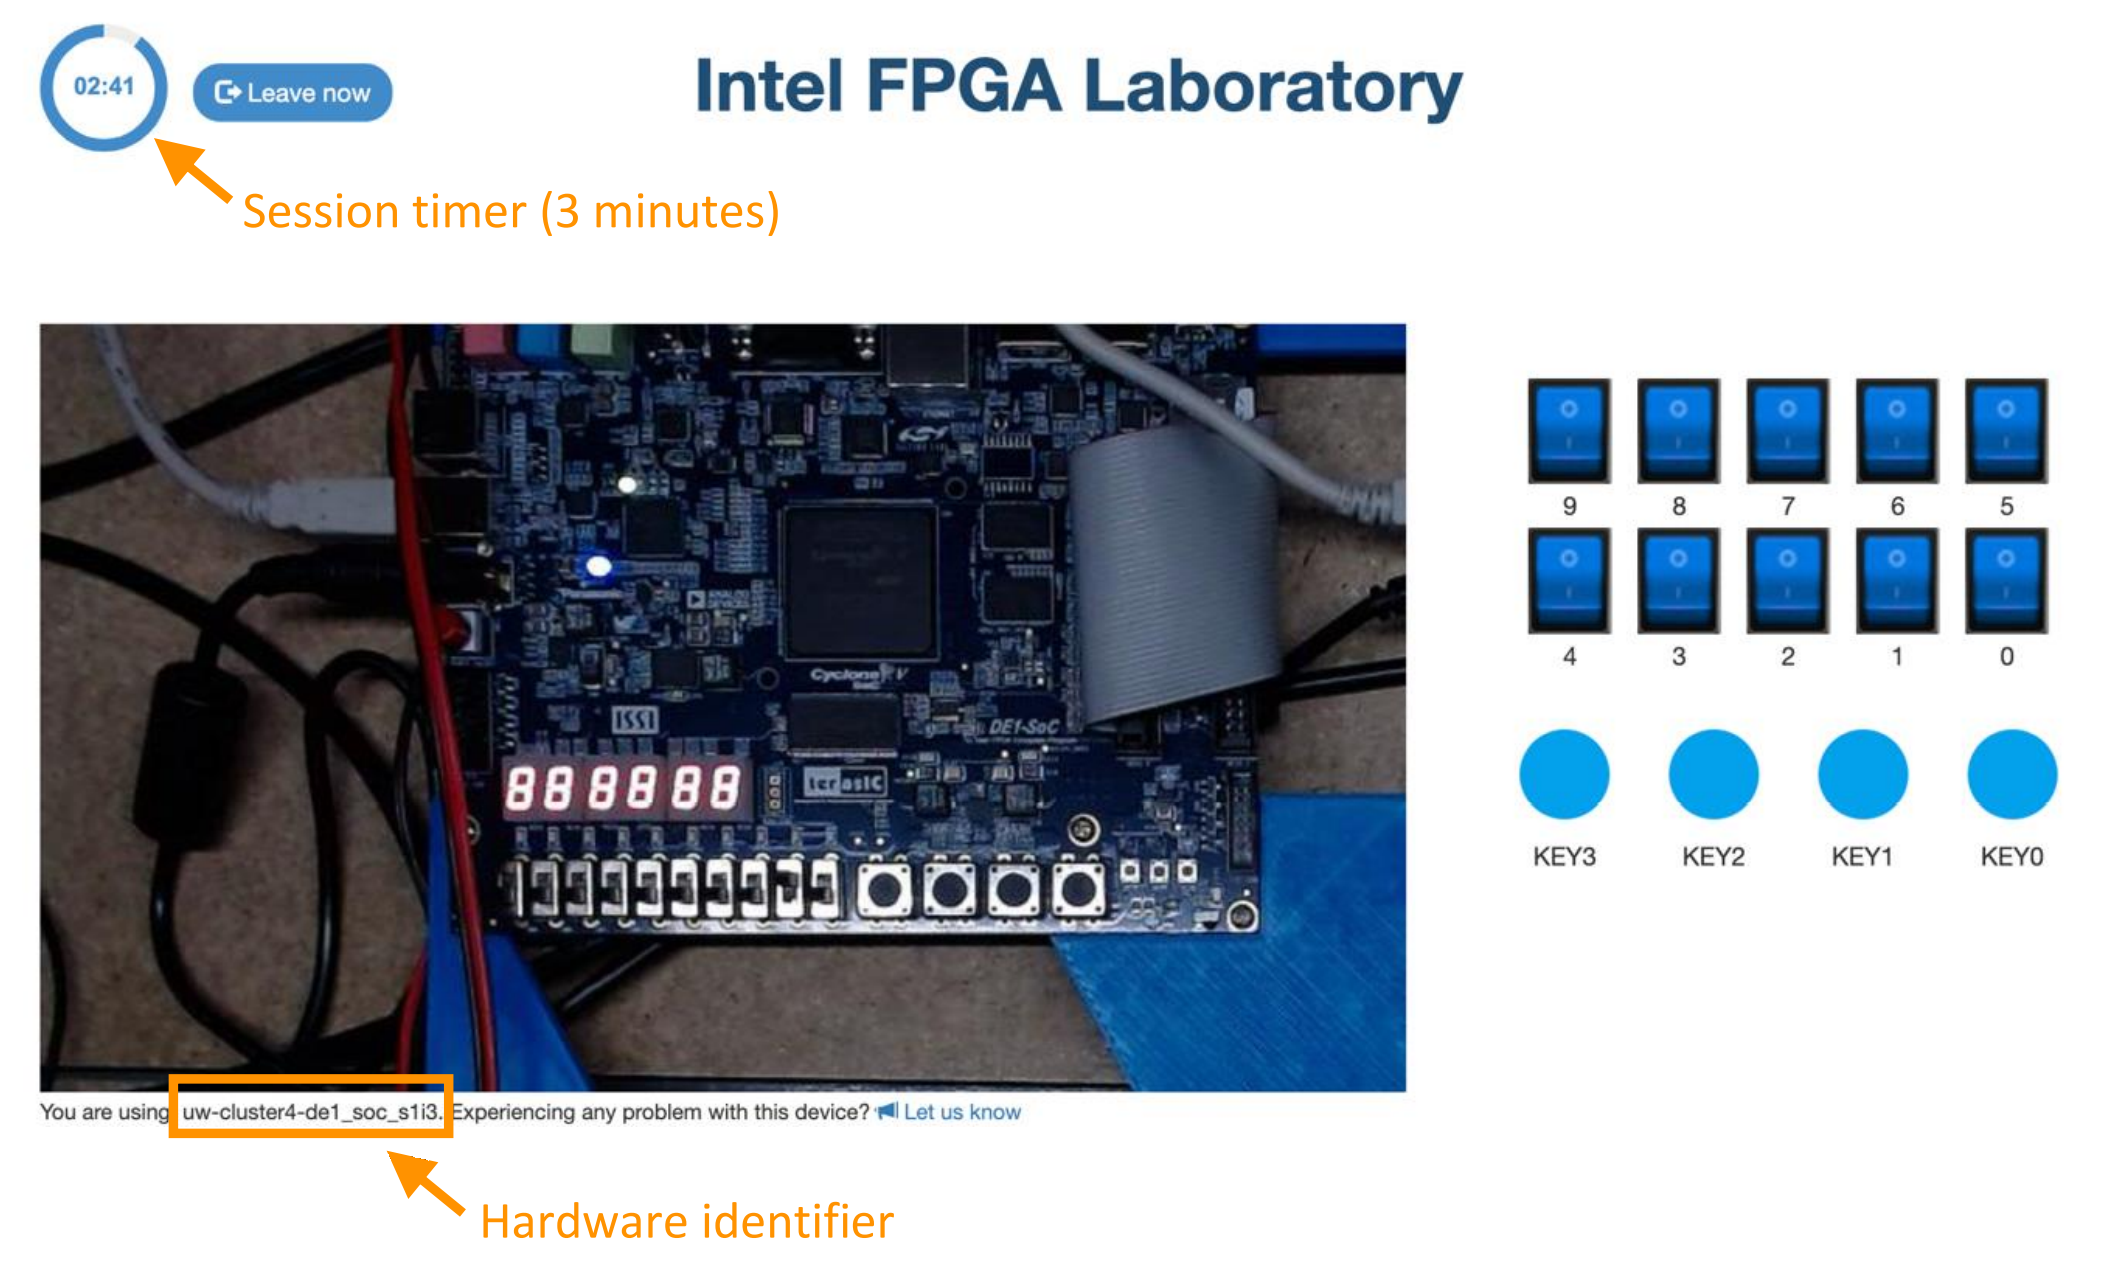
- After waiting for the remote FPGA to connect, you
will see the webpage shown below.
The right part of the page shows the buttons and keys of the FPGA,
which you can click as inputs.
- It is important to note that KEYS need to be held down, as they do not function like switches.
- It is also important to pay attention to the hardware identifier, as some setups/clusters may break/malfunction temporarily throughout the quarter.