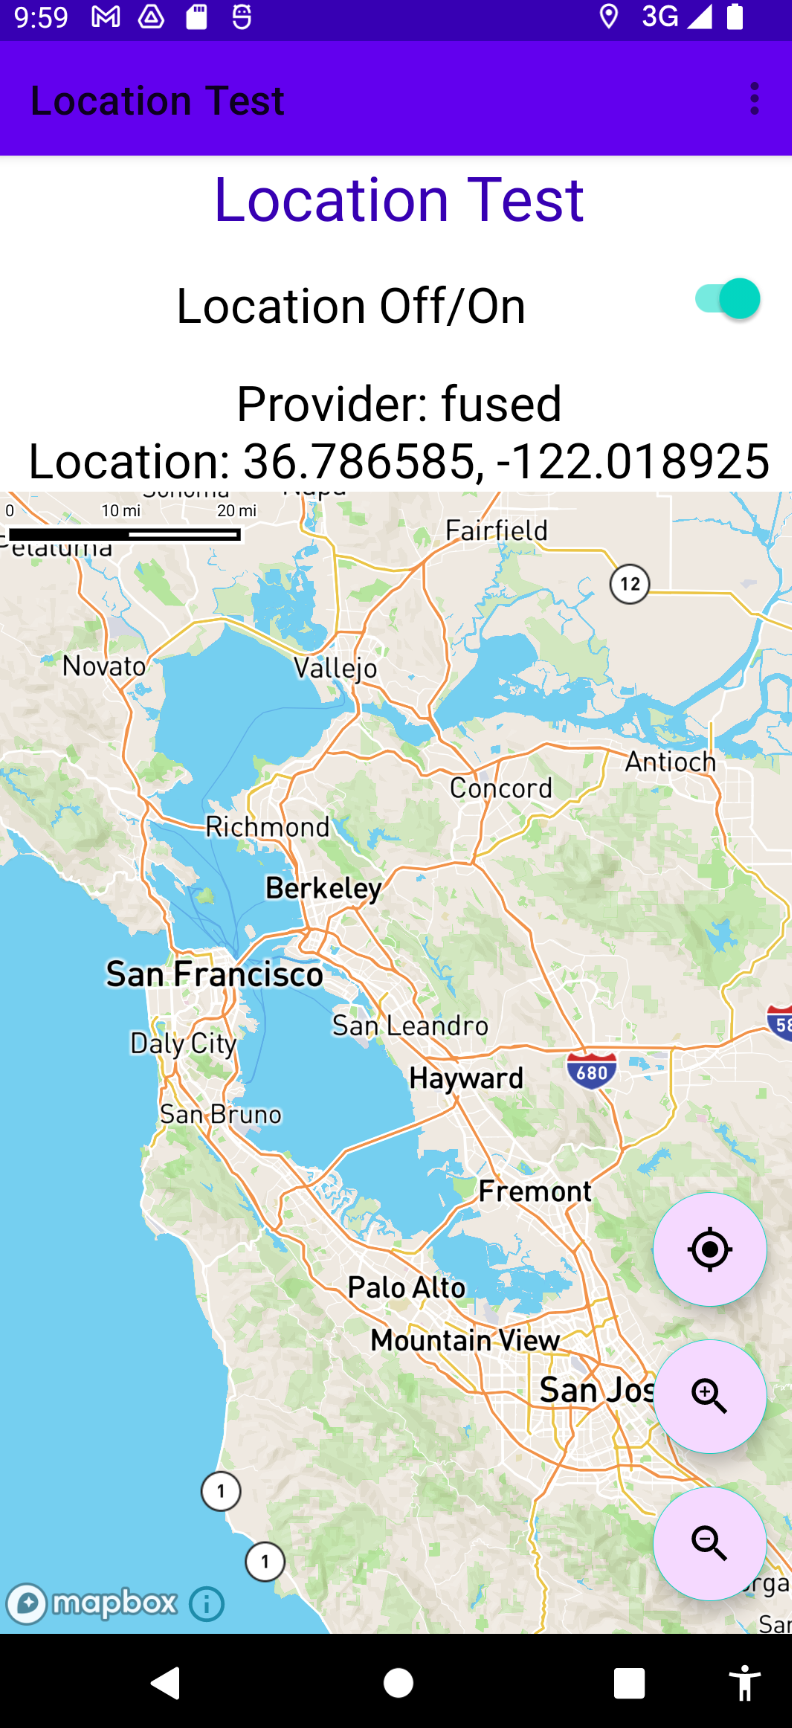
name: inverse layout: true class: center, middle, inverse --- # Implementing Location Lauren Bricker CSE 340 Winter 23 --- layout: false [//]: # (Outline Slide) # Today's Agenda - Administrivia - [Final project spec](/courses/cse340/23wi/assignments/final-project.html) - Learning goals - Review of Sensors - Implement location - Time to work on Sensing activity (and turn in screenshot) --- .left-column-half[ ## Types of Sensors - Review | | | | |--|--|--| | Clicks | Key presses | Touch | | Microphone | Camera | IOT devices | |Accelerometer | Rotation | Screen| |Applications | Location | Telephony| |Battery | Magnetometer | Temperature| |Bluetooth | Network Usage | Traffic| |Calls | Orientation | WiFi| |Messaging | Pressure | Processor| |Gravity | Proximity | Humidity | |Gyroscope | Light | Multi-touch | | ... | ... | ....| ] .right-column-half[ <br><br>  ] --- # Sensing: Categories of Sensors - Review * Motion Sensors * Measure acceleration forces and rotational forces along three axes * Includes accelerometers, gravity sensors, gyroscopes, and rotational vector sensor * Accelerometers and gyroscope are generally HW based, Gravity, linear acceleration, rotation vector, significant motion, step counter, and step detector may be HW or SW based * Environmental Sensors * Measures relative ambient humidity, illuminance, ambient pressure, and ambient temperature * All four sensors are HW based * Position Sensors * Determine the physical position of the device. * Includes orientation, magnetometers, and proximity sensors * Geomagnetic field sensor and proximity sensor are HW based --- # Do this now: Clone the [Sensing and Location Activity](https://gitlab.cs.washington.edu/cse340/exercises/cse340-sensing-and-location) repo if you have not already. --- exclude: true # Do this now If you've already accepted the [sensing exercise](https://gitlab.cs.washington.edu/cse340/exercises/cse340-sensing-and-location), please do the following: 1. go into the directory where your source code exists 2. `git stash push` any files you have changed 3. `git pull` to get the latest source 4. `git stash pop` to put your files over the newly grabbed files. You will also likely have to Invalidate Caches and Restart... as well as sync with the new gradle information There have been changes in the `LocationActivity`, some of the resource files, and gradle to prep for today's in class work. --- # Location - Locations are generally reported as Latitude and Longitude coordinates. - Generally reported using “Global Position System” (GPS) - Can also use cell tower or WiFi localization. - Three ways to do this - [LocationManager](https://stuff.mit.edu/afs/sipb/project/android/docs/training/basics/location/locationmanager.html) - [Fused Location Provider API](https://developers.google.com/location-context/fused-location-provider) - Need to set up [Google Play Services](https://developer.android.com/google/play-services/setup) on the device (including emulators) - Less power consumption - [Google Awareness API](https://developers.google.com/awareness) - Requires Google credits ($$$) --- # Location: details - Specify app permissions - Do we need to get the locations in the foreground or background? - Do we want a precise or approximate location? - How do we want to get the data - At a particular time (once) - At regular intervals? - When a certain event occurs, like someone goes out of a boundary. ??? --- # Reminder: Snapshots vs Fences Listeners are used to receive sensor or location updates at different intervals - This is like taking a snapshot of the sensor or location at a period of time. Fences (or Geofences) are a way to create an area of interest around a specific location. Listener is called any time a condition is true. --- # Google Awareness API in Android - A way to have your app react to the current situation - Seven signals (time, location, places, activity (like walking), beacons, headphones, and weather) - Allows for: - Ease of implementation - Better context data (raw signals are processed for quality) - Optimal system health (less impact on battery life) - Includes two APIs - [Fence API](https://developers.google.com/awareness/android-api/fence-api-overview) - [Snapshot API](https://developers.google.com/awareness/android-api/snapshot-api-overview) -- count: false This is FYI only - you are not expected to implement the Google Awareness API. --- # Snapshot with Google Awareness API But if you do... -- count: false ...Setting up the callback (just like callbacks for other events) ``` java Awareness.getSnapshotClient(this).getDetectedActivity() .addOnSuccessListener(new OnSuccessListener<DetectedActivityResponse>() { @Override public void onSuccess(DetectedActivityResponse dar) { ActivityRecognitionResult arr = dar.getActivityRecognitionResult(); } }) ``` --- # Fences with Google Awareness API Notify you *every time* a condition is true ```java // Create the primitive fences. AwarenessFence walkingFence = DetectedActivityFence.during(DetectedActivityFence.WALKING); ``` Use the `FenceClient` to register a a fence. Requires a `FenceUpdateRequest`, then use `FenceClient.updateFences()` Need to call `addFence()` for each fence to add. --- ## Location: Getting data with LocationManager This part you do need to know.... --- ## Location: Getting data with LocationManager The `LocationManager` is the "simplest" way to get the location. Start by declaring permissions in `AndroidManifest.xml` ```xml <uses-permission android:name="android.permission.ACCESS_FINE_LOCATION" /> <uses-permission android:name="android.permission.ACCESS_COARSE_LOCATION" /> ``` --- ## Location: Getting data with LocationManager `LocationManager` - Main class to access location services - Reference can be obtained by calling ` getSystemService()` in in the `onCreate()` in your `Activity` - Pick a location provider (like `GPS_PROVIDER`) or have the system pick based on criteria such as cost or accuracy. - Check if the provider is available `LocationListener#onLocationChanged` - to get notifications at regular intervals `LocationManager#getLastKnownLocation()` - will get you a snapshot of the last known location `Location` - an actual location --- # LocationManager example ``` Java LocationManager locationManager = (LocationManager) getSystemService(Context.LOCATION_SERVICE); Criteria criteria = new Criteria(); criteria.setAccuracy(Criteria.ACCURACY_COARSE); criteria.setCostAllowed(false); String provider = locationManager.getBestProvider(criteria, false); Location location = null; try { location = locationManager.getLastKnownLocation(provider); MyLocationListener mylistener = new MyLocationListener(); if (location != null) { mylistener.onLocationChanged(location); } else { ... } // location updates: at least 1 meter and 500 milli seconds change locationManager.requestLocationUpdates(provider, 500, 1, mylistener); } catch (SecurityException e) { ... } ``` --- ## Location: Getting data with Fused Location Provider - [Fused location provider](https://developers.google.com/android/reference/com/google/android/gms/location/FusedLocationProviderClient.html) is another mechanism to get locations - ✅ Faster - ✅ Provides more accurate locations - ❌ Requires Google Play Services installed on your device. - Specify app permissions - Do we need to get the locations in the foreground or background? - Do we want a precise or approximate location? - Create the location services client (a `FusedLocationProviderClient`) and set up a listener to get the location. --- ## Location: Getting data with LocationManager `FusedLocationProviderClient` - Location services client - Reference can be obtained by calling `LocationServices.getFusedLocationProviderClient()` in in the `onCreate()` in your `Activity` `FusedLocationProviderClient#requestLocationUpdates` - to get notifications at regular intervals `FusedLocationProviderClient#getLastKnownLocation()` - will get you a snapshot of the last known location - Need to have an `OnSuccessListener` callback set up. `Location` - an actual location --- ## Location: Getting data with FusedLocationProviderClient First get the `FusedLocationProviderClient` ```java // Initialize Location Services Client for continuous location checking FusedLocationProviderClient mFusedLocationClient = LocationServices.getFusedLocationProviderClient(this); mLocationRequest = LocationRequest.create(); mLocationRequest.setPriority(LocationRequest.PRIORITY_HIGH_ACCURACY); mLocationRequest.setInterval(DEFAULT_UPDATE_INTERVAL * 1000); mLocationRequest.setInterval(FAST_UPDATE_INTERVAL * 1000); ``` This will request the location permissions, need to gracefully handle if the user says no --- ## Location: Requestion updates from FusedLocationProviderClient First create a callback to handle the updates: ```java private final LocationCallback mLocationCallback = new LocationCallback() { @Override public void onLocationResult(LocationResult locationResult) { List<Location> locationList = locationResult.getLocations(); if (locationList.size() > 0) { // do something with the locations... } } }; ``` --- ## Location: Requestion updates from FusedLocationProviderClient If the user approves location permissions, connect the callback. ```java mFusedLocationClient.requestLocationUpdates(mLocationRequest, mLocationCallback, Looper.myLooper()); ``` --- ## Location: Stop tracking Location Generally good principle to stop tracking if the app is paused (responding to `onPause`) or the user revokes permissions ```java if (mFusedLocationClient != null) { mFusedLocationClient.removeLocationUpdates(mLocationCallback); ``` --- # Classroom activity .left-column40[  ] .right-column60[ Add some code in `LocationActivity#displayLocation(Location)` that will get additional information from the Location object and display it on the screen Alternatively add a Map! ] --- # Adding a map using Mapbox [Mapbox](https://www.mapbox.com/) is free to use if your app is under 25,000 monthly active users (no credit card needed to use the service) To use it: * Sign up for an account & verify your email * Create a token for your app * Follow the instructions for [how to install](https://docs.mapbox.com/android/maps/guides/install/) * The `README.md` in the [Sensing and Location](https://gitlab.cs.washington.edu/cse340/exercises/cse340-sensing-and-location) repository has information on how to get started. --- # Using a MapView interactor Once you've added your MapView to the screen (either in an `.xml` file or programatically), you can interact with it using their [mapbox-map API](https://docs.mapbox.com/android/maps/api/10.5.0/mapbox-maps-android/) API. Example 1 - setting the camera to a zoom level: ```java // Build a camera options object CameraOptions co = new CameraOptions.Builder().zoom(mZoomLevel).build(); // Set the camera to use the CameraOptions object mMapView.getMapboxMap().setCamera(co); ``` --- # Using a MapView interactor Once you've added your MapView to the screen (either in an `.xml` file or programatically), you can interact with it using their [mapbox-map API](https://docs.mapbox.com/android/maps/api/10.5.0/mapbox-maps-android/) API. Example 2 - setting the camera to a specific position: ```java Point p = Point.fromLngLat(mCurrentLocation.getLongitude(), mCurrentLocation.getLatitude()); // Build a camera options object to be at a particular Point CameraOptions co = new CameraOptions.Builder().center(p).build(); // Set the camera to use the CameraOptions object mMapView.getMapboxMap().setCamera(co); ``` --- # End of Deck