as5: Undo
Last revised: 3 Feb, 2022- 16 Feb, 2022
- Code and Video
Due 24-Feb, 10:00pm
Lock 26-Feb, 10:00pm
- Reflection
Due 27-Feb, 10:00pm
Lock 28-Feb, 10:00pm
Android Goals:
- Be able to understand and modify an existing user interface
- Modify floating action buttons
- Integrate a custom ColorPicker view
- Implement core data structure for Undo
HCI Goals:
- Modify and existing app in a consistent fashion
- Make your modifications accessible
- Make your modifications usable
- Turn-in links
- Overview of assignment
- Explanation of Codebase
- Codebase Structure
- Parts 1-5: Programming requirements
- Part 6: Video
- Part 7: Reflection
- Turn-in
Turn-in links
- Code: Upload and mark the code in this Ed Lesson
- Video: Upload your video to Canvas
- Reflection: Write your reflection and turn it into Gradescope
Overview of assignment
- Handle undo/redo operations (required)
- Add a new thickness (0) to your app (required)
- Replace the color menu with a ColorPickerView (required)
- Improve your app by adding an additional feature (not just another thickness, required)
- Make sure the button you add is accessible (required)
- Make sure your change is accessible (required)
- Identify at least one usability problem and address it (optional)
- Modify or create your own ColorPickerView (optional)
Demo of our solution (with no extra features):
Explanation of Codebase
This is one of the more complex programs we are giving you in terms of code. Moreover the starter code is already has a couple of fully functional features that you will be modifying as part of this assignment.
The initial interactor hierarchy at instantiation is shown below (shown at the side is a legend for the visibility status of different interactors). Hidden means on screen and drawn but hidden behind something else.
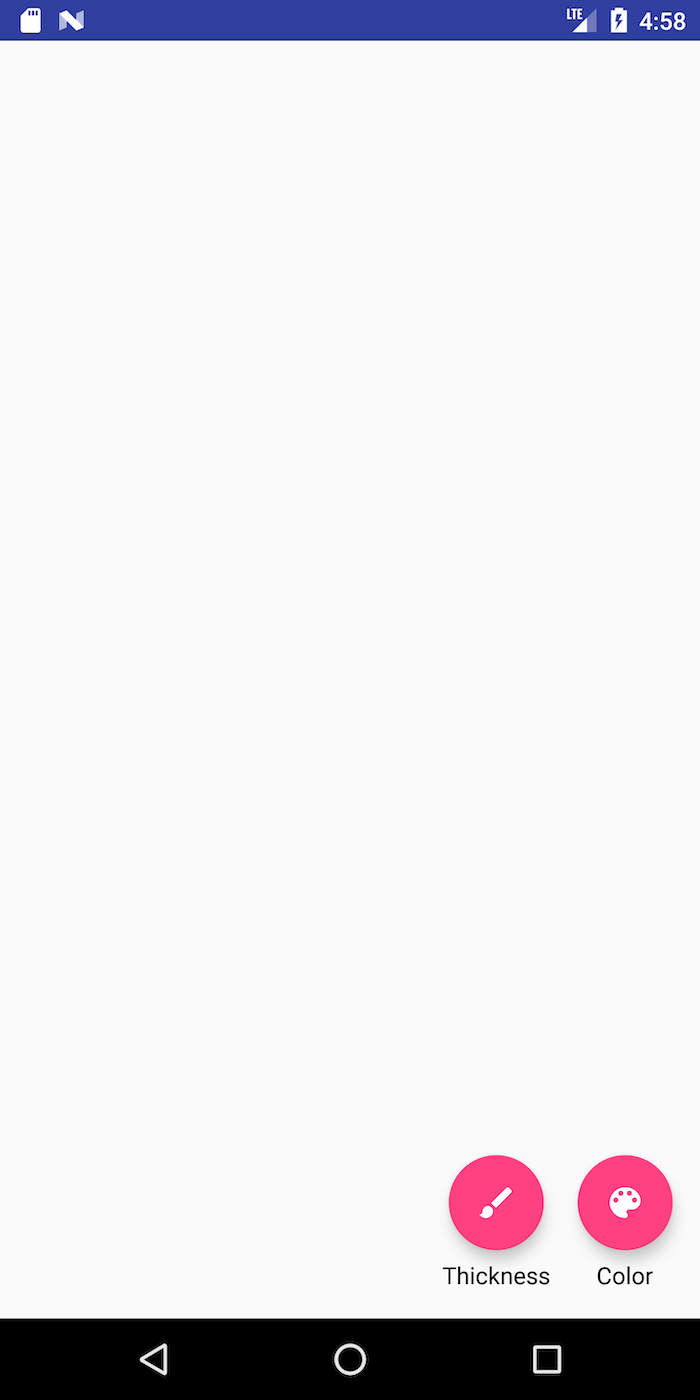
The Floating Action Button
(FAB) subtrees are the menus at the top of the screen (for undo and redo) and bottom (for
color and thickness), made up of one or more floating
action buttons. The DrawingView is the place where drawing takes
place. Each new stroke is saved as a separate, new StrokeView added
to the DrawingView.
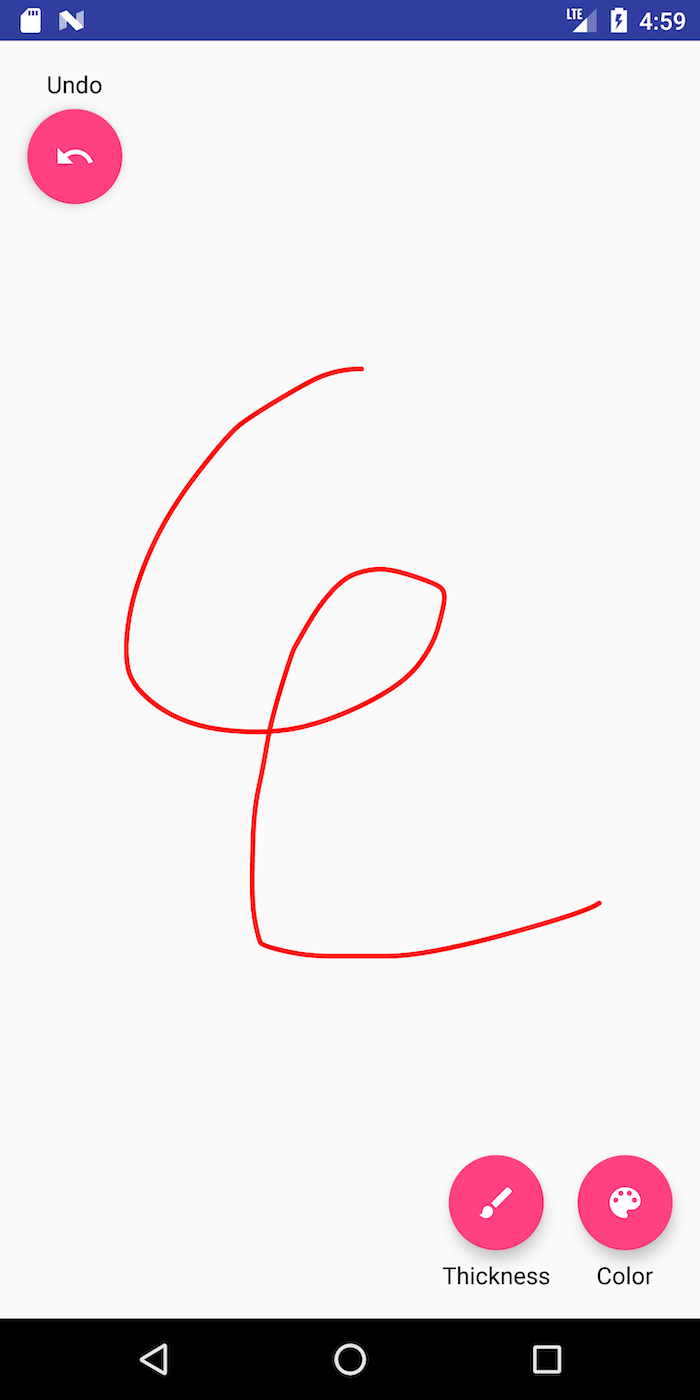
When the user draws on screen (by clicking and dragging inside the
DrawingView, this adds a new StrokeView to the interface. Notice
that the Undo button is now visible instead of invisible because there
is an action to undo.
The sequence in the interface:
You can play around with the interface to change color and
thickness. Each new stroke you add adds another StrokeView to the interface.
Codebase Structure
This is a complete codebase for a drawing program. It is designed to be as modular as possible and includes support for Command Objects which encapsulate changes to the application model.
Actions
Actions are Command Objects, which encapsulate changes to the
application model. An AbstractAction has a single method, doAction(view) which,
when called, will apply the action to the view. Our provided implementation of
AbstractAction#doAction is incomplete, it is overridden it in the concrete
subclasses, such as ChangeColorAction, ChangeThicknessAction, and the subclass
you will create to support your new feature (see Part 5).
AbstractReversibleAction extends AbstractAction to add undoAction(view) which,
when called, reverses the action.
As with events, AbstractActions are part of an inheritance
hierarchy. AbstractReversibleAction has three subclasses –
ChangeThicknessAction, ChangeColorAction and StrokeAction.
All of them modify properties of the DrawingView
class. ChangeThicknessAction modifies the stroke width, ChangeColorAction
will modify current color of the stroke, and the , and StrokeAction.represents
the creation of a child view object that encapsulates a painted stroke (a StrokeView
that is added to the DrawingView).
Application Code (/app)
We’ve mentioned a DrawingView (which is the main canvas for the
drawing application) and StrokeView (which encapsulates a specific
stroke for the drawing application).
-
AbstractDrawingActivityis an abstract class for an app that supports drawing without support for Undo. -
AbstractReversibleDrawingActivityextendsAbstractDrawingActivityand adds support for undo to it, including both the undo/redo buttons and the history. -
ReversibleDrawingActivityinherits fromAbstractReversibleDrawingActivity. It adds support for thickness and color to the undo/redo support inAbstractReversibleDrawingActivity. It also adds menus to show them. -
DrawingViewis the canvas on which drawing takes place. Drawings are made up ofStrokeViewclasses which are added to theDrawingView. This class also implements a PPS (shown below) which responds toonTouchEvent()by creatingStrokeViewobjects. -
StrokeViewis a single stroke. A stroke has aPathandPaintobject which define it.
onDrawStart() DRAWING --> [*]: Cancel/
onDrawCancel() DRAWING --> [*]: Up/
onDrawEnd() DRAWING --> DRAWING: Move/
onDrawMove()
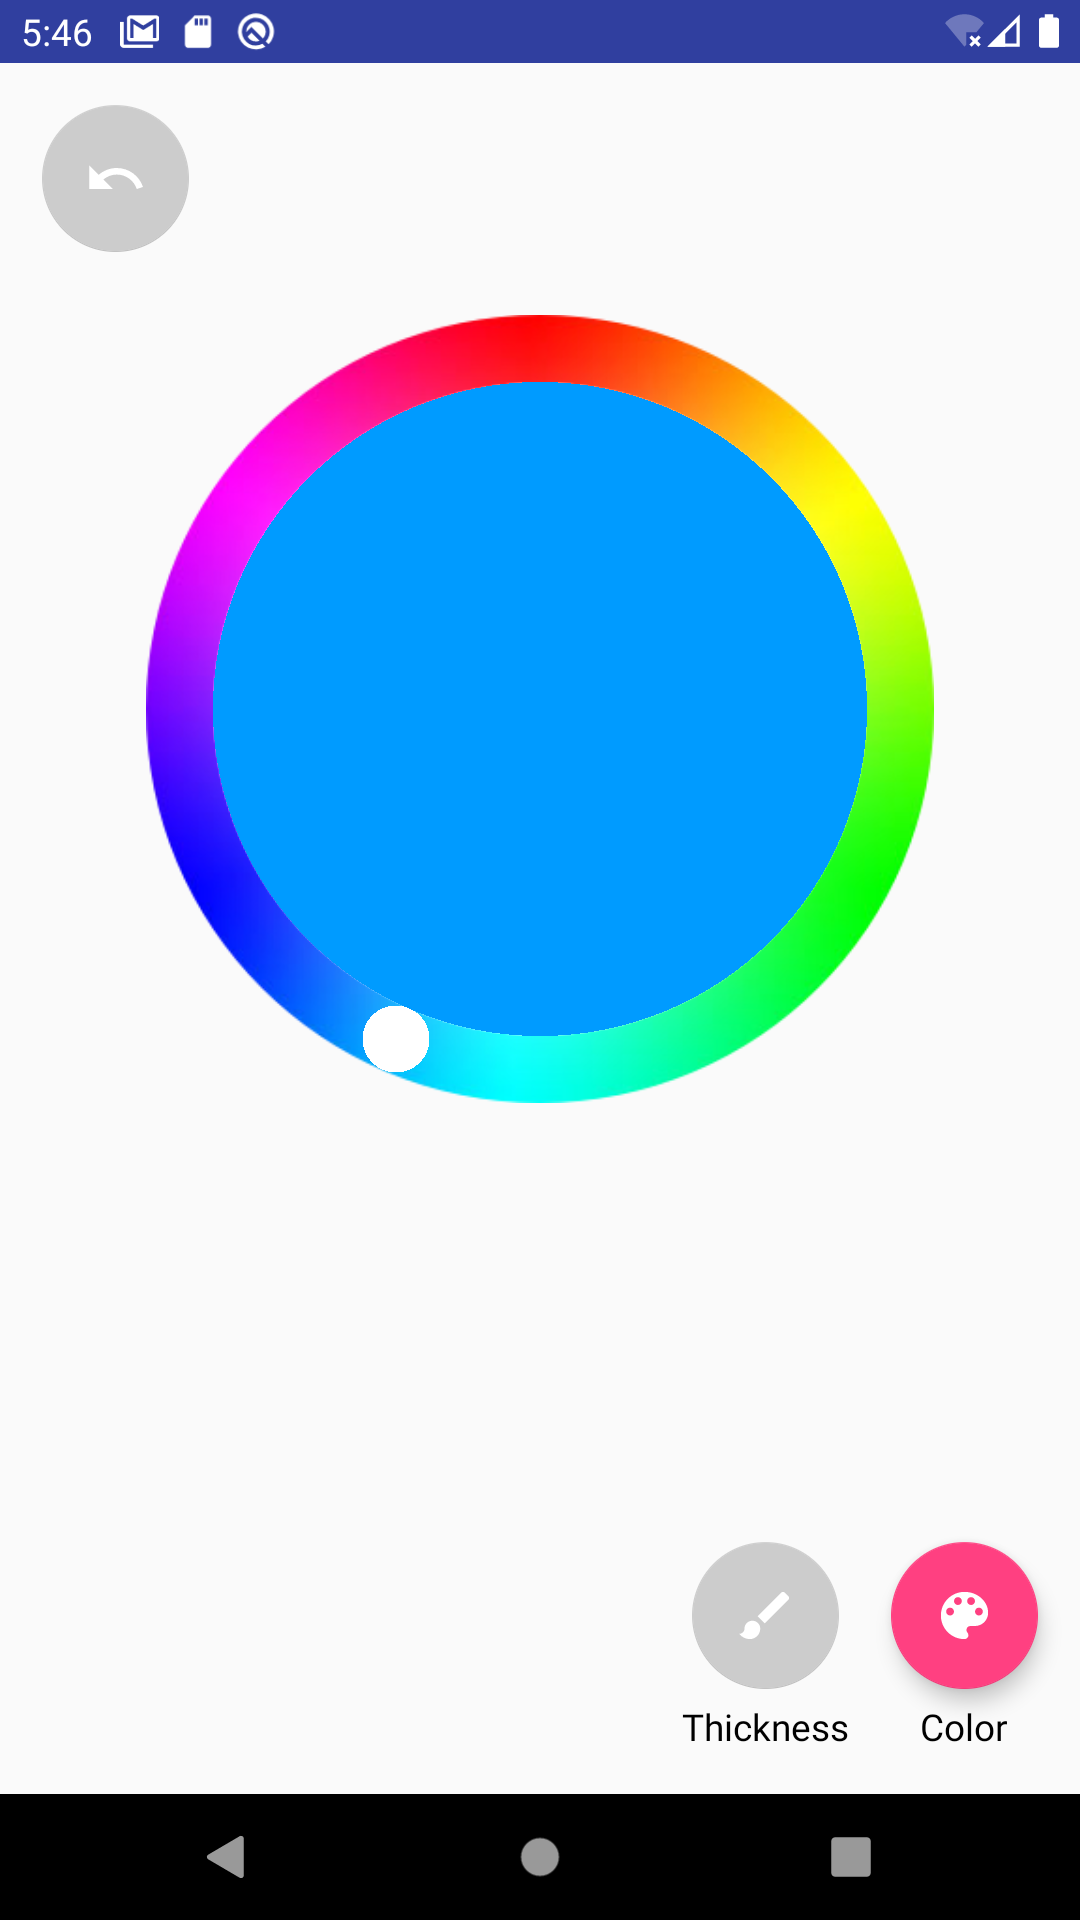
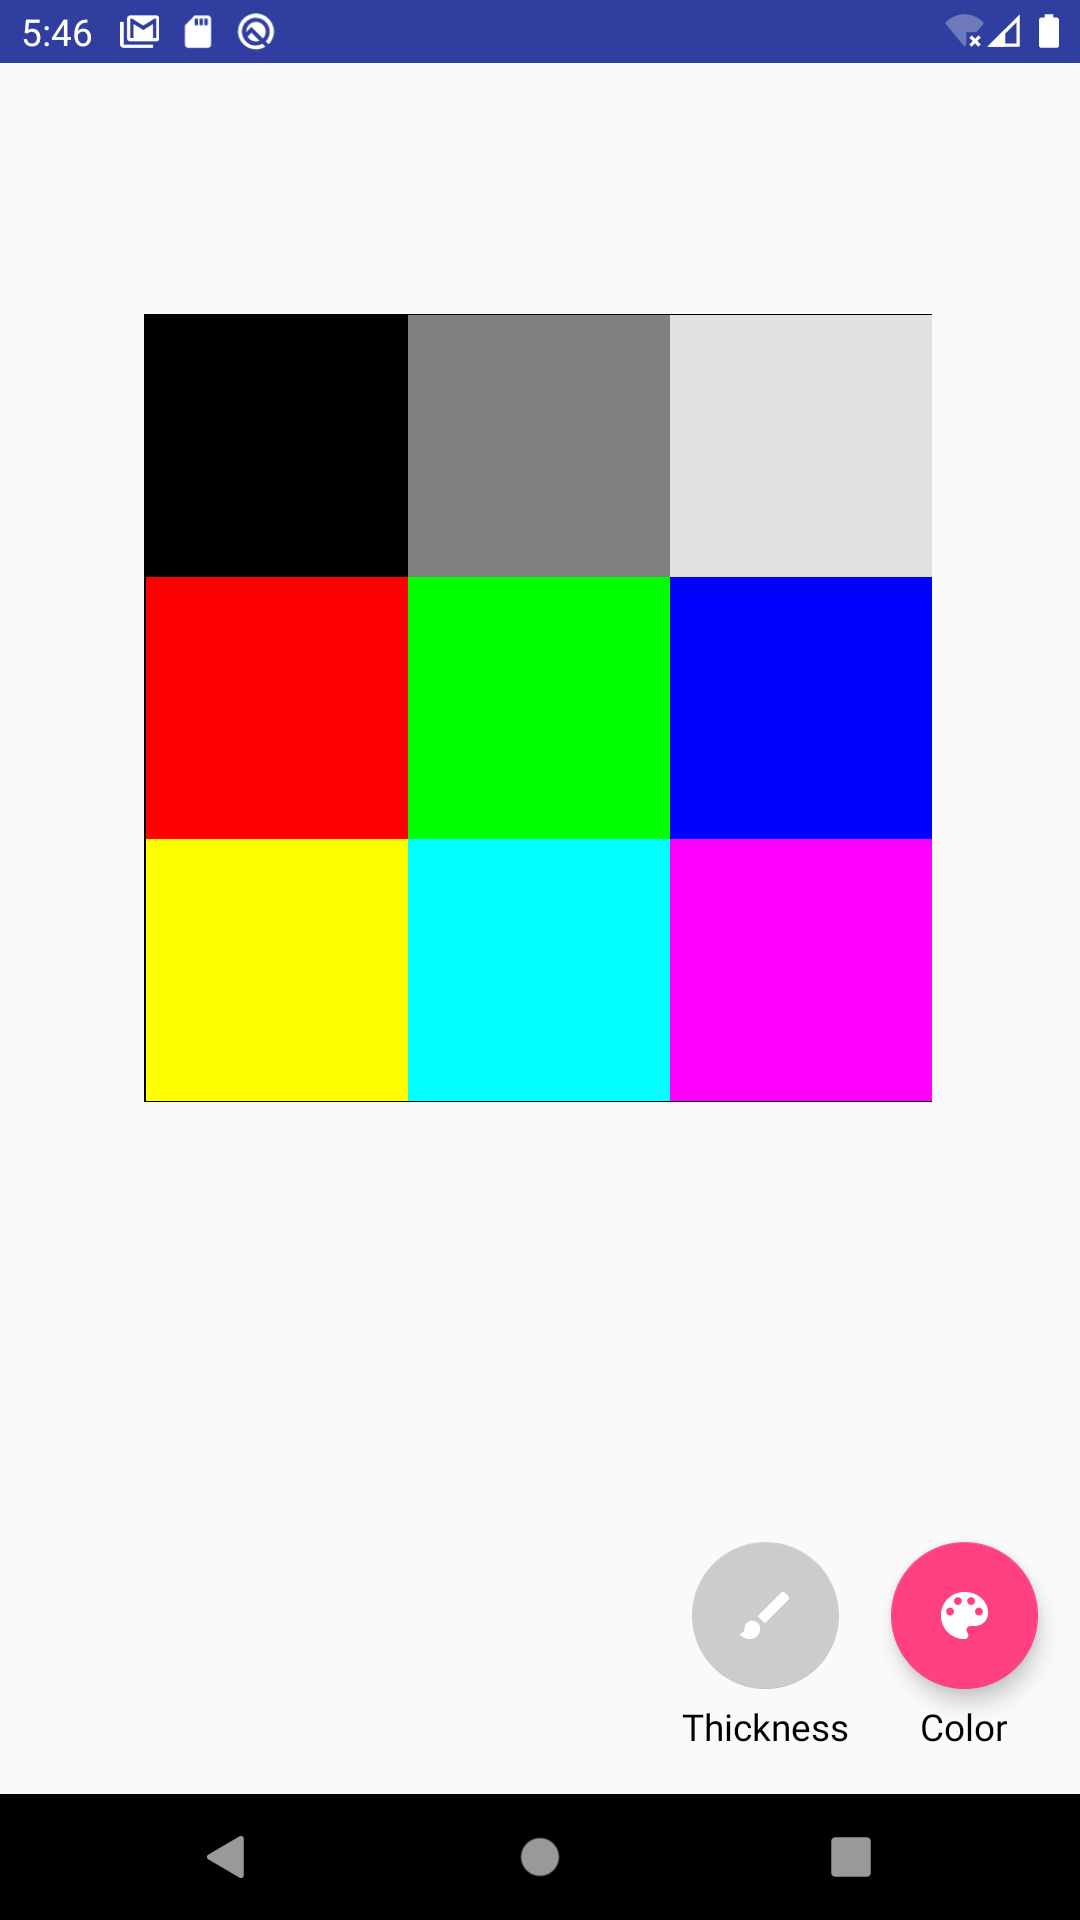
Color Picker (/app/colorpicker)
A color picker is a type of interactor that will allow a user to choose from a wide variety of colors. Two example color pickers are shown below: The one on the left is a circular color picker which allows a user to choose from color values along a wheel while it displays the currently selected color in the middle. The color picker on the right is a 3x3 square of pre-chosen common colors.
The code for these two color pickers, as well as three others, are included in the app\colorpicker
directory of your starter code. The implementations of these interactors inherit from
ColorPickerView.java which inherits AbstractColorPickerView.java.
You will want to read through all of these classes, including all of the comments in
AbstractColorPicker.java and AbstractMainActivity.java before using them to
ensure you understand the class hierarchy and what methods are being
used by the ColorPickerView you choose to use.
Parts 1-5: Programming requirements
There are five parts for the programming portion of this assignment:
- Part 1: Implement
ChangeThicknessAction - Part 2: Implement history
- Part 3: Add a thickness 0 FAB to the thickness menu
- Part 4: Integrate a
ColorPickerView - Part 5: Add a new feature to your app. Make sure it is accessible
You can also (optionally) improve the usability of the application.
Part 1: Implement ChangeThicknessAction
In order to familiarize yourself with Action objects and reversible logic, implement
ChangeThicknessAction. This will be very similar to ChangeColorAction, so first read and
understand that code before implementing the TODO items in ChangeThicknessAction.
Part 2: History
Actions are the objects that are used in the history. An
AbstractHistory simply allows an AbstractReversibleAction to be added and supports undo()
and redo(). We subclass this with a stack-based history class called StackHistory to support
undo() and redo(). You will implement the methods to support these features in this StackHistory class.
A StackHistory has a capacity (a max number of actions that it can
store), a undoStack (the history) and a redoStack (actions that
have been undone and can be re-applied). It also supports specific capabilities you must implement
(see comments in the code for specifically what to do):
-
addAction()adds an action to the history stack -
undo()undo the top action in the history stack -
redo()redo the top action in the redo stack. -
clear()reset everything
Related APIs
Undo/Redo behavior
Here is an example where the user performs a set of operations in the Undo app, and the state of the Undo Stack, Redo Stack and Interface after each operation. In this scenario we have denoted the user’s operations as:
(1) draw a stroke in the default color/thickness
(2) change the color
(3) change the thickness
(4) draw another stroke in the original thickness and color
with various undos and redos mixed in.
| Action | Undo Stack | Redo Stack | Interface state |
|---|---|---|---|
| drawstroke (1) | 1 | 1 | |
| change color (2) | 1,2 | 1,2 | |
| undo | 1 | 2 | 1 |
| redo | 1, 2 | 1, 2 | |
| change thickness (3) | 1, 2, 3 | 1, 2, 3 | |
| undo | 1, 2 | 3 | 1, 2 |
| undo | 1 | 3, 2 | 1 |
| drawstroke (4) | 1, 4 | CLEARED | 1, 4 |
| undo | 1 | 4 | 1 |
Part 3: Adding a thickness 0 FAB to the thickness menu
There are two main things you will need to do to add a “thickness 0” FAB button to the thickness menu.
First, find the place in thickness_menu.xml to modify. For example, this is
the XML in that file for the thickest FAB Action Button:
<android.support.design.widget.FloatingActionButton
        android:id="@+id/fab_thickness_30"
        android:layout_width="wrap_content"
        android:layout_height="wrap_content"
        android:layout_gravity="bottom|center"
        android:layout_marginBottom="@dimen/fab_label_margin"
        android:alpha="0"
        android:clickable="false"
        android:contentDescription="@string/thickness_desc"
        app:fabSize="mini"
        app:srcCompat="@drawable/ic_thickness_30" />
You must use the @string notation for your android:contentDescription, meaning you’ll
need to add a string definition to values/strings.xml.
Next, you will need to update onThicknessMenuSelected to respond when
your FAB is pressed. It must change the stroke width to 0.
Finally, you will need to make sure that ReversibleDrawingActivity is updated to account
for your new 0 thickness menu item. You will need to look for where the code or comments mention
thickness and change it to include this new item.
Part 4: Integrating a ColorPickerView
In addition to adding a thickness, we want to be able to draw strokes of any color instead of
being limited to 3. We have provided you with a choice of five different custom interactors
that allows users to choose a wide variety of colors. However these are not integrated
into the final project and it s your job to connect a ColorPickerView into this
application! To do this, you’ll need to:
- Add a
ColorPickerViewto yourdrawing_activity.xmllayout. The easiest way to do this is to first edit the code fordrawing_activity.xmland add the following:
<cse340.undo.app.colorpicker.SquareColorPickerView
        android:id="@+id/colorPicker" />
Once this is in, you’ll need to modify the properties for this view. You can do this in either the code or design view.
- Set a size for the View (note: you may add sizes in
dimens.xmlto allow for maximum flexibilty). - Ensure this view is neither visible nor focusable until the user clicks on the color FAB.
- You may want to use layout constraints or other properties to help position the view in its parent.
-
Change the behavior of the color FAB so that, when clicked, it opens up the color picking interface instead of opening the collapsible color menu. For reference on how to do this, take a look at
ReversibleDrawingActivity.java#onCreate(hint: make sure to take a look at what interfacesReversibleDrawingActivity.javaimplements). -
The Undo app now has to “listen” to any changes from the
ColorPickerView. There is aColorChangeListenerinterface defined inAbstractColorPickerView.ColorChangeListenerhas one method:onColorSelected(@ColorInt int color). You will need to register theReversibleDrawingActivity.javaas a listener for changes from theColorPickerViewin order for your code to respond to those changes. -
Ensure that the location of your
ColorPickerView, when visible, is not impeded by any of the FAB buttons on the screen as those buttons can impact your user’s interaction with the colorpicker. You may choose to solve this problem however you want. If you don’t choose to use layout constrints, you could set the Y location of themColorPickerViewinReversibleDrawingActivityto theR.dimen.color_picker_y_offsetvalue read in fromdimens.xml. (Feel free to change this value indimens.xmlas needed). Remember, to get the value you must usegetResources().getDimension(R.dimen.color_picker_y_offset). -
When users have the color picker interactor open, they must not be able to access any other FABs (undo, redo, thickness change) so be sure to disable them when you show the color picker and visually indicate to the user that they are disabled. This behavior should be very similar to the what happens when you try to change the thickness using the collapsible menu. If a color change is undone or redone, the color picker must reflect the correct color. Once you set up all the listeners to respond correctly, your color picker interactor must allow users to pick any stroke color they want!
-
Choose which ColorPicker you want to use with your application! You can feel free to use any of the five pickers we gave you, you’re welcome to modify one of these or create your own! To switch which picker your app uses, simply change the
SquareColorPickerViewclass name to another one in thedrawing_activity.xml.
Related APIs: View#using-views
Part 5: Improve the application
Create an interesting way the user can interact with the application that can be undone and redone.
This means that whatever interaction you add must have a custom undo and redo function (it might help to take a look at AbstractReversibleAction#doAction and AbstractReversibleAction#undoAction(DrawingView)).
Whatever you choose to implement, you will be describing how the user interacts with your addition in your reflection and justifying the design of this new feature using Application Design Principles we discussed in class.
In addition, make sure that the action you add is accessible.
Below is a video of an app with the a new Clear Screen and other features.
Other example videos on this playlist
Optional addition: Improving usability
Try to identify at least one usability problem and address it (optional). As with adding a feature, there are several options here. Here are some examples of things we think are usability issues. You may not agree, if you choose to do this, you should focus on something you think is a usability issue.
- Improve the over all accessibility of the application
- Modify the
ColorPickerViewyou choose to use (for instance adding more colors to theSquareColorPickerView) - Create your own subclass of
ColorPickerView - As a color is selected and after the color is selected, the color FAB should update its background to that color.
- When a thickness is picked, the thickness FAB should update its icon to indicate the thickness selected.
- If the user begins drawing with the color or thickness FAB open (sub-icons present) the FAB immediately collapses
- Some might find the menu items small and hard to select
- Currently there is no saving of state between invocations of the application. Could use bundle to do this.
Whatever problems you address, please briefly describe the problems and solutions in your reflection.
Part 6: Video
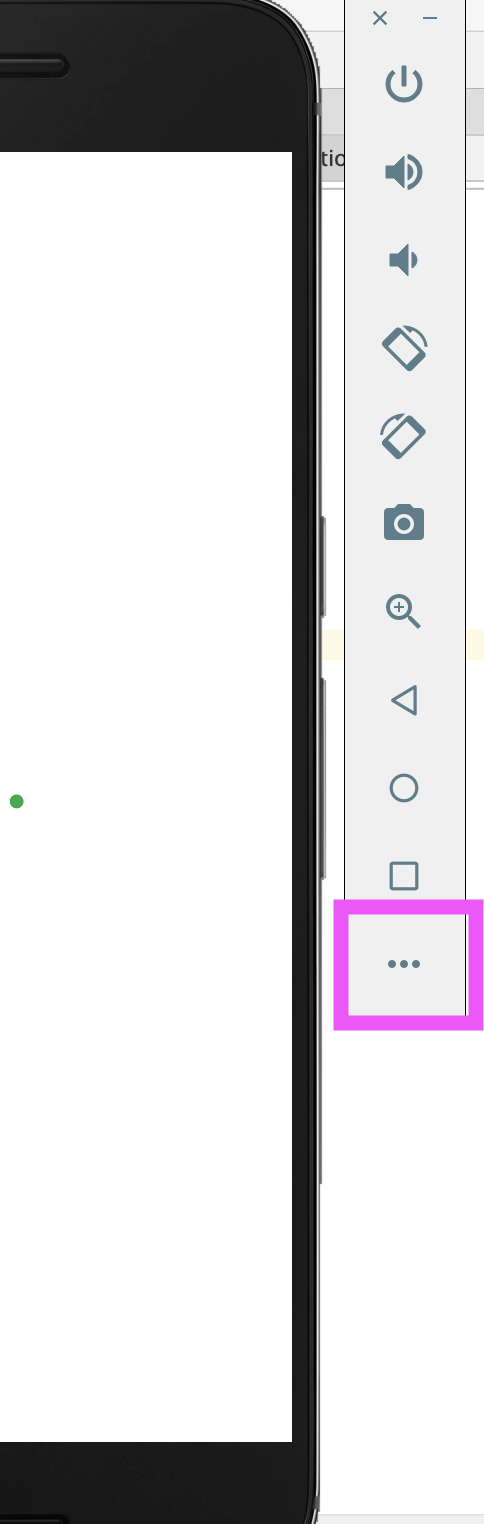
You will need to make a video of your final solution. To create a video, click on the … at the bottom of the panel to the right of your emulator, then select “screen record” and “start recording” (see images below).

If you are using an emulator and you see that your recording “blinks” (i.e. repeatedly shows Undo then a black screen), you may have to do the screen recording through Logcat or by using zoom and recording your screen.
In addition, you should follow these instructions to make sure that clicks are visible:
(Directions are also here)
Your video must demonstrate undoing and redoing actions for changing thickness, color, and your new feature. To do this you shoulkd have the sequence demonstrated.
- Step 1: draw something
- Step 2: undo
- Step 3: change the thickness
- Step 4: draw something
- Step 5: undo
- Step 6: undo
- Step 7: change color
- Step 8: try to redo
- Step 9: draw something
- Step 10: use new feature
- Step 11: draw something in the new feature (if you need to)
- Step 12: undo drawing (if done)
- Step 13: undo new feature
- Step 14: draw something
- Step 15: use new feature
- Step 16: undo
- Step 17: redo
- Step 18: draw something
Finish as you will (e.g. demonstrate optional usability improvement(s)).
Please DO NOT try to create a perfect version with no mistakes! You will not lose points for any usability issues - we just need to see that you can do and undo each required part of the app (unless your code isn’t working, which will not be affected by this video).
Part 7: Reflection
For this part, you will submit your reflection on this assignment to Gradescope. Create a MS Word, Google or other type of document and copy the following questions (in italics below) into that document. Add your responses below each question. You can have more than one answer per page, but if you can, please try to avoid page breaks in the middle of a question. Insert page breaks between questions as needed.
-
Describe the extra action you added to the Undo application.
- What was the goal of this action?
- Describe how a user interacts with it and include a screen shots illustrating its use.
- Justify the design of your action using the Application Design Principles we discussed in class.
- Describe how you made your new feature accessible.
- If you made any additional usability improvements, document what you did and why here.
-
Ask for some informal feedback about your new feature and respond to the feedback. Show your
app with your additional feature to at least 3-5 people (you may do this in person,
demonstrate your app over Zoom, or you may share your video with them.) Ask them to give you
some feedback about you feature. Questions you might ask them could include:
- Do they think they could learn (or learn and remember) how to use this feature easily?
- What did you like about this feature?
- What might you add to or change about this feature? What informal feedback were you given? Based on this feedback, list 1-2 things you would like to change about your app and this feature?
-
The Undo app as it is written is not completely accessible. Using accessibility tools such as TalkBack and the Accessibility Scanner, find and describe at least two accessibility issues that exist in the Undo App. For each of the problems you listed, detail a possible solution that will make the app more accessible.
-
How would you add context-aware computing in your Undo drawing app?
a. Pick one of the types of sensing-based apps (capture and access; adaptive services; novel interaction; behavioral imaging) and discuss how it could enhance the app.
b. Describe a case where your new context-aware feature could be problematic using the issues we discussed in the Sensing/ML lecture. - Acknowledgements: Cite anything (website or other resource) or anyone that assisted you in creating your solution to this assignment. Remember to include all online resources (other than information learned in lecture or section and android documentation) such as Stack Overflow, other blogs, students in this class, or TAs and instructors who helped you during OH
Turn-in
Submission Instructions
You will turn in the following files here. It will accept:
history/StackHistory.javaapp/ReversibleDrawingActivity.javaactions/ChangeThicknessAction.java- Any additional classes you create in
actionsand/orappfor your new action - Any additional classes you create in
app/colorpickerfor your color picker layout/*_menu.xmllayout/drawing_activity.xmldrawable/*values/{colors,dimens,strings}.xml
You will turn in your video to Canvas
You will turn in your reflection on Gradescope
Grading
This HW will be out of 50 points and will roughly (subject to small adjustments) be distributed as:
Implementation (30 pts)
- Part 1: Implement ChangeThicknessAction (2 pts)
- Part 2: StackHistory (7 pts)
- Part 3: Adding thickness to FAB thickness menu (3 pts)
- Part 4: Integrating ColorPickerView (9 pts). Includes correct interactive behavior, and correct interaction with the stack.
- Part 5: Additional action is properly integrated into Undo (7 pts)
- Code Organization and quality: (2 pt)
Part 6: Video (2pts)
- Video order is correct
- Improvement is evident, significant and can be done, undone, then done again.
Part 7: Reflection: 18 pts