as2: Layout
Last revised: 10:45 PM Wednesday, January 29, 2020- January 17th, 2020
- Part1-2 January 22nd, 2020, 10:00pm
- Part1-2 Lock January 24th, 2020, 10:00pm
- Part3-4 January 31th, 2020, 10:00pm
- Part4 Lock Feb 2nd 2020, 10:00pm
- Reflection Feb 2nd 2020, 10:00pm
Android Goals:
- Understand Android layout GUI and XML
- Familiarize with Android programmatic layout API
- Understand Android constraints implementation
- Handle portrait and landscape orientation correctly
- Handle fixed and variable size container views
- Learn about Inflators
HCI Goals:
- Make use of interactor hierarchy
- Use constraints to create responsive layouts
- Make use of complex built-in layouts
- Implement reusable layouts
- Understand how scrolling works
- Understand how sizes influence layout
- GitGrade links
- Assignment Description
- Introduction to Parts 1 and 2
- Part 3
- Part 4
- Reflection
- Development Strategies
- Turn-in
GitGrade links
Classroom Summary
Part 1-2: Accept the Assignment / Turn-in the Assignment
Part 3-4: Accept the Assignment / Turn-in the Assignment
Assignment Description
This is the assignment spec for Layout. Scroll down below part 4 for some development strategies and tips curated from last spring’s students!
In Spring 2019, students spent about 10 - 12 hours on average on this assignment. It has been modified somewhat since then, but make sure that you are getting started early, as this can quickly become one of the more time-consuming assignments of the quarter.
Introduction to Parts 1 and 2
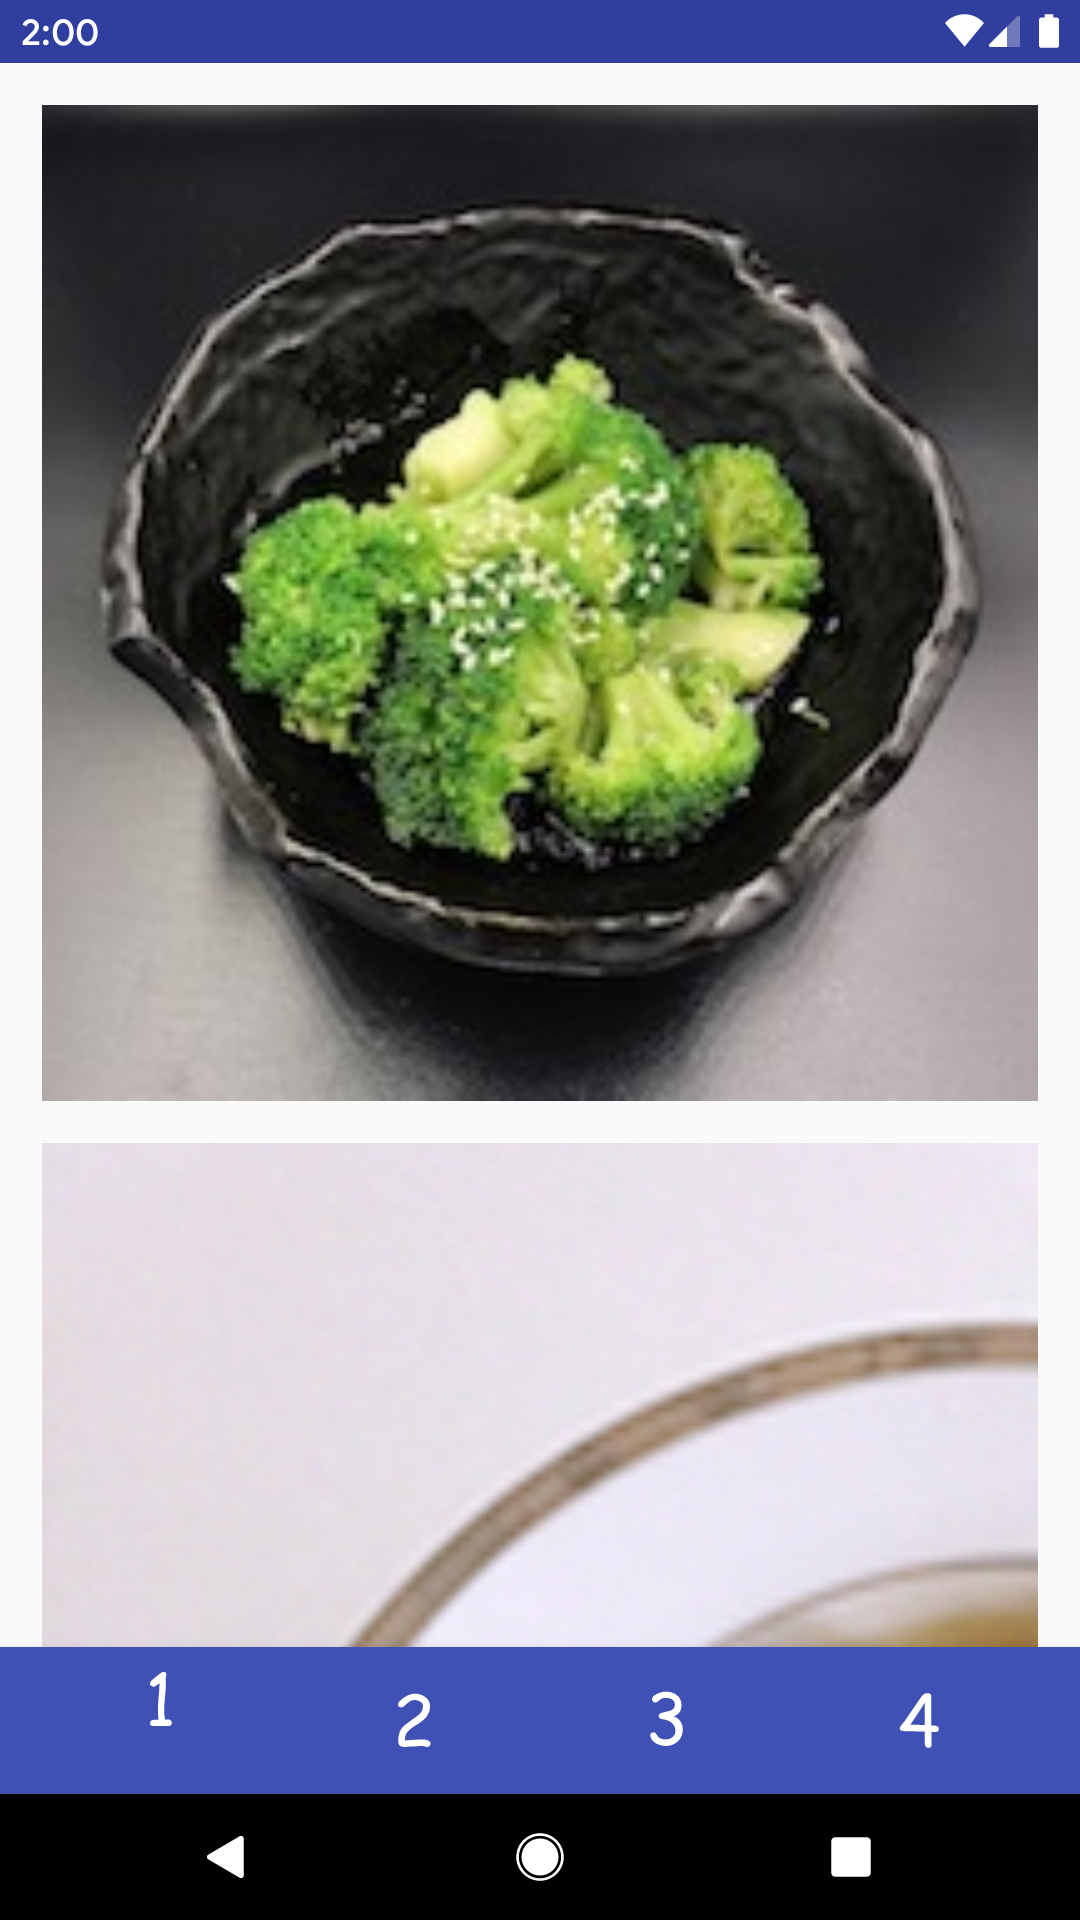
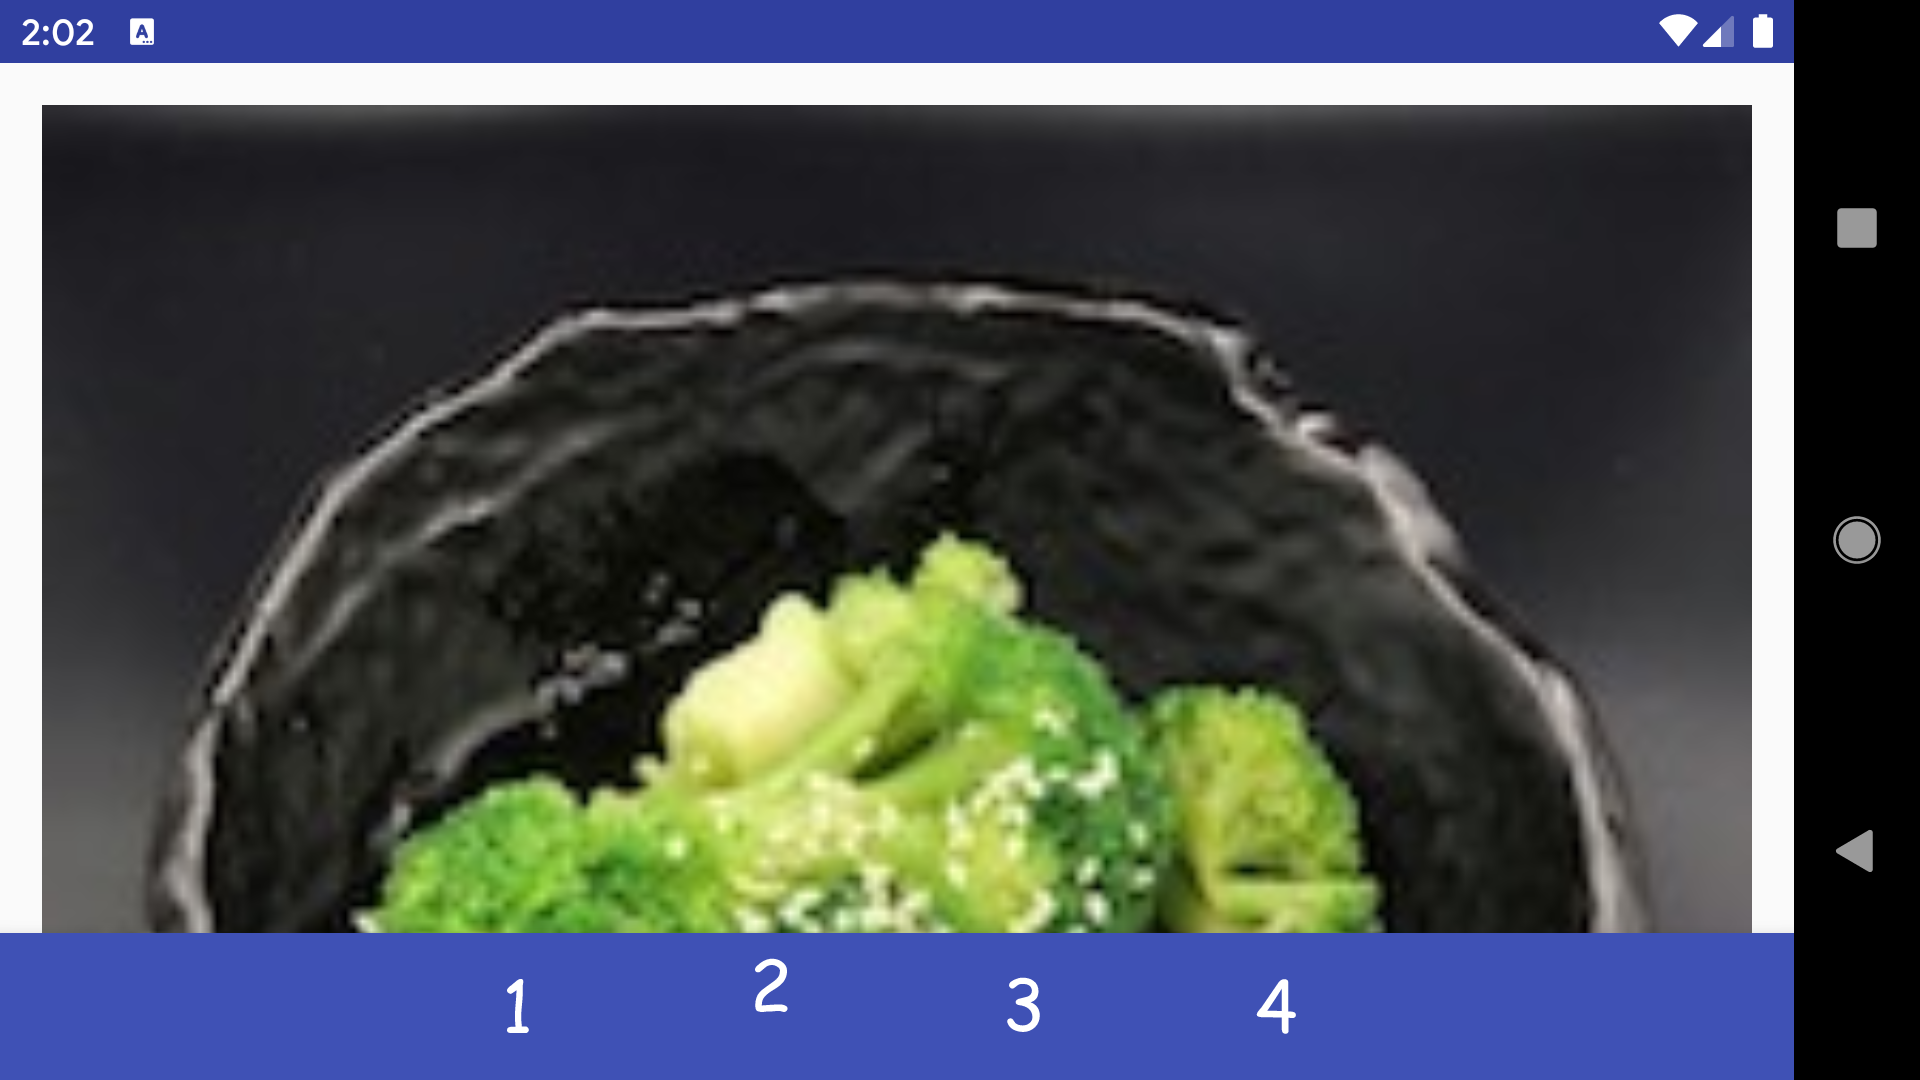
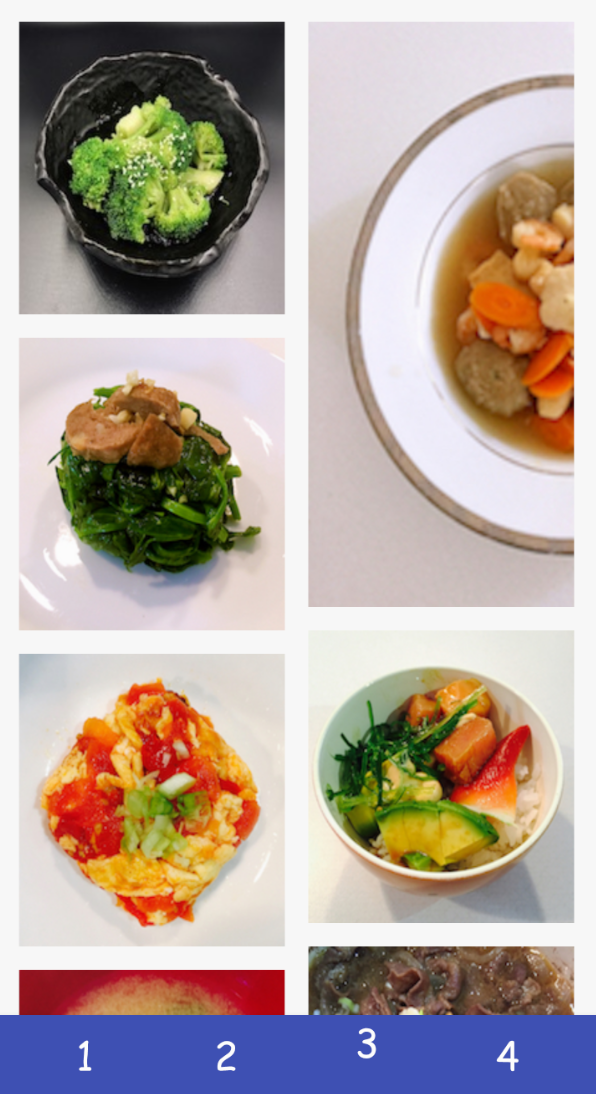
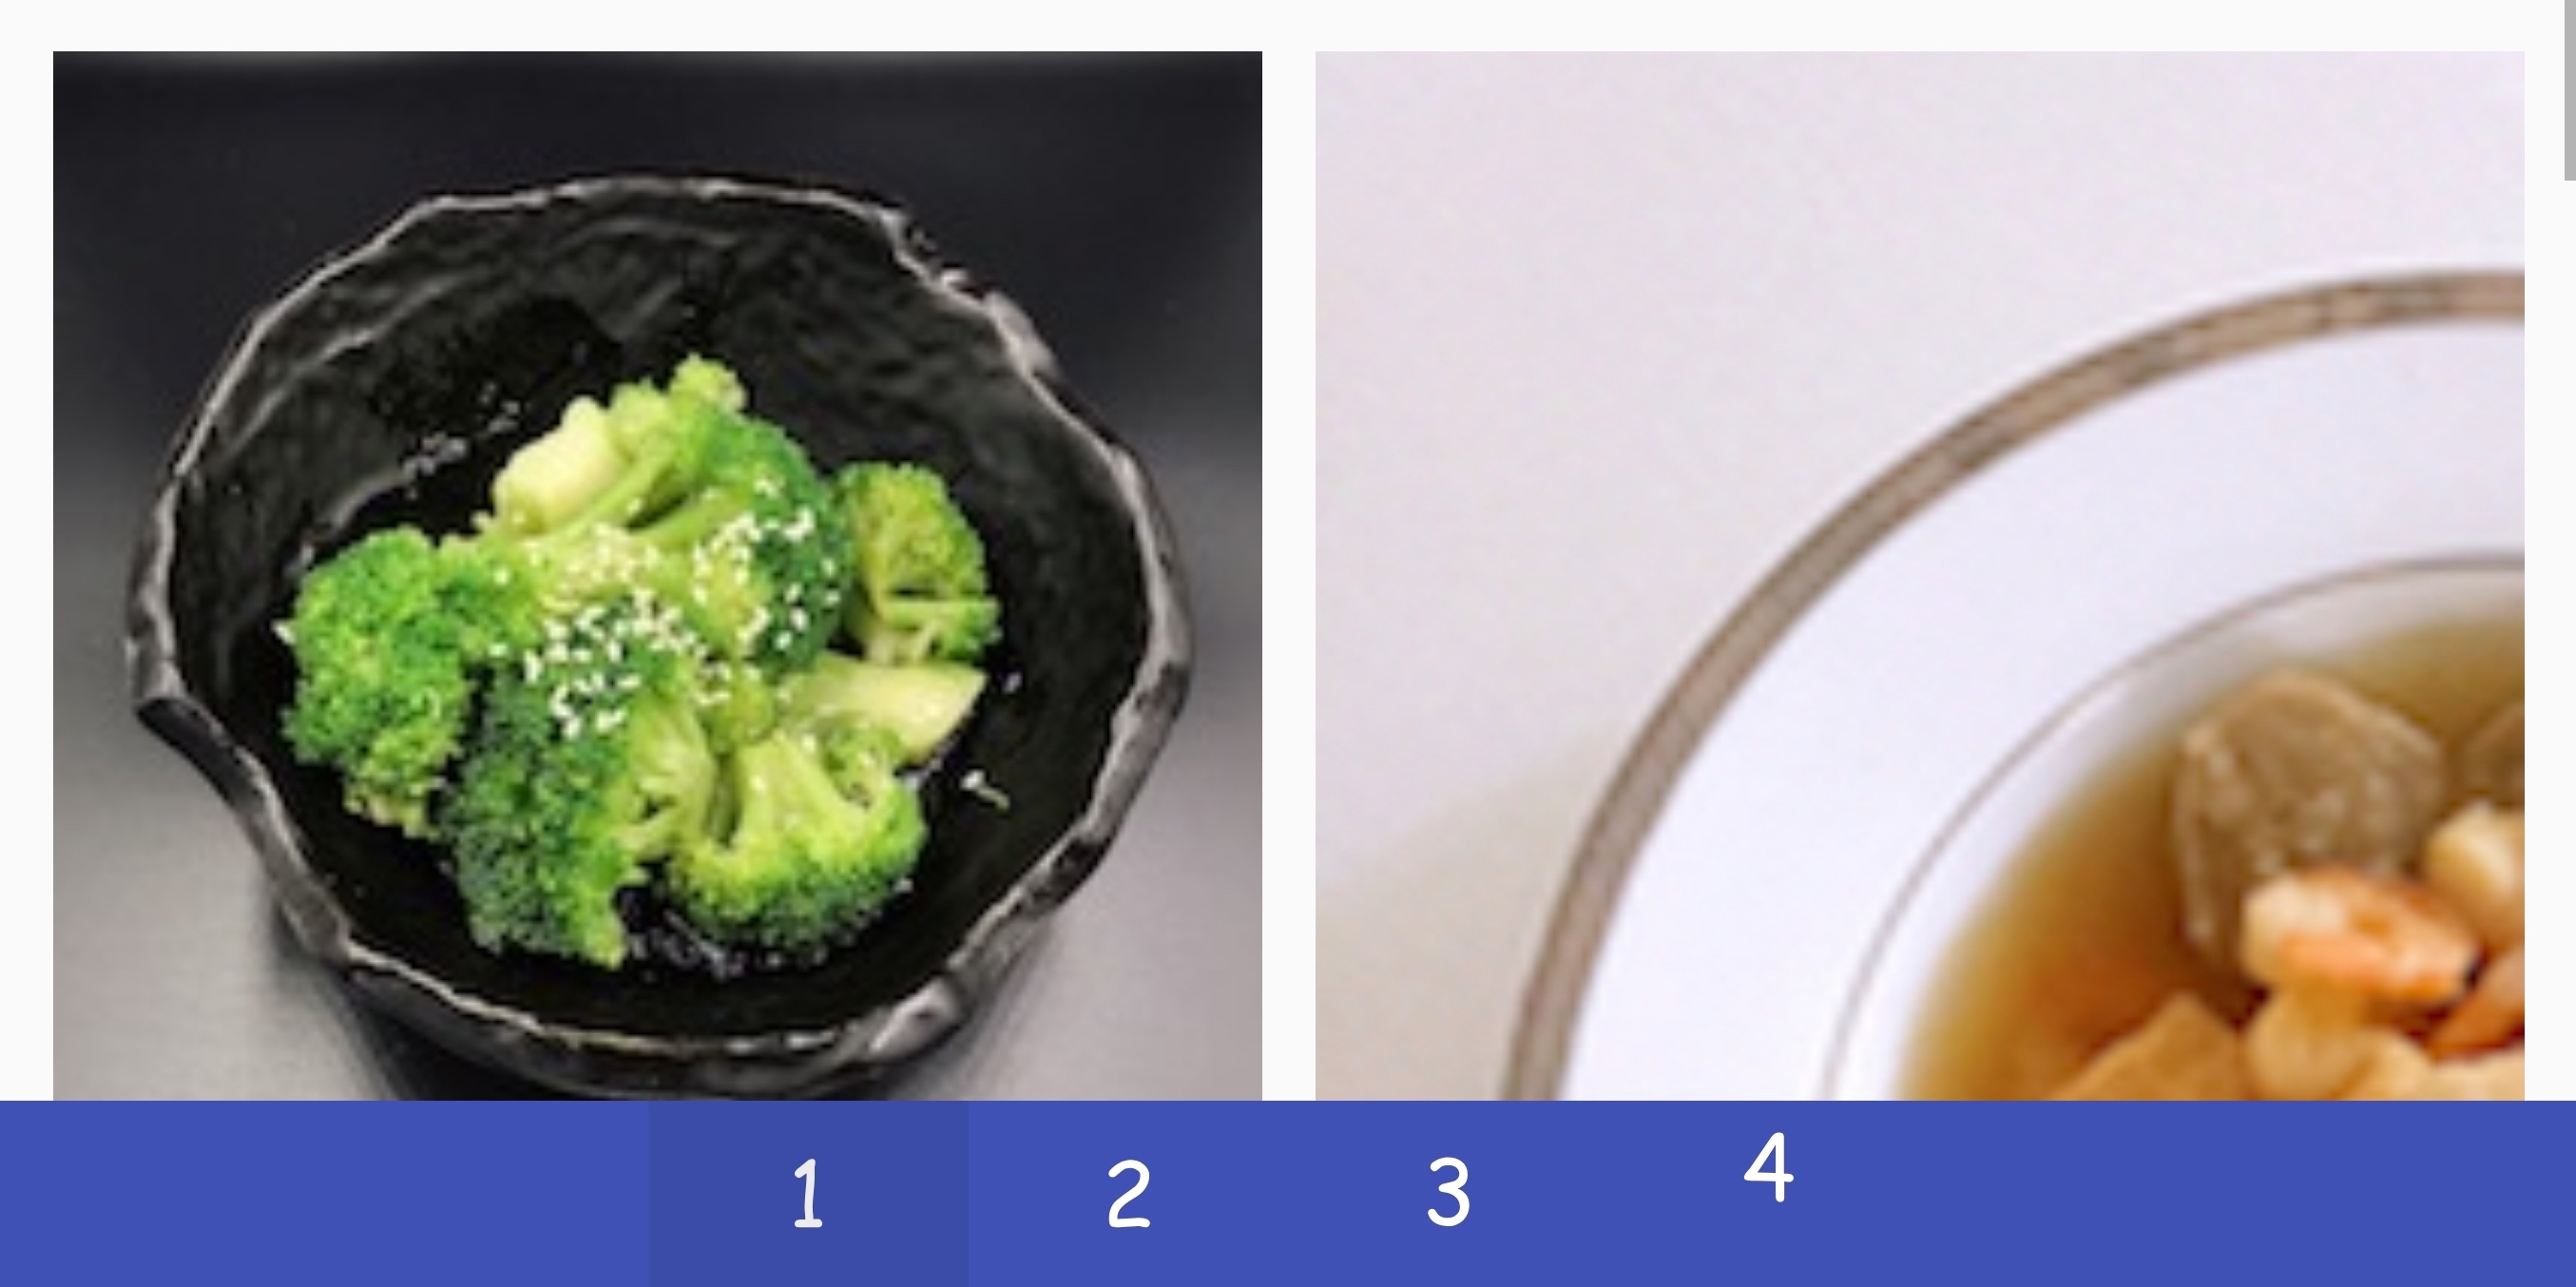
For parts 1 and 2, you will be building the same layout twice. It should show five images, be scrollable, and look equally nice horizontally and vertically. In addition, you should use constraints to achive this, using the ConstraintLayout we provide in part1.xml.
It should look like this:
For part 1, you will create the desired layout using Android Studio’s built-in layout editor to create the desired layout, using a combination of XML and the GUI.
For part 2, you will create the same layout programatically and using Java syntax to construct view objects and add them to our activity.
The important part of the interactor hierarchy for parts 1 and 2 is shown below:
We can represent this same interactor hierarchy visually as so. Note that you will only be adding things inside of ConstraintLayout.
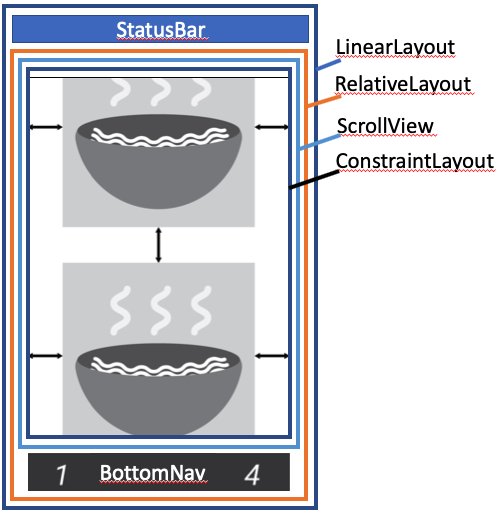
Note that you will only be configuring the ImageViews as they relate to ConstraintLayout (shown in blue). Also this is simplified from what you would see in LayoutInspector
And this video shows parts 1 and 2 in action:
You may find the following link helpful when working with constraint layouts: “Building a Responsive UI with Constraint Layout” – Note the “Set Size as a ratio” section here
Further details on Part 1
part1.xml can be found in the res/layout directory in Android Studio once the layout project has been opened.
Tasks:
- Use the tools provided by Android Studio to build a layout that vertically stacks images.
When it comes to layout, working directly with XML can be a pain, especially when there’s several attributes to keep track of on each element. Luckily, Android Studio provides a visual editor which you can use to build your app layout.
For part1.xml, you will accomplish the following:
-
Familiarize yourself with how to reference images in res/drawable.
-
Use the Visual and XML editor to construct a single, scrollable column of images.
-
You should place a
vMargingap between images and their container, as well as between consecutive images. You do not have to ensure that the bottom image hasvMarginspace between it and its parent’s bottom.vMarginis defined inres/values/dimens.xml -
Your layout should have enough images that you need to scroll (use
food_0throughfood_4 -
Each image should be scaled so it fits horizontally and is centered while maintaining its aspect ratio. This requires you to set some attributes specific to ImageViews (not inherited) which are mentioned in the ImageView Documentation
-
You should use constraints to ensure that an image is adjacent to the previous image (
Top_toBottomOf) and that its left and right side is constrained to the parent container
Part 2
The Part2View starter code can be found in the cse340.layout directory in Android Studio.
In Part2Activity we have set up the basic scaffolding necessary to complete the given layout. For this section you will be instantiating the view objects from Part 1 programmatically.
Note that, although you have been given the list of image names to add to your view, you still need a way to access that image resource programmatically. We do this for you, but you should study how we do this as it will be used in future assignments.
Tasks:
-
Reproduce the exact layout you created in Part1, but use code instead of XML/GUI
-
Achieve the layout from
Part1Viewwithout using an XML file. That is, you should accomplish the layout requirements from Part 1 programmatically, creating Views in Java to accomplish your desired layout. -
You may not make use of your part 1 solution when writing the code for this part of the assignment.
It may be useful to view the interactory hierarchy using Layout Inspector when Part1 is running to understand how to structure things.
Part 3
Note: Remember to accept the as2-layout-part-3-4 assignment and turn-in the assignment when you are done.
The Part3View starter code can be found in the cse340.layout directory in Android Studio. We will create a custom Layout in Part3 that can organize an arbitrary series of Views into a Pinterest like layout. Pinterest is a great example of a high-profile app that can be built with relatively simple layout instructions. For instance, one could imagine breaking the layout into two large vertical columns, then assigning various elements to each one. You will also need to ensure the columns never differ by more than the height of one image.

To determine which column a photo should go in, we will use “pinterest” ordering. You should track the height of the images in each column and add the next image to the shorter column (or the left if equal). Be careful not to track the height of the Drawables as opposed to the display height of the image. Two photos of the same aspect ratio should affect the column height identically regardless of resolution as they will both have the same size on-screen.
We will use inflation as well. A LayoutInflater allows us to accept a valid XML file specifying part of an interactor hierarchy convert it into a View object that can be added to the interactor hierarchy you are constructing. The XML/visual editor makes it much easier to build our app layouts, so we can use that to create new layouts, then use an inflater to convert the XML into an object before programmatically appending it to our current app layout.
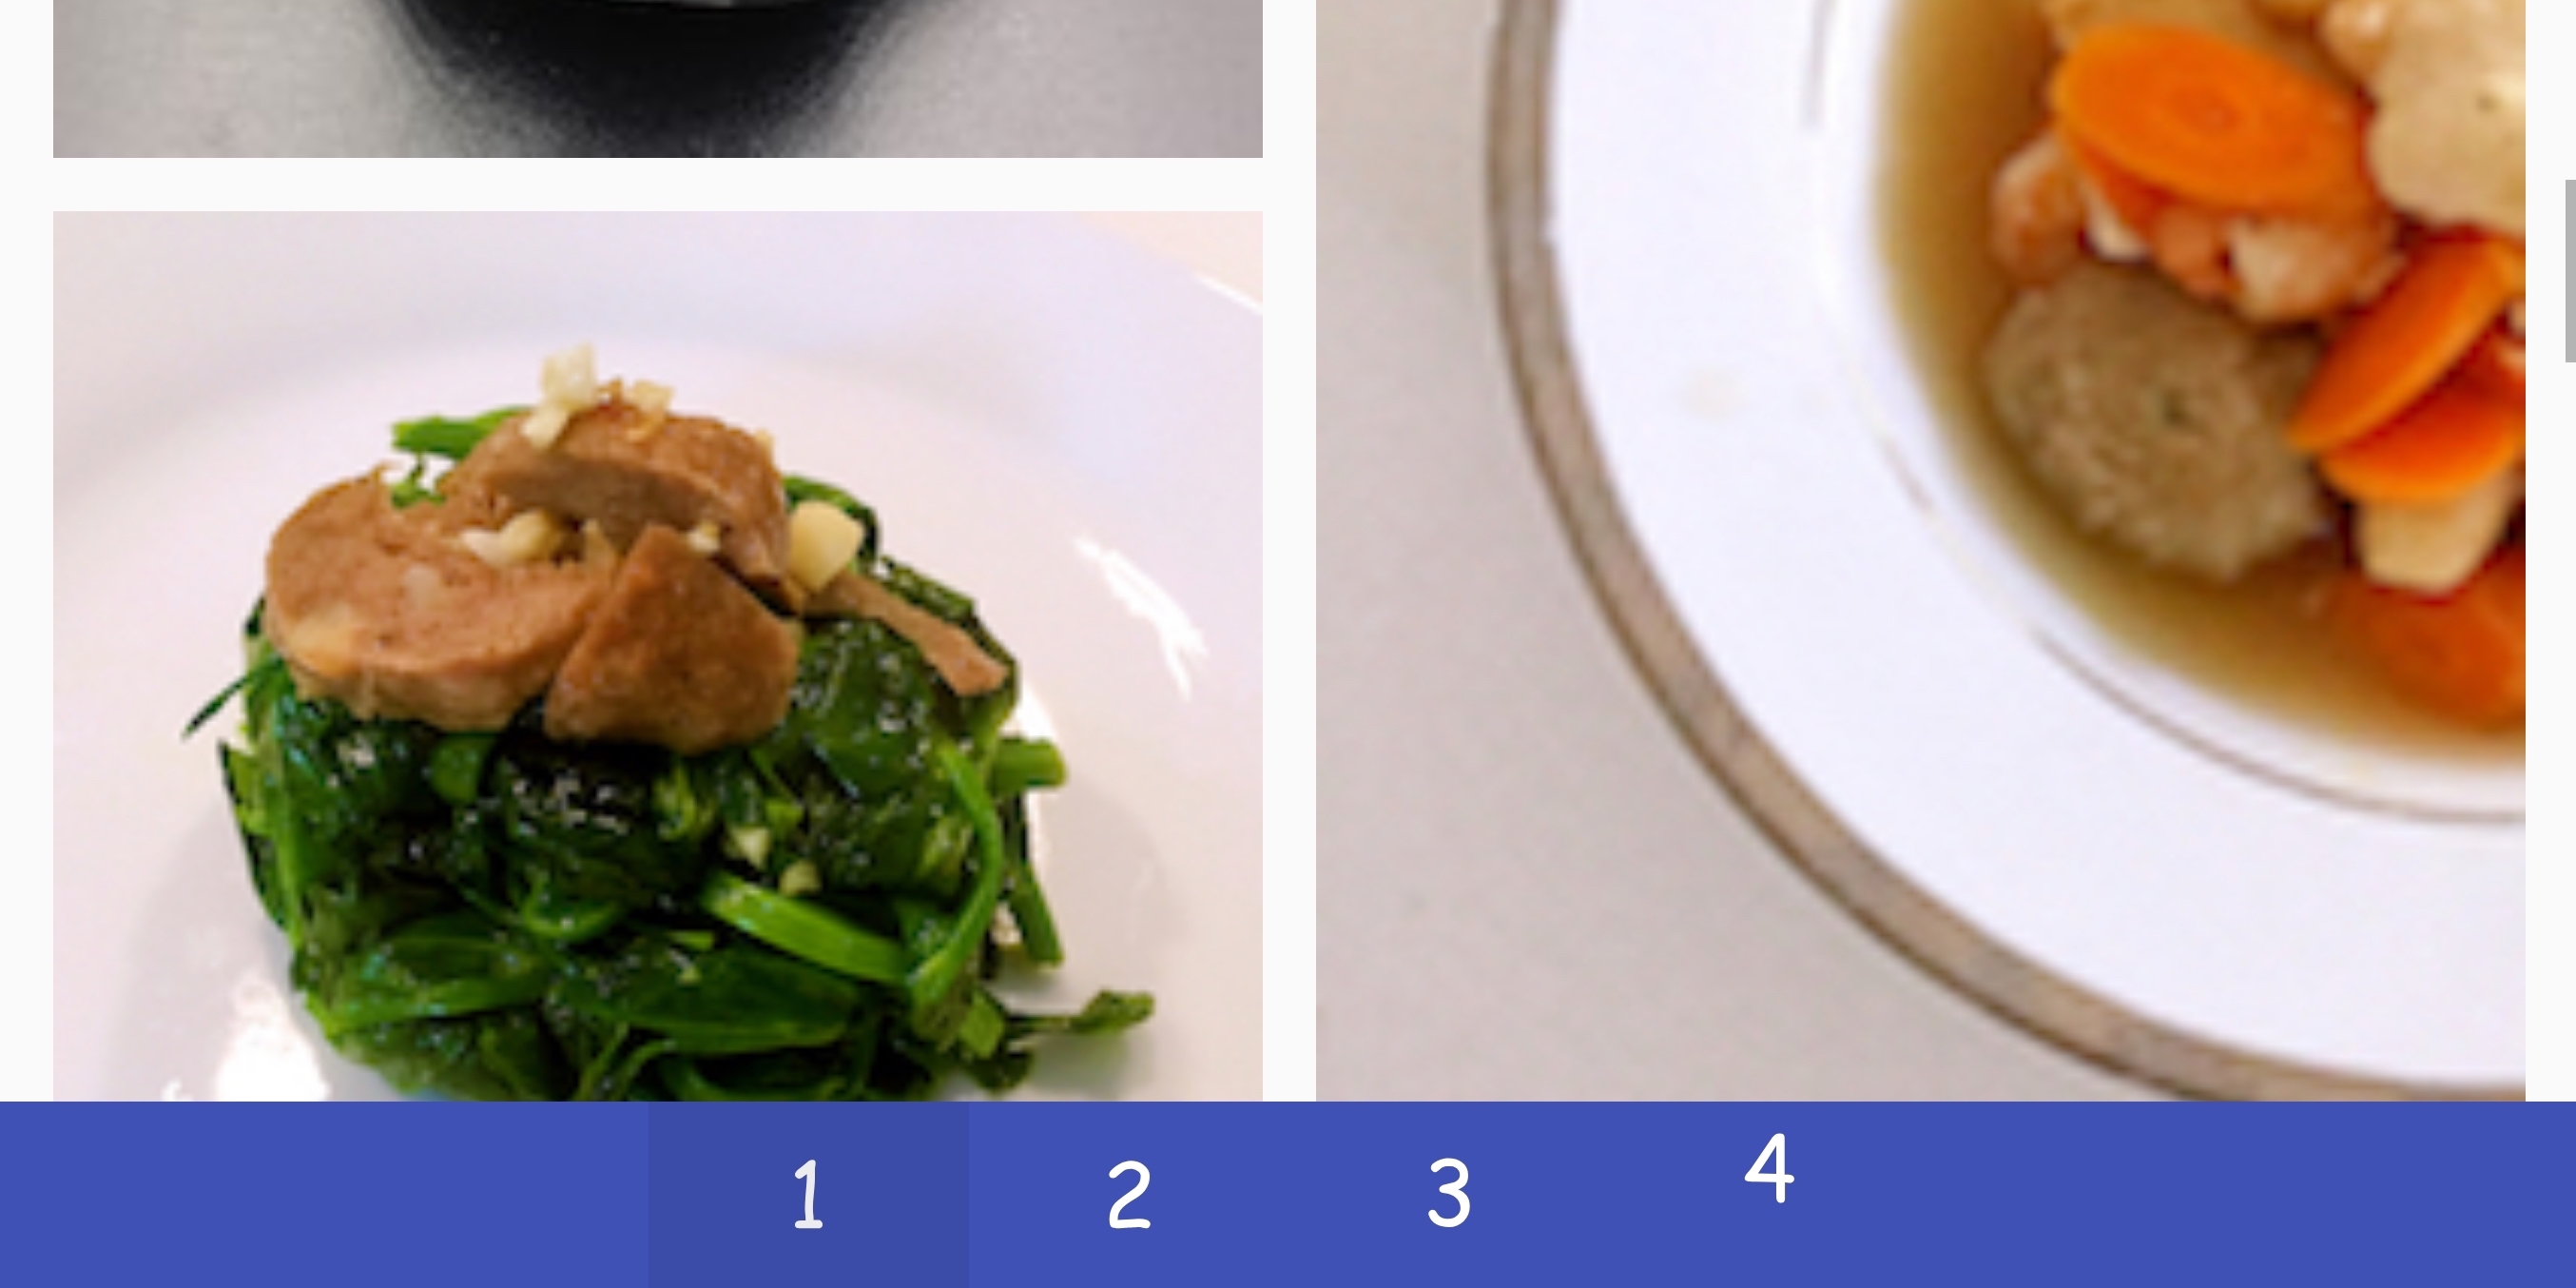
The interactor hierarchy for Part 3 is shown below. The elements marked in light green should be created using inflation (and the part3_grid.xml file should do this). The elements shown in blue should be created programmatically. Note the switch to LinearLayout to hold the images.
Tasks:
-
Before getting started on this section, try constructing a LayoutInflater and passing in your
part1.xmlfile. -
Once you are comfortable with inflation, use inflation to make use of the ConstraintLayout we have provided for you (
cse340.layout.R.layout.part3_grid) - Programmatically create ImageViews based on the information passed in
- Add each image to one of two columns.
- Each image should be
vMarginfrom the previous image vertically (or the top of the column if first image). - There should be a vMargin gap between the two columns, however, the center of the gap must be in the exact center of the screen.
- The bottom of the last image should be flush with the bottom of the column.
- Write code which evenly distributes ImageViews between a given set of columns.
Part 4
The Part4View starter code can be found in the cse340.layout directory in Android Studio.
For part 4, feel free to explore anything pertaining to layout that we have discussed in the past 2 weeks. Your task is to wireframe and recreate an interface from another popular app. For instance: Twitter, Facebook, Instagram, etc. (not Pinterest!)
Your layout must meet the following requirements:
-
Your layout must implement a scroll view in some fashion, allowing the user to scroll through content on your application.
-
Your layout must be responsive to device orientation. If the user rotates their device, then your application should adjust to fit the new orientation.
-
In your final reflection, you must provide a diagram of the interactor hierarchy, and the corresponding interface, using the same approach shown in this assignment spec for Part1.
Reflection
For this part, you will submit your reflection on this assignment to Gradescope. The responses to each question should be kept separate from each other.
- Please include the following for Part4 in this reflection:
- A screen shot of the interface you are emulating
- Your diagram (hand or computer drawing) of the interactor hierarchy and interface you built. (Note: do not turn in a screen shot of the layout inspector for this). You should turn in something similar to the 2nd and 3rd image on this spec page.
- A screenshot of the result of your final implementation
- Tell us: What did you learn from doing Part4?
- Tell us: Was there anything that was surprisingly easy or hard?
Development Strategies
- You may run into issues when rotating the device. Note that, when rotating the emulated device, or your personal Android device, that the layout should adjust accordingly. You do not need to readjust the layout of your images when rotating the device, as this should remain the same.
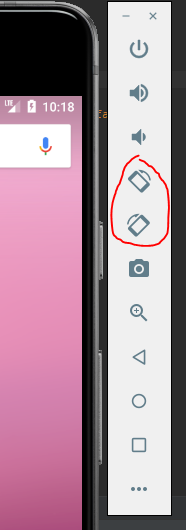
These buttons will allow you to rotate the emulated device clockwise/counter-clockwise.
- When dealing with the Android documentation: ask as many questions as necessary! The android documentation can be painful to read through, as there are many potential options to choose from. If you need any help parsing it, feel free to ask anyone on the course staff for advice! Additionally, we suggest that you read through the following resources as you develop your apps, in order to better understand the tools you are utilizing (these are referenced in their respective parts as well):
- Linear Layouts (Part 1)
- An explanation of the ImageView ScaleType attribute (Part 1)
- Building a Responsive UI with Constraint Layout (Part 3) Note the “Set Size as a ratio” section here
- What’s new in Constraint Layout 1.1.0 (Part 4)
Turn-in
Submission Instructions
Turn-in the Assignment using GitGrade
We will test layout on emulators with different screen sizes. Please use constraint correctly. Don’t just try to match pixels in our sample screenshots.
Grading (40pts)
Layout Rubric: Part 1-2 checkpoint
- Turned in and compiles: 1 pt
- Passed >1/2 of tests: 1 pt Note: on
Final checkpoint
- Turned in and compiles: 1 pt
- Part 1: 5 pts
- Properly places and scales images using constraints: 2pt
- Properly uses margins and specifies with XML: 1pt
- Works in portrait and landscape mode: 2pt
- Part 2: 10 pts
- Reproduces the exact layout you created in Part1, but using code instead of XML/GUI: 2pt
- Properly uses margins and specifies with XML, programmatically: 2pt
- Properly places and scales images: 2pt
- Properly uses IDs: 2pt
- Works in portrait and landscape mode: 2pt
- Part 3 correctness (10 pts)
- Properly assigns images to columns in correct Pinterest ordering: 2pt
- Properly uses and accounts for margins: 2pt
- Correctly iterates over imageNames: 2pt
- Works in portrait and landscape mode: 2pt
- Properly uses inflation: 2pt
- Part 4 Code: 2pt
- Part 4 works with both portrait and landscape mode: 2pt
- Part 4 Writeup (turned into Gradescope): 10pt
- Part 4 resembles original screenshot: 2pt
- Interactor diagram and hierarchy match and correctly describes what was implemented: 4pt
- Written reflection: 4pt
IDE Errors/Warnings you can ignore
NOTE: An error/warning that can be ignored for this assignment cannot be ignored for every assignment. Check IDE notices against specs on per assignment basis.
-
Button- Hardcoded Strings
-
TextView- Hardcoded Strings
-
ImageView- Missing
contentDescription
- Missing