AS1: Doodle
Last revised: 10:30 PM Tuesday, March 31, 2020- Wednesday, April 1, 2020
-
Code
Due 10:00pm, Thursday, April 9, 2020
Lock 10:00pm Saturday, April 11, 2020 -
Peer evaluation
Out late Saturday night or Sunday morning
Due 10:00pm, Tuesday April 14, 2020 -
Reflection
Due 10:00PM Wednesday April 15, 2020
Android Goals:
- Get familiar with Android Studio
- Understand XML and View
- Load image and drawable resources
- Learn Activity Lifecycle
HCI Goals:
- Use abstractions to draw on screen
- Create animations
- Use coordinate transformation
- Try to create something appealing
GitGrade Turn-in links
Assignment Description
For this assignment, you will be creating an activity class which will allow you to create “Doodles” consisting of images, lines, and text.
This assignment will take about 6 - 8 hours to complete. You should expect this amount of workload on most assignments this quarter, so make sure to build good habits when completing it.
If you find yourself taking additional time on this submission, we strongly suggest that you get in touch with the course staff on Ed or in person.
The assignment is broken into four parts
- Assignment Description
- Part 1: Learning by Doing
- Part 2: Custom Doodle
- Part 3: Peer Review
- Part 4: Reflection
- Turn-in
Part 1: Learning by Doing
Tasks:
- Get your development environment ready
- Download and install Android development environment and git if you do not already have it
- Accept the Doodle assignment from Gitgrade
- Successfully clone our starter code to your computer
- Open our skeleton code in Android Studio, read through and understand it
- Implement three methods:
addImage,addText,addLine - Call the methods you implemented and compare your app screen with our screenshot
- Animate
UWso it slides from left to right when the app opens.
Prepping your development environment
Instructions for downloading and installing the Android development environment are on our schedule page and have been sent out through our Ed discussion platform. Please come to our first section or office hours if you are having any trouble with your machine set up.
Use GitGrade to accept the assignment and receive the starter code. See the instructions for more details.
Understanding the starter code
We have provided you with the shell of an application which has the following class structure.
AppCompatActivity is an Android class that we subclassed in TabActivity so we can switch back and
forth between your Part 1 and Part 2 code using the blue navigation bar at the bottom of the screen.
You should not edit this part of the code but if you are curious, this tabbing functionality is
controlled by the code in the Part1Activity#onCreate(Bundle) and Part2Activity#onCreate(Bundle) methods.
We are using a View called BottomNavigationView that gives the functionality of a navigation bar -
the switch statement in each of the onCreate methods tells the program when to show which activity.
Note: The notation such as Part1Activity#onCreate(Bundle) is a common shortcut to demonstrate a specific
method in a specific class (here the onCreate method which takes a Bundle as parameter
in the Part1Activity class).
Your Tasks…
This task involves implementing three methods in Part1.java. Each method is named here but
detailed doc comments can be found in Part1’s superclass, Doodler, which also defines some
nice helper methods. It also defines the onCreate behavior of the Activity which calls the
method Doodler#doodle(FrameLayout).
In Part1, you’ll find missing implementations for three methods: addImage, addText, and addLine.
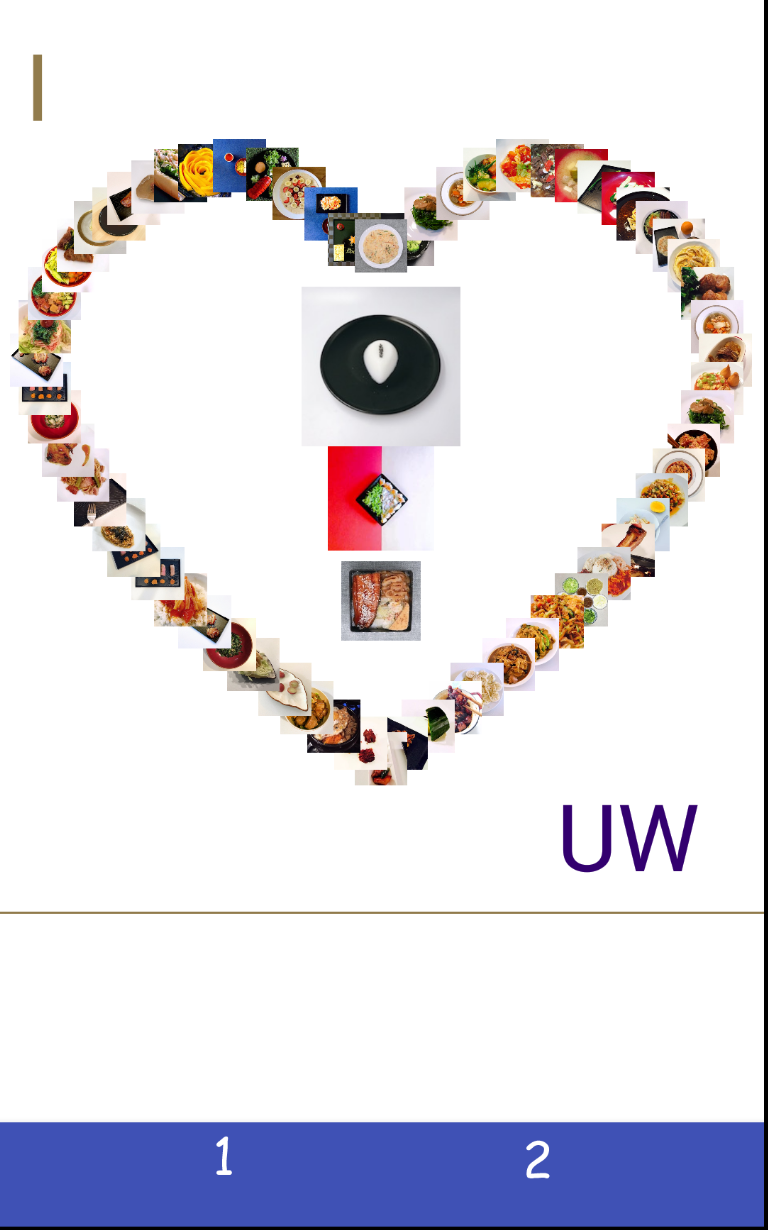
Subclasses of Part1 will have access to these methods once they are implemented. Take a look at
an example of this in Part1Activity. It extends Part1 and uses the three methods to
draw the following image on the screen:

You’ll notice in doodle in Part1 that we use scaleX and scaleY around our coordinates
(and size for images). These allow us to ensure the doodle still looks good on smaller screen sizes.
If you use any pixel coordinates in your solutions, remember to wrap them in these scaling methods.
These will scale coordinates from the Pixel 2 XL to the dimensions of your device’s screen.
We’d recommend that you use a Pixel 2 XL emulator to compare the finished doodle against our
screenshot to be sure you’re implementing everything right.
Specification for addImage
ImageView addImage(FrameLayout doodleView, String imageName, float x, float y, int size);
Most of this method is implemented for you. Please read through it to understand how it works,
then try to set the size and location of ImageView added in this method. Critically, the images are
going to be squished into a square, so only one size parameter is given.
In order to implement this correctly you need to properly position the bounding box of the view:
the x and y location relative to the parents are passed in as parameters and the size parameter
is used for both the width and height. Setting the width and height will be done using the
getLayoutParams() and setLayoutParams().
If you implement it correctly, you’ll see the image below if you run:
addImage(doodleView, "food_3", scaleX(300), scaleY(300), scaleX(300));
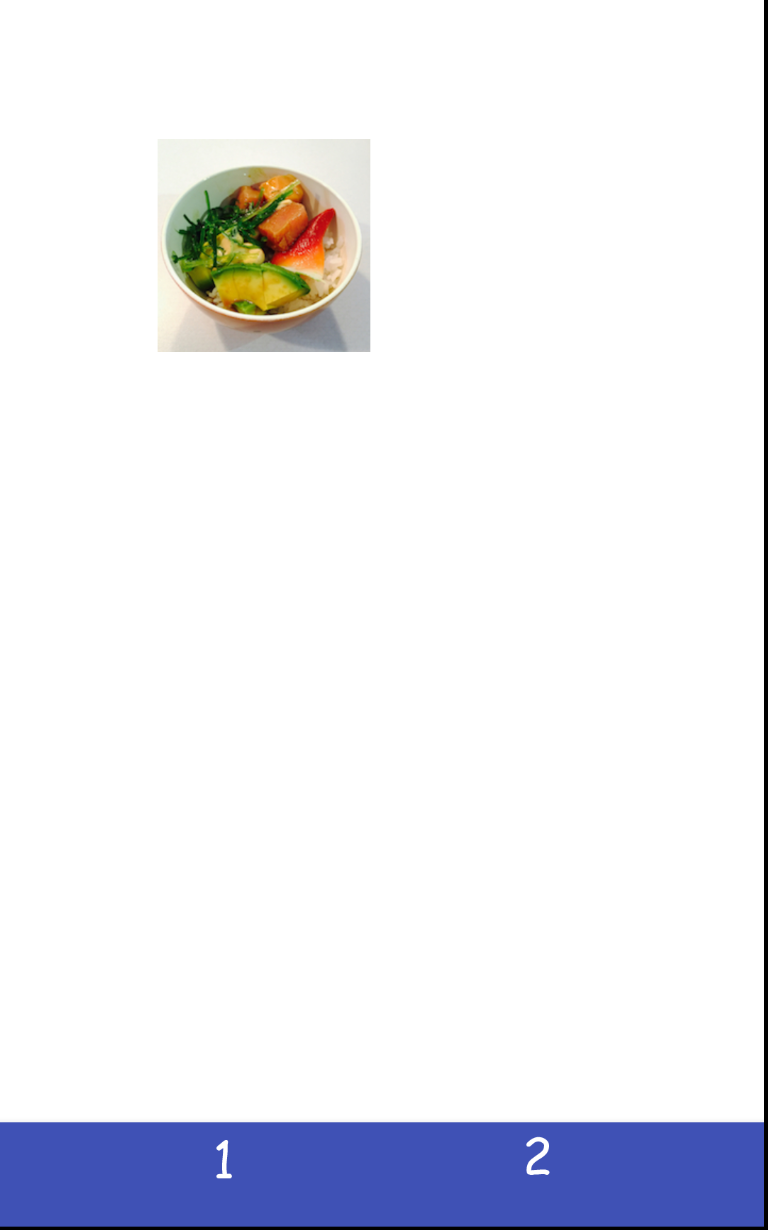
Remember that this is covered in section (😉).
Related APIs: ImageView
Specification for addText
TextView addText(FrameLayout doodleView, String text, float x, float y, int fontSize, int color);
This does not need to have it’s bounding box adjusted.
You may find the comments and the implementation of addImage useful. Make sure you are not
editing the xml, addText is an abstracted function for adding text to a canvas, not
specific to the contents in Part1. The font-family is the default one, no need to do anything
special here.
If you implement it correctly, you’ll see the image below if you run:
addText(doodleView, "CSE340", scaleX(550), scaleY(200), 60, Color.rgb(51,0,111));
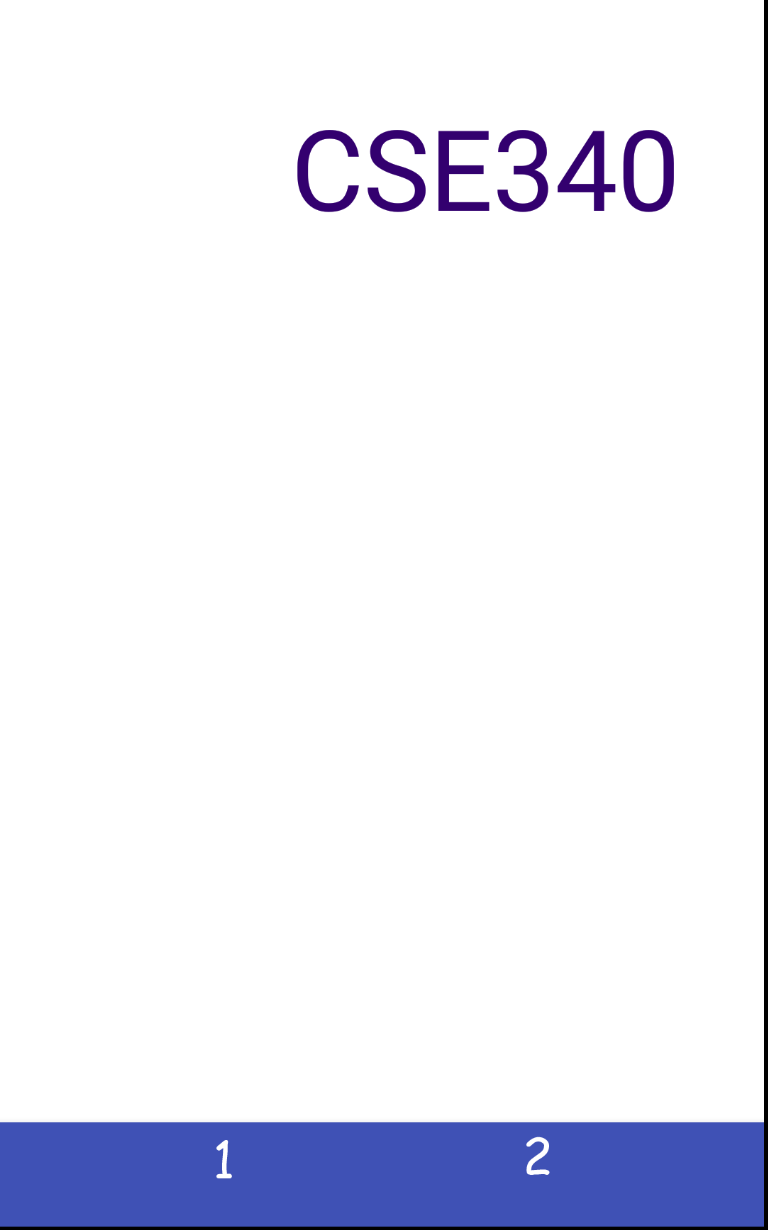
Related APIs: TextView
Specification for addLine
LineView addLine(FrameLayout doodleView, float startX, float startY, float endX, float endY,
                int lineWidth, int color);
There are several ways to draw a line. The Android Code snippets blog has a good example.
For this method, you will be using a class called LineView whose job is to draw a line onto the
canvas. Parameters passed into addLine should also be passed into the LineView constructor to create a line
of the appropriate color. You will be implementing both the constructor and onDraw methods in LineView.
To this end, we have provided some blank stub code for you to
fill in. Each LineView should draw a single line onto the canvas.
By default, the size of the LineView will start out as the size of it’s parent, i.e. the Canvas.
In order to implement addLine correctly you need to adjust the size of this view (the bounding box)
to be ONLY from the from startx, starty, to endx and endy, and ensure that it is correctly
located at startx starty. To do this you will use the method we discussed in
class (getLayoutParams() and setLayoutParams() and setX() setY()).
If you implement it correctly, you’ll see the image below if you run:
addLine(doodleView, scaleX(100), scaleY(250), scaleX(700), scaleY(1200), 15, Color.rgb(200,0,0));
addLine(doodleView, scaleX(400), scaleY(1500), scaleX(250), scaleY(100), 20, Color.rgb(0,0,255));
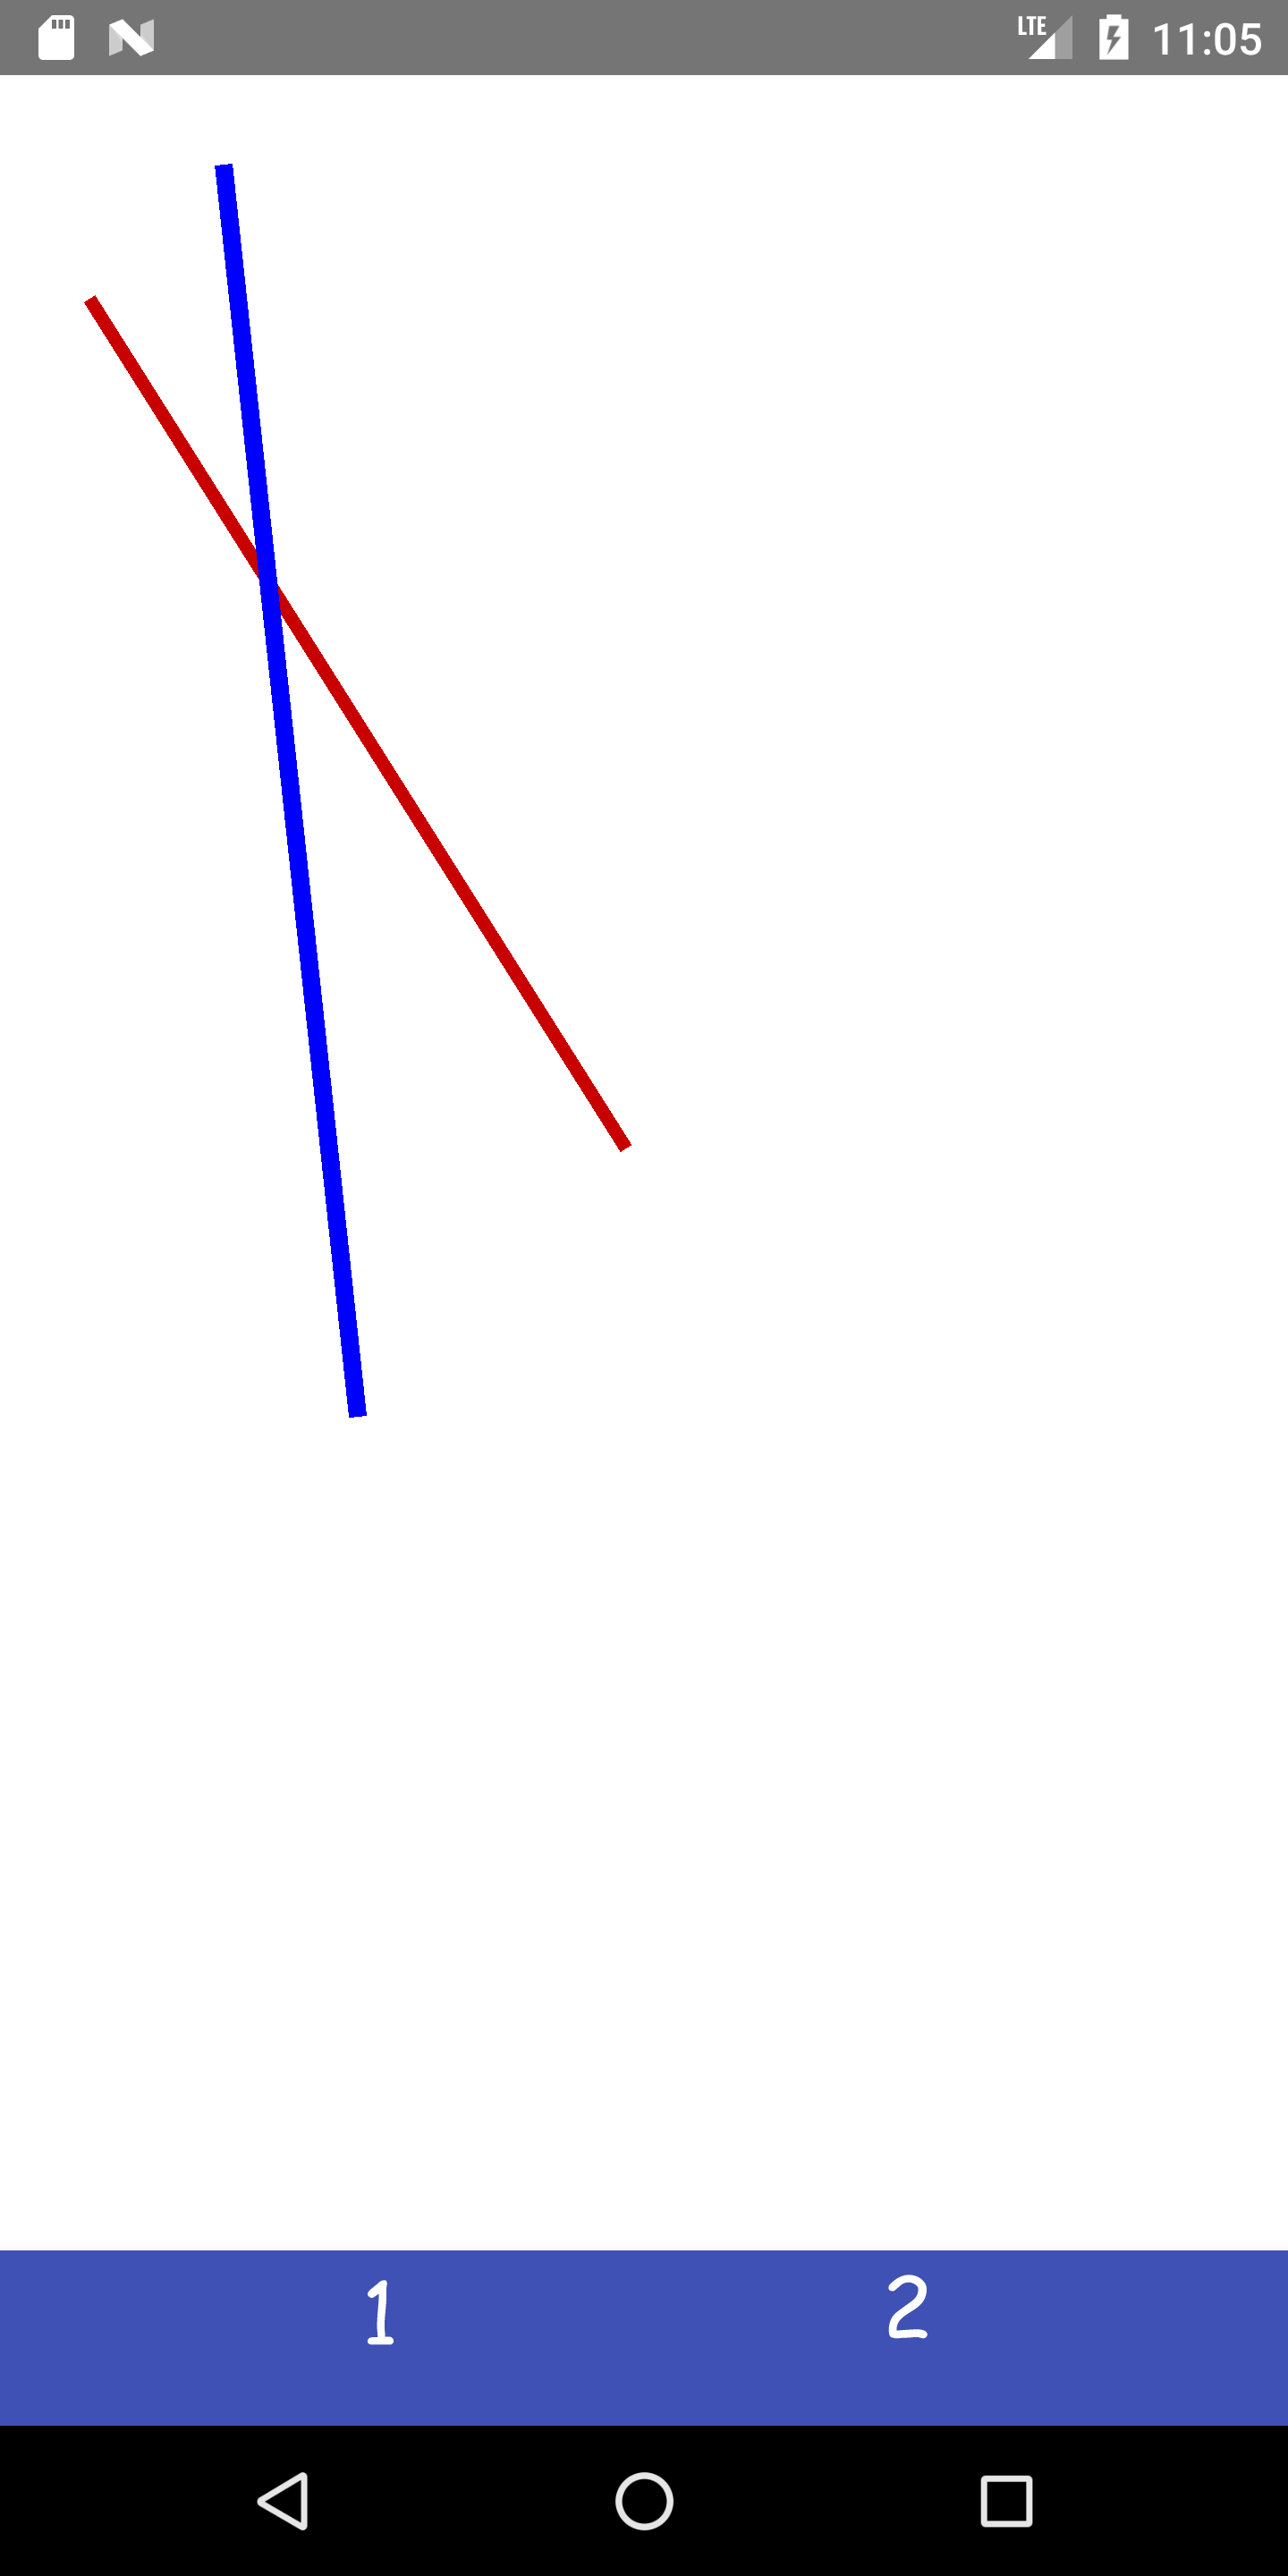
Updated Note for 2020: You only have to handle lines that have a negative, 0, or infinite slope. In other words, you do not need to handle a line that draws from the lower left to upper right OR the upper right to the lower left.
Animating Text
Once you’ve implemented the three methods defined above, your doodle should match. For the last part,
you will need to figure out how to animate text. In Part1Activity#doodle(FrameLayout),
use animations to move the TextView variable uw from (50f, 1650f) to (1050f, 1650f). Remember to apply
scaleX and scaleY to these animations. The animation should last 1000ms (milliseconds not seconds).
Once you’ve finished your animation, your doodle should match this screenshot:
A gif of this animation is shown below but you can also see a higher resolution .webm version of this file as well.
Related APIs and documentation:
- ObjectAnimator
- A beginners guide to implement Android Animations — Part 1 (2 part series)
Important note for Windows Users
In the past we have had issues with the app crashing because of the
line endings in the .csv file on Windows machines. When you
clone the repository onto your Windows machine, all the line endings are automatically converted to
carriage returns (“\r\n”) instead of the usual new line character (“\n”). This will prevent the
.csv from being parsed correctly due to the regular expression (regex) we use. There are 2 ways to fix this:
- Changing the line endings to “LF” in the bottom right hand corner of Android Studio (should initially say “CRLF”). See this animated .gif for more details.
- Replacing the
scan.useDelimiter(“[\n]”)line inDoodler.javawithscan.useDelimiter("[,]|\\r\\n|[\\n\\r\\u2028\\u2029\\u0085]")
Part 2: Custom Doodle
Tasks:
- Design a beautiful doodle of your own.
- Implement your design in Android.
- Create a video of your Animation
This is where your creativity comes into play. We’ve created a blank slate for you in Part2Activity.
In here you must use all three methods implemented in Part 1 to draw your own doodle,
and your doodle should have an animation incorporated into it. You are also
welcome to implement new methods in Part2Activity to make a more creative and beautiful doodle.
To start you must spend 5-15 minutes sketching out your idea. Here you should you think about how to incorporate lines, text, and images, and how these will be moved around the screen. Storyboarding is a good way to sketch out how this animation will progress. For more information about storyboarding watch at least the first 1:30 of this video. This storyboard does not have to be very complex - even 2-3 frames will give you an idea of how to progress. This storyboard will be turned in as part of your reflection.
To ensure your peer reviewers see your Custom Doodle once you’ve completed it, take a video of the running doodle to submit through this web form.
- To see how to capture a your running animation on the emulator,
watch this video. - To capture your doodle on your phone (tethered to Android Studio), do this, but you have to put your phone into Developer mode first.
Tips:
- Aim for complexity similar to Part 1 (images, text, and shapes) though you don’t need to use as many images. Try to be creative - your work will be evaluated by your peers.
- You may use the attractive home-cooked food images (photo credit)
we include in
res/drawableor use your own images. - If your animation is slow, laggy, or not visibly showing (particularly ) on the emulator), try the following
- Reduce the number of images you put on canvas or reduce the file size of images (e.g., convert png to jpg, reduce resolution of image file).
- Check the duration of the animation. Recall that the parameter to the method if in milliseconds, not seconds. It may be worth inflating the number you pass in during testing.
- Ensure that your animation
propertyNameis set correctly for your intended animation - Ensure that your animation starts and ends in different locations if necessary (translating in place is not visibly discernible)
- Recall that
PathandonFloattake absolute coordinates unless otherwise specified - Ensure that animations have not been turned off in the settings app of the phone/emulator
- Recall that “Child views are drawn in a stack, with the most recently added child on top.” (from the FrameLayout documentation). You can add a child at a specific index in the child list, see the documentation of the ViewGroup documentation for more about how to add and remove children.
- You can switch between the activities by using the navigation bar at the bottom of the screen.
- Make sure that your doodle depends on nothing outside of the files described in Turn-in.
Related APIs: Android Animation / View Animation / Property Animation / Vogella Tutorials - Android Animation
Commenting your code
Most of the starter code has been fairly well commented for you. However there are some places you should add comments as you are completing your solution:
- If you have any significantly complicated code for your custom doodle, add comments that might help your TA effectively grade your awesome work!
- If you received significant help from a source on any part of your code, be sure to add a comment referencing their help. See the Collaboration Policies portion of our syllabus for more details.
- If you add and use an image that requires copyright, you may add the attribution in your source code where you add the image to the screen. See the Application Content portion of our syllabus for more details.
Part 3: Peer Review
The Custom Doodle will be peer reviewed as part of the grading process. We will use these peer reviews to ensure that you have implemented all of the parts required for Part 2
Peer grading will take place once everyone has turned in their assignments. You will receive an
email with links to three other students’ .apk files (and associated videos) and a link to a form to fill
out for each student you have been assigned to peer grade. You will load these files into the
emulator via Android Studio or onto a physical phone, view and review their
custom doodles for Part 2, then fill out the survey to give them your feedback. Note: you must
evaluate the a given doodle based on the .apk, using the video only as a backup, for instance, if
the animation does not run on your emulator or phone when you load it.
Additionally, you will have a chance to nominate the most creative doodles! The winners will be shown off in class later this term.
Part 4: Reflection
Each assignment this quarter will have a reflection component as it is a vital part of your work as a Programmer, Computer Scientist, and/or Engineer. Your reflections do not have to be long (please no more than a paragraph or two in length). Details on what a well written reflection includes can be found here. You will be graded on your answers to these reflection questions based on the following
- Student gives at least a minimum answer to all parts of the guiding question.
- Clear/concise but descriptive examples are given throughout the response. An uninformed reader can create a mental picture of the situation being described. Abstract concepts are explained accurately.
- Student elaborates on the significance and meaning of the examples; why they are important.
- Occasionally a student will be given extra credit for an particularly insightful reflection.
Create a MS Word, Google or other type of document and copy the following questions (in italics below) into that document. Add your your responses below each question. You can have more than one answer per page, but if you can, please try to avoid page breaks in the middle of a question. Insert page breaks between questions as needed.
You will need to submit your write up as a PDF file. If you are new to Gradescope, see this document for instructions on how to scan and submit hand-written solutions.
Gradescope accounts will be created on the first (or second) day of the quarter for all registered students. You will receive an email message from Gradescope with a link that you can use to create an account and submit your solution. Your Gradescope username will be your UW email address. If you are not registered for the course before the assignment is due, please email the instructor with your name, your UW ID number, and your UW email address (uwnetid@uw.edu) so we can set up a Gradescope account for you.
For this assignment, your reflection should cover the following:
-
Include the sketches and storyboard you made as part of your design work for Part 2 and a screen capture of your beautiful Doodle.
-
In looking at your design sketches from Part 2, what changed when you did your actual implementation? Why did you make those changes from your original design vision?
-
Why is be better to animate a
View, rather than invalidate/redraw its contents? -
At the moment, other than the bottomNavigationBar, our application does not respond to the user at all. Think of at least two ways that you would go about adding interactivity to this application.
-
What did you learn from reading the peer evaluation about the user experience of your doodle?
Turn-in
Part 1 and Part 2: Code
You will turn in the following files on GitGrade here.
Make sure you only edited the following files for turn in:
─ Part1.java
- LineView.java
─ Part1Activity.java
─ Part2Activity.java
- part2.csv (optional)
Do not edit any of the other files with one exception: if you are on a Windows machine and need
to modify the scan.useDelimiter(“[\n]”) call in Doodler#addAllImagesFromData(FrameLayout).
If you use your own images in Part 2, please make sure to add and commit them to
your repository in the res/drawable directory. If your images are not there, your custom doodle
will not work for others and you will NOT get credit for the work you did.
If you’re positioning a large number of images for Part 2, it is best to use a
CSV similar to data.csv which is used for the heart in Part 1. Include this as
part2.csv if necessary. Remember, the CSV coordinates are on a Pixel 2 XL and scaled to the
current screen in Doodler#addAllImagesFromData(FrameLayout).
Remember to submit a video of your custom doodle animation through this web form at the same time you submit your code.
Follow these instructions to submit to GitGrade
- Make sure the code you want to submit is pushed to GitLab (origin/master)
- If you just commit locally and don’t push, GitGrade won’t see those changes
- (Optional) Go to your repo on GitLab to double check that the latest commit hash matches your latest local commit hash
- Go to the turn in link
- Check the box and click “Turn in”
Part 3: Peer Evaluation
You will receive more details about this step of the assignment in our second lab. We will send out the emails to your uw.edu email account. Make sure to reach out on our discussion board if you do not receive the emails when it is announced that they were sent out (but check your spam folder first!)
Part 4: Reflection
The reflection will be turned in to Gradescope.
Grading (40pts)
This HW will be out of 40 points and will roughly (subject to small adjustments) be distributed as:
- Part 1
-
addImage: 2 pts -
addText: 3 pts -
addLine: 8 pts -
UWAnimation: 4 pts
-
- Part 2
- Static verification of custom Doodle (1pt)
- Active custom Doodle as verified through Peer Evaluation
- Using each of the three methods at least once: 3 pts
- Using an animation: 1 pt
- Part 1 & 2 Code quality (2 pts)
- Part 3: Complete assigned peer evaluations: 3 pt
- Part 4: Reflection
- Sketch for part 2 is turned in with reflection (1pt)
- Each of the 4 question is worth 3 points (12 pts total)