File Transfer Tutorial
Gradescope Upload
So you've finished working on your exercise/homework files on the CSE Linux environment and you're ready to upload them to Gradescope. What's next depends on your setup:
- CSE Lab Machines or CSE Linux VM: Open your internet browser of choice (e.g., Firefox), navigate to Gradescope, and upload your files directly from the current machine.
- attu: You will first need to transfer your files to your local machine. The sections below will cover how to do this from (1) the command line and (2) a GUI application.
Command Line Transfer (scp)
The following examples will assume the following file structure, where NETID is your CSE NetID and user is your username on your local machine.
- File to be transferred on attu: /homes/iws/NETID/333/ex0.c
- Directory on local machine for file to be transferred to: C:\Users\user\Documents
Generic scp Command
Any scp command should be run from your local machine because there is no URL/IP address to reach your machine from attu.
scp user@host:/path/to/source-file /path/to/destination-folder
- user@host should be NETID@attu.cs.washington.edu
- /path/to/source-file can be /homes/iws/NETID/333/ex0.c (absolute path) OR 333/ex0.c (relative path, noting that /homes/iws/NETID is your home directory)
- /path/to/destination-folder can be C:\Users\user\Documents (absolute path) OR . if you've navigated your local terminal to that directory)
After typing this command, you will be prompted to enter your CSE password before the file is transferred.
Variations of Interest
-
Adding the -r flag to scp will
recursively traverse a source directory and copy it and its
contents to the destination.
- For example, the following command will copy the 333
directory from your attu home directory to your
current local directory:
scp -r NETID@attu.cs.washington.edu:333/ .
- For example, the following command will copy the 333
directory from your attu home directory to your
current local directory:
-
The * wildcard can be used in the source
path to copy all files that match to the destination.
Multiple examples given below:
- The following command will copy all of the files
within the 333 directory on attu to
your current local directory (note, doesn't copy the
333 folder itself or folders within 333):
scp NETID@attu.cs.washington.edu:333/* .
- The following command will copy all of the C source files
(i.e., files ending in .c) within the
333/ex1/ directory on attu to your current
local directory:
scp NETID@attu.cs.washington.edu:333/ex1/*.c .
- The following command will copy all of the text files
(i.e., files ending in .txt) from all
exercise subdirectories of 333 (i.e.,
subdirectories starting with ex) on attu to
your local directory:
scp NETID@attu.cs.washington.edu:333/ex*/*.txt .
- The following command will copy all of the files
within the 333 directory on attu to
your current local directory (note, doesn't copy the
333 folder itself or folders within 333):
Graphical User Interface (Cyberduck)
A GUI file transfer tool can be especially helpful when copying many files, entire directories, or when you want to visually confirm what was transferred. Cyberduck uses the same underlying SSH/SFTP protocol as scp; the difference is only the interface.
Installation
- Navigate to the Cyberduck website.
- Download the installer for your operating system.
- Run the installer and complete the installation.
- Open the Cyberduck application.
Connecting to attu
- Click Open Connection (or File > Open Connection).
- Select SFTP (SSH File Transfer Protocol).
-
Enter the server address:
attu.cs.washington.edu -
Enter your CSE credentials:
- Username: your CSE NetID
- Password: your CSE password
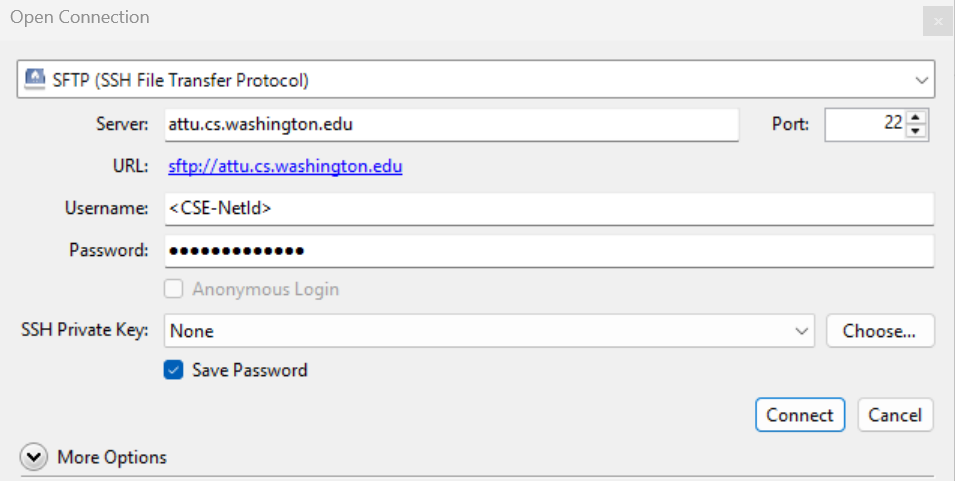
- Click Connect.
Opening a Local File Browser
- Open a second browser window using File > New Browser.
- In the new browser, choose Open Connection > Local to browse your local filesystem.
You should now have one Cyberduck browser window for the remote attu server and one for your local machine. Files can be transferred between them using drag and drop.