Suggested CSE 333 Text Editors
This page is here to help you choose, setup, and find an efficient workflow for a text editor to use in this class. While you can make just about anything work, the following editors can all be used directly with the CSE Linux environment; you must make sure that your code compiles and runs there before submission. This will help to minimize the amount of file copying and/or git push/pull-ing necessary when debugging.
This page covers setup and tips for the three most popular options: vim (), VS Code (), and Emacs ().
Vim
Getting Started
- In order to launch vim on the CSE Linux environment,
type
vimorvim <filename>on the command line and press [Enter]. This will open a welcome screen or the specified file, respectively, for viewing and modification. - The course staff has put together a of commonly used vim commands to help you get started with basic file navigation and editing, which can be useful while learning and before you have the muscle memory down.
- When finished, you can type
:qto exit (or:q!to exit and discard changes).
Tutorials
vimtutorcan be run from the command line and gives a brief introduction to vim terminology and the general gist of how it works. This describes how to move around, select, copy, paste, and other basic functions of vim. However,vimtutoris quite dry.- is a browser-based, interactive tutorial. There is also a "Practice" mode with a handy context-aware help menu. Make sure to complete the tutorial (and take notes!) before navigating elsewhere because it will restart if you do.
- is a game-based, interactive introduction; the free version (levels 1-3) covers basic text navigation in vim, but in a way that will help with your muscle memory.
CSE 333 Vim Configuration
.vimrc
Commands placed in the file ~/.vimrc will be run when
vim starts up.
The CSE 333 starter vimrc file can be automatically placed in the
correct location for you using the following command:
$ curl -Lo ~/.vimrc https://cs.uw.edu/333/editors/vimrc.txt
This should serve as a good starting point for you to customize vim yourself and does the following for you:
- Sets the color theme to
‘ron’. Instructions for changing this are in the.vimrcfile. - Turns on line numbers by default.
- Enables the
:Man <page number> <function>command, which allows you to viewmanpages within vim. - Allows you to press
F9to run make (you can also just do:make). Then, you can run:copento see the output alongside your code. vim will even take you to the lines that have compiler problems. - Adds a ruler at 80 characters so you can avoid those pesky linter complaints.
- Highlights all matches for searches.
- Highlights whitespace at the end of lines.
- Automatically turns tabs into spaces and indents the proper amount after hitting [Enter] (specifically for C files).
If you're curious how it works, the file has comments that describe
what each command does; just open the file with
vim ~/.vimrc.
c.vim
vim also has features that allow it to conditionally execute commands from a file. A particularly useful example is that vim can recognize file types and conditionally execute a command file based on the file type. The course staff has provided a file that sets up vim to help with automatically formatting C/C++ files. You can download and install it using this command:
$ curl --create-dirs -Lo ~/.vim/after/ftplugin/c.vim https://cs.uw.edu/333/editors/c_vim.txt
Like with .vimrc, this file includes comments that
explain what it's doing.
You can view them with vim ~/.vim/after/ftplugin/c.vim.
VS Code
Getting Started
-
.
- If you're using the CSE Linux VM, then you're done — you can directly run VS Code to edit files on the VM!
- If you're connecting to attu, then continue to the configuration section.
- Install the
.
The simplest way to do so is to open the VS Code quick-open dialog
(Ctrl-P) and paste this command:
ext install ms-vscode.cpptools
As VS Code is an integrated development environment (IDE), you open and close the application like you would other applications like Microsoft Word and there is no need to use the terminal.
Tutorials
If you haven't used VS Code much before, it might be useful to walk through this tutorial.
CSE 333 VS Code Remote Configuration
- Install the
.
The simplest way to do so is to open the VS Code quick-open dialog
(Ctrl-P) and paste this command:
ext install ms-vscode-remote.remote-ssh
- Open the command palette (there are several
keybindings for this, but [F1] works on all platforms) and paste
the following:
Remote-SSH: Add New SSH Host...
Then run it by hitting [Enter]. - Follow these steps to connect to attu:
- When prompted for your "SSH Connection
Command", enter
ssh <netid>@attu.cs.washington.edu, substituting your CSE NetID. - When asked to "Select SSH configuration file
to update", this can be left as the default (which will vary
by platform).

- You've now added attu as an SSH host in VS Code. This means VS Code will remember your username and the attu.cs.washington.edu domain. It will also keep track of the recent files you've opened on attu.
- Open the "Remote Explorer", which should be
the bottom-most icon on the left-hand sidebar.
You should see an entry labelled
attu.cs.washington.edu, right-click it and select "Connect to Host in Current Window". Enter your CSE NetID password when prompted.
- Your VS Code is now connected to attu!
You can view a terminal on attu with Ctrl-`
or use
View: Toggle Terminalin the command palette. - Clone your CSE 333 repository to attu if you haven't already. Then select the folder in "Explorer" (which can be opened with the button on the top of the left-hand sidebar).
- When prompted for your "SSH Connection
Command", enter
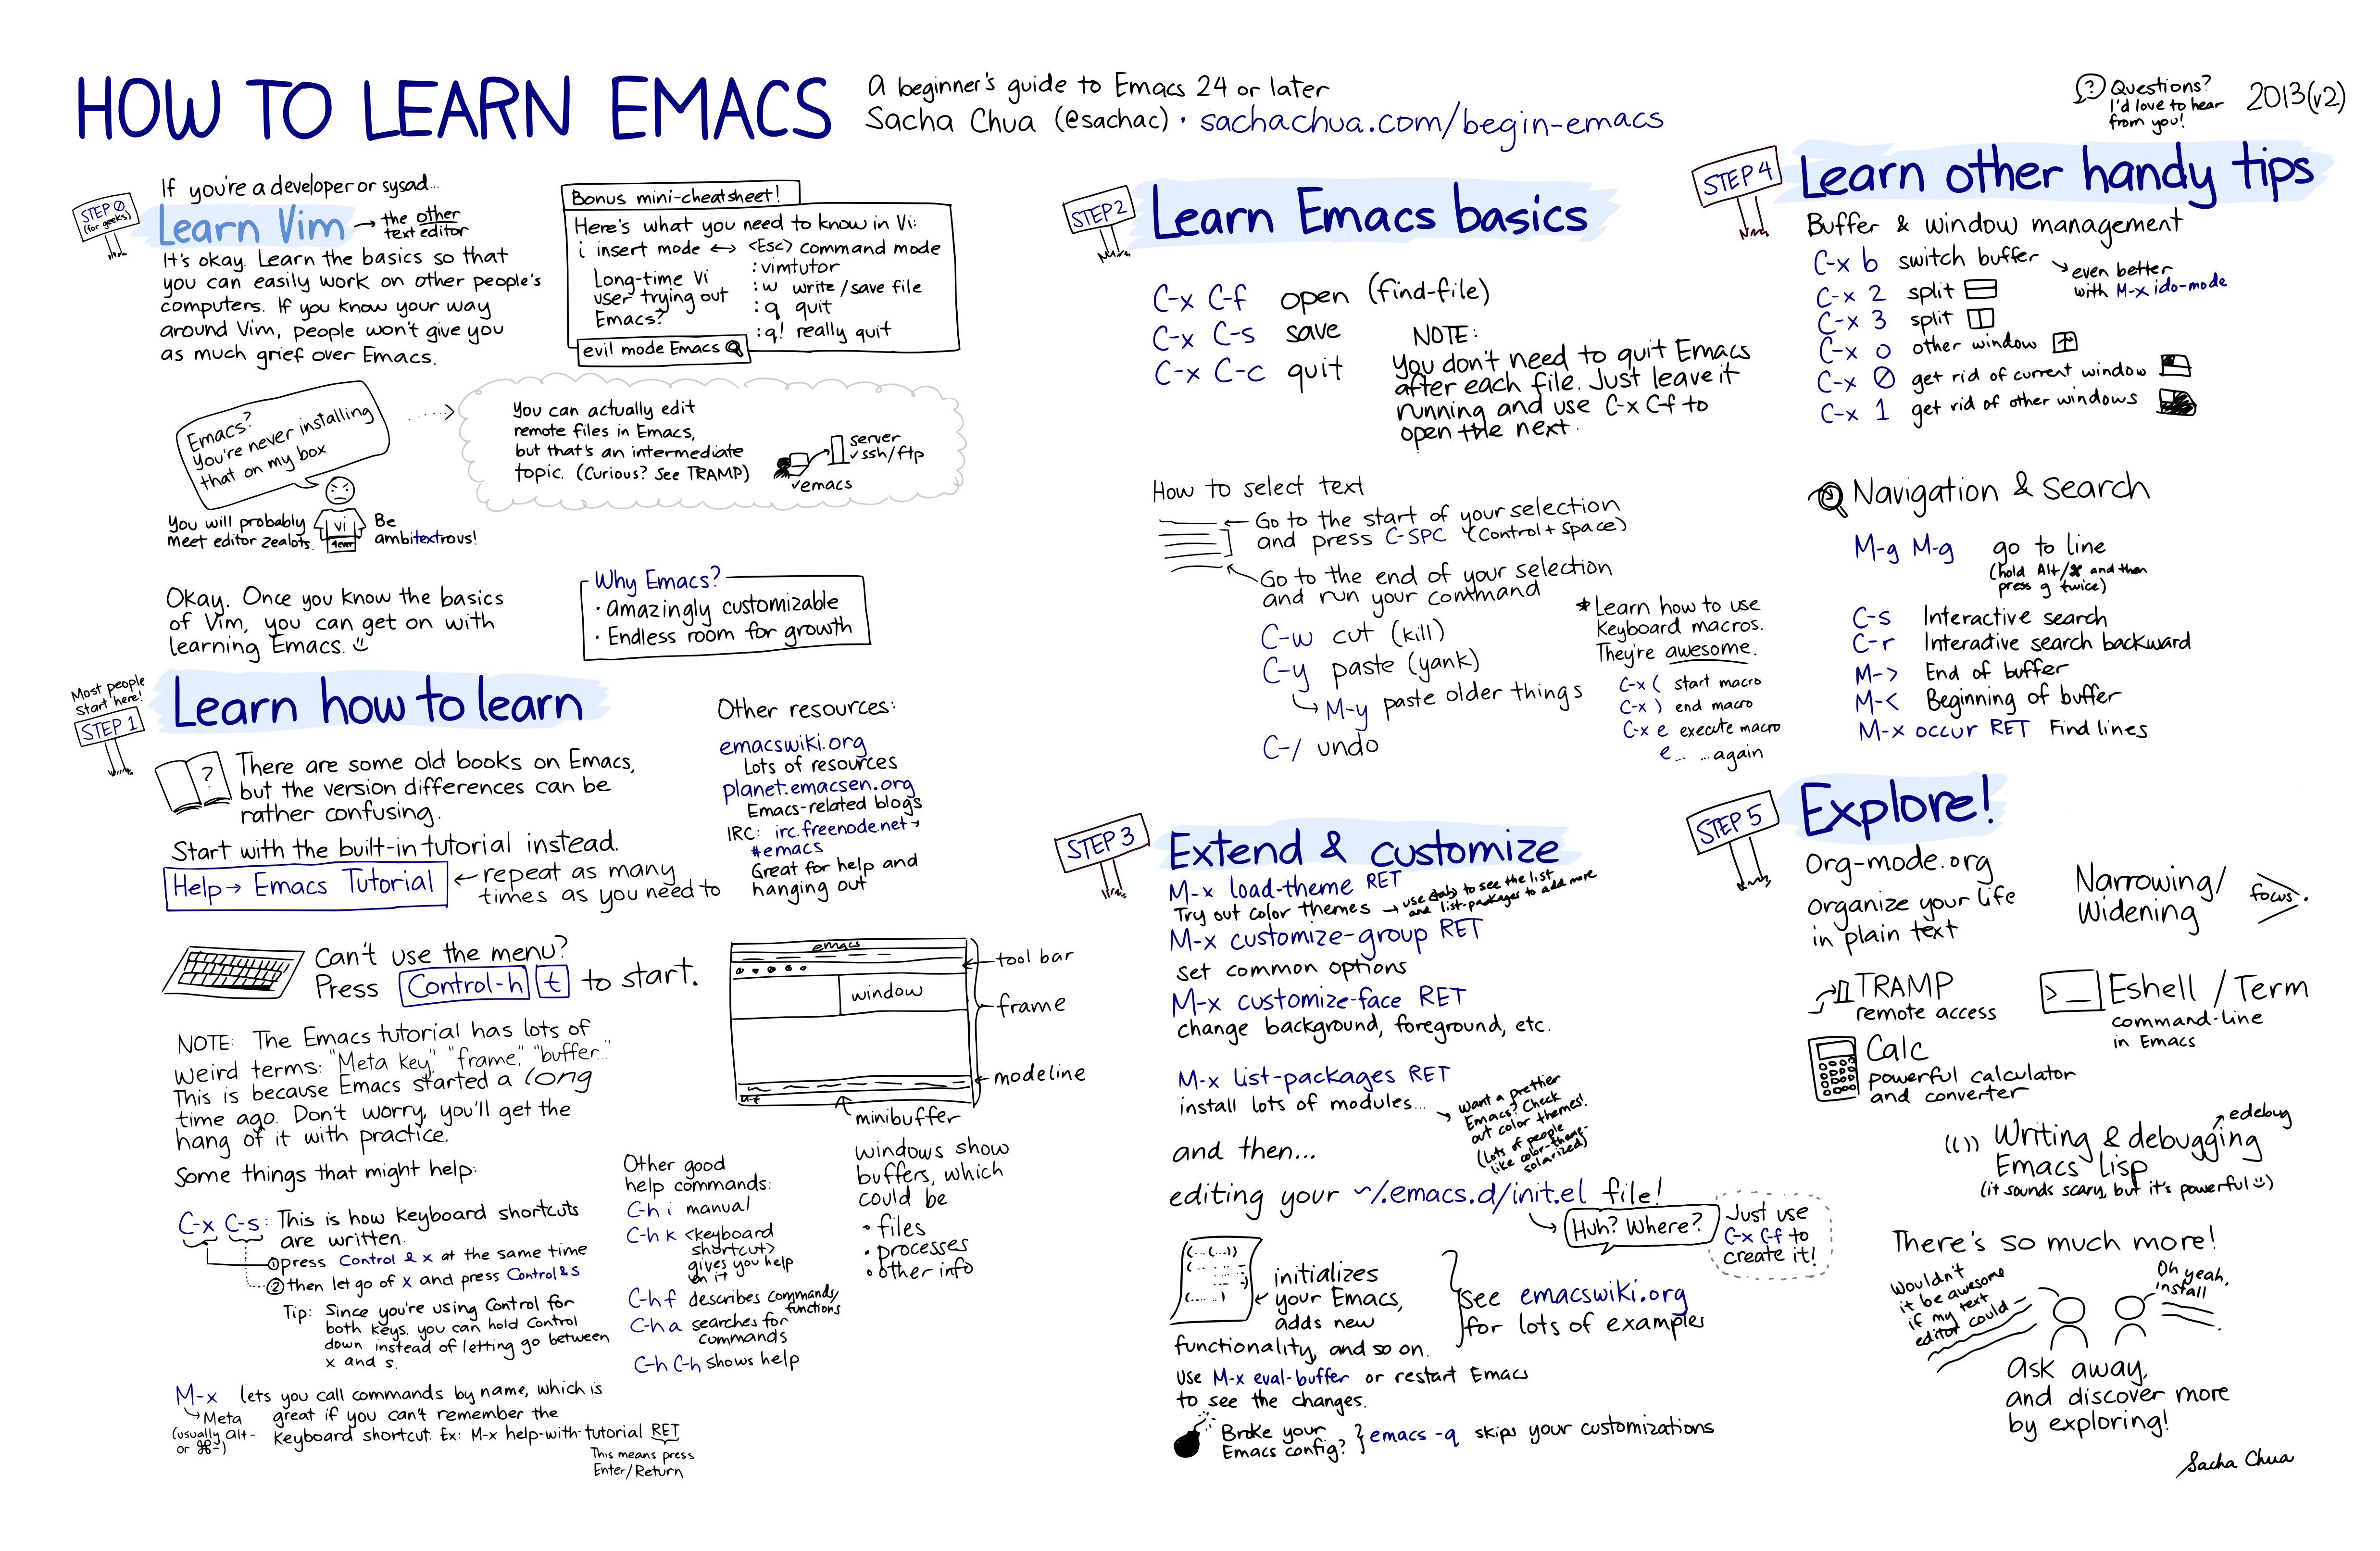
Emacs
Getting Started
- In order to launch Emacs on the CSE Linux environment,
type
emacsoremacs <filename>on the command line and press [Enter]. This will open a welcome screen or the specified file, respectively, for viewing and modification. - You can find an of commonly used commands to help you get started with basic file navigation and editing, which can be useful while learning and before you have the muscle memory down.
- When finished, you can type
Ctrl-x, Ctrl-cto exit.
Tutorials
- The official Emacs Tutorial is accessed by typing
Ctrl-h, tfrom within Emacs. This will open up a text file with instructions to follow that covers the basics of movement and editing. As this is just plain text, it can feel dry and is a lot to read. - Here is a
by Xah Lee.
The presentation leaves something to be desired, but use the left
side menu to access pages of interest.
- Recommended: "Emacs Principles, Command and Keys", "Basic Emacs Keys", "Basic Tips", everything under the "Find Replace" heading, everything under the "Copy/Paste" heading
- The official Emacs documentation includes this .
- "Mastering Emacs" is an online repository of guides and articles about Emacs. The author does recommend going through the Emacs Tutorial first, but has an article on .
CSE 333 Emacs Configuration
.emacs
Commands placed in the file ~/.emacs will be run when
Emacs starts up.
The default settings should do a decent job as-is, so we won't be
providing a starter configuration file.
If you do feel like customizing a bit, you can find some examples
.