Editing, Compiling, Running, and Testing Java Programs
This handout describes how to perform common Java development tasks in the Gates Center or Allen Center software labs and your personal computer using IntelliJ and the command line.
Contents:
- Using the Unix Command Line
- Opening Files & Managing Multiple Files
- Creating New Files
- Editing Java Source Files
- Running Automated Tasks with Gradle
- Running Java Programs
- Testing Java Programs with JUnit
- Using javadoc to generate specs
- SpotBugs Optional Tool
Using the Unix Command Line
A few CSE 331 tasks require connecting to a Linux machine and running commands from the command line. To understand the instructions may require some basic understanding of how to use a shell to perform command-line actions. This material is covered (in more depth than we need) in CSE391, which has materials posted online.
Opening Files & Managing Multiple Files
To view the files in a project, use the "Project" view along the left side of IntelliJ. If you can't find it, you can open it by using (View » Tool Windows » Project).
You can open multiple files in IntelliJ by double-clicking each of them from the Project View pane. Once you have multiple files open, you can switch between them quickly by holding down Ctrl and hitting Tab to bring up a dropdown box of open files, and then using the arrow keys to select the file whose editor you wish to bring into focus. You can also navigate through different files using the tabs on top of the editor pane.
Creating New Files
New Java files
To create a new Java source file (with the .java extension), right click on the package
you want to add the file to New »
Java Class. A window will pop up, asking you for the name of the class. Choose a name for
your class (e.g. MyClass) Type this name in the
"Name" field and click Finish.
(If you want your new class to be executable, it will need a main method.)
New Text files
There is a similar procedure for creating new non-Java files such as text files. Right click on the
directory you want to add the file to New » File. In the resulting dialog box,
type the desired filename. If you want to create a new directory, you can do so by appending the
directory name in front of your desired filename. For example, if you want to create a file
problem0.txt
in the directory hw1/answers, but the answers directory does not yet exist,
you can choose hw1 as the parent directory, and then type
answers/problem0.txt as the file name, and IntelliJ will create the new directory and
file for you.
Editing Java Source Files
Here are some useful actions that you can perform when editing Java code:
Autocompletion
Autocompletion is the ability of an editor to guess what you are typing after you type out only part of a word. Using autocompletion will reduce the amount of typing that you have to do as well as the number of spelling mistakes, thereby increasing your efficiency.
IntelliJ continuously parses your Java files as you are editing, so it is aware of the names of variables, methods, etc... that you have declared thus far.
CTRL+Space can be used to autocomplete most things inside the IntelliJ Java editor.
For example, if you have declared a variable named spanishGreeting in the current class,
and have typed the letters spanishGree in a subsequent line, IntelliJ can infer that you
mean to type spanishGreeting. The autocomplete popup should appear automatically while
your cursor is at the right of the incomplete name (e.g. you should see spanishGree
expand to spanishGreeting), but if it does not, press CTRL+Space to force
it to appear. To select an item from the autocomplete popup menu, use the arrow keys to navigate
between choices and then hit the ENTER or TAB key to actually perform
the highlighted autocompletion.
IntelliJ can also help you autocomplete method names. Suppose you have a variable myList
of type List, and you want to call the method clear. Begin typing
"myList."
— at this point, a pop-up dialog will display a list of available methods for the type List.
Once again, you can select the appropriate method with the arrow keys, then hit ENTER or
TAB.
Organizing Imports
You can press CTRL+ALT+O to organize your imports in a Java
file. IntelliJ will remove extraneous import statements and try to infer correct ones for
types that you refer to in your code but have not yet been imported. (If the name of the class that
needs to be imported is ambiguous – for example, there is a java.util.List as well
as a java.awt.List
– then IntelliJ will prompt you to choose which one to import.)
Viewing Documentation
Although you can directly browse the Java 11 API and other documentation at the Oracle website, it is often useful to be able to cross-reference parts of your code with the appropriate documentation from within your editor.
Note that you need to generate the API documentation locally before you can view docs for classes in the assignment. Use the javadoc task on gradle to do the same.
IntelliJ provides multiple ways to look at documentation of code directly from the IDE. Their website contains documentation on how to do this.
If you are adding documentation of code that is written by you, you will need to prepend the file
location with file:///.
Running Automated Tasks with Gradle
Gradle is a build system - it manages all the different code files involved in a large project,
compiling them when changed and re-using old compiled versions to speed things up when possible. It
also manages dependencies - so when you use libraries in later assignments that aren't part of the
Java standard library, it's Gradle's job to find those libraries and put them in the right place for
you. In this course, we will be managing all the configuration for gradle (the .gradle
files), so you don't need to learn how to configure a Gradle project at all. You will, however, be
using Gradle to build (compile/run/test) your code, so you'll need to learn how to use it at a basic
level.
Gradle is originally designed to be run from the command line. If you're curious, there are instructions for doing this below. However, IntelliJ also has excellent support for Gradle projects and will help you out a lot. If you haven't already, make sure you've read through and followed the Configuring IntelliJ for Gradle section of the Software Setup handout. Once that's ready, you'll be able to use the right-click menus and buttons along the top of the IntelliJ window to manage Gradle. The main control window for Gradle is found along the right side of IntelliJ. If you don't see it, use View » Tool Windows » Gradle to open it.
Using IntelliJ (Recommended)
You'll also often want to run specific gradle tasks that do a variety of things to help you write, run, and test your code. We will provide all the Gradle tasks you need to run code in this class, see the homework specs for details about homework-specific tasks. To invoke a Gradle task from IntelliJ, open the Gradle window on the right side of IntelliJ. If it isn't visible, use View » Tool Windows » Gradle to open it:
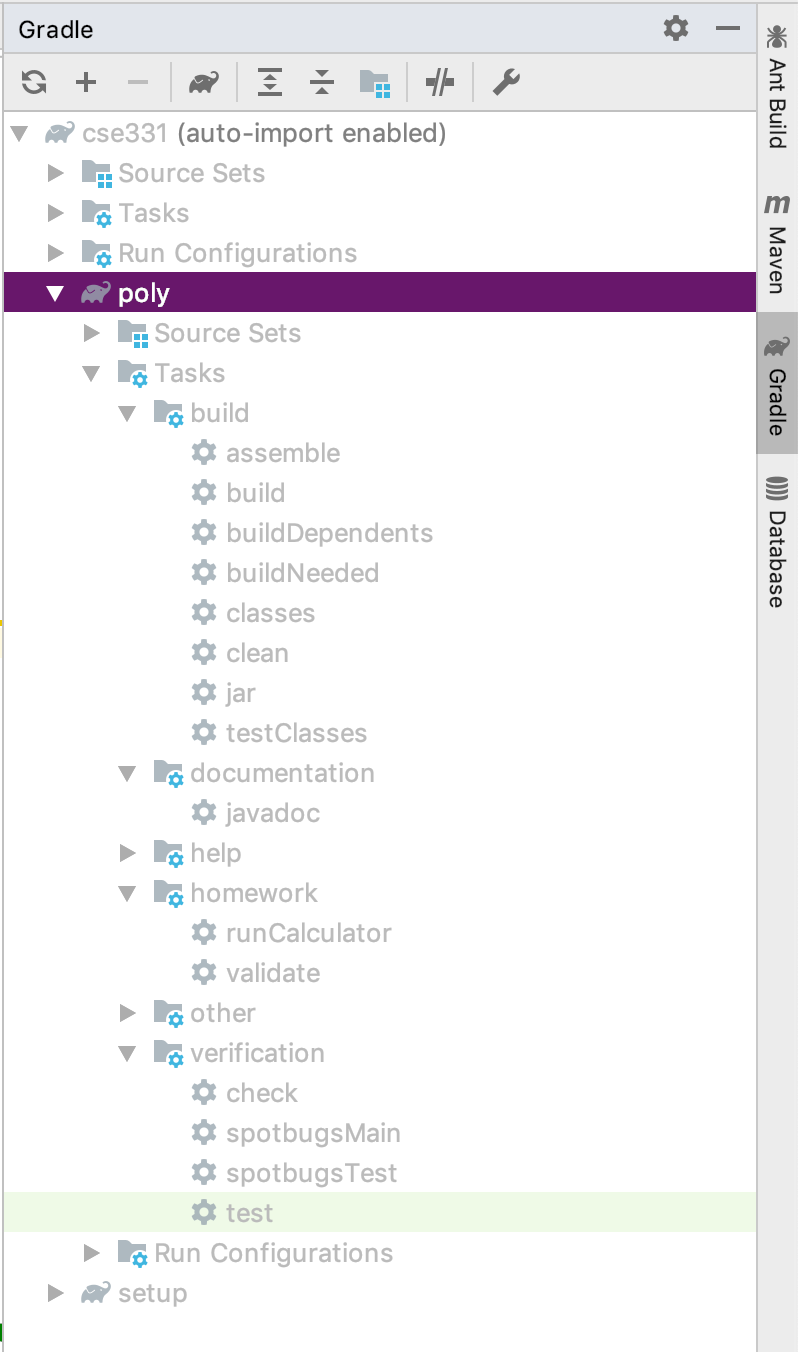
This lists every homework assignment as a separate sub-project, titled by the homework names. In the image above, the "setup" assignment and the "poly" assignment are available to the student. Under "poly," we can see the "Tasks" menu that lists all possible tasks available for that assignment. Any 331-specific tasks added for that particular assignment will be found under "homework," and other useful tasks can be found under "build", "documentation", "verification", and "other." Simply double-click on a task name to run that particular task. There is a similar structure under "setup" to allow you to run tasks on the "setup" assignment. Running a task from the upper "Tasks" menu that's not inside a project will run the respective task in all projects.
Some useful tasks and their basic functionality are listed below:
- build: Compile and test your code, and run SpotBugs.
- clean: Deletes old files generated from other Gradle tasks, like class files and javadocs.
- javadoc: Generates a javadoc webpage from corresponding javadoc comments in source code.
- validate: Cleans, Compiles both main and test code, runs javadoc, and runs tests.
- spotbugsMain: Run SpotBugs on the "main" code (in src/main/*).
- spotbugsTest: Run SpotBugs on the "test" code (in src/test/*)
- test: Run all JUnit tests in src/test/*
Using the Command Line (eg. when on attu)
To invoke Gradle from the command line, run the command ./gradlew in directory ~/cse331-20wi-YourCSENetID.
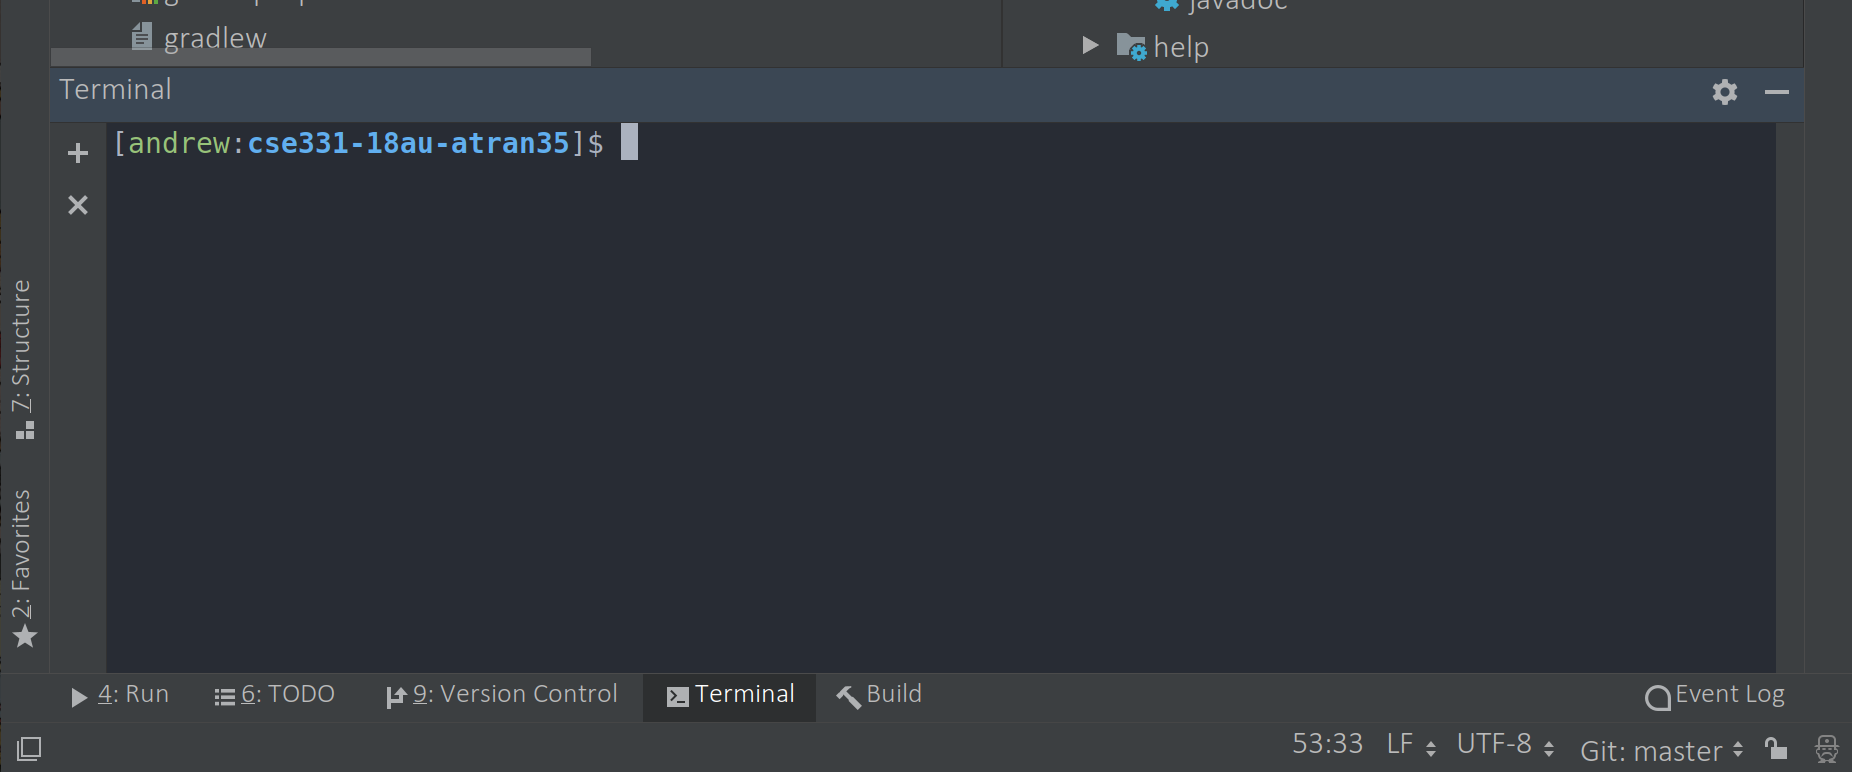
If you must use the command line, we recommend using the IntelliJ Terminal tool window at the bottom -
it'll make sure you're running Gradle from the correct location on your computer.
Windows Users: You should replace all instances of "./gradlew" with "gradlew.bat" to use the windows version of the gradle scripts. All the task names and gradle commands work the same as macOS or linux, otherwise.
In CSE331, each homework assignment has an associated name. For example, the first assignment is
called "hw-setup". When running gradle tasks, you can choose to run tasks on ALL homework assignments, or
just one. To select just a specific assignment to run a task on, put HW-NAME: in
front of the task name. Like so:
Runs the build task on ALL assignments:
./gradlew build
Runs the build task on just the "hw-setup" assignment:
./gradlew hw-setup:build
You can use the "tasks" task to find out which tasks are available. Just like before, prepend a homework name and a colon before "tasks" to find out which tasks are available for a particular assignment.
The most common task is ./gradlew build. It runs the "build" task, which checks your
program for common errors, compiles your program, runs tests, and generates documentation. Using a
build system like gradle is better than you having to remember to run each of those tasks separately.
There are also often additional tasks added for specific assignments, see the homework specs for those
assignments for details.
Command line troubleshooting
A timeout error such as "read timed out", or "Could not resolve all artifacts", indicates a network
connection problem. Try your command again. If that does not work, then add the --offline
command-line option to your ./gradlew command. (This may not always solve the problem, contact
the staff for help if this persists.)
If you get
Execution failed for task ':clean'.
> Unable to delete file: ...
then run ./gradlew cleanByRenaming
If Gradle hangs and produces no output for a long time, run the following command
kill -9 $(lsof -t +D ~/.gradle) && rm -rf ~/.gradle
(which itself may take many seconds, but generally less than a minute, to run) and try again. If the command fails, you can run this instead:
mv ~/.gradle ~/.gradle-DELETEME
Running Java Programs
Using IntelliJ (Recommended)
To run a program, right click on the Java source file containing the main() method and
choose Run 'FILENAME' where FILENAME is the file with the main()
method. There is also a button near the top-right-hand side of the IntelliJ window that looks like
![]() which will re-run the last application (or JUnit test, see below) that
you ran.
which will re-run the last application (or JUnit test, see below) that
you ran.
Using the Command Line
Typically, to run a program you will just type ./gradlew on the command line, possibly
with a more specific target: ./gradlew HW-NAME:target. See the homework specs
for more details on which targets to use to run different parts of your projects.
Testing Java Programs with JUnit
JUnit is the testing framework that you will use for writing and running tests.
For more information, visit:
- JUnit 4 web site
- JUnit Cookbook, a brief tutorial
- JUnit API documentation
Using IntelliJ (Recommended)
To run all tests for a particular assignment, use the "test" Gradle task for that particular assignment in the IntelliJ Gradle window. IntelliJ will open a test runner window that will display the output of all tests run. You can also right-click on a particular test class in the project view to run just the tests in that class. A description of the different features in the test results is below:
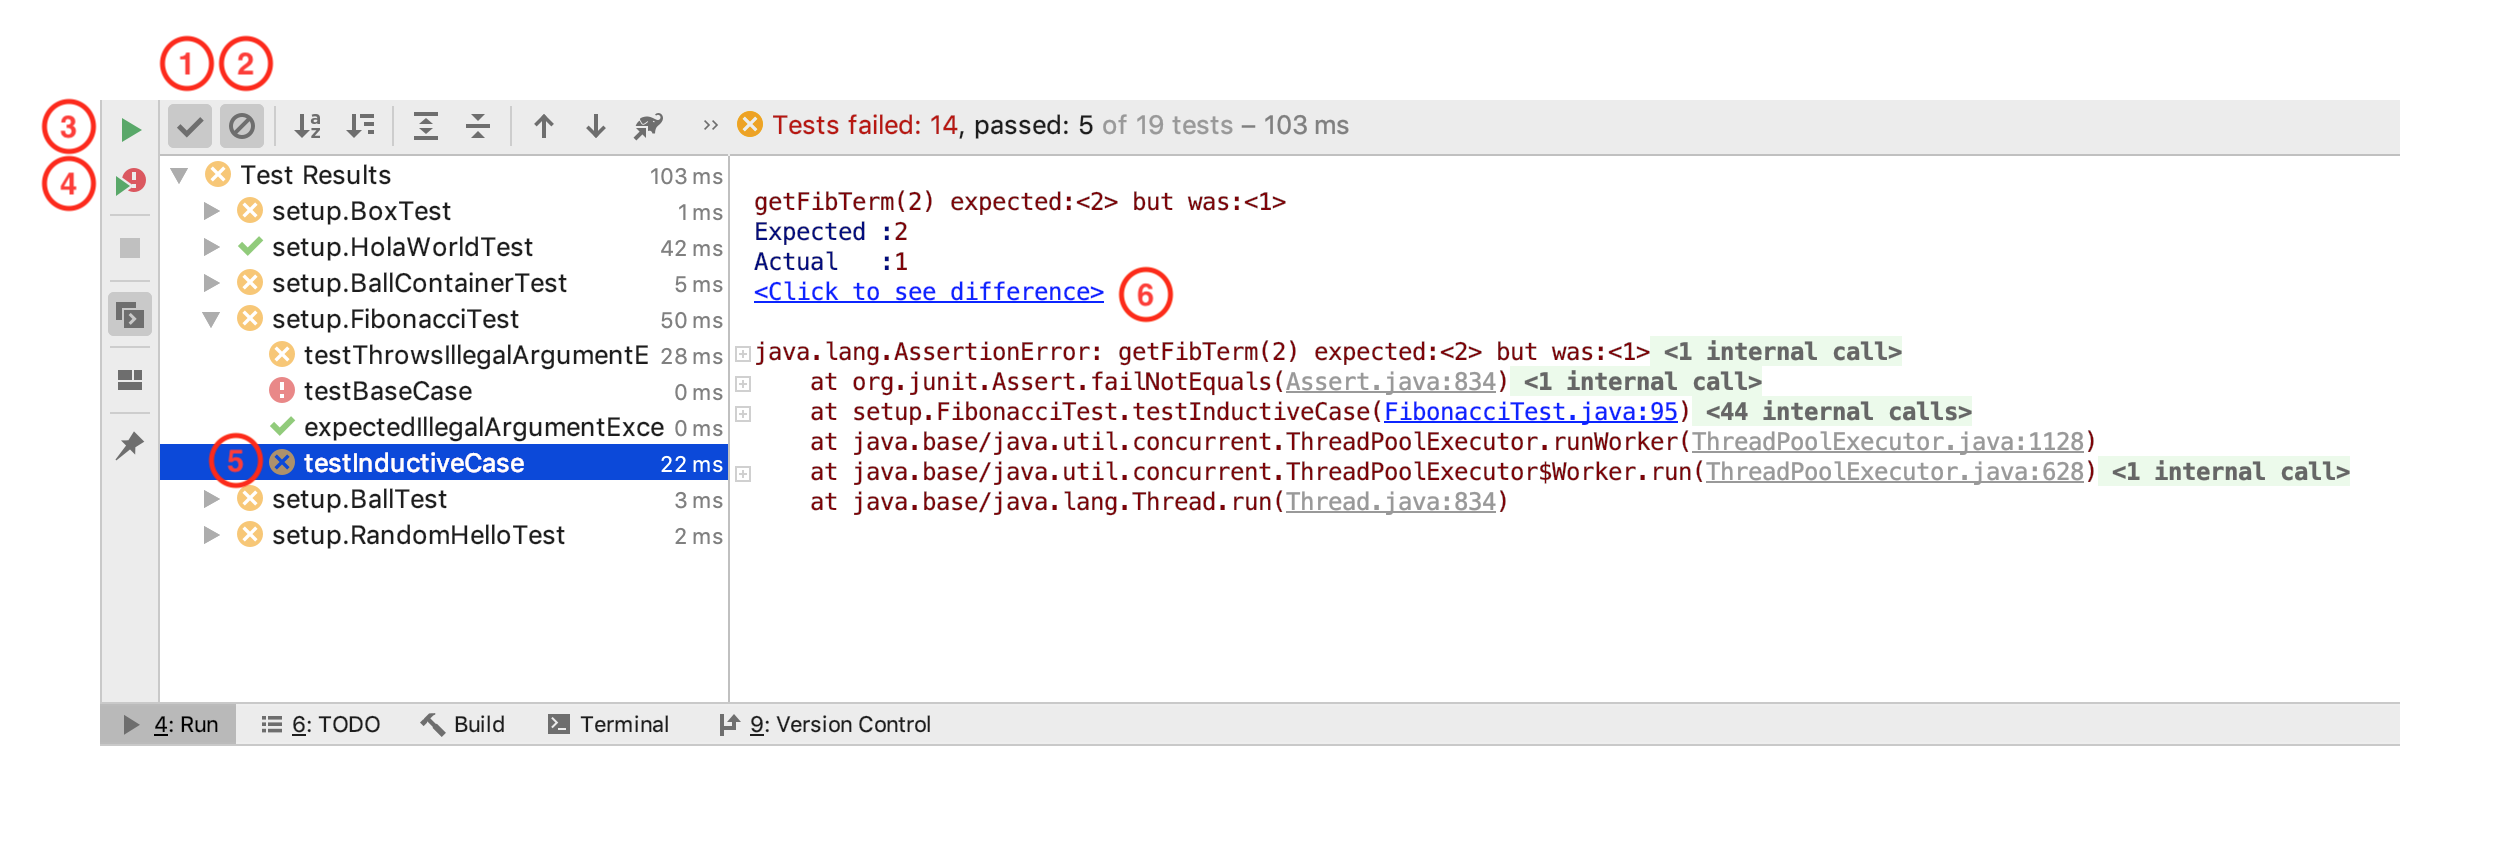
Each aspect of the window numbered above are described below:
- Toggle this to show/hide tests that passed. In this example, passed tests are visible.
- Toggle this to show/hide tests that failed. In this example, failed tests are visible.
- Press this to re-run the same test suite that was most recently run.
- Press this to re-run only tests that failed during the last test run.
- This is the list of all tests that were run, filtered by (1) and (2) above, and sorted by test class. Select a particular test to see the results on the right and details about why a test failed, if it did.
- Here the difference between what the test expected versus the actual value is printed here. You can use the "Click to see difference" link to view the difference in more detail - this comes in handy for larger strings used in later assignment tests. Any exceptions thrown (and not caught or expected) during the test are also printed here. Standard output is also printed directly to this window for any tests.
Using the Command Line
To compile your code and run tests:
./gradlew test
You can also run just the tests for a specific assignment. For example, the "setup" assignment:
./gradlew hw-setup:test
You can run specific tests by including the package and class name of the test or tests you'd like to
run. For example, to run just the tests in the FibonacciTest class, which is in the
setup package, use the following command:
./gradlew hw-setup:test --tests setup.FibonacciTest
You can also run just a specific test method like this:
./gradlew hw-setup:test --tests setup.FibonacciTest.testBaseCase
This can be useful if you're having trouble with just a couple tests as you're debugging.
If all the run tests succeed, gradle will simply print "BUILD SUCCESSFUL" after finishing the test task. If any tests failed, gradle will print "BUILD FAILED". Scroll up to see a listing of all the tests that failed, as well as explanations of where in the code the tests failed and what happened. Any outputs headed with "STANDARD_OUT" (you'll see a few in the setup assignment, for instance), correspond to any outputs printed out by the code during a particular test. (For example, test code that calls System.out.println or similar methods will have the output show up in a section titled "STANDARD_OUT", alongside the test name.)
If you'd like more detailed information about all the tests run (including the tests that succeeded),
you can view the generated testing report. Every time the test target runs, a report is created at
build/reports/tests/test/index.html in the assignment's folder. To view this report,
right click on it in IntelliJ's file browser, go to "Open in Browser", and select your favorite web
brower. This report can sometimes be useful for going through testing data if there were lots of tests
that failed or large error messages printed by gradle.
Using javadoc to generate specs
The javadoc tool produces API documentation (in HTML form) from source code annotated with special comments.
To run the Javadoc tool, issue this command:
./gradlew javadocYou can find the generated API documentation, in HTML form, under
build/docs/javadoc.
If IntelliJ fails due to unknown tags, you will need to add the tags to IntelliJ.
Javadoc tags
Your Java code comments contain "tags", which are introduced by an at-sign (@). The Javadoc tool formats these specially in the HTML output.
We have extended the javadoc tool to recognize additional CSE 331 tags, in addition to the standard tags. These additional tags declare specification fields for classes and requires, modifies, and effects clauses for methods. Note that all Javadoc tags must appear after all non-tag comments for classes and methods.
-
Some extended tags belong in the overview for a class; they are used to formally define what a
given Abstract Data Type represents.
-
@spec.specfield name : T text-- Indicates that name is a abstract specification field of type T for the class, adding text as a comment if present -
@spec.derivedfield name : T // text-- Same as specfield, except that this also adds the property "derived" to the output information
Derived fields can be viewed as functions on preexisting state; thus if a class had a specfield
@spec.specfield n : integerwe could define a derived field:@spec.derivedfield pos : boolean // pos = true iff n > 0
Derived fields are not allowed to hold any information that could not be already calculated from the already existing state in the object. Thus, you use specfields to introduce new state variables and derived fields to introduce functions on those state variables.
Derived fields are not strictly needed in specifications, but they may reduce complexity and redundancy.
-
-
Other extended tags belong in the specification for a method; they define the method's
preconditions, postconditions, and side effects.
-
@spec.requires X-- Declares X to be a precondition for the method -
@spec.modifies Y-- Declares that nothing besides Y will be modified by the method (as long as X holds when it is invoked) -
@spec.effects Z-- Declares that Z will hold at exit from the method (as long as X holds when it is invoked)
-
SpotBugs Optional Tool
We're including an additional tool with your project: SpotBugs. This can help you find issues in your
code that may be hiding tricky bugs. Some of its warnings are mundane and fine to ignore for this
class, but you're welcome to run it if you'd like it to take a look at your code. Every homework
assignment has its own spotbugsMain and spotbugsTest that runs SpotBugs on
your main assignment code and test code, respectively.
Output from the SpotBugs tool can be found in HW-NAME/build/reports/spotbugs.
Your code is not required to pass all the SpotBugs checks in order to receive full
credit, it's simply an optional tool provided to help you if you'd like to use it.
Troubleshooting IntelliJ
If the staff provides a new version of a library, IntelliJ might not automatically find the library's new symbols (classes and methods). As a result, IntelliJ will not do completion and may issue warnings about them. To resolve the problem:
In IntelliJ's Gradle window (View > Tool Windows > Gradle), click the refresh button at the end to refresh all libraries.