Anaconda 3
Anaconda is a tool that simplifies Python package management and deployment. In this course, we will be using Anaconda 3 as our all-in one system setup for local Python development.
Install Anaconda 3
Already have Anaconda 3 with Python 3.7?
If you already have Anaconda 3 installed with Python 3.7 or later, you may skip over this step.
Already have Anaconda 3 with an earlier version of Python?
We will be using Python 3.7 for the homework assignments. Earlier versions of Python may work, but the course staff may be unable to provide support for issues relating to earlier versions.
To update your Python version, open your terminal/command prompt and paste the following commands:
conda update condaconda install python=3.7
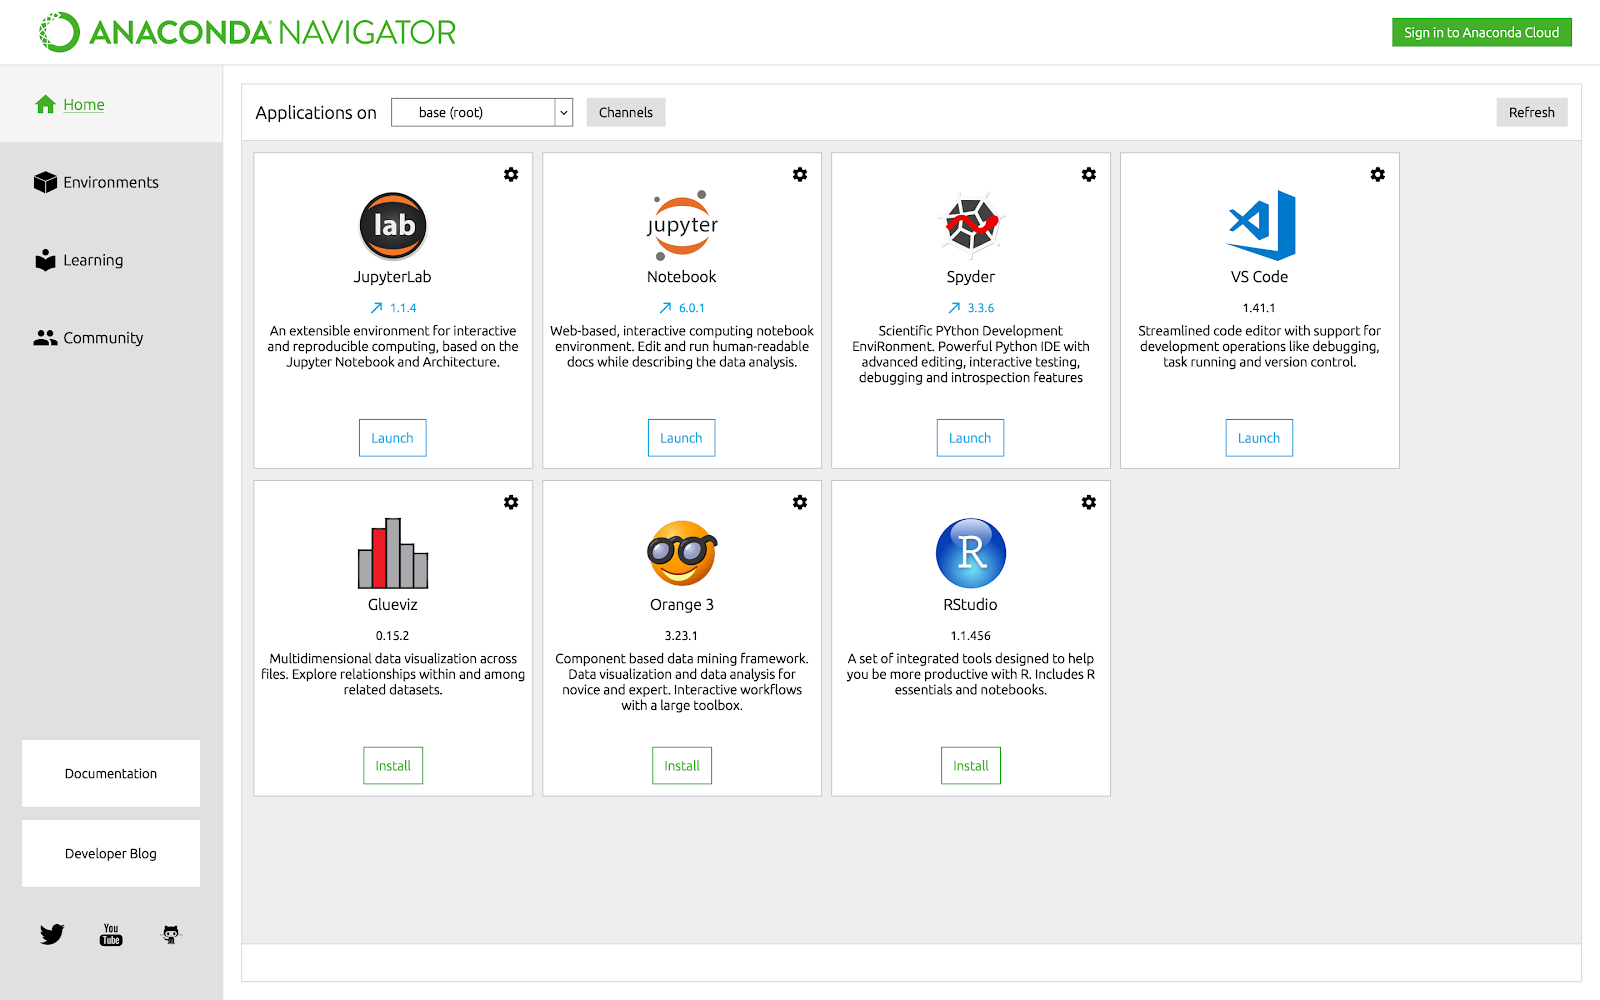
Go to Anaconda’s website, scroll down to the bottom, and download and run the installer for your operating system. Once installed, open the Anaconda Navigator application and you should see the home screen:
Ubuntu Users
If you are using Ubuntu, the downloaded file will be a script named similarly to Anaconda3-2021.05-Linux-x86_64.sh. Install Anaconda by navigating to the file in the terminal and run the following commands:
chmod +x name_of_your_anaconda_file.sh./name_of_your_anaconda_file.sh
Follow the prompted instructions. Once finished, you can open Anaconda Navigator by typing anaconda-navigator in your terminal.
Python Environment
Python environments are self-contained Python installations meant to limit version conflicts and dependencies between different Python projects. It is fairly common to create a new environment whenever you work on a different project. As a result, we’ll create an environment specific for this course.
Info
Some web browsers might automatically save the yaml file as a .txt file. Go ahead and rename the file to have the .yaml extension.
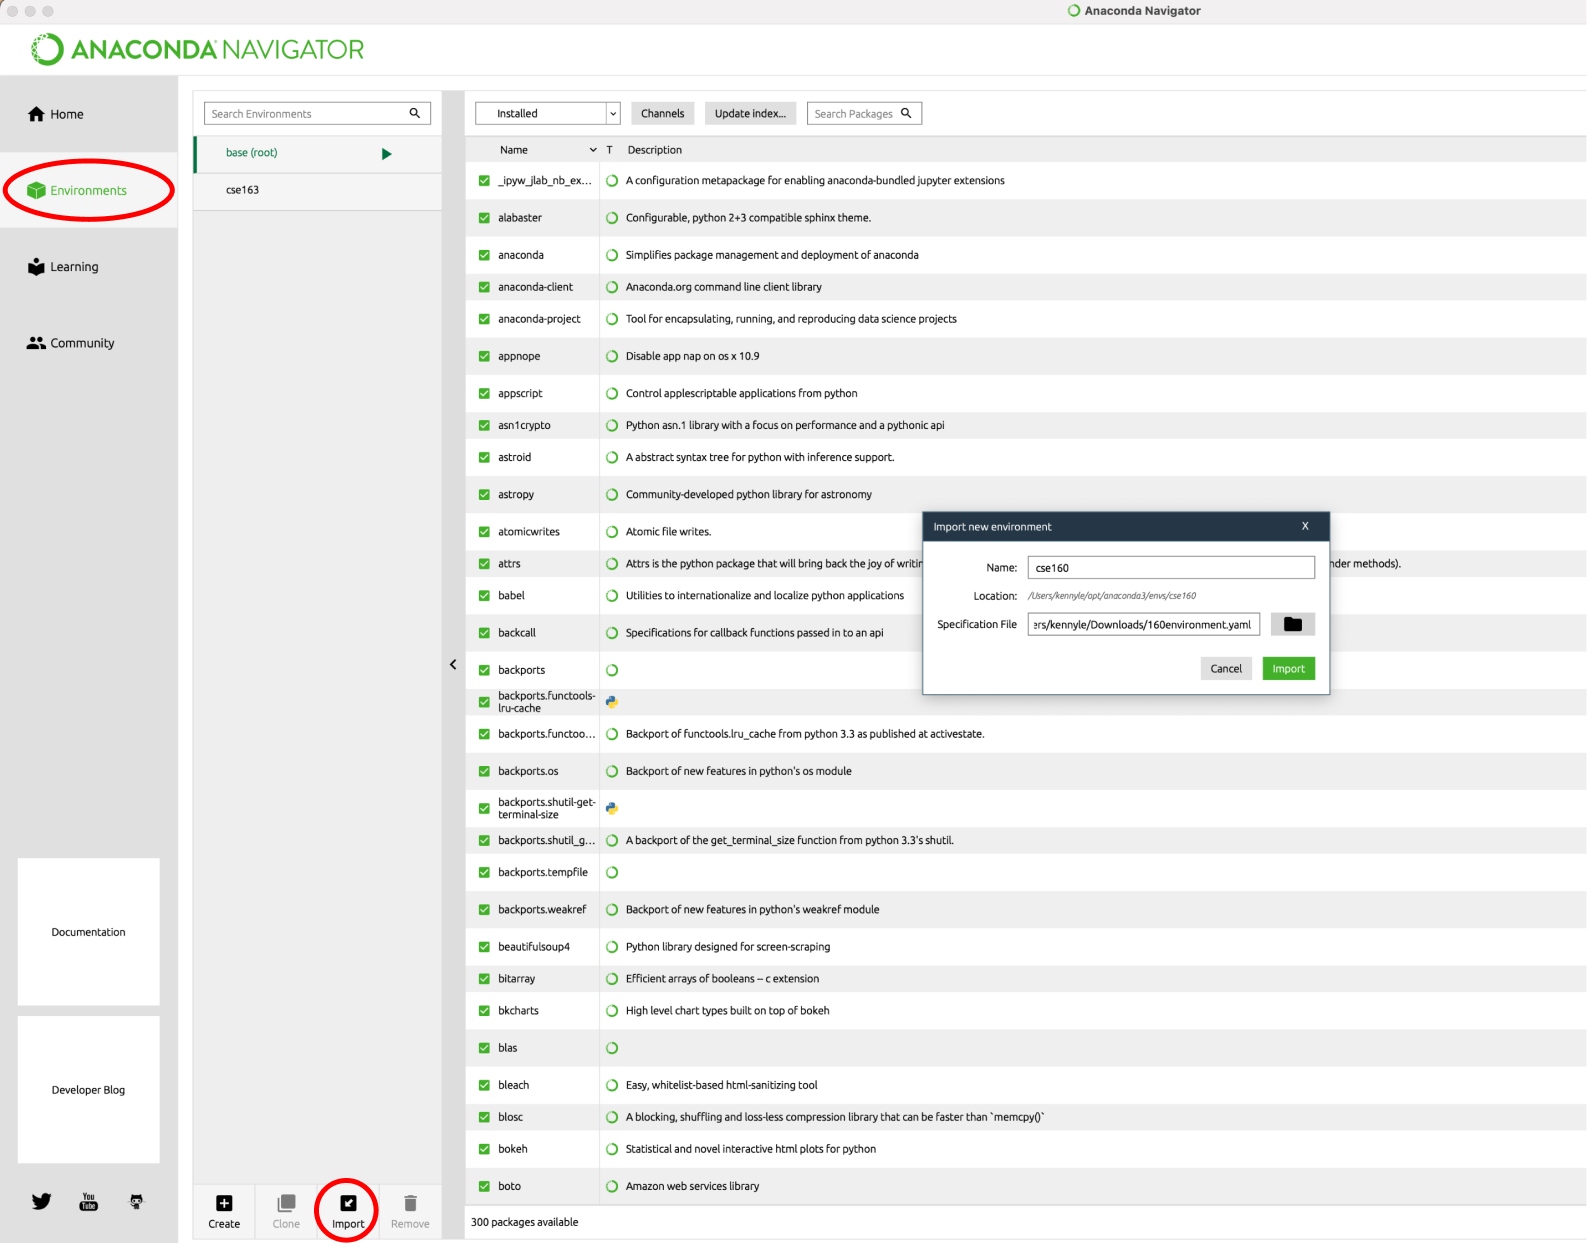
- Download our 160environment.yaml file, which specifies all requisite Python packages (and their respective versions) we’ll be using in this course.
- Navigate to the Environments section of Anaconda Navigator, click Import at the bottom and select the
160environment.yamlfile. Go ahead and name your environment to whatever you would like (something likecse160). - Verify that your environment has installed all the packages successfully by clicking on your environment and viewing its packages.
Visual Studio Code
Visual Studio Code (VSCode) is a popular text editor that many developers use for a number of different programming languages. While Python can be programmed in various different tools, we will be using VSCode as our main development tool in this course.
Download VSCode
- Download and install VSCode according to your computer’s operating system.
Tip
If you are on a Mac and get a warning dialog about being unable to install an app from an unidentified developer, you can get around it by right-clicking the installation file and clicking Open.
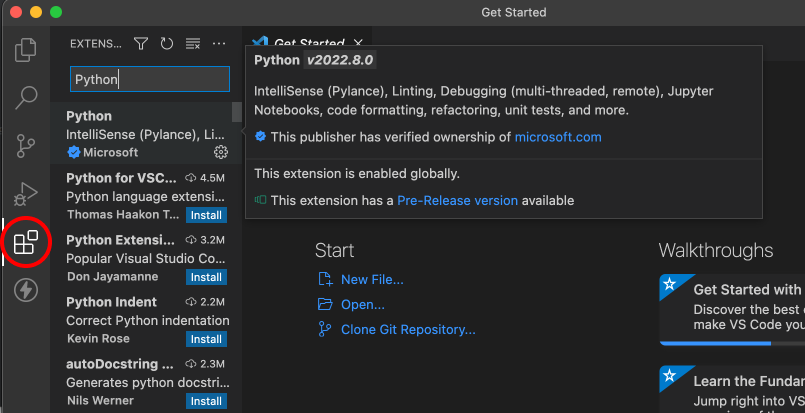
- Once the home screen has loaded, install the necessary Python plugin by clicking on the Extensions icon on the left navigation pane, and installing the Python plugin by Microsoft.
Setting Up VSCode
- Download
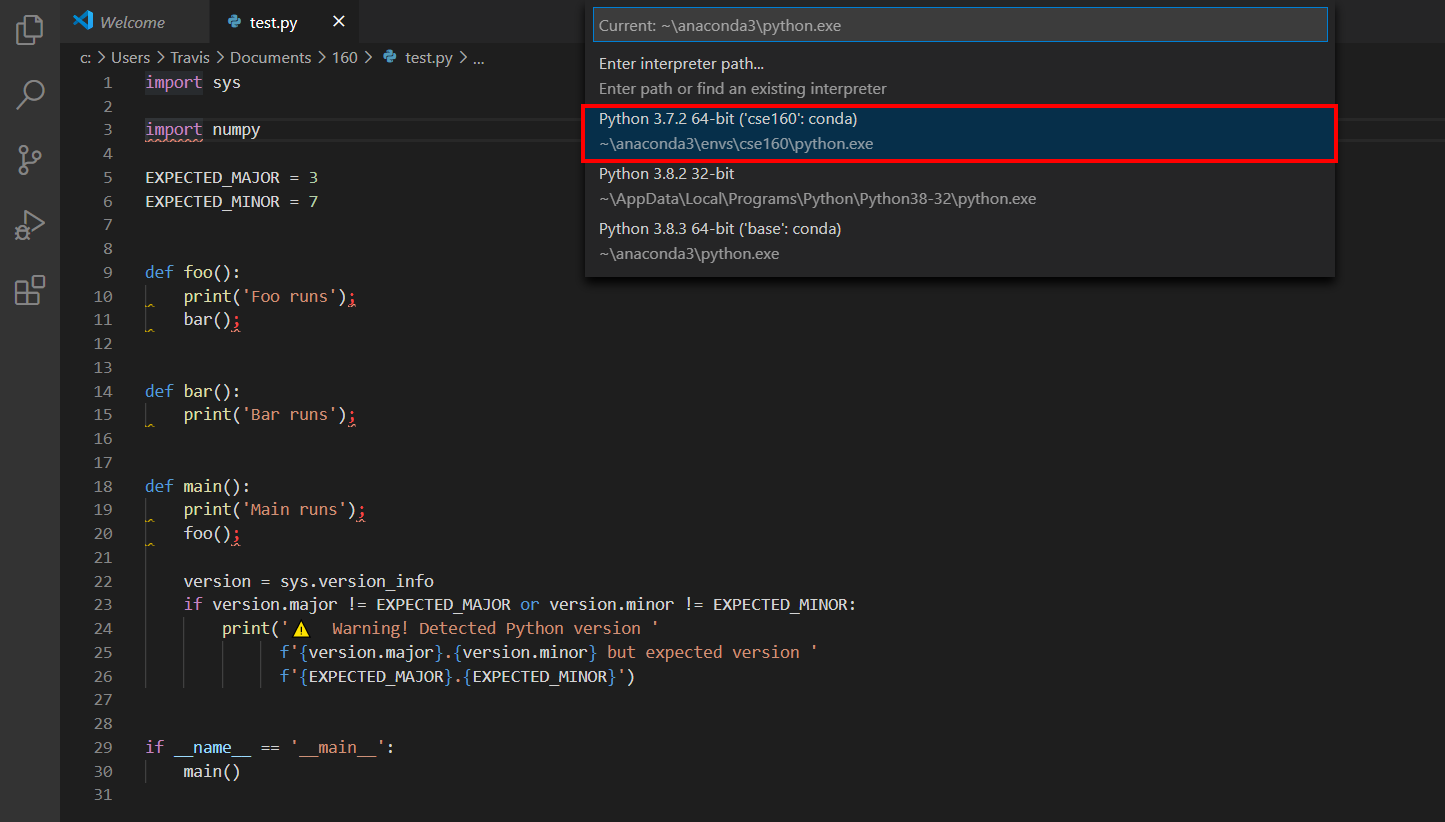
test.pyand open it in VSCode: File | Open and selecttest.py. - Navigate to the Command Pallet from Help | Show All Commands, type in
Python: Select Interpreterand hit Enter. - Select the
cse160Anaconda environment we created earlier, which should have a path similar toanaconda3/envs/cse160.
Additional Steps for Windows
-
If you are using Windows, you must change the default program that Windows uses to run Python files. Navigate to the Command Pallet again, type in
Open Settings (JSON), and hit Enter. -
Add in this line between the curly braces:
"terminal.integrated.defaultProfile.windows": "Command Prompt" -
Click File | Save. Finally, quit and reopen VSCode for changes to take affect.
Configure Linter
Linters are a type of program that check your code quality and style (and displays warnings and errors if certain rules are violated!). For this course, we will use flake8 as our linter.
- Navigate to the Command Pallet, type in
Python: Select Linter, and hit Enter. - Select
flake8and installflake8if prompted to.

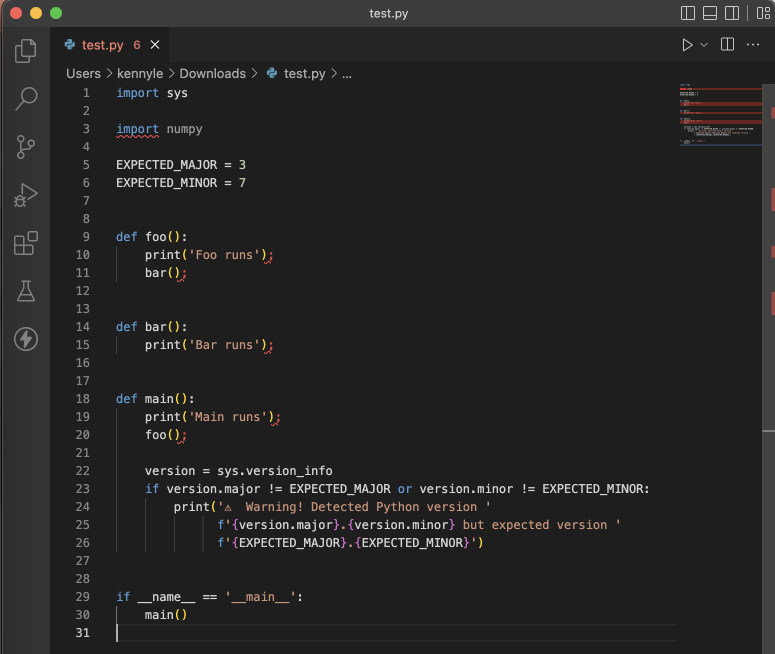
Sanity Checking VSCode Setup
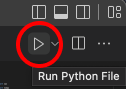
You can check that everything is set up correctly by test.py by clicking the Run button in the upper right-hand corner.
If everything runs correctly you should see the following output in the terminal at the bottom:
Main runs
Foo runs
Bar runs
You should see a number of red squiggly lines in VSCode (warnings from flake8) since test.py has some things that break style conventions in Python (unused import statement and semicolons). You may ignore these for now, but for future homework assignments, you should fix all flake8 errors.
Warning
It is possible to run Python programs without fixing all flake8 errors, however, you will lose points on assignments if you do not fix all flake8 errors.