Due: at 11:59pm on Monday, October 19, 2020.
Submit via Gradescope. (REQUIRED survey)
Learning Objectives:
Although you will fill in the body of one function and call it, you do not need to write additional functions for this assignment. You are encouraged to examine the provided function filename_to_string, which opens and reads in data files, but you do not need to understand anything about opening and reading files in order to do this assignment. For all of our assignments you should NOT use parts of Python not yet discussed in class or the course readings.
Advice from previous students about this assignment: 14wi 15sp
You will use, modify, and extend a program to compute the GC content of DNA data. The GC content of DNA is the percentage of nucleotides that are either G or C.
DNA can be thought of as a sequence of nucleotides. Each nucleotide is adenine, cytosine, guanine, or thymine. These are abbreviated as A, C, G, and T. A nucleotide is also called a nucleotide base, nitrogenous base, nucleobase, or just a base.
Biologists have multiple reasons to be interested in GC content:
If you are curious, Wikipedia has more information about GC content. That reading is optional and is not required to complete this assignment.
Your program will read data files produced by a high-throughput sequencer — a machine that takes as input some DNA, and produces as output a file containing a sequence of nucleotides.
Here are the first 8 lines of output from a particular sequencer:
@SOLEXA-1GA-2_2_FC30DNN:1:2:574:1722
CCCCCCCCCCCCCCCCCCCCCCCCCCCCCCCCCCCC
+SOLEXA-1GA-2_2_FC30DNN:1:2:574:1722
hhhhhhhhhhhhhhhhhhhhhhhhhhhhhhhhhhhh
@SOLEXA-1GA-2_2_FC30DNN:1:2:478:1745
GTGGGGGTGATGTCCACGATTACGCCGACCGGCTGG
+SOLEXA-1GA-2_2_FC30DNN:1:2:478:1745
hhhhhhhhhhhhhhhhhhhhhhhhhhhhhhhhhhhh
The nucleotide data is in the second line, the sixth line, the tenth line, etc. Thus to calculate GC content, you will be looking for the percentage of the letters appearing on these lines that are G or C. Your program will not use the rest of the file, which provides information about the sequencer and the sequencing process that created the nucleotide data. Don't worry, we provide the code to read the appropriate lines of the file into a string for your program to process. But it will be useful for you to know what parts of the file are being used when checking your work by looking at files.
We have noticed that some Mac users were having issues between conda and VSCode. This issue seems specific to Mac OS, but if you later find you are having issues with running verify_setup.py due to invalid syntax, then you should come take a look at this section.
First, lets double check to make sure you have a problem in the first place.
To start, open the either this homework or another python file in VSCode.
Run that python file in the terminal in VSCode by either right clicking on the
main code window and hitting "Run Python File in Terminal" or by hitting the green
triangle button in the upper left corner. Afterwards type
python -V in the terminal and hit enter. You should see it say
"Python" followed by a version number. If you are seeing a number that starts
with 3 (such as 3.7.2) then you are likely fine and can move on to
problem 1. There is an issue if you see a number that
starts with 2 (such as 2.7.16), and we will show you how to fix it.
To fix this issue, follow these steps:
Shift+Cmd+P on Mac, Ctrl+Shift+P on Windows/Linux)>Preferences: Open Settings (JSON) and select it."terminal.integrated.inheritEnv": false,. Be sure that your json file is formatted properly. Specifically that there is a comma at the end of each line except for the last item listed in the json file.python -V into the terminal again.
If you get a version number that starts with 3, then you should be good to go!
If you still have a version number that starts with 2, make a post on ed and staff will try to help you as quickly as possible.
Obtain the files you need by downloading the homework2.zip file. (This is a large download — be patient.)
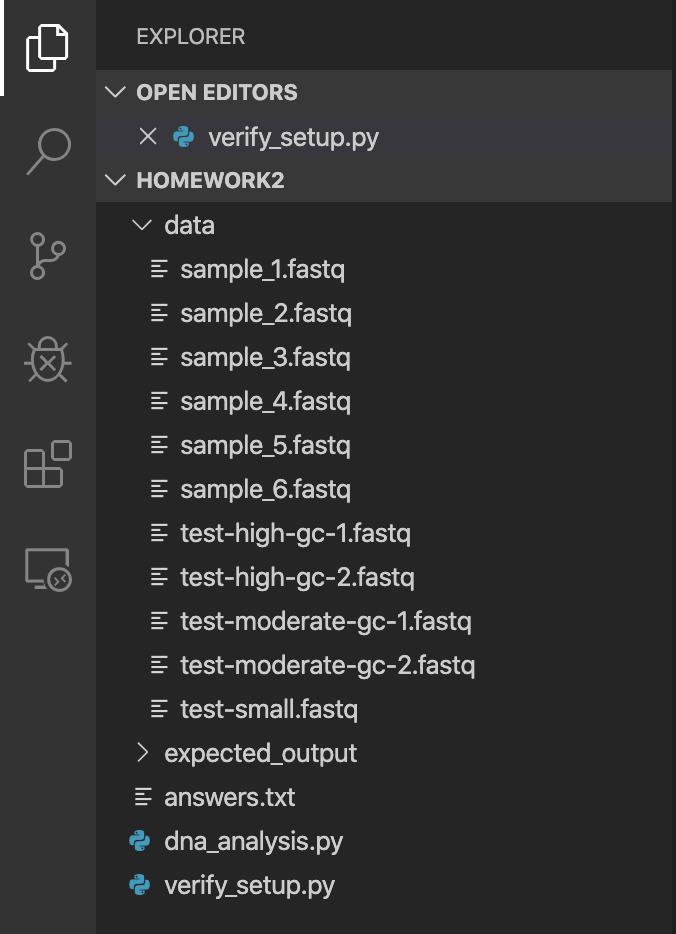
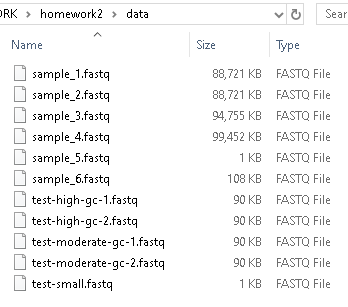
Unzip the homework2.zip file to create a homework2 directory/folder. Depending on how you unzip, an additonal directory could be created for you and you may have some troubles selecting the correct directory. Make sure your file directory looks the same as what is shown below. You will do your work by opening the homework2 FOLDER from VS Code. Be sure you don't accidentally open up one of the sub-folders (data and expected_output). You want to open up the "top level" homework2 folder which contains both of those folders. You should see the file directory similar to this in VSCode:
You will do your work by modifying two files — dna_analysis.py and answers.txt — and then submitting the modified versions. Add your name to the top of each of these files.
Each problem will ask you to make some changes to the program dna_analysis.py (or to write text in the answers.txt file, or both). When you do so, you will generally add to the program. Do not remove changes from earlier problems when you work on later problems; your final program should solve all the problems.
In either file, keep the number of characters on a particular line below 80, otherwise your files become hard to read. One technique to do this in Python is to break large equations into smaller ones by storing subexpressions in variables. Breaking things down into smaller computations can also help with debugging.
By the end of the assignment, we would like dna_analysis.py to produce output of the exact form:
GC-content: ___
AT-content: ___
G count: ___
C count: ___
A count: ___
T count: ___
Sum of G+C+A+T counts: ___
Total count: ___
Length of nucleotides: ___
AT/GC Ratio: ___
GC Classification: ___
Where ___ is replaced by values that you will calculate. Of course, the exact values in each category will vary depending on the input data that you are using. We expect the formatting of your program output to exactly match this.
Check your output - You should validate your dna_analysis.py program's output using the Diff Checker before submitting your assignment. You can compare your output to the files given in the expected_output directory of the homework2 files. Drag a file to a window in the Diff Checker. Select text in a terminal window and paste it into the other window and select "Compare".
Editing text files - You will submit answers.txt as a text file. Plain text is the standard for communicating information among programmers, because it can be read on any computer without installing proprietary software. You can edit text files using VSCode or another text editor. If you use a word processor, then be sure to save the files as text. Windows users should never use Notepad, as Notepad will mangle the line endings in the file; WordPad or Notepad++ are better alternatives.
VSCode Terminal Window - In the past some students have had trouble running from the command line when folder names had spaces in them. You may find it easiest to avoid this (that is, rename your folders so they do not have spaces in the name). Also, be sure you are using the VSCode Terminal so that Andaconda Python and the cse160 environment is configured as the Python version used on the command line. When you type: python --version you should see: Python 3.7.2. Make sure you verify your environment is set up correctly (see next problem)!
To cut and paste things from the VSCode Terminal Window, left click and drag the mouse to select text from anywhere in the command prompt window. Once you have highlighted what you want, use control-C to select it and then control-V to paste into Diff Checker or a text file.
You do not need to modify answers.txt or dna_analysis.py for this problem.
We have noticed some different configurations for python so we thought it would be useful to leave some instructions here to make sure you are setup correctly. If you open this assignment in VSCode and notice that you are not seeing "Python 3.7.2 64-bit('cse160': conda)" or flake8 is not giving you warnings, try running through these steps. Otherwise, you are likely safe to skip to Problem 2.
If all of that checks out, then hopefully these settings should stick for the remainder of the homeworks in this course! You can close hi.py.
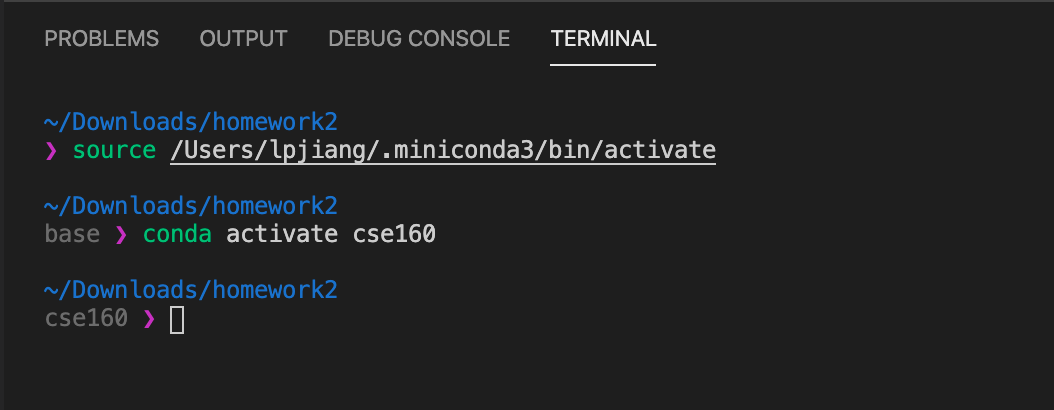
On Mac you should see something similar like:
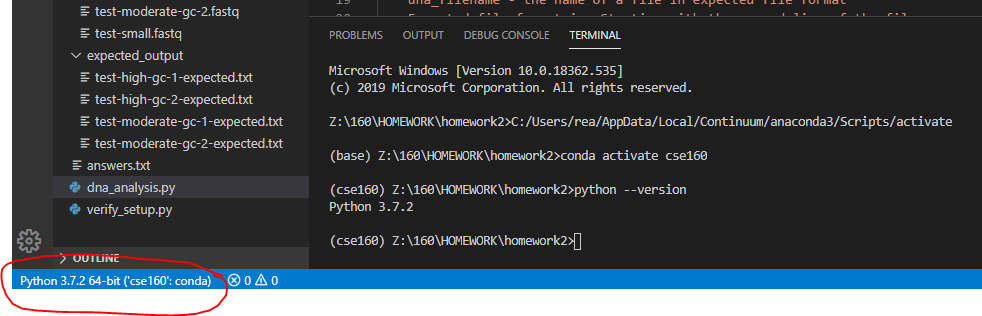
If you do not see the commands shown above or your environment does not show up as cse160 in the blue bar at the bottom of the screen, set your environment to cse160 by clicking on the blue bar: a prompt should appear at the top of the screen for you to select an environment, and you should find the one relating to the cse160 Anaconda environment (should be something like anaconda/envs/cse160/bin/python, but may be different based on your operating system). Then kill this terminal window by hitting the trash can icon and start a new one by hitting Ctrl+Shift+` or selecting Terminal->New Terminal at the top of the screen.
To verify everything else, type the following into the terminal window:python verify_setup.pyIf your setup is correct, you will see:
No errors found.If there are errors, hopefully they should be clear enough to tell you what is wrong, if not, please ask! For example, take a look at the last line in this output:
An error occured: Traceback (most recent call last): File "verify_setup.py", line 13, inassert os.path.exists(os.path.join(data_path, f)), f"{f} was not found in data folder!" AssertionError: test-small.fastq was not found in data folder!
If you were using the green triangle button to run your Python programs in VSCode for HW1, you will find that approach DOES NOT WORK for HW2 (nor will it work for many of our remaining homeworks). All of our remainging homeworks will be reading from data files. An easy way to quickly change which data file your program is reading from is for your program to accept the name of the data file as a command line parameter. When you run your Python program from the terminal (sometimes called the "command line"), you can easily change the name of the data file by using a different filename as an argument. We have already provided code for you in dna_analysis.py that reads in a data file name as an argument from the command line. In fact, if you just hit the green triangle you will get an error message that our program prints when you have not provided a data file name as a command line parameter. Try it! and see the message printed out in the terminal window. Instead you will need to run dna_analysis.py from the terminal window as described below, so you can easily provide a data file name as a command line parameter (sometimes called a command line argument).
When writing programs that analyze data (or any other type of program) it is important to check the correctness of your programs. One way to do this is by comparing the output of your program to a computation done in some other way, such as by hand or by a different program. We have provided the test-small.fastq file for this purpose. This file is small enough that you can easily open it up in a text editor and calculate the GC content by hand. Then, run your program to verify that it provides the correct answer for this file.
You should be able to open up test-small.fastq and other input and output files in VSCode by just clicking on it in the Explorer window (Ctrl+shift+E to open in Windows if it is not already showing). Alternatively you can open a file in VSCode by going to the File menu, selecting "Open File" on Windows (or just "Open" on Mac) and navigating to the data folder. (If this first appears empty, next to file name, switch from "All supported files" to "All files".) Select the file you want to open. If you want to open files in another text editor you may also do that (although just clicking on a .fastq file is not likely to work since the .fastq file extension is not one that is known to your operating system).
You can run dna_analysis.py on sample data files by entering the following command in the terminal, similar to how you ran verify_setup.py:On Mac/Linux:
python dna_analysis.py data/test-small.fastq
On Windows:
python dna_analysis.py data\test-small.fastq
Note that the data files are in the data folder/directory within the homework2 folder, so we need to specify that when giving the name of a data file as a command line argument. If you get a "can't open file 'dna_analysis.py'" error or a "No such file or directory" error, then perhaps you are not in your homework2 directory, or you mistyped the file name.
You should confirm that dna_analysis.py is giving the correct GC content for test-small.fastq by looking at test-small.fastq in VSCode or another text editor and calculating the GC content by hand. Remember that GC content is defined as the percentage of nucleotides that are either G or C. Here is what test-small.fastq looks like:

After you have confirmed that it is working on test-small.fastq, run dna_analysis.py on each of the 6 real sample_N.fastq files provided, by executing 6 commands such as:
python dna_analysis.py data/sample_1.fastq
or if you are a Windows user,
python dna_analysis.py data\sample_1.fastq
Run your program on different data files by changing sample_1.fastq to a different file name in the commands above. Be patient — you are processing a lot of data, and it might take a minute or so to run. Many of these .fastq files are large enough that they are not easily opened in VSCode or another text editor. You can see the size of the data files in a file explorer on your machine:
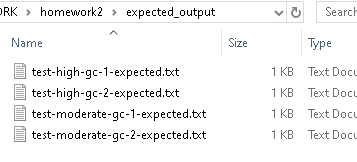
We have provided expected output files for the other test-*.fastq files in the expected_output directory:
(If you are interested, sample_3.fastq and sample_4.fastq are from Streptococcus pneumoniae TIGR4, and sample_5.fastq is from Human herpesvirus 5.)
If you have already used the Diff Checker, you might notice that some of your results are different than the example results. Don't worry about this — this issue will be resolved in Problem 6.
Cut and paste the line of output produced by your program regarding GC-content when run on sample_1.fastq into your answers.txt file. See "Tips" at the top of this page for info on cutting and pasting things from the VSCode Terminal. (Note, this could take a minute or so to run.) For example, your answer might look like:
GC-content: 0.42900139393
(Note that this is not the answer you should expect to get, this is just an example of the format that your answer should be in.)
gc_count = 0
by prefixing it by the # character. Save the file and then re-run the program from the comand line in the terminal window, just as you did for Problem 2. In answers.txt, explain what happened, and why it happened.
nucleotides = filename_to_string(filename)
Explain what happens and why in answers.txt.
Augment your program so that, in addition to computing and printing the GC ratio, it also computes and prints the AT content. The AT content is the percentage of nucleotides that are A or T.
Two ways to compute the AT content are:
You may use whichever approach you prefer. Add whatever new variables you need. As you modify your program, make sure you are producing output that matches the output format shown above.
Check your work by manually computing the AT content for file test-small.fastq, then comparing it to the output of running your program on test-small.fastq.
Run your program on sample_1.fastq. Cut-and-paste the relevant line of output into answers.txt.
Augment your program so that it also computes and prints the number of A nucleotides, the number of T nucleotides, the number of G nucleotides, and the number of C nucleotides. Add whatever new variables you need.
When doing this, add at most one extra loop to your program. You can solve this part without adding any new loops at all, by reusing an existing loop. At this point you should also feel free to modify the code we have given you if another structure of if statements makes more sense to you. We just caution you against looping through the data more times than you need to as this could cause your code to run very slowly.
Check your work by manually computing the results for file test-small.fastq, then comparing them to the output of running your program on test-small.fastq. As you modify your program, make sure you are producing output that matches the output format shown above.
Run your program on sample_1.fastq. Cut-and-paste the relevant lines of output into answers.txt (the lines that indicate the G count, C count, A count, and T count). Note that you can use the up-arrow key in the terminal window to retrieve commands you ran previously.
Modify dna_analysis.py so that it will calculate and print the following three quantities:
As you modify your program, make sure you are producing output that matches the output format shown above.
Then run dna_analysis.py on each of the eleven .fastq files you have been given.
For at least one .fastq file, at least one of these quantities will be different from the other two. In your answers.txt file, state which .fastq file(s) and which quantities differ. (If all three quantities are equal for each .fastq file, then your code contains a mistake.) In your answers.txt file, write a short paragraph that explains why these differ.
Explaining why (or debugging your code if all three quantities were the same in all .fastq files) might require you to do some detective work.
This exercise is meant to expose you to a situation you might encounter when processing a data file of your own. When your program does not give the results you expect, there are two likely sources of the problem. One is that your program contains a bug! Check your code carefully to be sure you are calculating all values correctly. We will talk about testing in more detail later but for now, try walking through your code with a very small data set and calculating values by hand. A second source of unexpected results that is very common with data files is that there is something you were assuming about the contents of the data files that was an incorrect assumption. This could include things like assuming each line would contain a certain number of characters or words, or that all characters would be uppercase or lowercase, or that values might only be in a certain range. If you wrote your program assuming something about your data files that was not correct, your program may not give correct results.
To track down a wrong assumption about a data file, think about ways you can modify your program to help you determine what is happening. This could include having it print out values when they do not meet some assumption you are making about the file. You could also try just loading a data file into a text editor and examining it with your eyes to see if you see something you did not expect. (Although if you try this approach we strongly suggest that you start with the smallest data file for which the three quantities are not all the same.) Another approach would be to modify your program, or create a new program, to compute the three quantities for each line of a data file separately (as opposed to for the file as a whole as you have been doing): if the quantities differ for an entire file, then they must differ for at least one specific line in that file. Examining that/those line(s) will help you understand the problem.
If all of the three quantities that you measured in problem 6 are the same, then it would not matter which one you used in the denominator when computing the GC content. However, you saw that the three quantities are not all the same. In answers.txt, state which of these quantities should be used in the denominator and which should not, and why.
If your program incorrectly computed the GC content (which should be equal to (G+C)/(A+C+G+T)), then state that fact in your answers.txt file. Then, go back and correct your program, **and also update any incorrect answers elsewhere in your answers.txt file. It is fine to change the code we provided you if needed.
**If you are unsure if you are calculating things correctly, now would be a good time to validate your dna_analysis.py program's output using the Diff Checker. (See "Tips" at the top of this page for info on cutting and pasting things from the VSCode Terminal window. In particular, when copying and pasting into Diff Checker, be sure that you select the entire line as it will show differences in trailing spaces as a difference.) You can compare your output to the files given in the expected_output directory of the homework2 files. You have not yet completed the assignment, so your output will not be identical. But things like GC-content, AT-content and individual counts should be identical. You will produce the last two lines of output in the expected_output files in Problem 7 and Problem 8 below.
Sometimes biologists use the AT/GC ratio, defined as (A+T)/(G+C), rather than the GC-content, which is defined as (G+C)/(A+C+G+T).
Modify your program so that it also computes the AT/GC ratio. As you modify your program, make sure you are producing output that matches the output format shown above.
Check your work by manually computing the results for file test-small.fastq. Compare them to the output of running your program on test-small.fastq.
Run your program on sample_1.fastq. Cut-and-paste the relevant lines of output into answers.txt (the line that indicates the AT/GC ratio).
The GC content can be used to categorize microorganisms.
Fill in
the body of the classify function to return the
classification of the organism ("high", "moderate" or "low") described
in the data file given using these classifications:
If the GC content is above 60%, the organism is considered “high GC content”.
If the GC content is below 40%, the organism is considered “low GC content”.
Otherwise (In other words, the GC content is between 40% and 60% inclusively), the organism is considered “moderate GC content”.
IMPORTANT: Note that even though the classification message that should be printed to the screen (as seen in the expected output files) will be "high GC content", "low GC content", or "moderate GC content", your function should only return the values "high", "moderate" or "low".
Biologists can use GC content for classifying species, for determining the
melting temperature of the DNA (useful for both ecology and
experimentation, for example
PCR is
more difficult on organisms with high
GC content), and for other purposes. Here are some examples:
The GC content of Streptomyces coelicolor A3(2) is 72%.
The GC content of Yeast (Saccharomyces cerevisiae) is 38%.
The GC content of Thale Cress (Arabidopsis thaliana) is 36%.
The GC content of Plasmodium falciparum is 20%.
Again, test that your program works on some data files with known outputs. The test-small.fastq file has low GC content. We have provided four other test files, whose names explain their GC content: test-moderate-gc-1.fastq, test-moderate-gc-2.fastq, test-high-gc-1.fastq, test-high-gc-2.fastq.
You will find a "skeleton" or "stub" for the classify function near the top of dna_analysis.py, just before where the main program begins. There is an assignment statement inside of the function body that is there only as a placeholder. You should edit/remove it once you have added your code. The function classify takes the gc_content as an input parameter and returns an appropriate string indicating the GC Classification. Once you have filled in the body of the classify function you should call the function from your main program in the appropriate place and use the string it returns to print out a message that matches what is expected. For example, be sure that your output for test-moderate-gc-1.fastq matches test-moderate-gc-1-expected.txt exactly using Diff Checker.
After your program works for all the test files, run it on sample_1.fastq. Cut-and-paste just the relevant line of output from your program into answers.txt (the line that indicates the GC classification).
You are almost done!
We recommend doing a quick search on this web page for answers.txt to confirm that each place we asked you to answer a question, you have answered it.
At the bottom of your answers.txt file, in the “Collaboration” part, state which students or other people (besides the course staff) helped you with the assignment, or that no one did.
Submit the following files via Gradescope. You should receive an email from Gradescope indicating your files were uploaded. Once you receive this email, go to the link provided and confirm that BOTH files were properly uploaded! NOTE: If you re-submit, you MUST re-upload BOTH files again! If "Check For Correct Files" shows up in Red with the comment that the Test failed, that was because you did not upload both files AT THE SAME TIME or you have named the files incorrectly. Please resubmit and be sure that you select BOTH files before hitting the "Upload" button.
**Please be sure to validate your dna_analysis.py program's output using the Diff Checker before submitting your assignment. You can compare your output to the files given in the expected_output directory of the homework2 files. Be sure that both the values are correct AND that the messages you are printing are formatted correctly and have no typos.
Answer a REQUIRED survey asking how much time you spent and other reflections on this assignment.
Now you are done!