CSE 154
Lecture 16: Intro to Node.js
Agenda
Introduction to Node.js!
Reminders:
- Quiz 3 releases today after lecture. Possible topics include: async/await, APIs, Fetch, POST, JSON, validation, regex
- CP3 due yesterday, locks Thursday
- HW3 out now, due next week
Review: Web Services
Web service: software functionality that can be invoked through the internet using common protocols
It's like a remote function(s) you can call. Done by contacting a program on a web server
- Web services can be written in a variety of languages
- Many web services accept parameters and produce results
- Clients contact the server through the browser using XML over HTTP and/or AJAX Fetch code
- The service's output might be HTML but could be text, XML, JSON, or other content
What's happening?
Open APOD.html
Click button: Photo appears
From Chrome Debugger: Network tab. What do you see?
Request to https://api.nasa.gov/planetary/apod, with a JSON response.
We have all of the JS/HTML/CSS here in the browser. We can "View Source" and check it all out.
But what about the source that creates the APOD JSON?
So How Does a Web Service Respond to Requests?
CSE 154 Modules: Where We're At
- Webpage structure and appearance with HTML5 and CSS.
- Client-side interactivity with JS DOM and events.
- Using web services (APIs) as a client with JS.
- Writing RESTful web services with Node.js and Express.
- Storing and retrieving information in a database and server-side programs.
URLs and Web Servers
https://server[:port]/path/fileUsually when you type a URL in your browser:
- Your computer looks up the server's IP address using DNS
- Your browser connects to that IP address and requests the given file
- The web server software (e.g. Apache) grabs that file from the server's local file system and then send back its contents to you
Some URLs actually specify programs that the web server should run, and then send their output back to you as the result:
https://courses.cs.washington.edu/courses/cse154/webservices/pokedex/pokedex.php?pokedex=all
The above URL tells the server courses.cs.washington.edu to run the
program pokedex.php and send back its output
Why Do We Need a Server to Handle Web Service Requests?
Servers are dedicated computers for processing data efficiently and delegating requests sent from many clients (often at once).
These tasks are not possible (or appropriate) in the client's browser.
Our (New) Server-Side Language: JS (Node)

- Open-source with an active developer community
- Flourishing package ecosystem
- Designed for efficient, asynchronous server-side programming
- You can explore other server-side languages after this course!
Languages for Server-Side Programming

Server-side programs are written using programming languages/frameworks such as PHP, Java/JSP, Ruby on Rails, ASP.NET, Python, Perl, and JS (Node.js)
Web servers contain software to run those programs and send back their output.
What is Client-Side JS?
So far, we have used JS on the browser (client) to add interactivity to our web pages
"Under the hood", your browser requests the JS (and other files) from a URL resource, loads the text file of the JS, and interprets it realtime in order to define how the web page behaves.
In Chrome, it does this using the V8 JavaScript engine, which is an open-source JS interpreter made by Google. Other browsers have different JS engines (e.g. Firefox uses SpiderMonkey).
Besides the standard JS language features, you also have access to the DOM when running JS on the browser - this includes the window and document
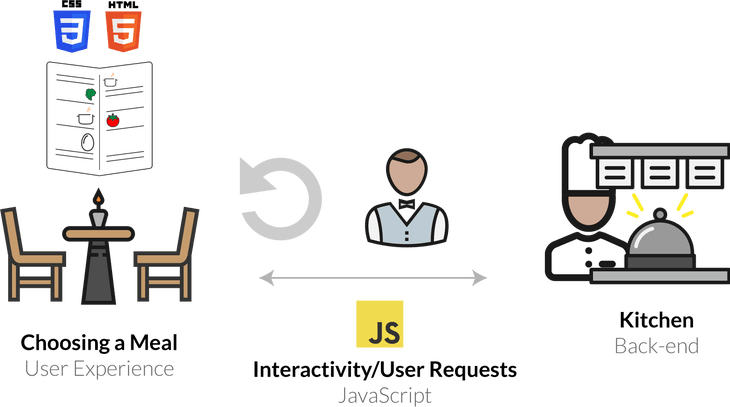
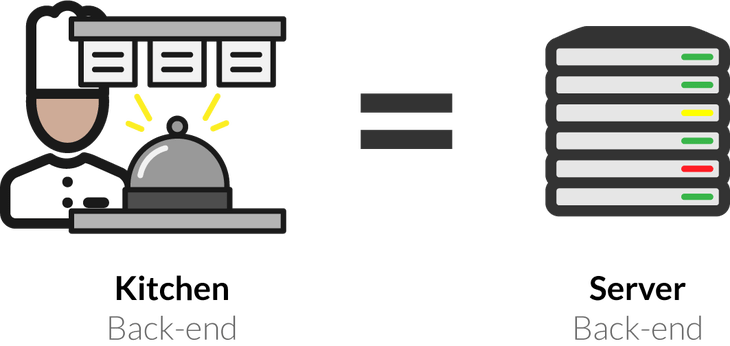
Client vs. Server-side JS
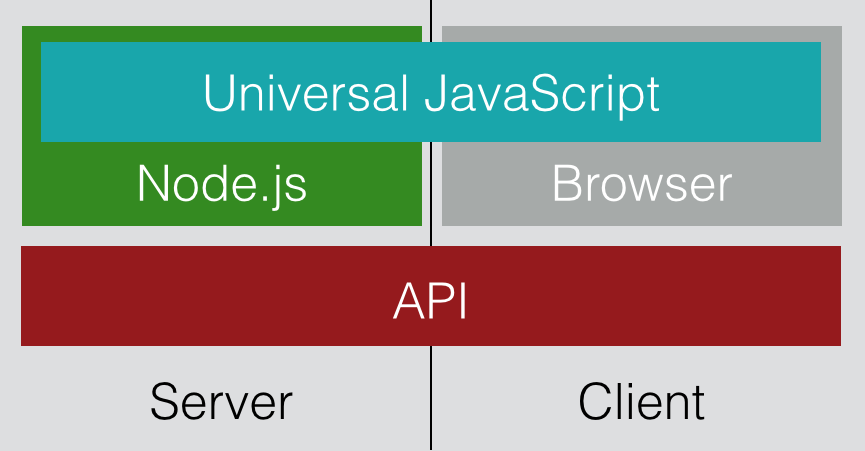
Node.js: Server-side JS
Node.js uses the same open-source V8 JavaScript engine as Chrome
Node.js is a runtime environment for running JS programs using the same core language features, but outside of the browser.
When using Node, you do not have access to the browser objects/functions (e.g. document, window, addEventListener).
Instead, you have access to functionality for managing HTTP requests, file i/o, and database interaction.
This functionality is key to building REST APIs!
Getting started with Node.js
When you have Node installed you can run it immediately in the command line.
- Start an interactive REPL with
node(no arguments). This REPL is much like the Chrome browser's JS console tab. - Execute a JS program in the current directory with
node file.js
Starting a Node.js Project
There are a few steps to starting a Node.js application, but luckily most projects will follow the same structure.
When using Node.js, you will mostly be using the command line.
- Start a new project directory (e.g.
node-practice) - Create your Node.js file (e.g.
app.js) - Inside the directory, run
npm initto initialize apackage.jsonconfiguration file (you can keep pressing Enter to use defaults, but be sure app.js is used) - Install any modules with
npm install <package-name> - Write your Node.js file!
- Include any front-end files in a
publicdirectory within the project.
Along the way, a tool called npm will help install and manage packages that are useful in your Node app.
Starting a Node.js Project
Run npm init to create package.json
Starting a Node.js Project
Run npm install express to install the Express.js package
Starting app.js
Build your basic app:
"use strict";

const express = require('express');
const app = express();

app.get('/posts', function (req, res) {
  res.type("text").send("Hello World");
});

app.listen(8080);
Node.js Modules
When you run a .js file using Node.js, you have access to default functions in JS (e.g. console.log)
In order to get functionality like file i/o or handling network requests, you
need to import that functionality from modules - this is similar to the import keyword you have used in Java or Python.
In Node.js, you do this by using the require() function, passing the string name of the module you want to import.
For example, the module we'll use to respond to HTTP requests in Node.js is called express. You can import it like this:
const express = require("express");JS
Quick reminder on const Keyword
Using const to declare a variable inside of JS just means that you can never change what that variable references. We've used this to represent "program constants" indicated by ALL_UPPERCASE naming conventions
For example, the following code would not work:
const specialNumber = 1;
specialNumber = 2; // TypeError: Assignment to constant variable.
JS
When we store modules in Node programs, it is conventional to use const instead of let to avoid accidentally overwriting the module.
Unlike the program constants we define with const (e.g. BASE_URL), we use camelCase naming instead of ALL_CAPS.
app.listen()
To start the localhost server to run your Express app, you need to specify a port to listen to.
The express app object has a function app.listen which takes a port number and optional callback function
At the bottom of your app.js, add the following code - (process.env.PORT is needed to use the default port when hosted on an actual server)
const PORT = process.env.PORT || 8000; // Allows us to change the port easily by setting an environment variable, so your app works with our grading software
app.listen(PORT);
JS
Basic Routing in Express
Routes are used to define endpoints in your web service
Express supports different HTTP requests - we will learn GET and POST
Express will try to match routes in the order they are defined in your code
Useful Request Properties/Methods
| Name | Description |
|---|---|
| req.params | Endpoint "path" parameters from the request |
| req.query | query parameters from the request |
Useful Response Properties/Methods
| Name | Description |
|---|---|
| res.write(data) | Writes data in the response without ending the communication |
| res.end() | Ends the process |
| res.send() | Sends information back (default text with HTML content type) |
| res.json() | Sends information back as JSON content type |
| res.set() | Sets header information, such as "Content-type" |
| res.type() | A convenience function to set content type (use "text" for "text/plain", use "json" for "application/json") |
| res.status() | Sets the response status code |
| res.sendStatus() | Sets the response status code with the default status text |
Setting the Content Type
By default, the content type of a response is HTML - we will only be sending plain text or JSON responses though in our web services
To change the content type, you can use the res.set function, which is used to set response header information (e.g. content type).
You can alternatively uses res.type("text") and res.type("json") which are equivalent to setting text/plain and application/json Content-Type headers, respectively.
app.get('/hello', function (req, res) {
  // res.set("Content-Type", "text/plain");
  res.type("text"); // same as above
  res.send('Hello World!');
});
Setting plain text response
app.get('/hello', function (req, res) {
  // res.set("Content-Type", "application/json");
  res.json({ "msg" : "Hello world!" });
  // can also do res.json({ "msg" : "Hello world!"});
  // which also sets the content type to application/json
});
Setting JSON response content type
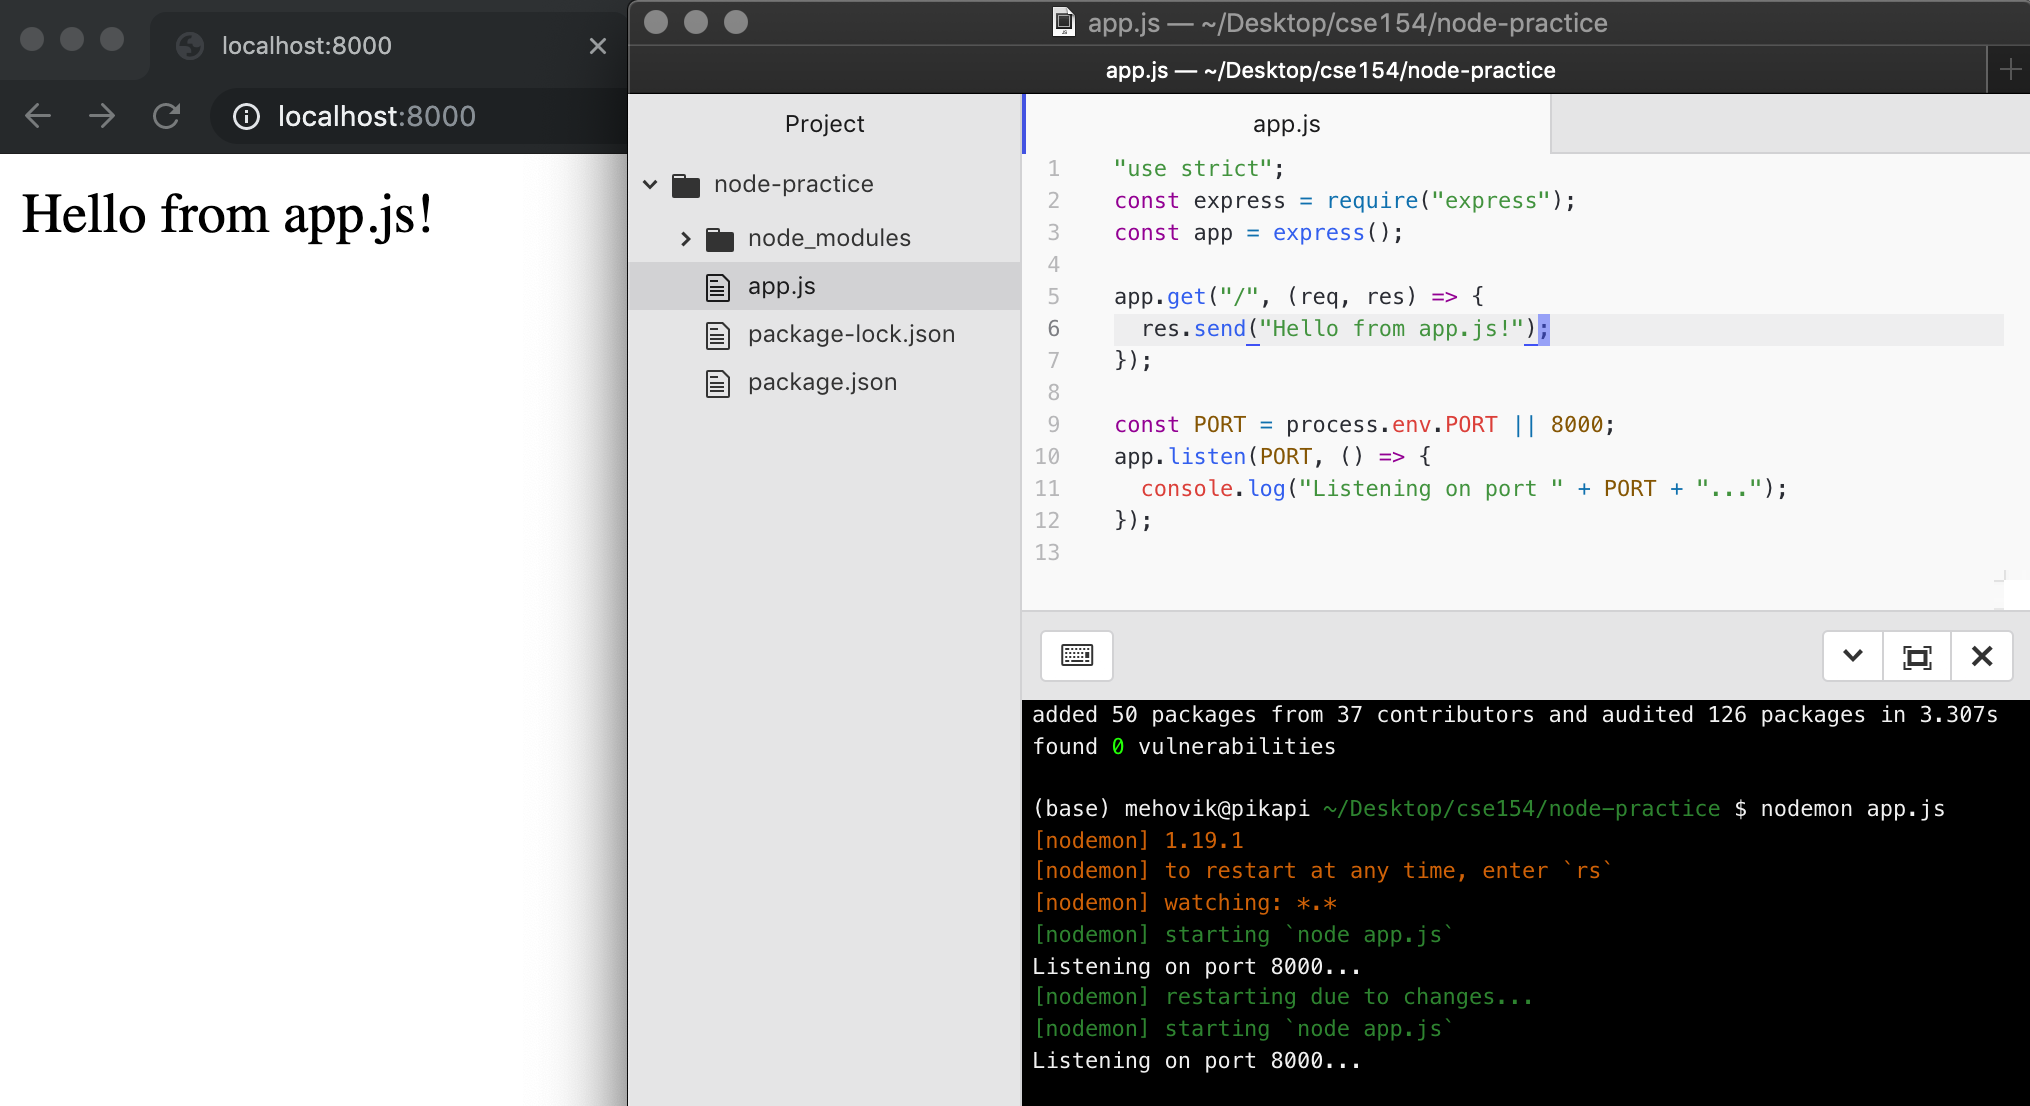
Adding our first "root" route
When you add a route in your Express app (here, we use '/' for the most basic "root" route), you can use res.send to send a response to the client (browser) and view using the port (here, 8000 on localhost)
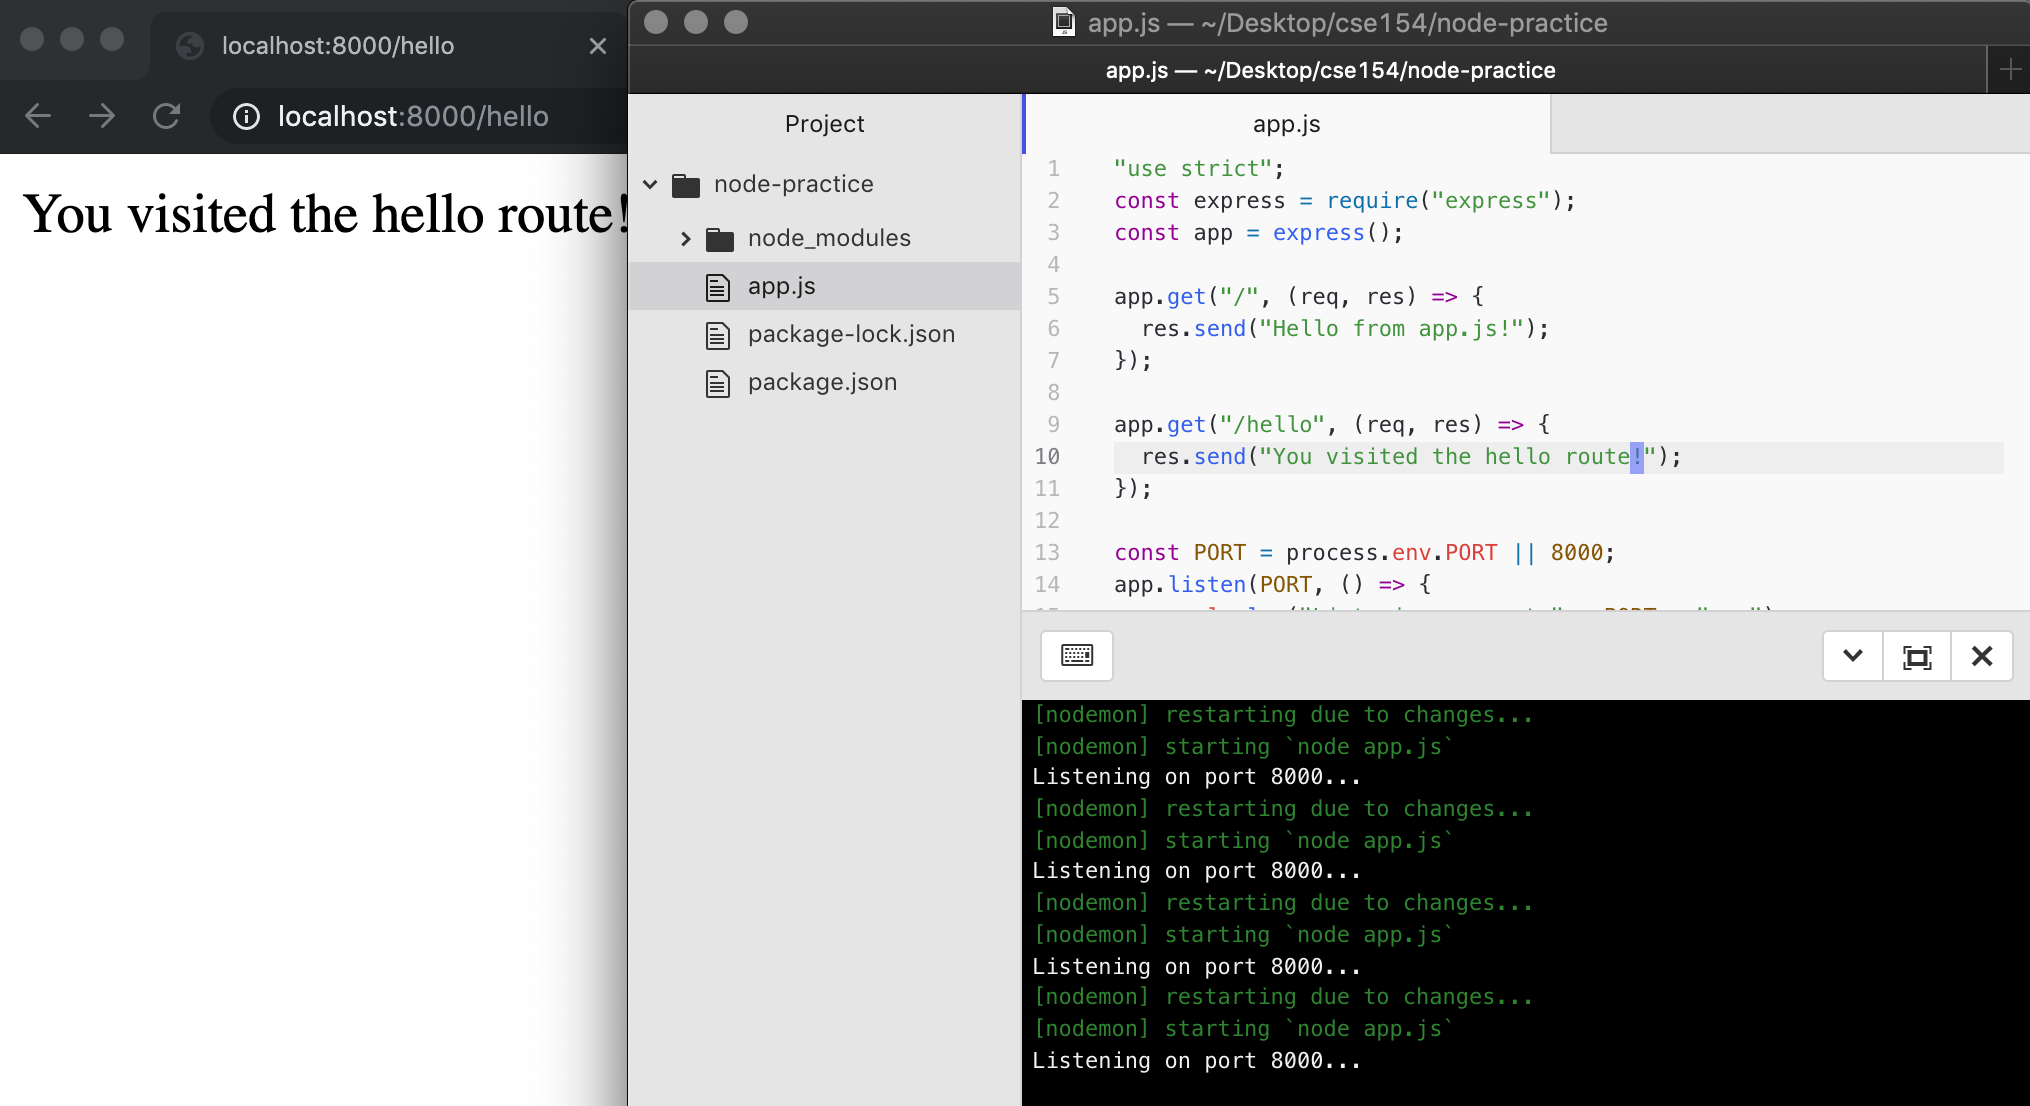
Adding another route
You can add more routes in your file, and Express will use the first one matching the request path
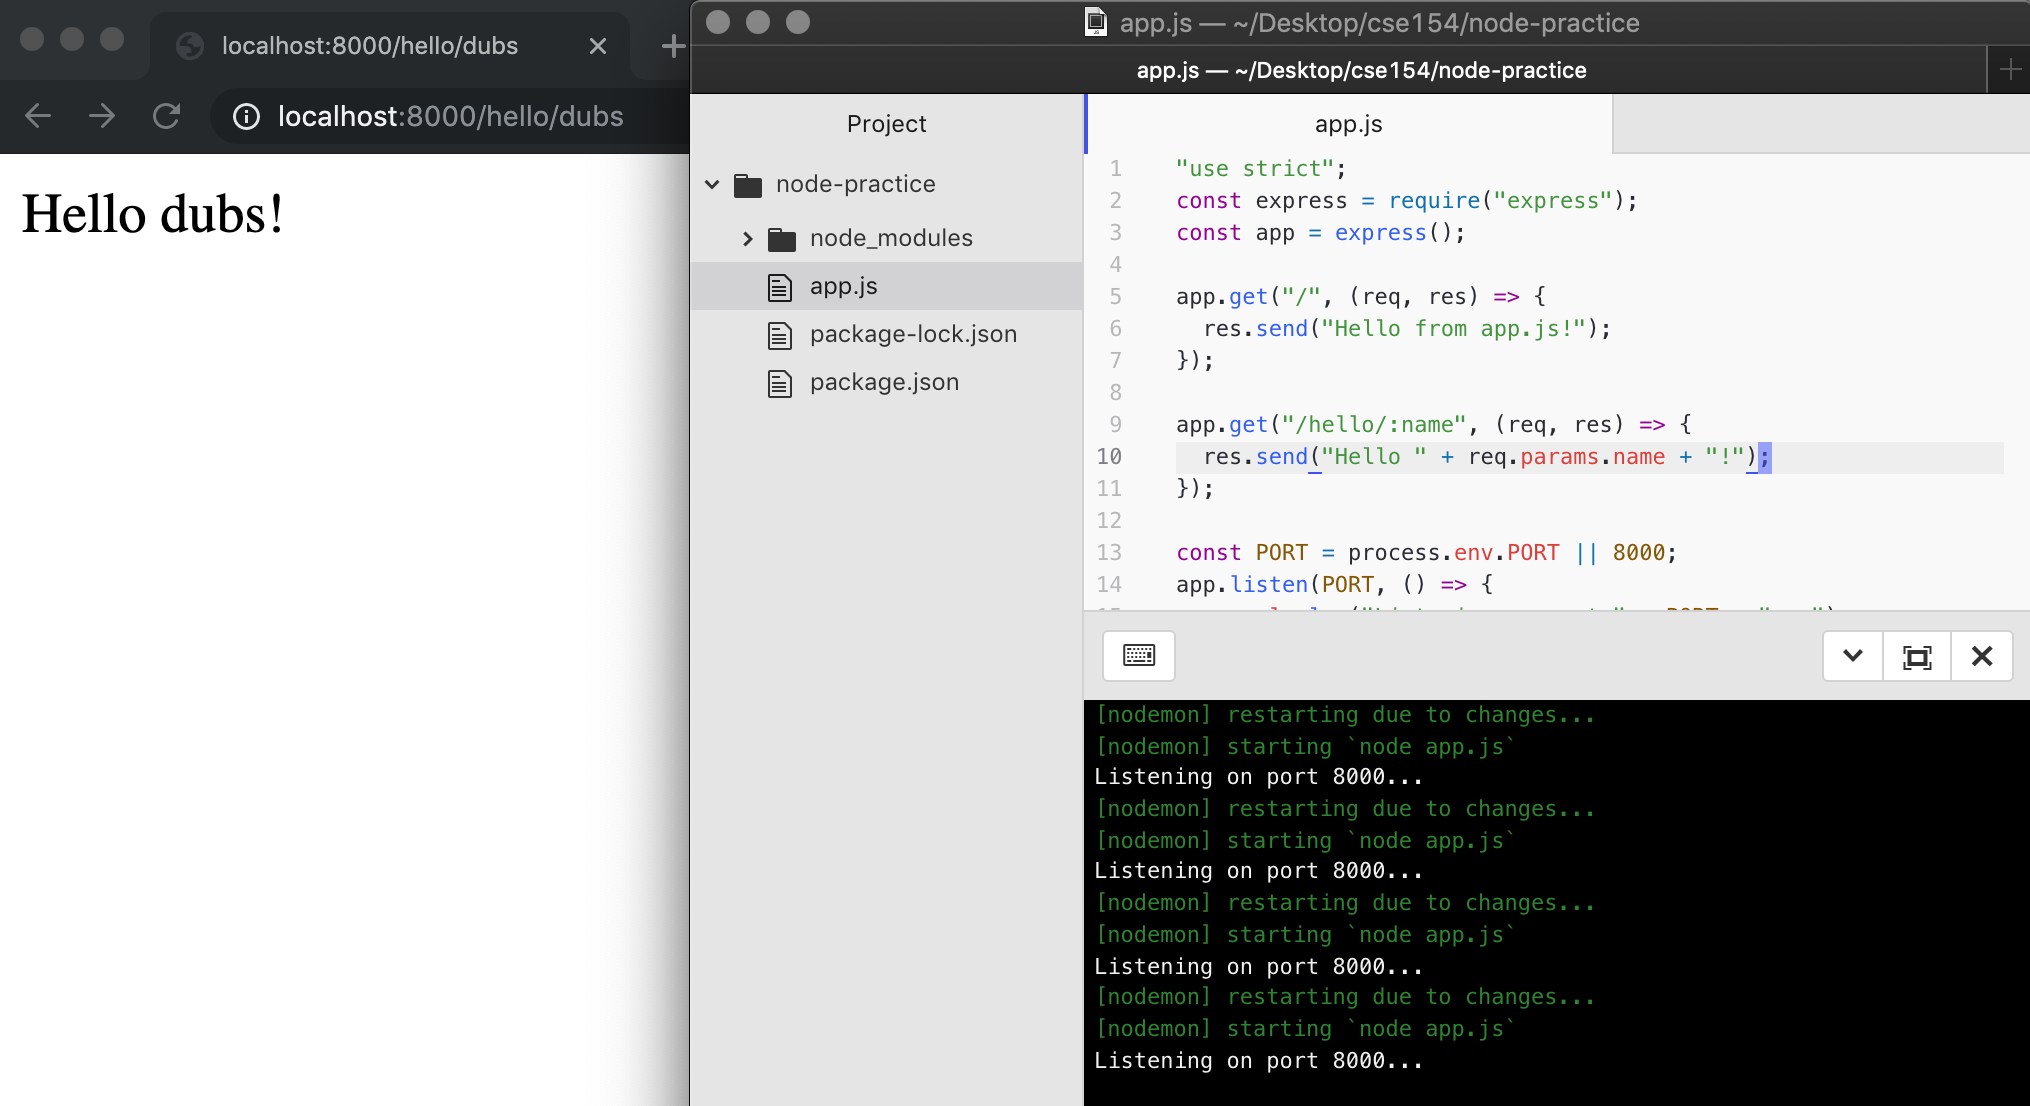
Request Parameters: Path Parameters
Act as wildcards in routes, letting a user pass in "variables" to an endpoint
Define a route parameter with :param
Route path: /states/:state/cities/:city
Request URL: http://localhost:8000/states/wa/cities/Seattle
req.params: { "state": "wa", "city": "Seattle" }
These are attached to the request object and can be accessed with req.params
app.get("/states/:state/cities/:city", function (req, res) {
  res.type("text");
  res.send("You sent a request for " + req.params.city + ", " + req.params.state);
});
JS
Adding route parameters: Example
Request Parameters: Query Parameters
You can also use query parameters in Express using the req.query object, though they are more useful for optional parameters.
Route path: /cityInfo
Request URL: http://localhost:8000/cityInfo?state=wa&city=Seattle
req.query: { "state": "wa", "city": "Seattle" }
app.get("/cityInfo", function (req, res) {
let state = req.query.state; // wa
let city = req.query.city; // Seattle
// do something with variables in the response
});JS
Unlike path parameters, these are not included in the path string (which are matched using Express routes) and we can't be certain that the accessed query key exists.
If the route requires the parameter but is missing, you should send an error to the client in the response.
Setting Errors
The Response object has a status function which takes a status code as an argument.
The 400 status code is what we'll use to send back an error indicating to the client that they made an invalid request.
A helpful message should always be sent with the error.
app.get("/cityInfo", function (req, res) {
  let state = req.query.state;
  let city = req.query.city;
  if (!(state && city)) {
    res.status(400).send("Error: Missing required city and state query parameters.");
  } else {
    res.send("You sent a request for " + city + ", " + state);
  }
});
JS
Summary of Building an Express App
- Create a file (e.g.
app.js) - Add required modules at the top (at minimum,
require('express')) - Create an app instance:
const app = express(); - At the end of the file, listen to a port (e.g. 8000)
- Add routes! '/' stands for the basic root route, which can be visited in your browser at localhost:8000/ when your app is running.
More questions from this lecture?
Especially if you're watching a recording, write your question on PollEverywhere and I'll answer them at the start of next lecture.
Either on your phone or computer, go to PollEv.com/robcse
